
Huawei eKit
Kompatybilność
Rozwiązanie Social WiFi zostało przetestowane i działa w następujących konfiguracjach:
Huawei AP361
Wersja oprogramowania >= V200R023C00SPC200
Dostęp do kontrolera Huawei eKit
Ten przewodnik korzysta z interfejsu internetowego Huawei eKit. Aby uzyskać do niego dostęp:
- Przejdź do strony logowania.
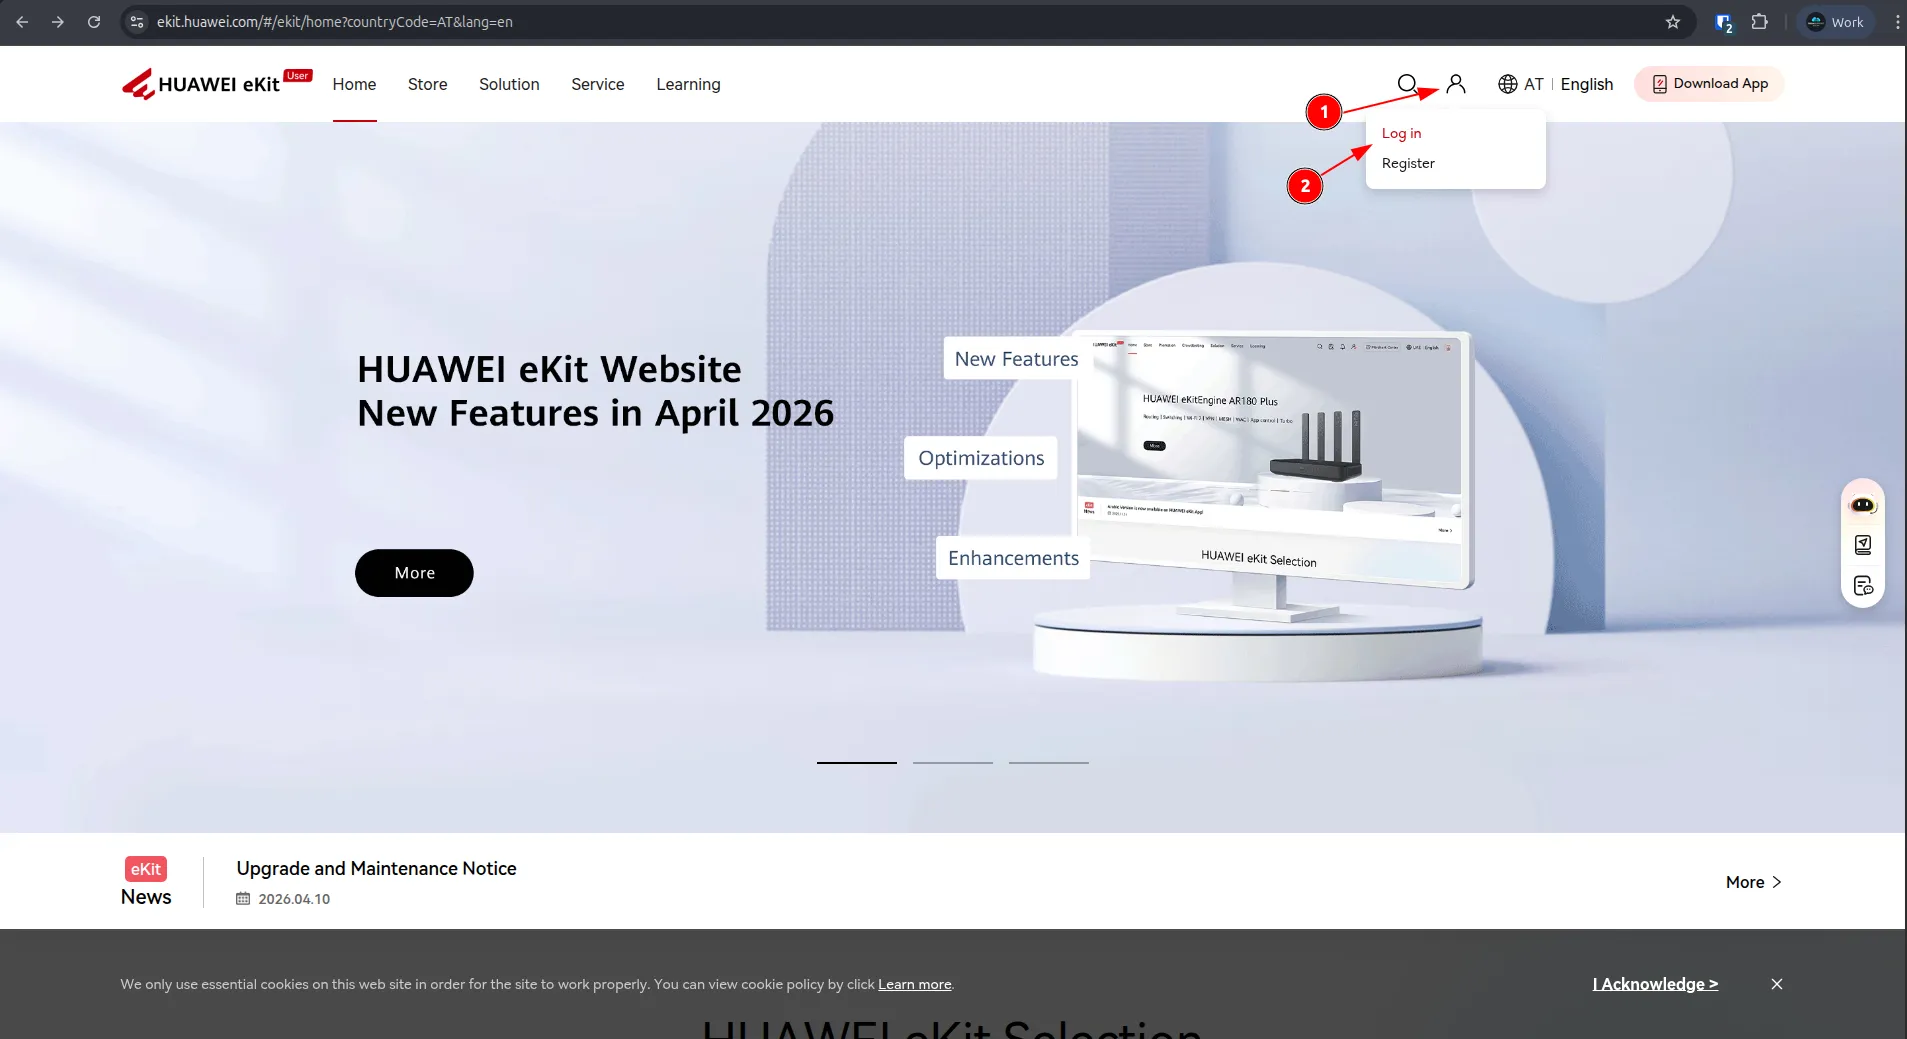
- Zaloguj się przy użyciu swoich danych uwierzytelniających lub utwórz konto, jeśli go nie masz.
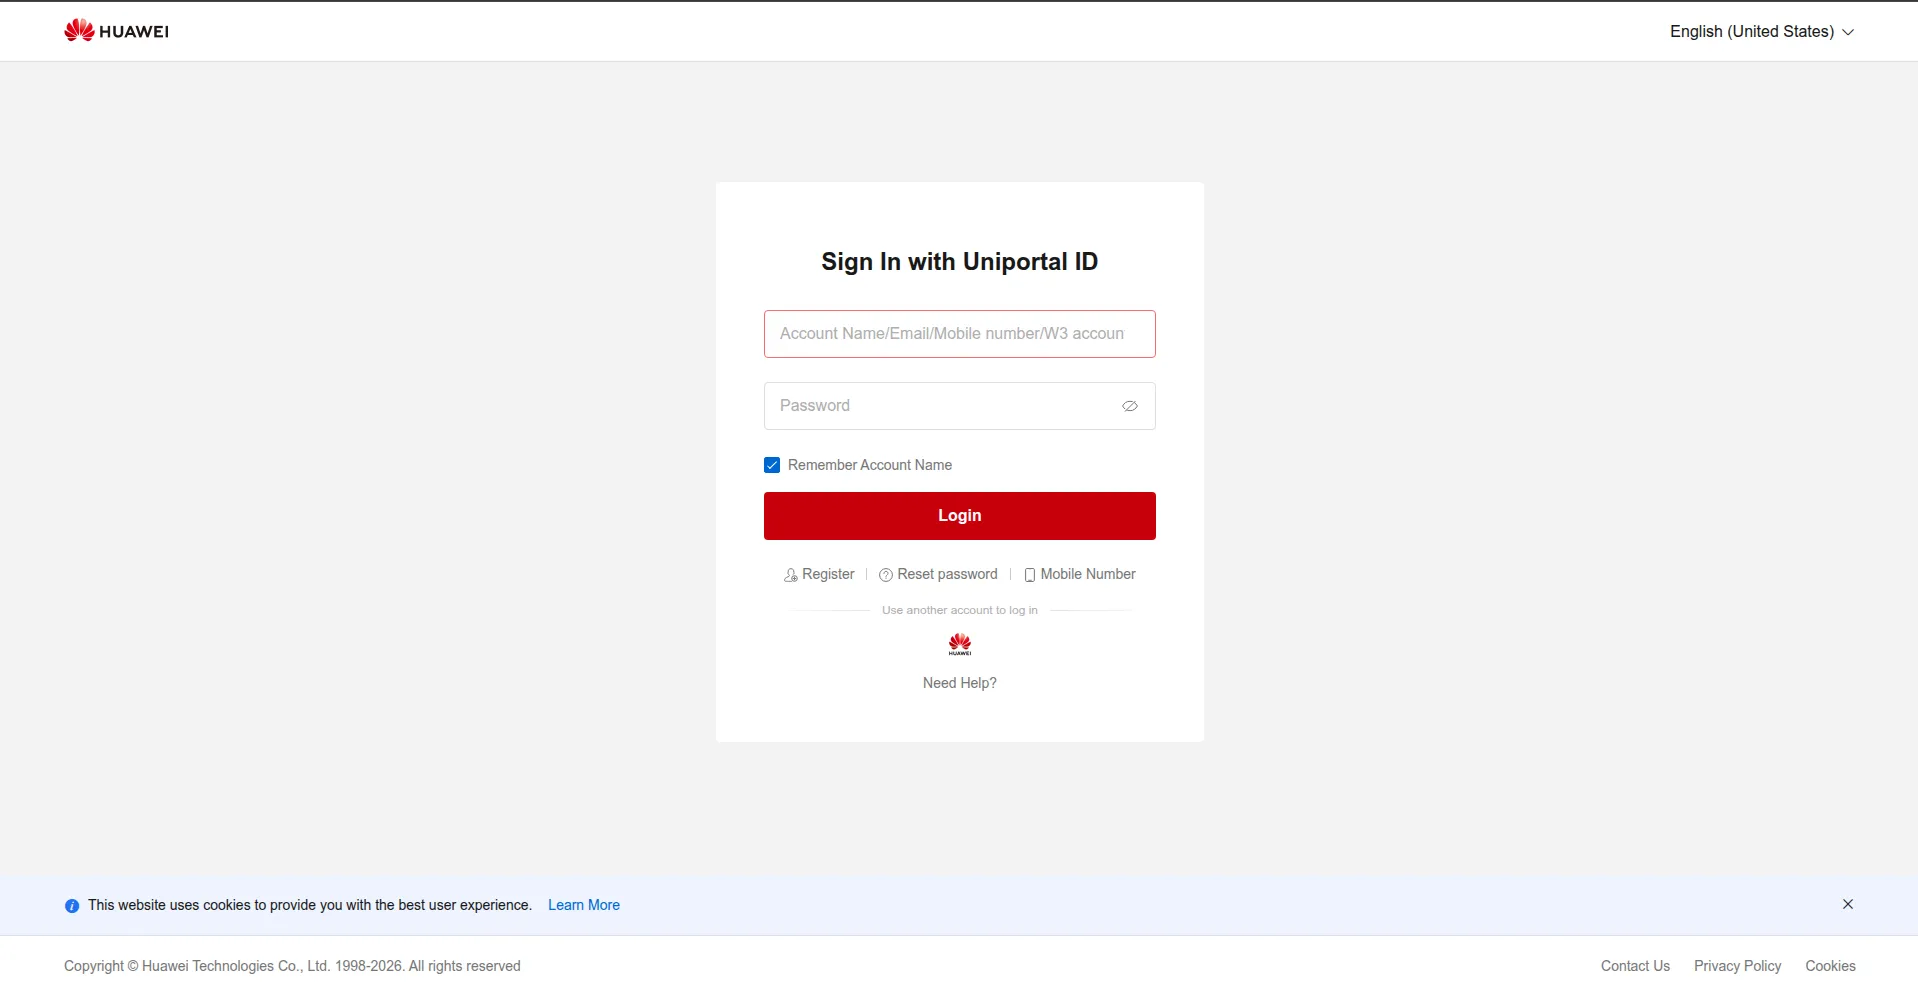
- Po zalogowaniu przejdź do zakładki Service, przewiń w dół do sekcji Cloud Management Platform, znajdź swój projekt i wybierz go.
Instalacja
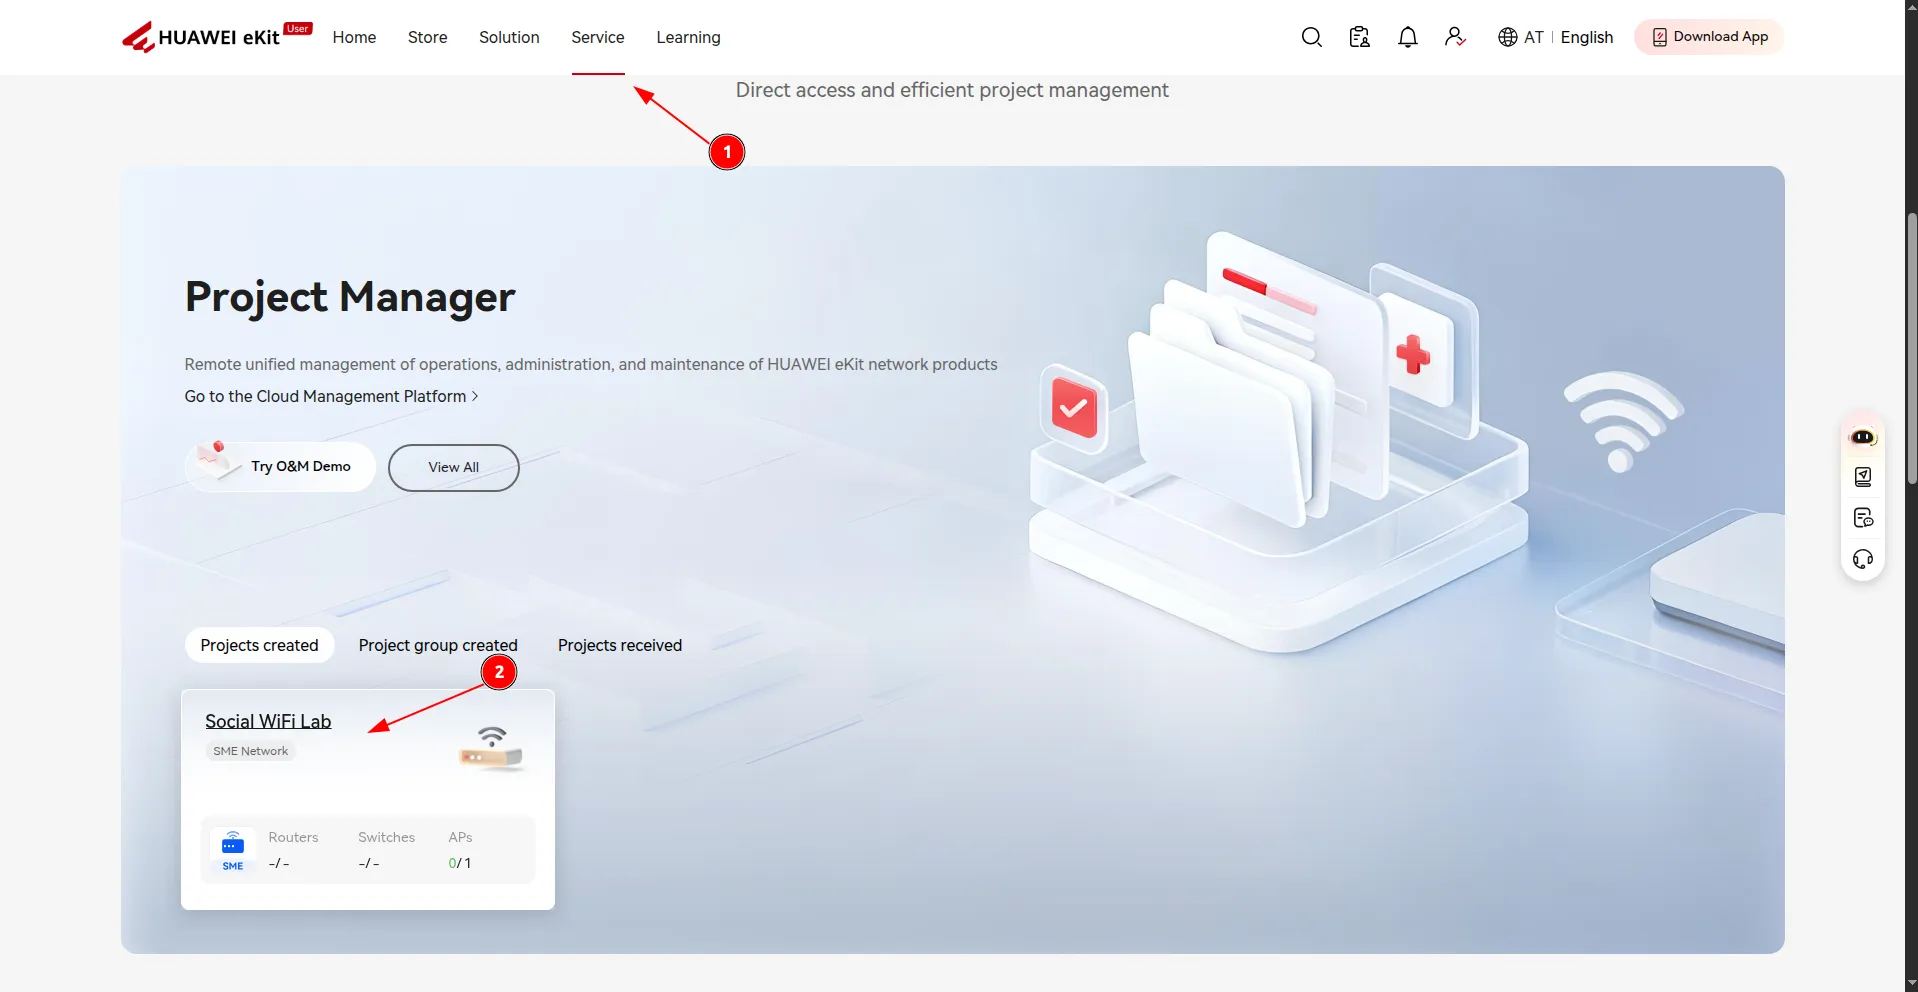
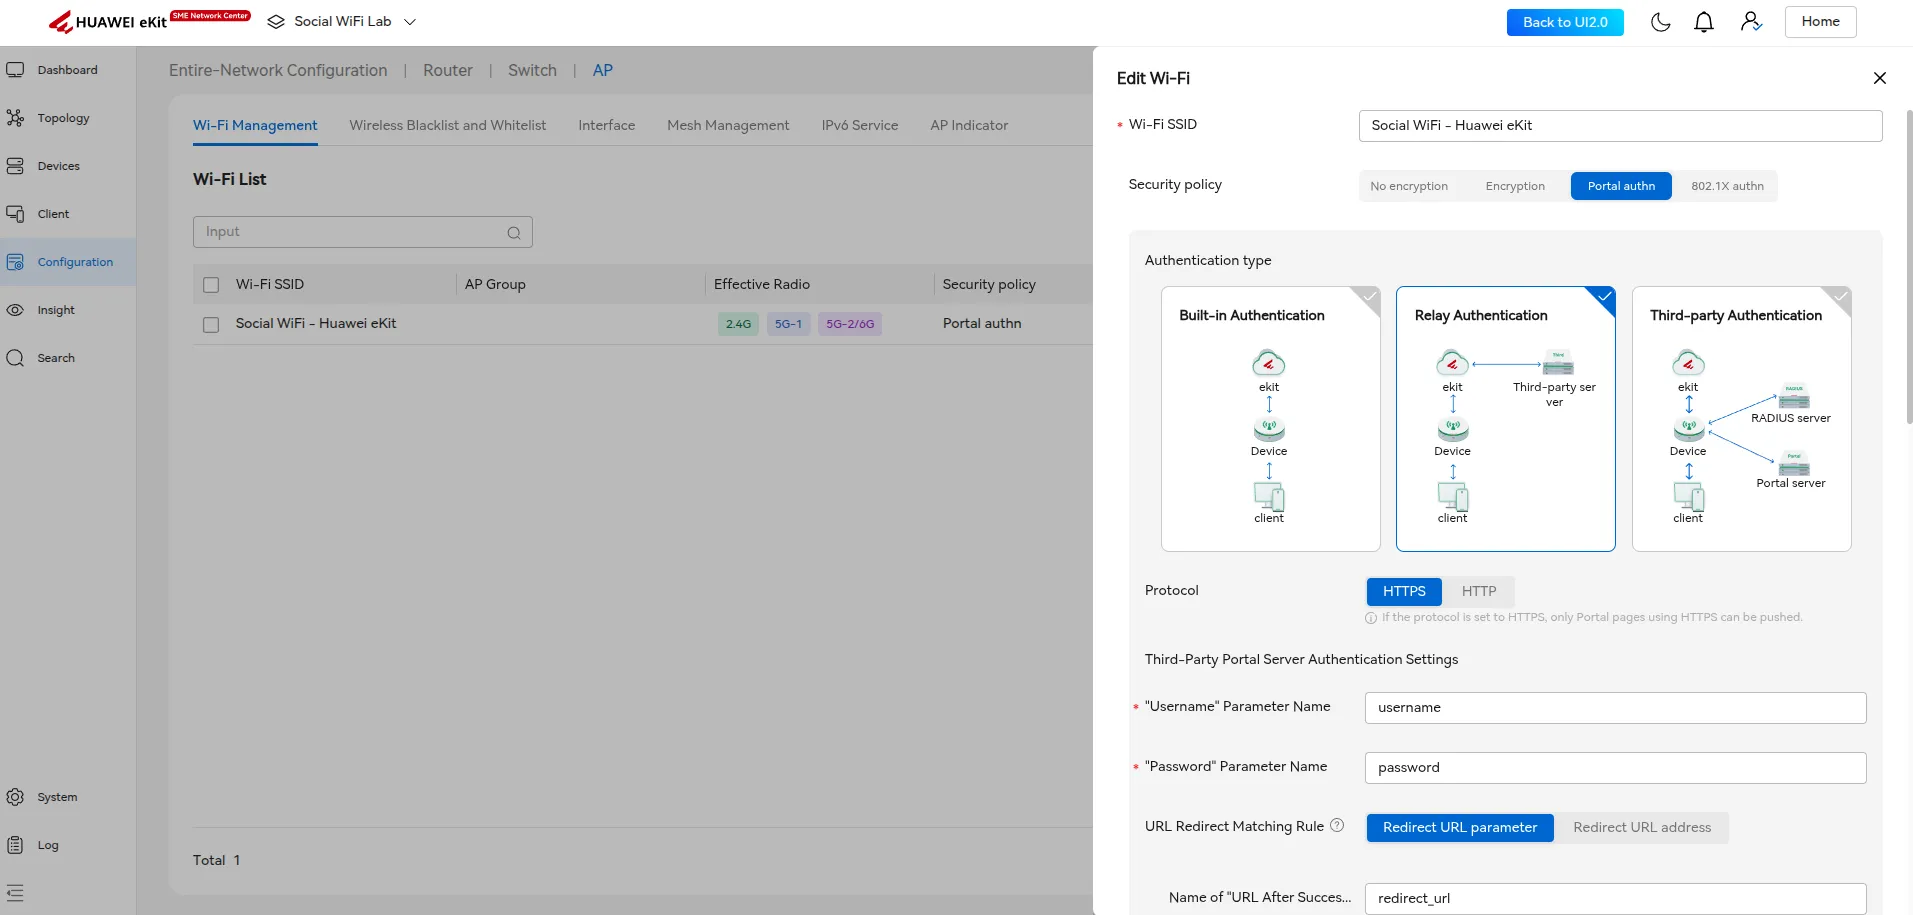
Przejdź do Configuration -> AP, następnie otwórz zakładkę Wi-Fi Management i kliknij Create.
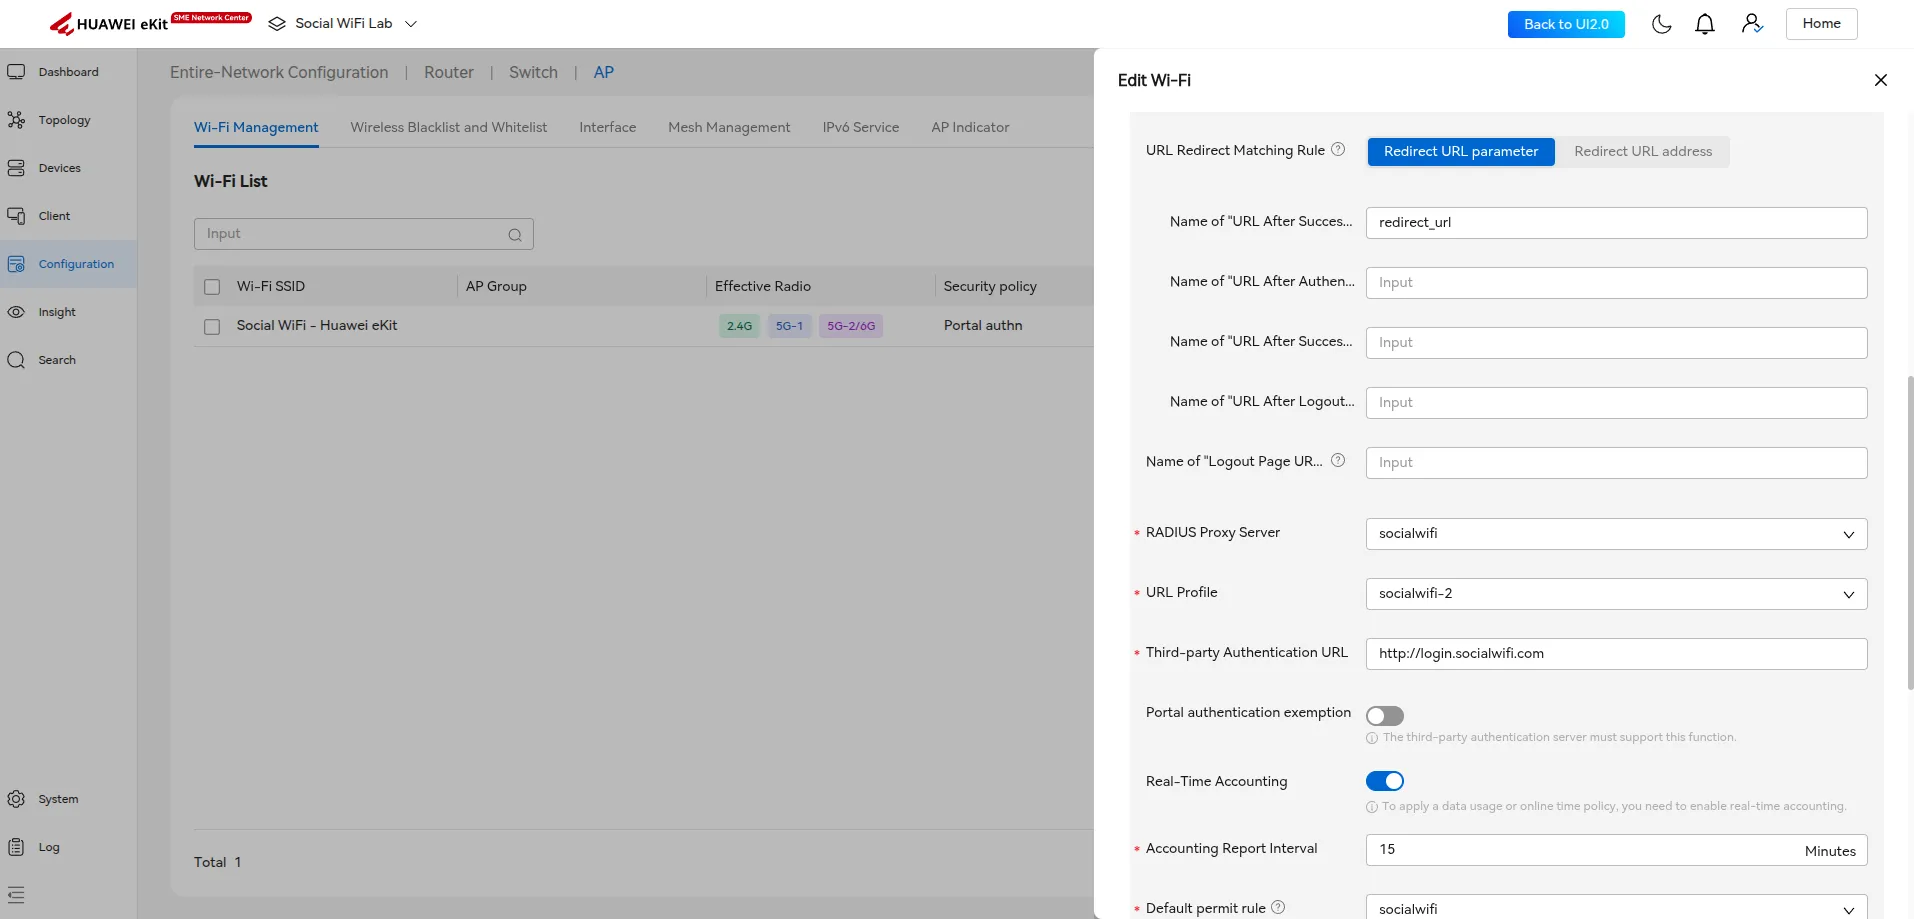
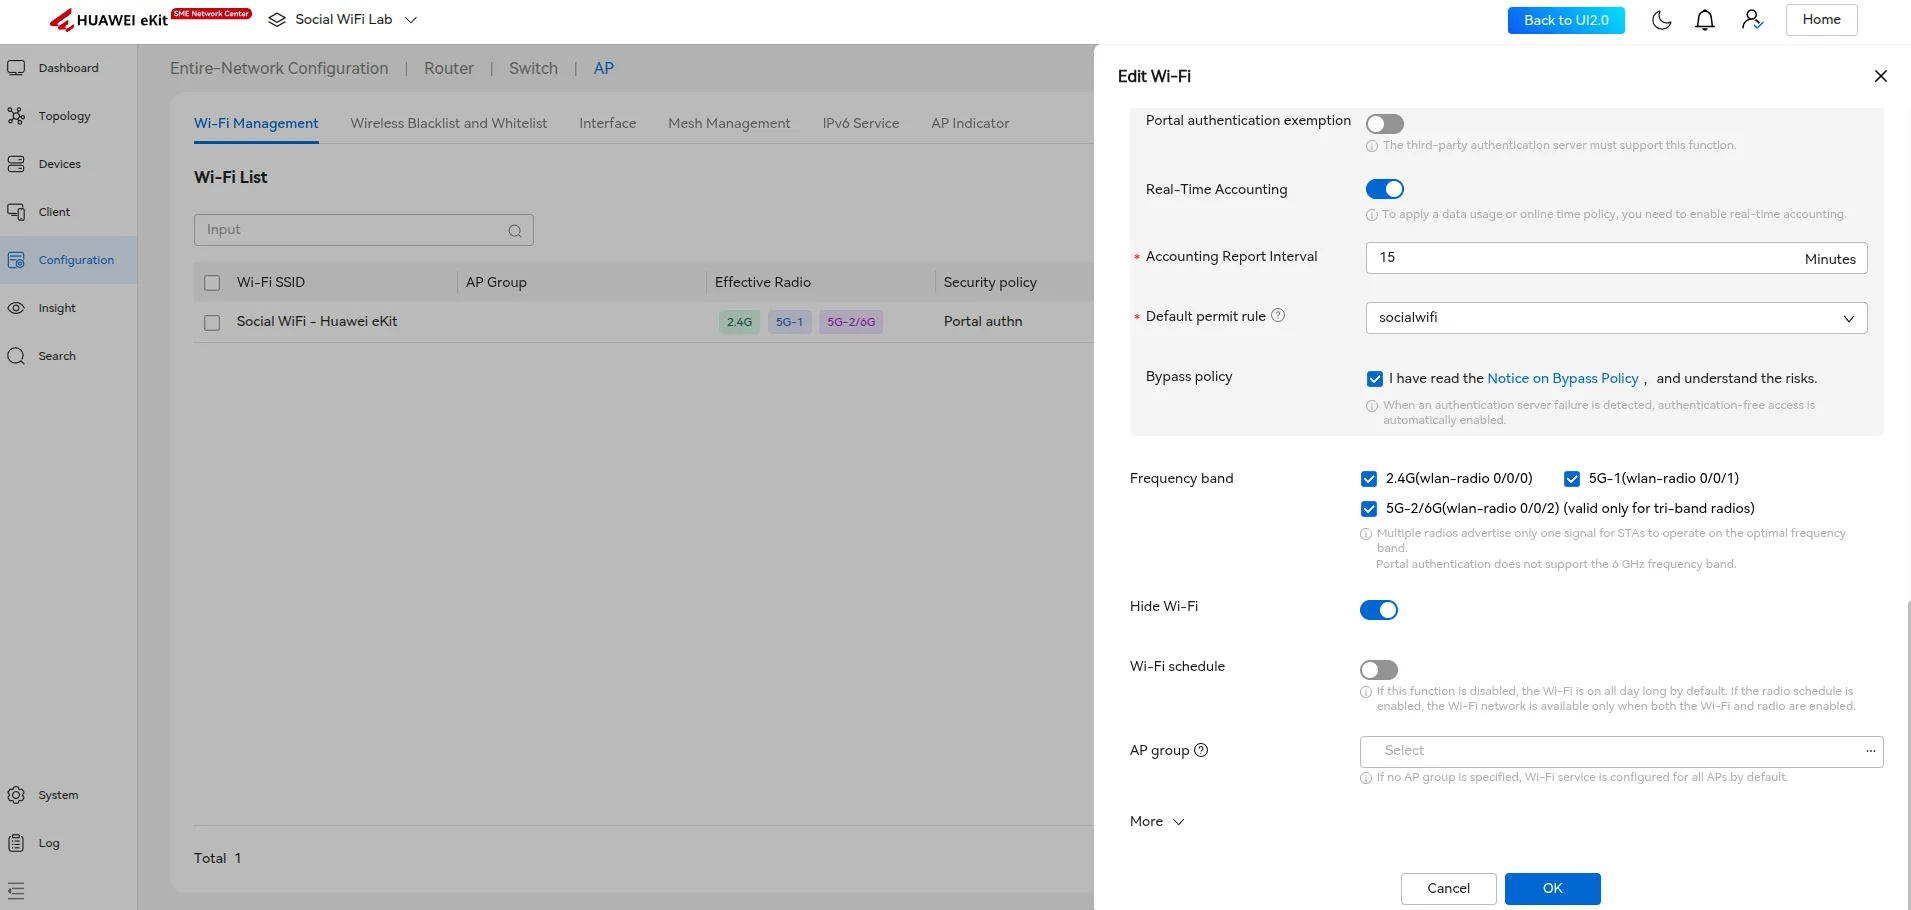
Otworzy się panel Edit Wi-Fi. Skonfiguruj sieć zgodnie z poniższą tabelą. Trzy pola - RADIUS Proxy Server, URL Profile oraz Default permit rule - wymagają uprzedniego utworzenia nowych podkonfiguracji. Postępuj zgodnie z poniższymi podpunktami, aby utworzyć każdą z nich, a następnie wróć tutaj, aby sfinalizować i zapisać formularz.
| Wi-Fi SSID | Widoczna nazwa Twojej sieci gościnnej |
|---|---|
| Security policy | Portal authn |
| Authentication type | Relay Authentication |
| Protocol | HTTPS |
| ”Username” Parameter Name | username |
| ”Password” Parameter Name | password |
| URL Redirect Matching Rule | Redirect URL parameter |
| Name of “URL After Successful Authentication” Parameter | redirect_url |
| Name of “URL After Authentication Failure” Parameter | (pozostaw puste) |
| Name of “URL After Successful Logout” Parameter | (pozostaw puste) |
| Name of “URL After Logout Failure” Parameter | (pozostaw puste) |
| Name of “Logout Page URL” Parameter | (pozostaw puste) |
| RADIUS Proxy Server | Utwórz nowy - zobacz Utwórz RADIUS Proxy Server |
| URL Profile | Utwórz nowy - zobacz Utwórz URL Template |
| Third-party Authentication URL | http://login.socialwifi.com |
| Portal authentication exemption | Disabled |
| Real-Time Accounting | Enabled |
| Accounting Report Interval | 15 minutes |
| Default permit rule | Utwórz nową - zobacz Utwórz Default Permit Rule |
| Bypass policy | Enabled |
Utwórz RADIUS Proxy Server
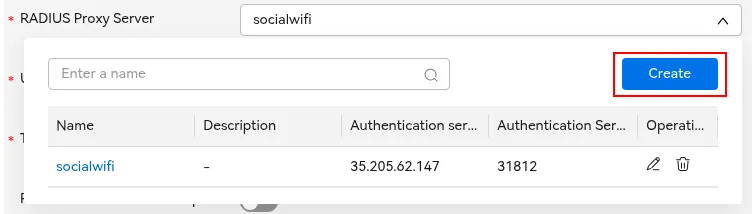
W polu RADIUS Proxy Server rozwiń listę i kliknij Create. Pojawi się okno - skonfiguruj je w następujący sposób:
| Name | socialwifi |
|---|---|
| Authentication Server Address | 35.205.62.147 |
| Authentication Server Port | 31812 |
| Authentication Protocol | PAP |
| Accounting Server Address | 35.205.62.147 |
| Accounting Server Port | 31813 |
| Timeout | 5 |
| MAC Address Format Set | Enabled |
| MAC Address Case | Uppercase |
| MAC Address Separator | Hyphen (-) |
| MAC Address Format | XX-XX-XX-XX-XX-XX |
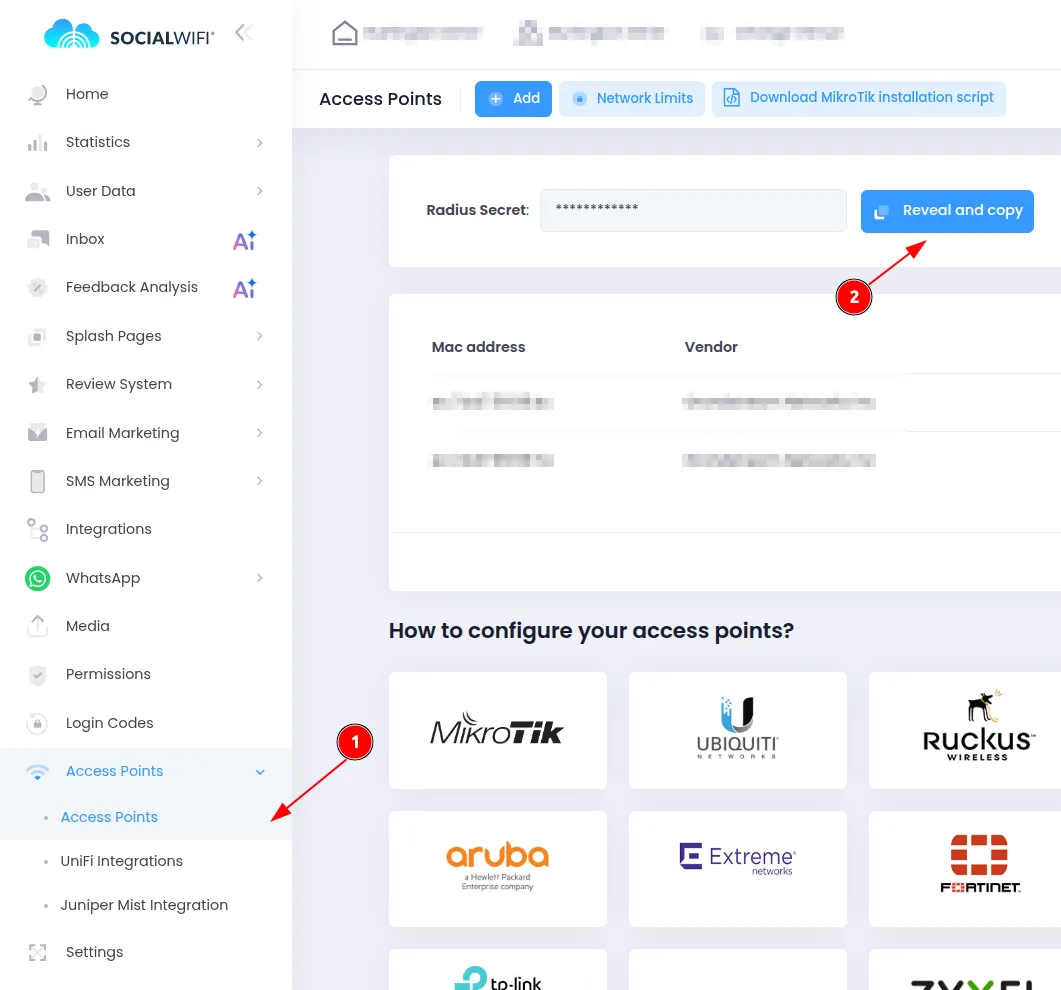
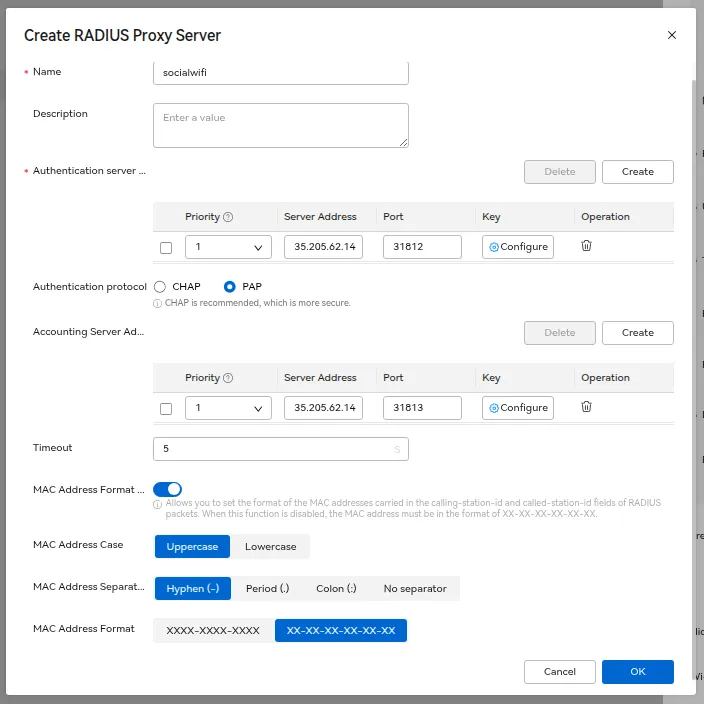
Kliknij OK. Wrócisz do formularza Edit Wi-Fi z wypełnionym polem RADIUS Proxy Server.
Utwórz URL Template
W polu URL Profile rozwiń listę i kliknij Create. Pojawi się okno - ustaw nazwę oraz format adresu MAC w następujący sposób:
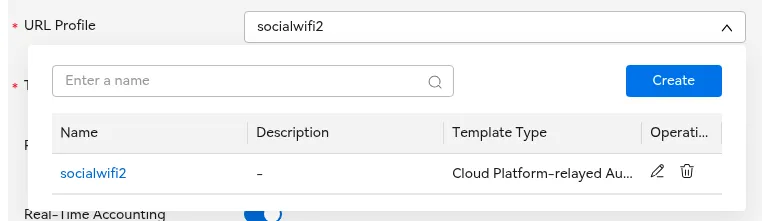
| Name | socialwifi |
|---|---|
| MAC Address Format Set | Enabled |
| MAC Address Case | Uppercase |
| MAC Address Separator | Hyphen (-) |
| MAC Address Format | XX-XX-XX-XX-XX-XX |
W sekcji Template Parameters upewnij się, że obecne są następujące cztery wpisy:
| Value Assignment Mode | Parameter | Parameter Name |
|---|---|---|
| Replace | device-mac | device-mac |
| Replace | user-mac | user-mac |
| Replace | loginurl | loginurl |
| Replace | redirect-url | redirect-url |
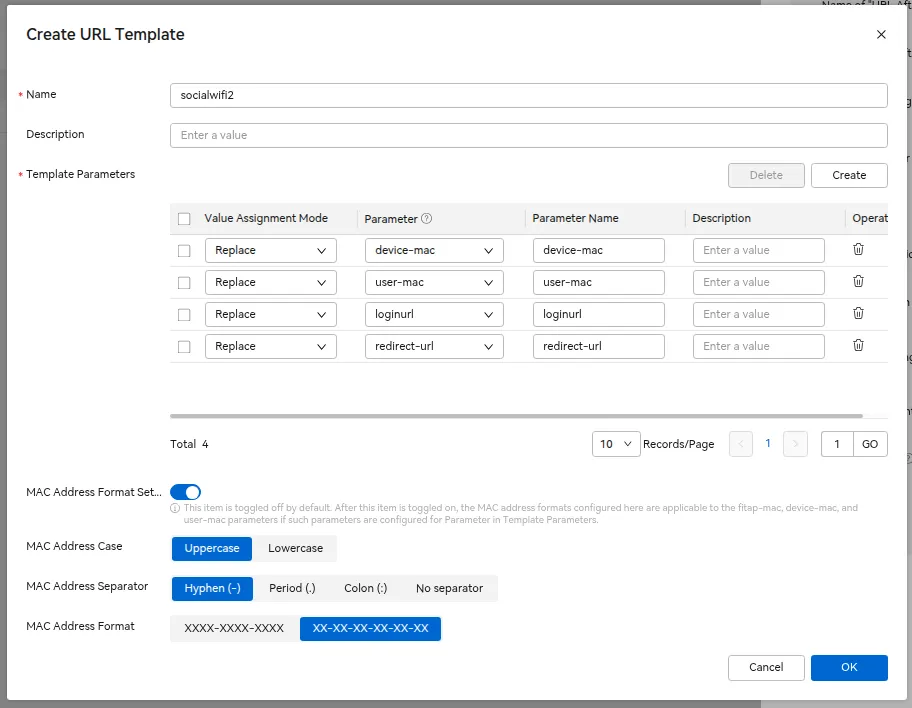
Kliknij OK. Wrócisz do formularza Edit Wi-Fi z wypełnionym polem URL Profile.
Utwórz Default Permit Rule
W polu Default permit rule rozwiń listę i kliknij Create. Pojawi się okno - skonfiguruj je w następujący sposób:
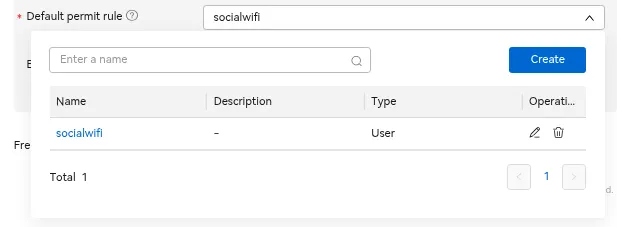
| Name | socialwifi |
|---|---|
| IPv4 rule: Address Type: Domain name: Protocol: Address Type: Domain name: Protocol: Address Type: Domain name: Protocol: Address Type: Domain name: Protocol: Address Type: Domain name: Protocol: Address Type: Domain name: Protocol: Address Type: Domain name: Protocol: Address Type: Domain name: Protocol: Address Type: Domain name: Protocol: Address Type: Domain name: Protocol: Address Type: Domain name: Protocol: Address Type: Domain name: Protocol: Address Type: Domain name: Protocol: Address Type: Domain name: Protocol: Address Type: Domain name: Protocol: Address Type: Domain name: Protocol: Address Type: Domain name: Protocol: Address Type: Domain name: Protocol: Address Type: Domain name: Protocol: Address Type: Domain name: Protocol: Address Type: Domain name: Protocol: Address Type: Domain name: Protocol: Address Type: Domain name: Protocol: Address Type: Domain name: Protocol: | Domain name *.socialwifi.comAny Domain name sw-login.comAny Domain name facebook.comAny Domain name *.facebook.comAny Domain name *.fbcdn.netAny Domain name linkedin.comAny Domain name *.linkedin.comAny Domain name *.licdn.comAny Domain name twitter.comAny Domain name api.twitter.comAny Domain name x.comAny Domain name api.x.comAny Domain name *.twimg.comAny Domain name whatsapp.comAny Domain name *.whatsapp.netAny Domain name *.whatsapp.comAny Domain name connect.facebook.netAny Domain name www.facebook.comAny Domain name www.googletagmanager.comAny Domain name www.googleadservices.comAny Domain name googleads.g.doubleclick.netAny Domain name *.youtube.comAny Domain name *.ytimg.comAny Domain name *.googlevideo.comAny Domain name yt3.ggpht.comAny |
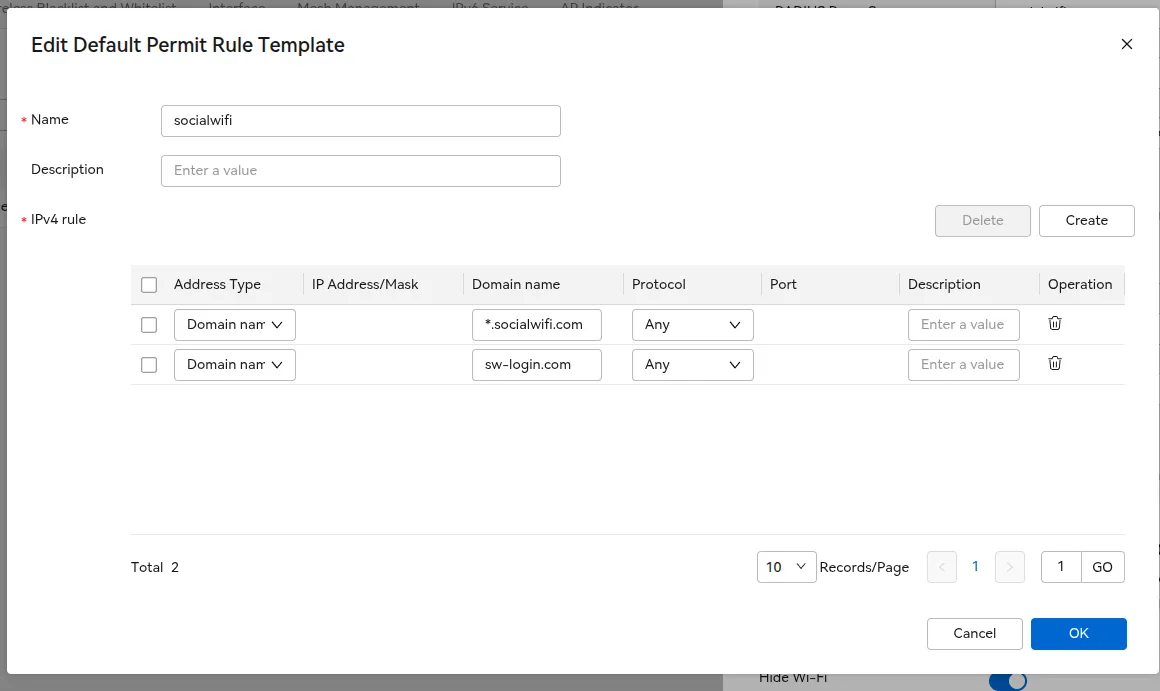
Kliknij OK. Wrócisz do formularza Edit Wi-Fi z wypełnionym polem Default permit rule.
Finalizacja konfiguracji
Po skonfigurowaniu wszystkich trzech podpunktów upewnij się, że pozostałe ustawienia w dolnej części formularza są zgodne z powyższą tabelą.
Kliknij OK, aby utworzyć sieć Wi-Fi.
Dodaj punkt dostępowy do panelu Social WiFi
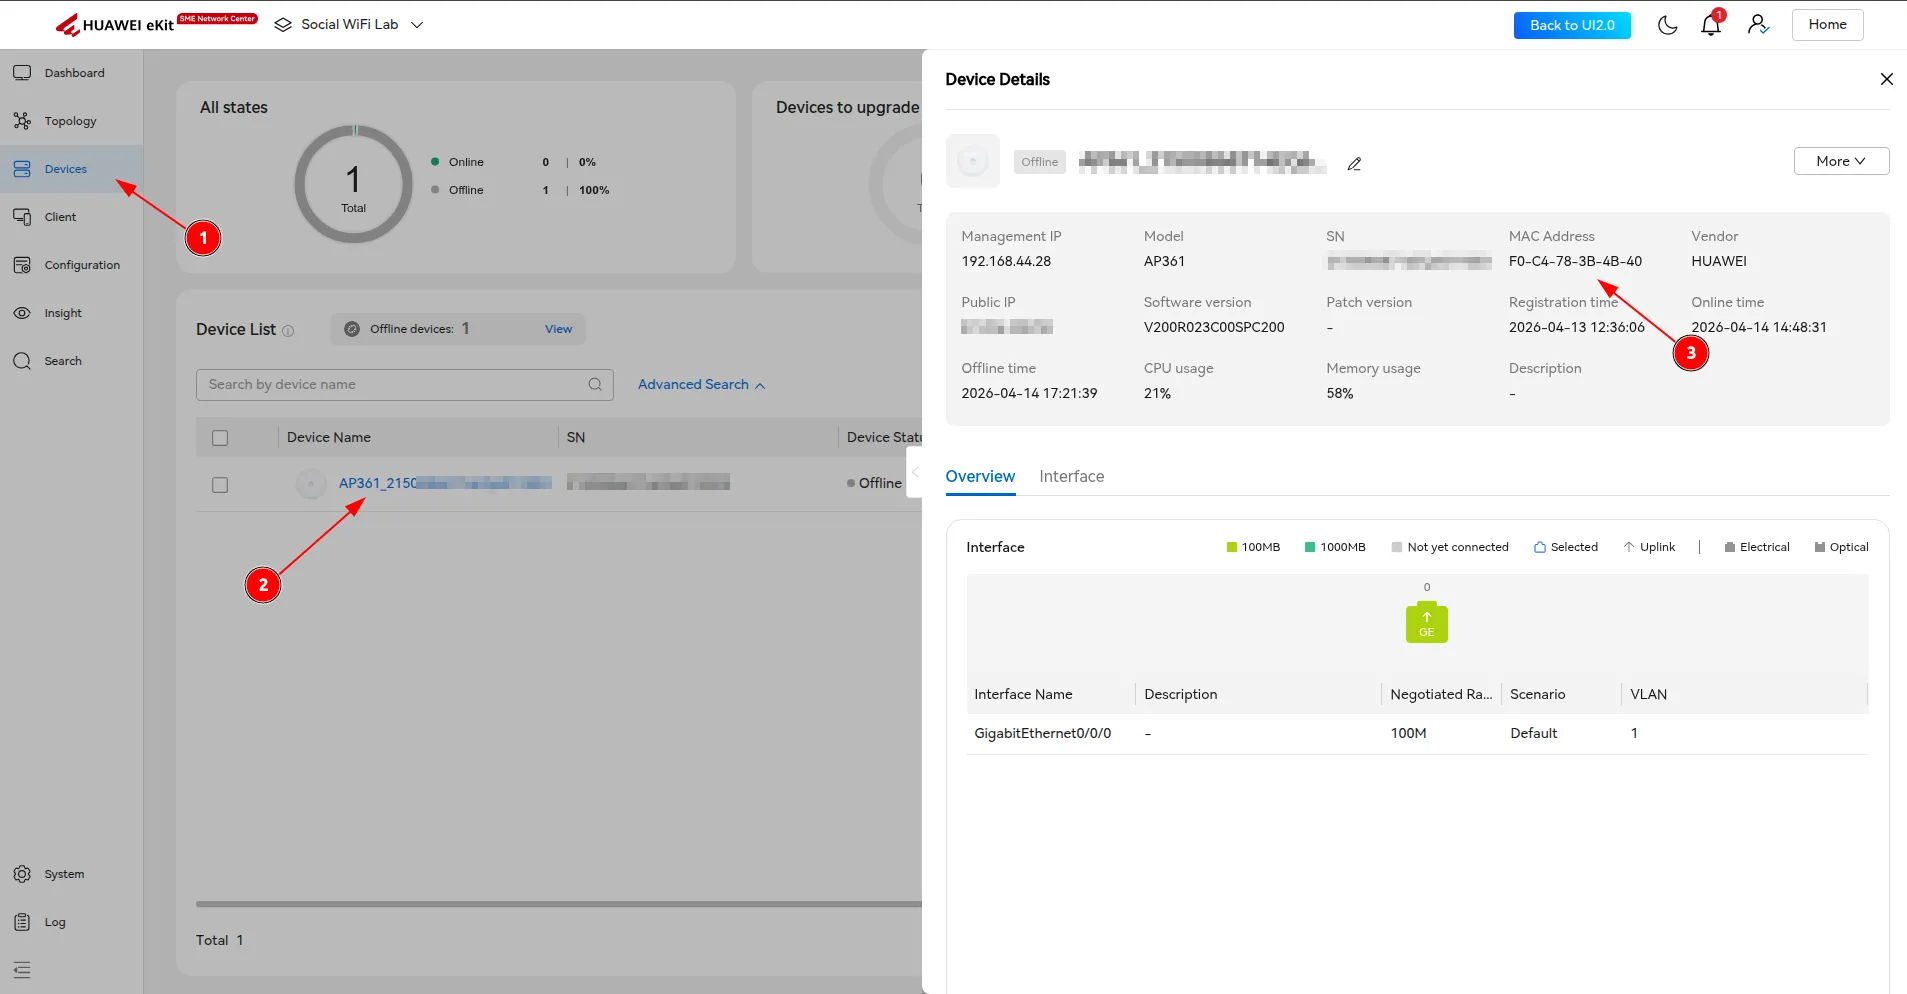
Aby znaleźć adres MAC swojego urządzenia, przejdź do sekcji Devices i kliknij w AP, który chcesz dodać. Skopiuj jego adres MAC.
Zaloguj się do Panelu Social WiFi, przejdź do zakładki Access Points i kliknij Add new.
Testowanie rozwiązania
Połącz się z siecią Wi-Fi. Powinieneś zostać przekierowany na stronę logowania. Zakończ proces logowania - po jego zakończeniu powinieneś uzyskać dostęp do Internetu. Twoje pierwsze połączenia i autoryzacje pojawią się w sekcji Statistics w Panelu Social WiFi.