Ruckus One
Ta treść nie jest jeszcze dostępna w Twoim języku.
Compatibility
Social WiFi has been tested and is proven to work on the following configuration:
- Ruckus R310 Access Point running firmware Solo Access Point 118.2.0.0.875
Installation
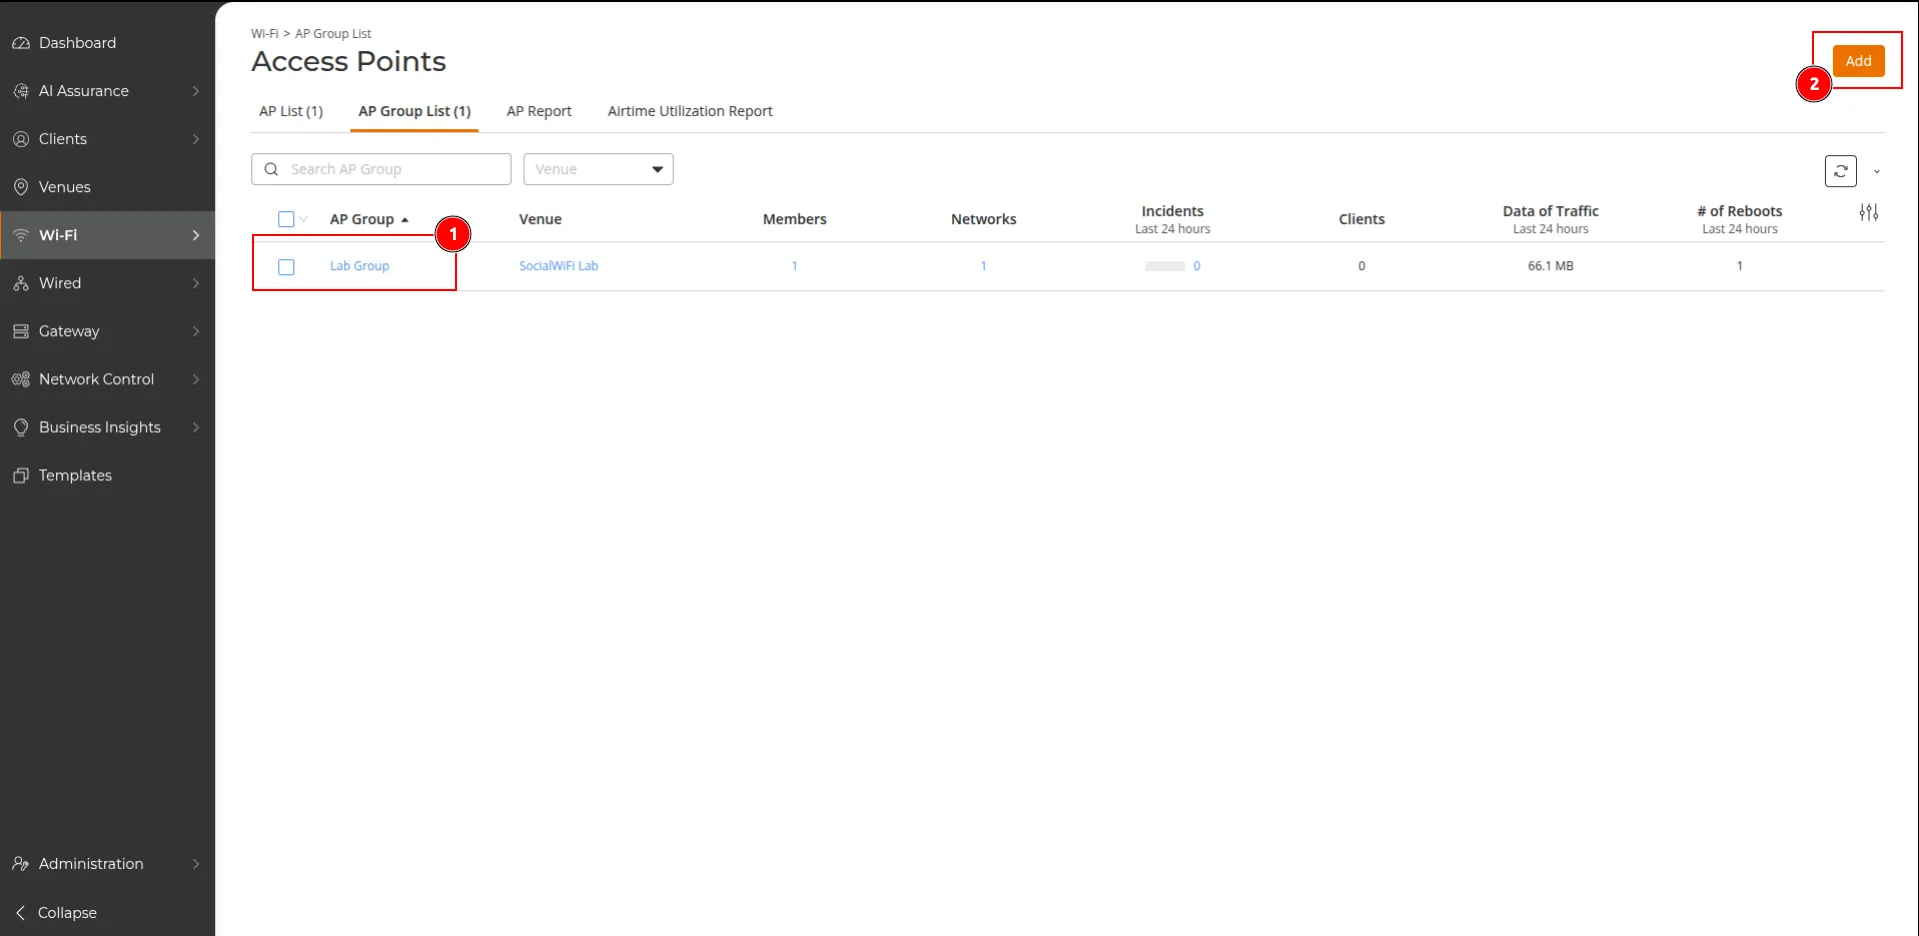
- In the Ruckus One dashboard, go to Wi-Fi -> AP Group List.
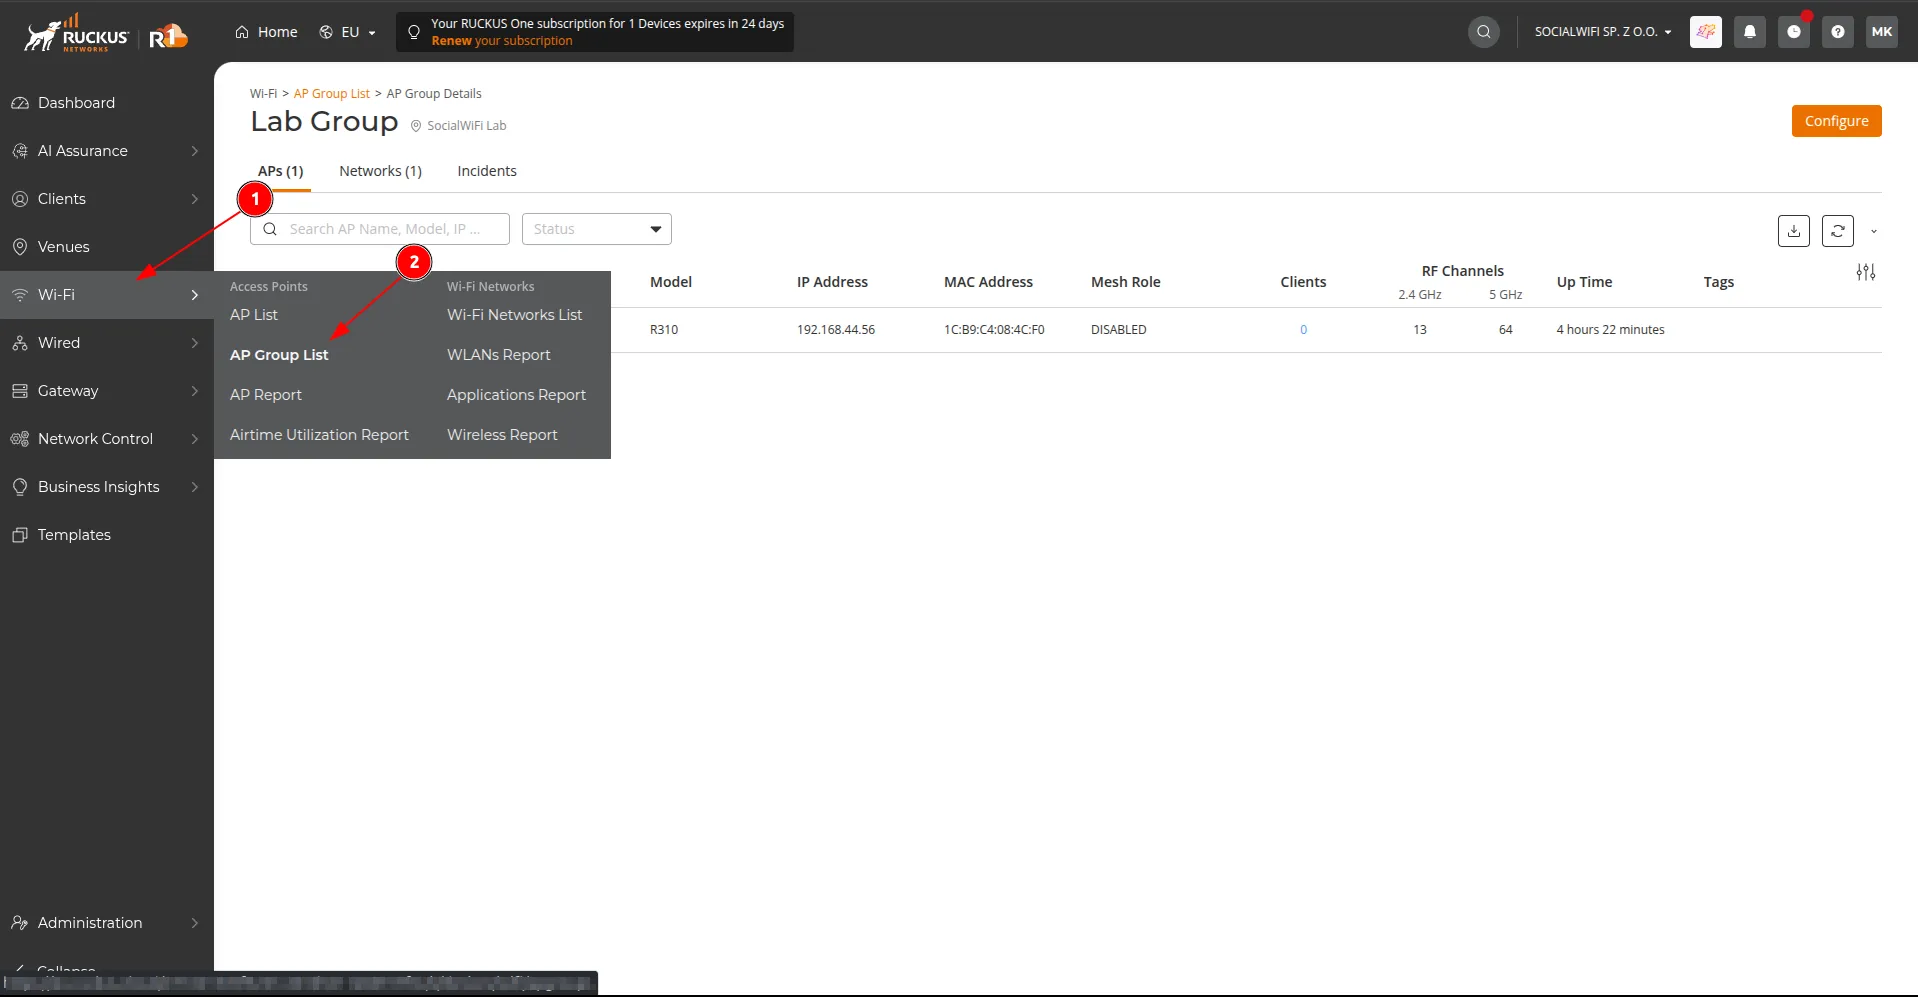
Select an existing AP Group (1), or create a new one with Add (2).
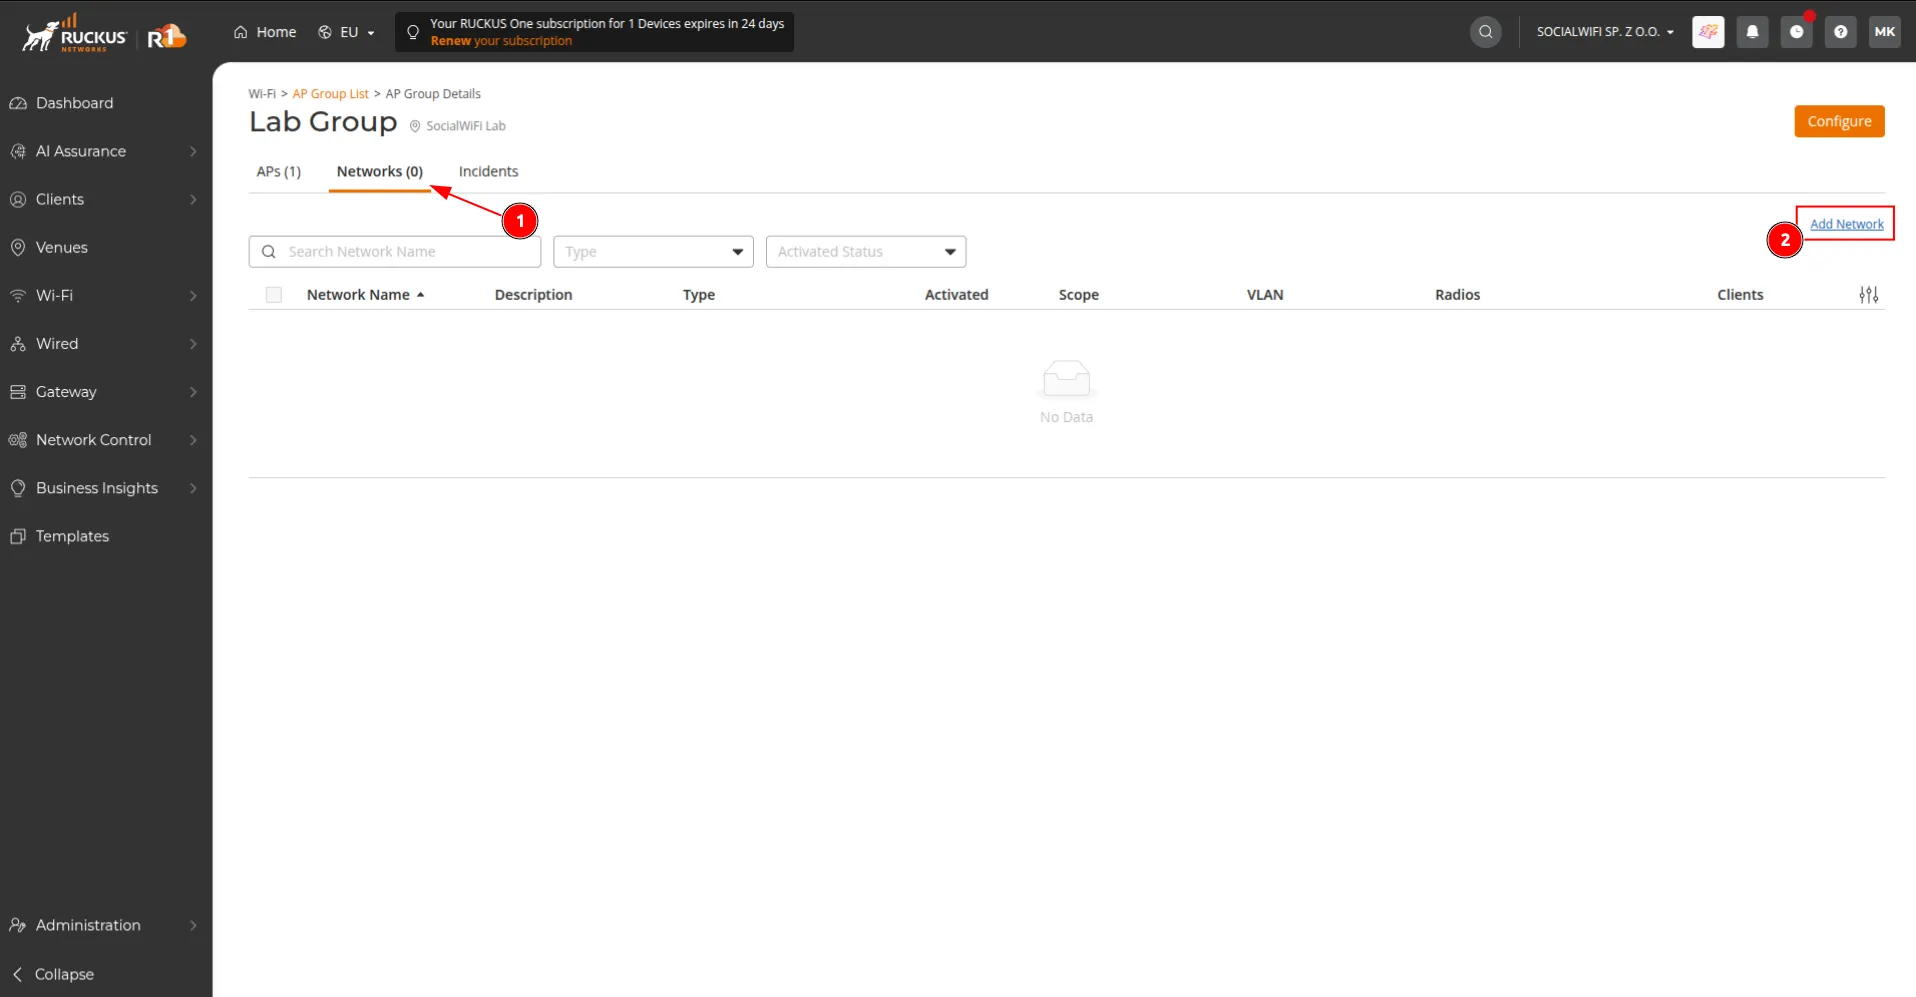
- Open the AP Group, switch to the Networks tab and click Add Network.
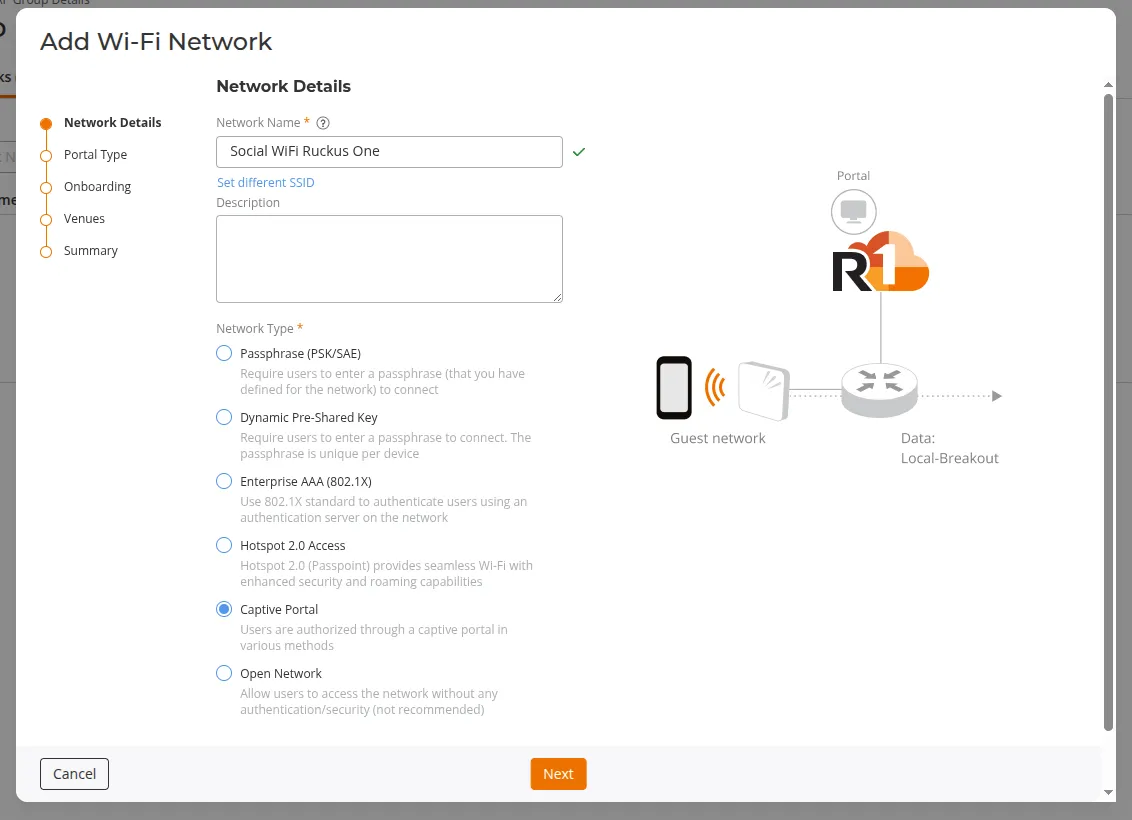
- On the Network Details step, set the Network Name (the SSID visible to clients) and select Network Type -> Captive Portal. Click Next.
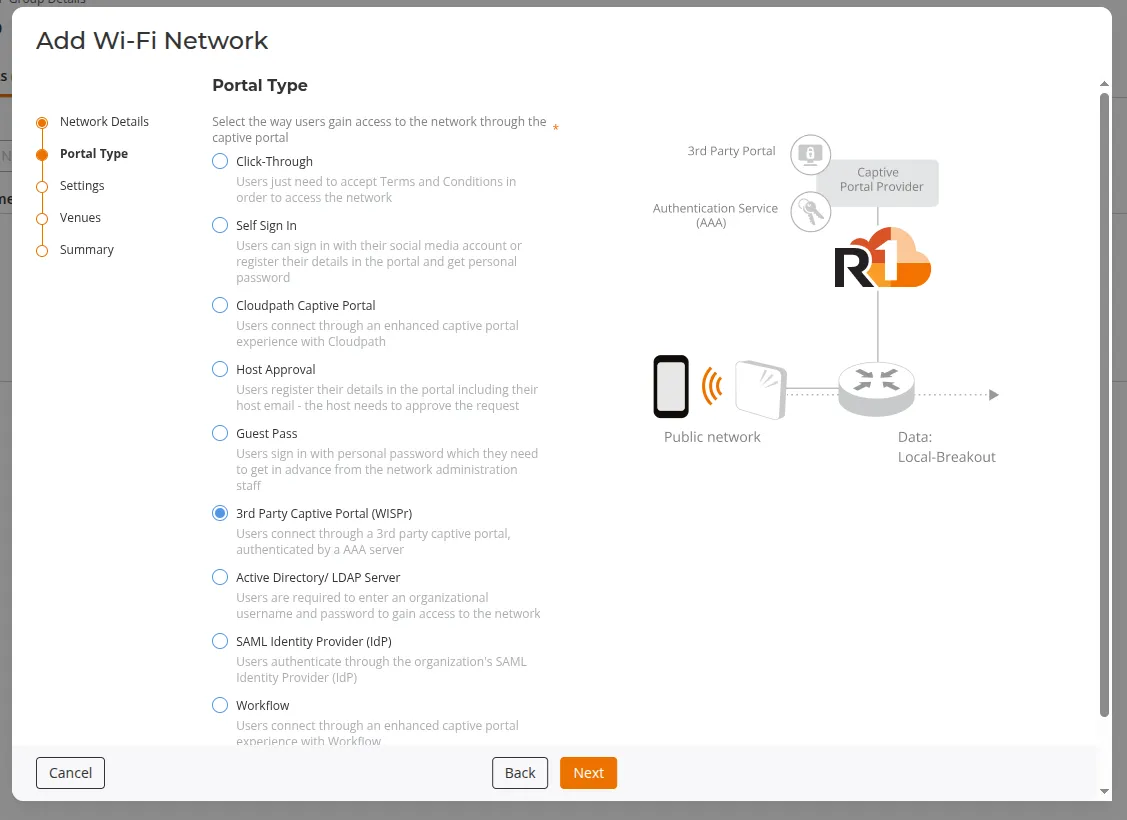
- On the Portal Type step, select 3rd Party Captive Portal (WISPr). Click Next.
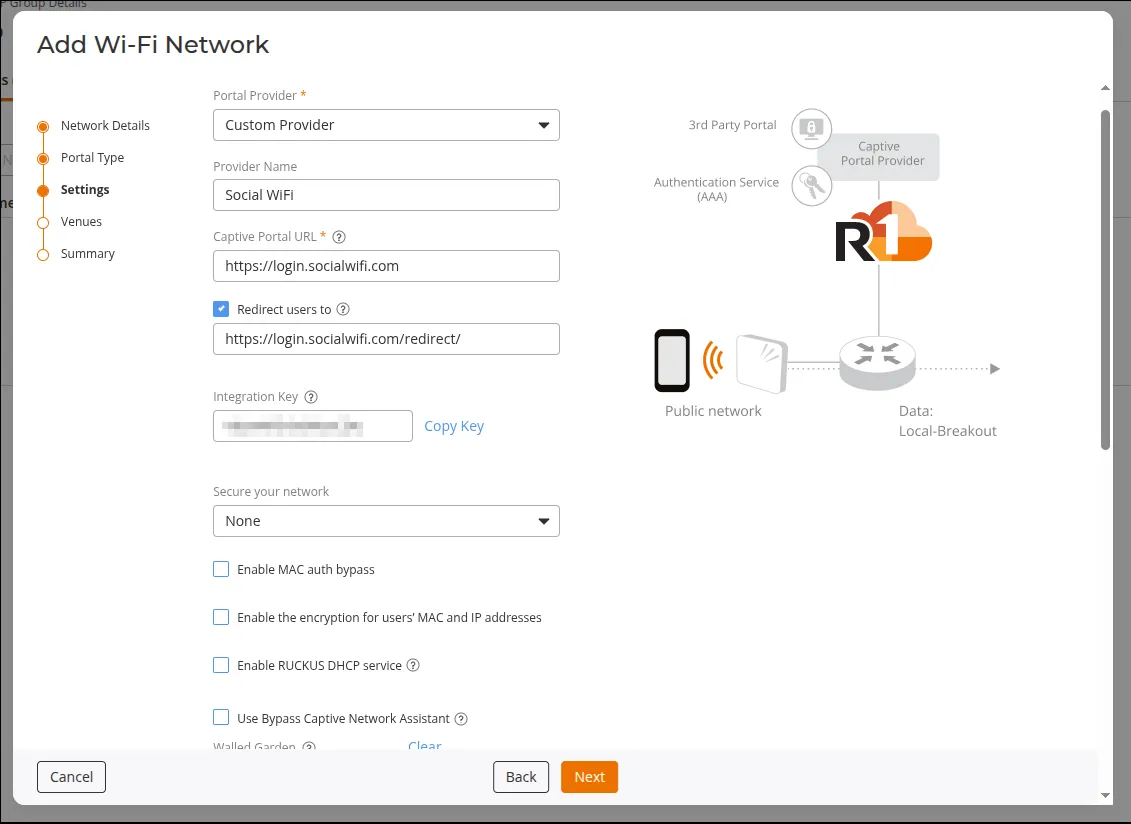
- On the Settings step, configure the following values:
| Portal Provider | Custom Provider |
|---|---|
| Provider Name | optional (e.g. Social WiFi) |
| Captive Portal URL | https://login.socialwifi.com |
| Redirect users to | enabled - https://login.socialwifi.com/redirect/ |
| Secure your network | None |
| Enable MAC auth bypass | Disabled |
| Enable the encryption for users’ MAC and IP addresses | Disabled |
| Enable RUCKUS DHCP service | Disabled |
| Use Bypass Captive Network Assistant | Disabled |
- Scroll down to the Walled Garden section, copy and paste domains below:
*.socialwifi.comsw-login.comfacebook.com*.facebook.com*.fbcdn.netlinkedin.com*.linkedin.com*.licdn.comtwitter.comapi.twitter.comx.comapi.x.com*.twimg.comwhatsapp.com*.whatsapp.net*.whatsapp.comconnect.facebook.netwww.facebook.comwww.googletagmanager.comwww.googleadservices.comgoogleads.g.doubleclick.net*.youtube.com*.ytimg.com*.googlevideo.comyt3.ggpht.com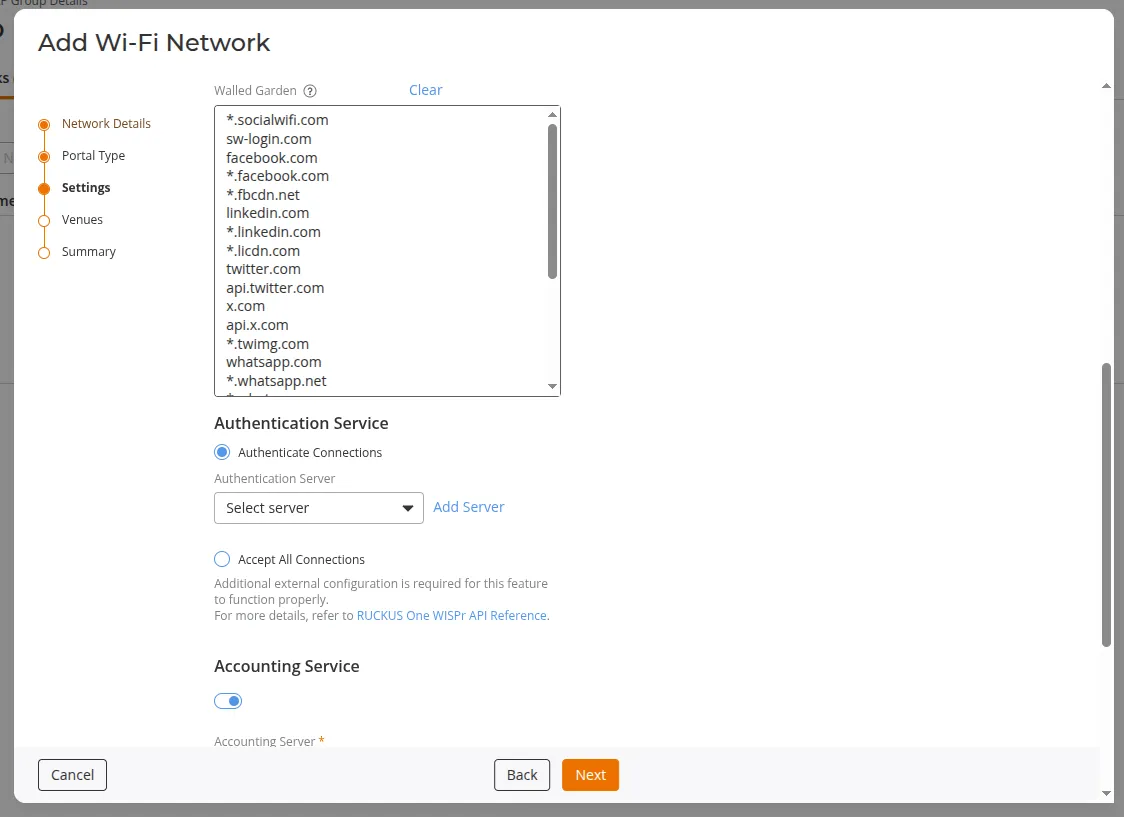
-
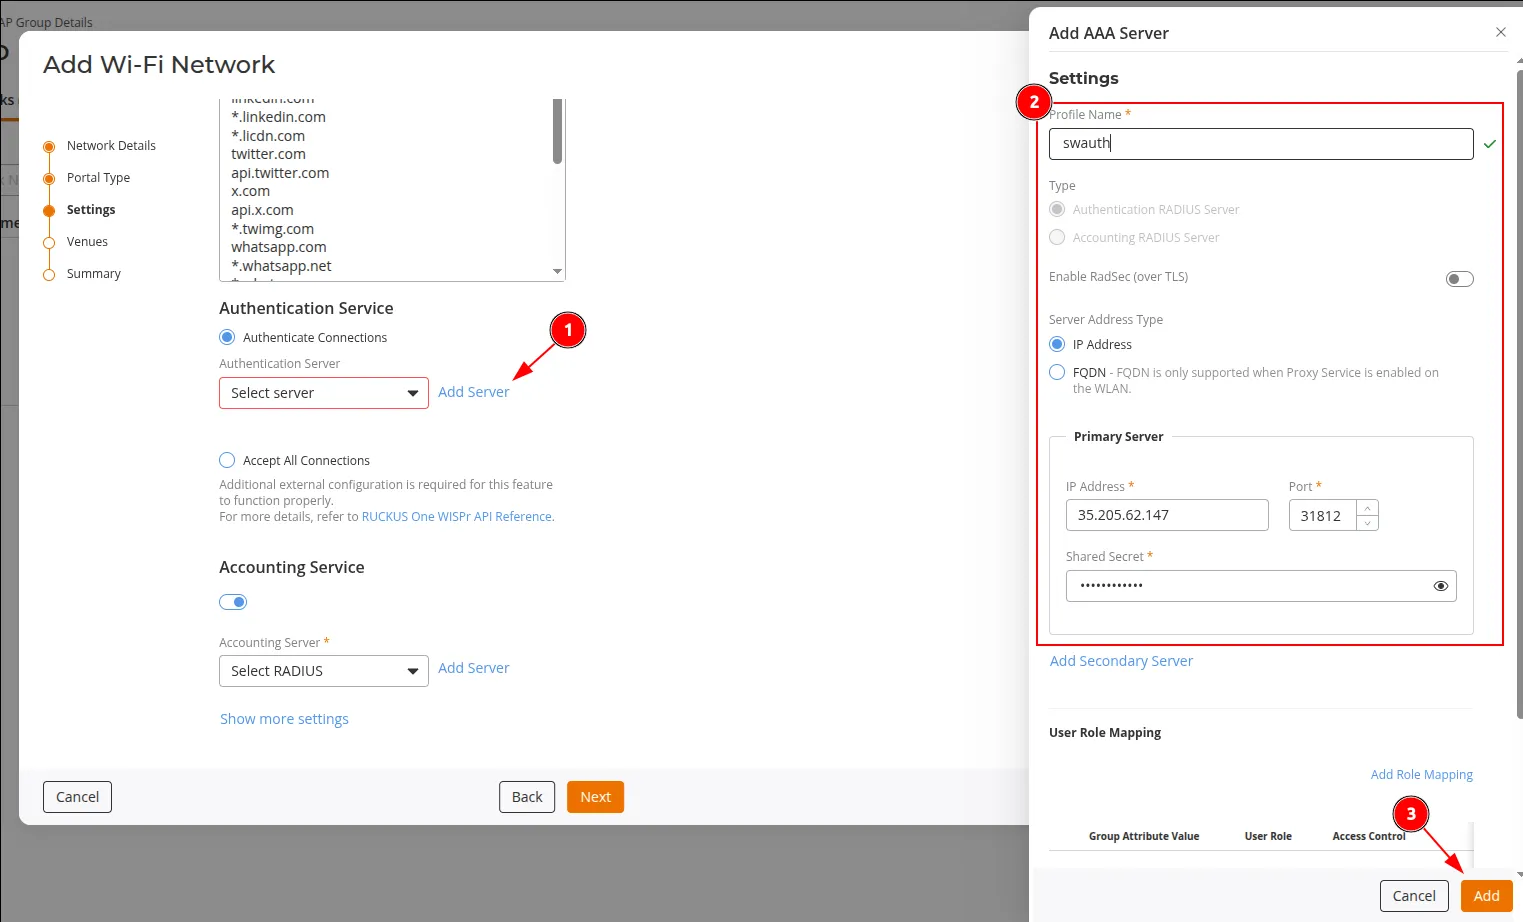
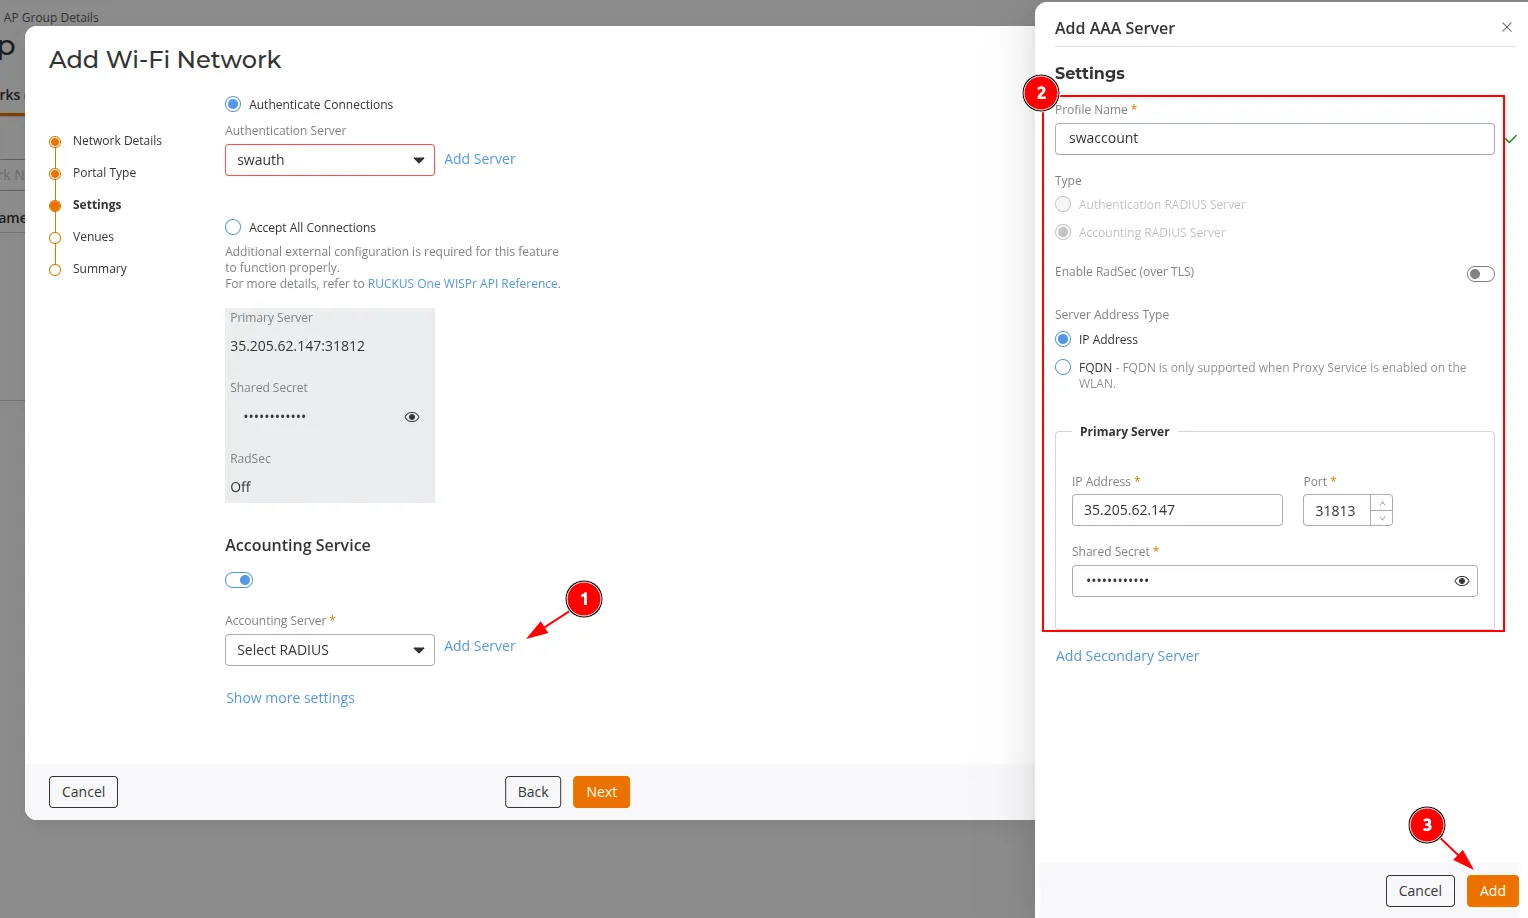
Under Authentication Service, select Authenticate Connections and click Add Server to add a new Authentication (RADIUS) server.
Use the RADIUS server address, port and shared secret from the Social WiFi Panel. The tested configuration uses port 31812 for the Authentication server, with RadSec (over TLS) disabled.
-
Under Accounting Service, enable the toggle and click Add Server to add a new Accounting (RADIUS) server.
Use the same RADIUS server address and shared secret from the Social WiFi Panel. The tested configuration uses port 31813 for the Accounting server, with RadSec (over TLS) disabled. Click Next.
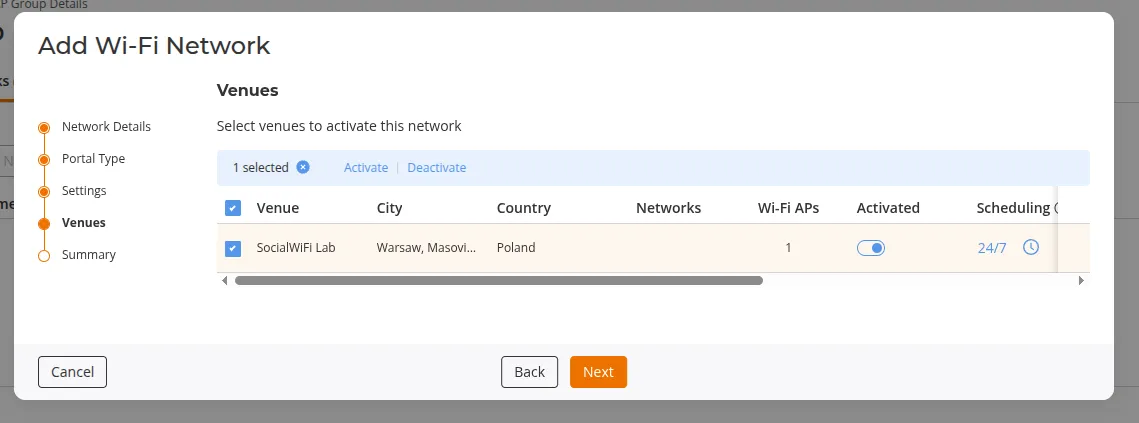
- On the Venues step, select the venues where the new Guest Wi-Fi should be activated. Click Next.
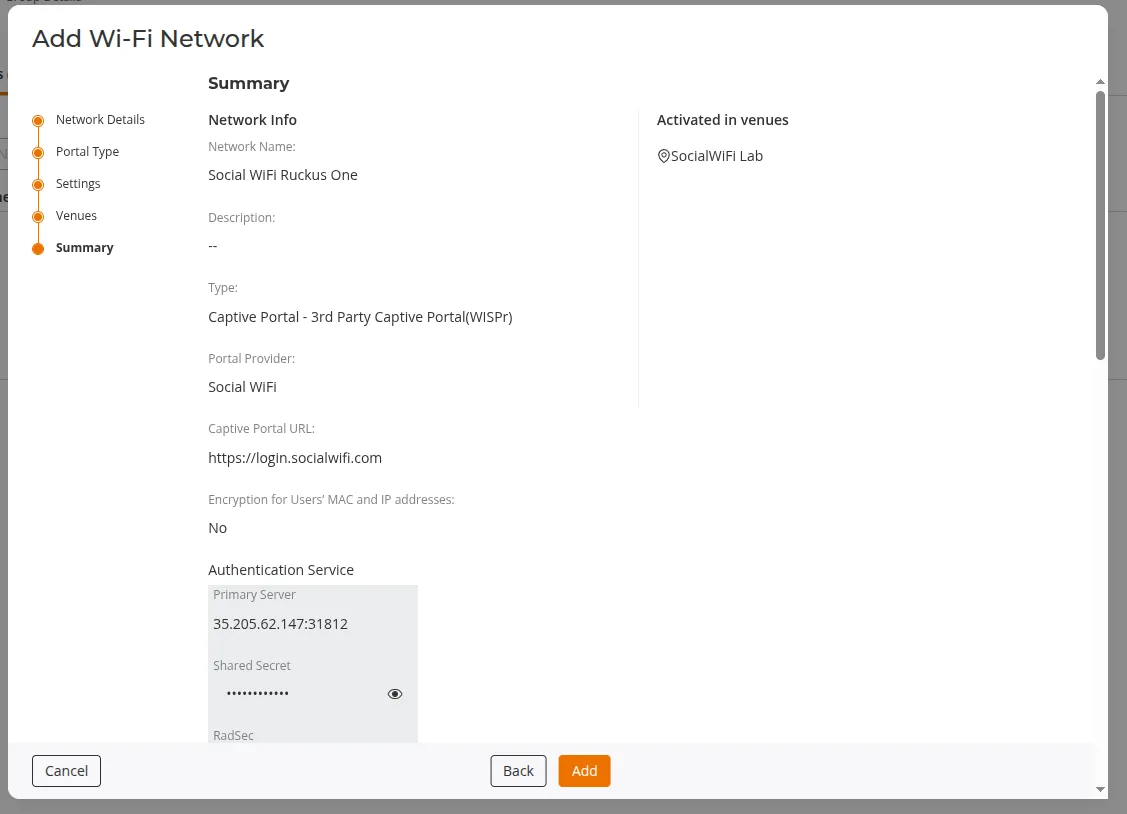
- On the Summary step, verify the configuration and click Add.
Add the access point to Social WiFi Panel
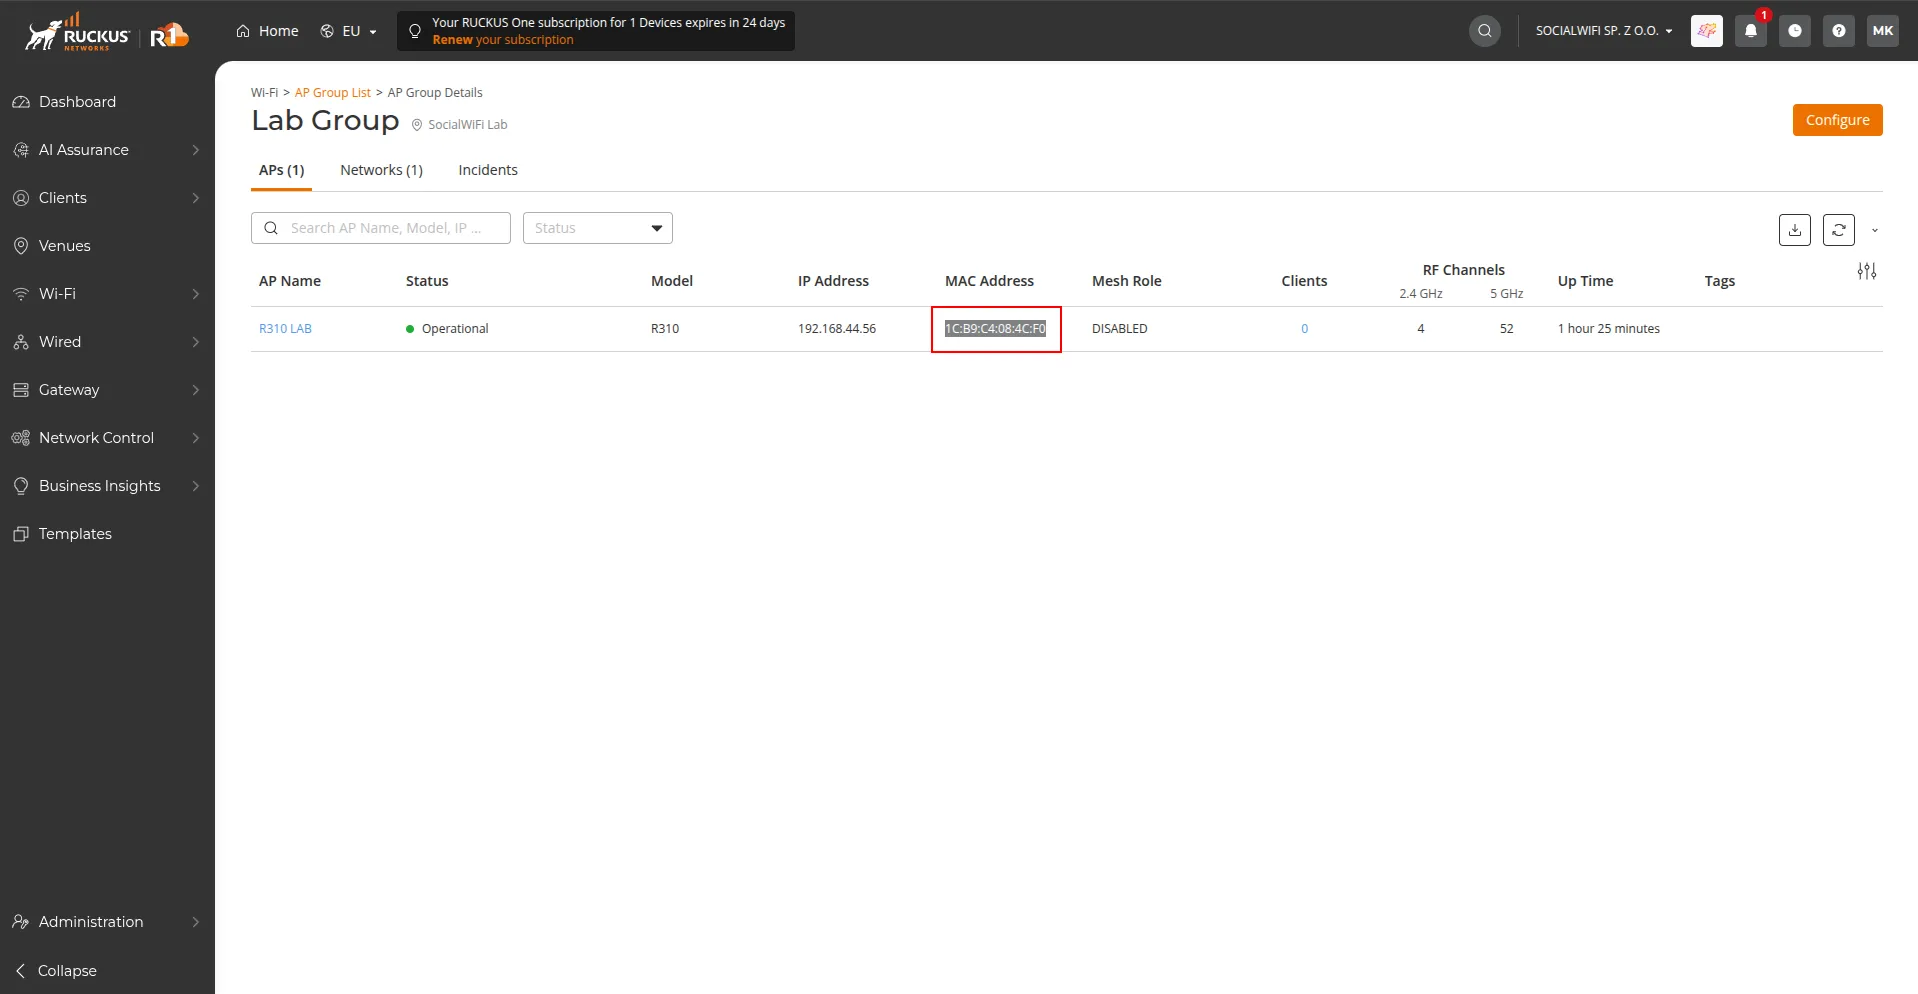
Go back to Wi-Fi -> AP Group List and open your AP Group. Copy the MAC address of each access point that will serve the Guest Wi-Fi through the Social WiFi integration, then enter them in the Access Point tab of the Social WiFi Panel.
Test the solution
Connect to the Wi-Fi network. You should be redirected to the login page. Complete the login process - once done, you should have internet access. Your first connections and authorizations will appear in the Statistics section of the Social WiFi Panel.