EnGenius
Ta treść nie jest jeszcze dostępna w Twoim języku.
Compatibility
Social WiFi has been tested and is proven to work on:
- EnGenius ECW520, Firmware Version 1.10.103
Access Point MAC Address
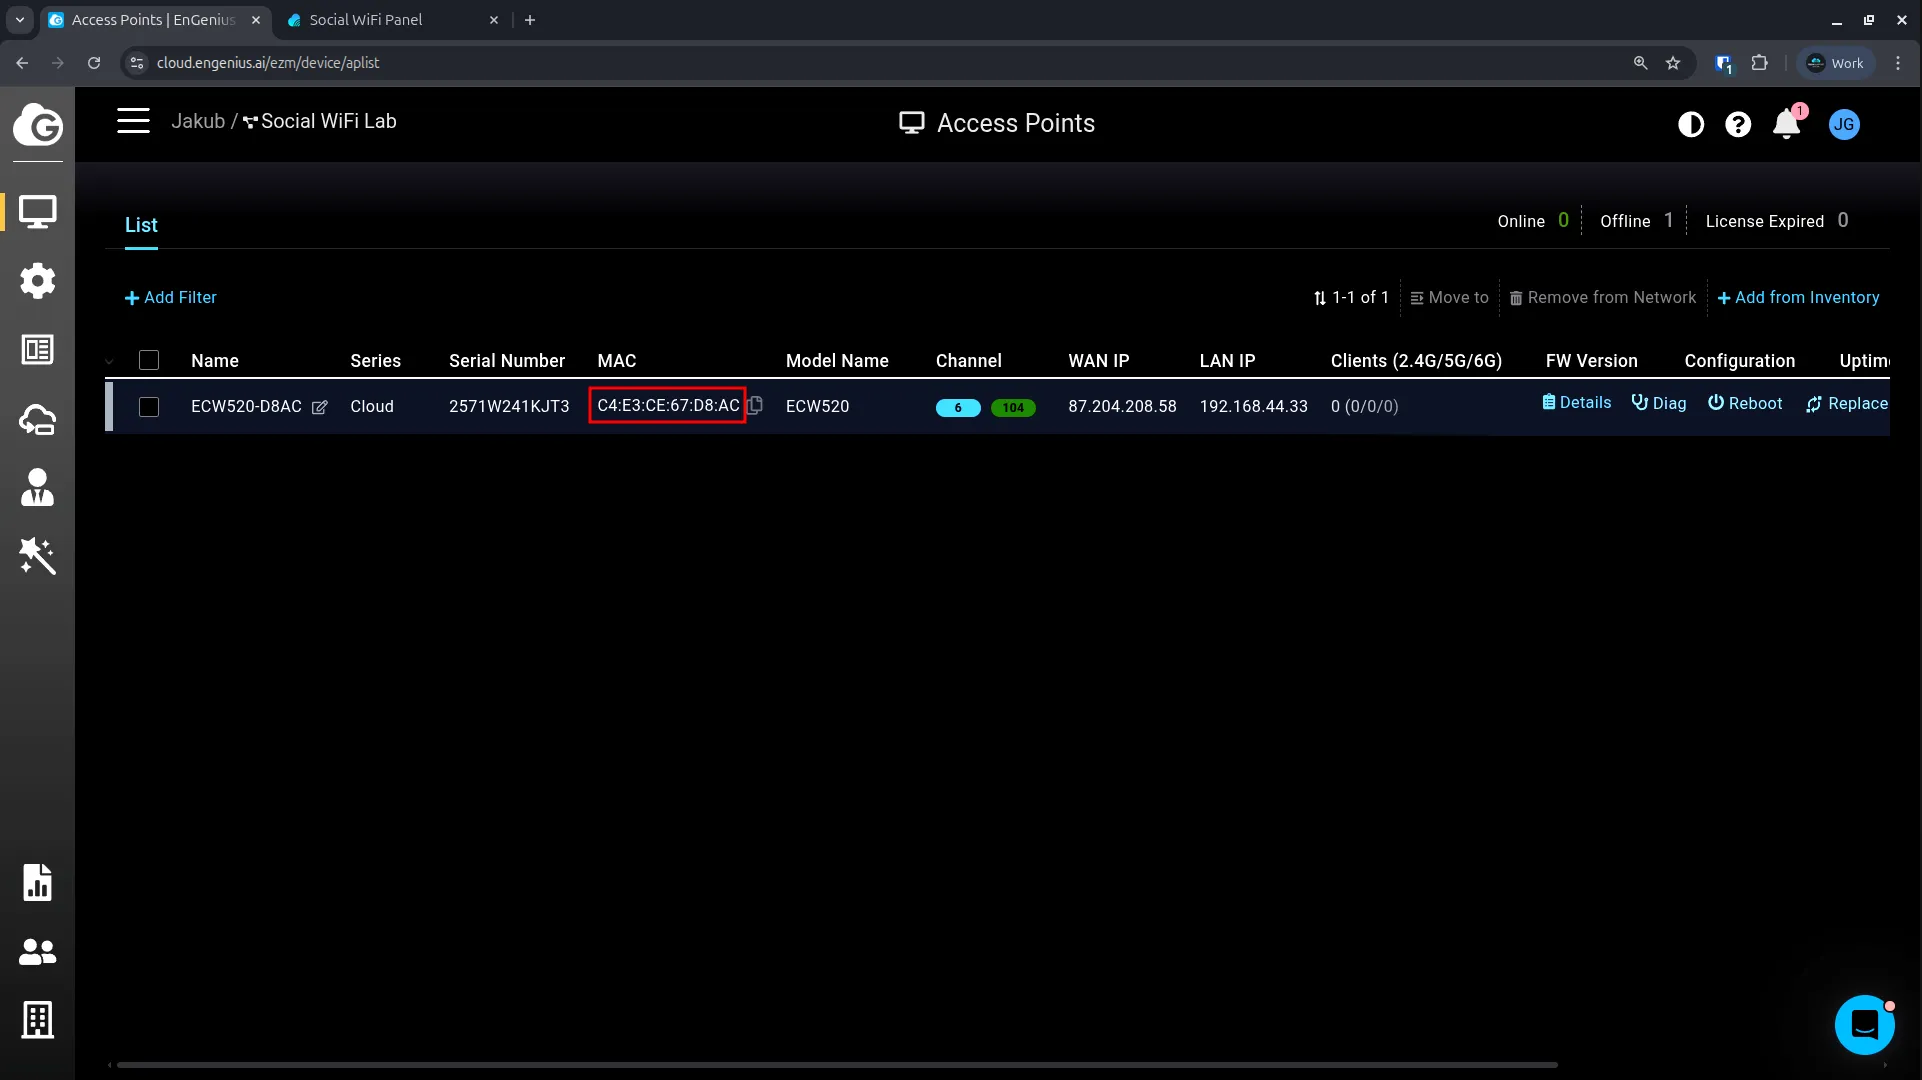
- Log in to the EnGenius Cloud portal.
- Navigate to Manage -> Access Point.
- Copy the Access Point MAC address.
Social WiFi Panel Configuration
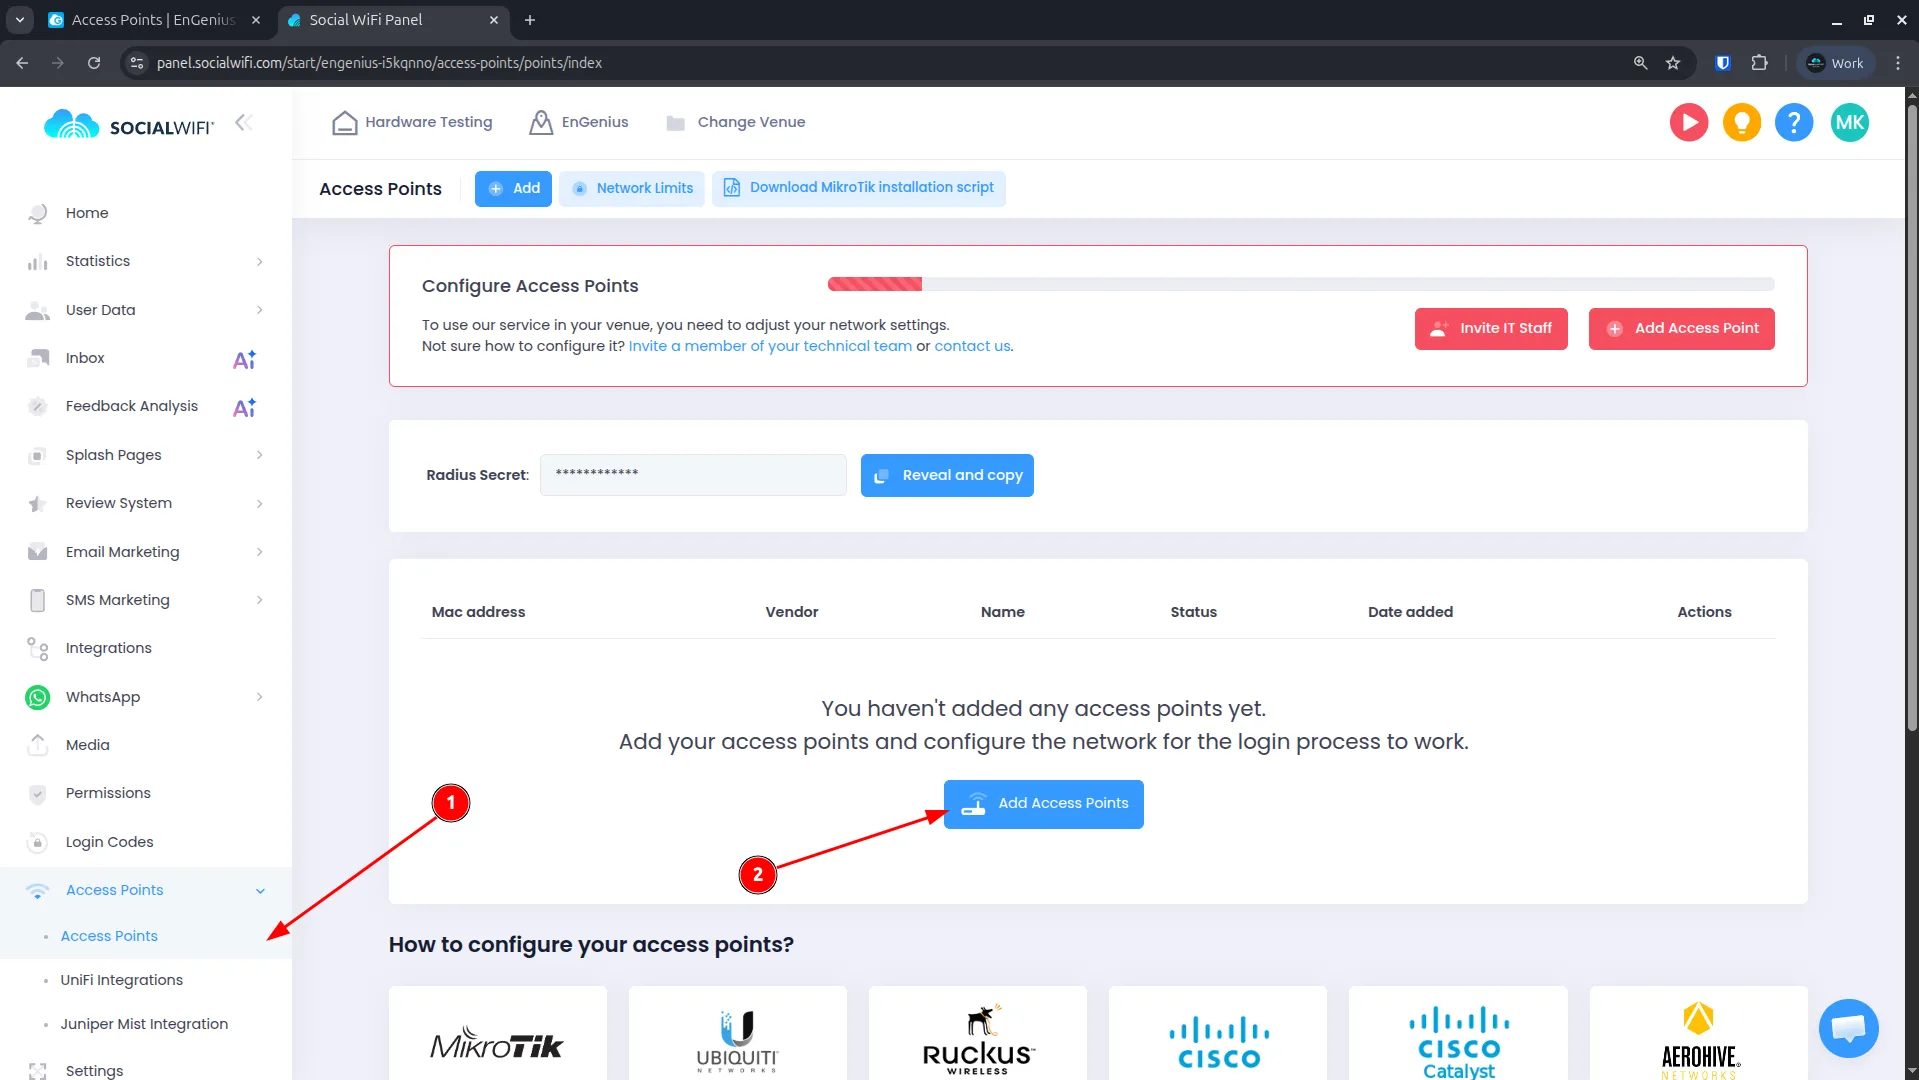
- Log in to the Social WiFi Panel.
- Navigate to Access Points.
- Click Add Access Points.
-
Paste the MAC address copied from the EnGenius portal.
-
Click Add and then Create.
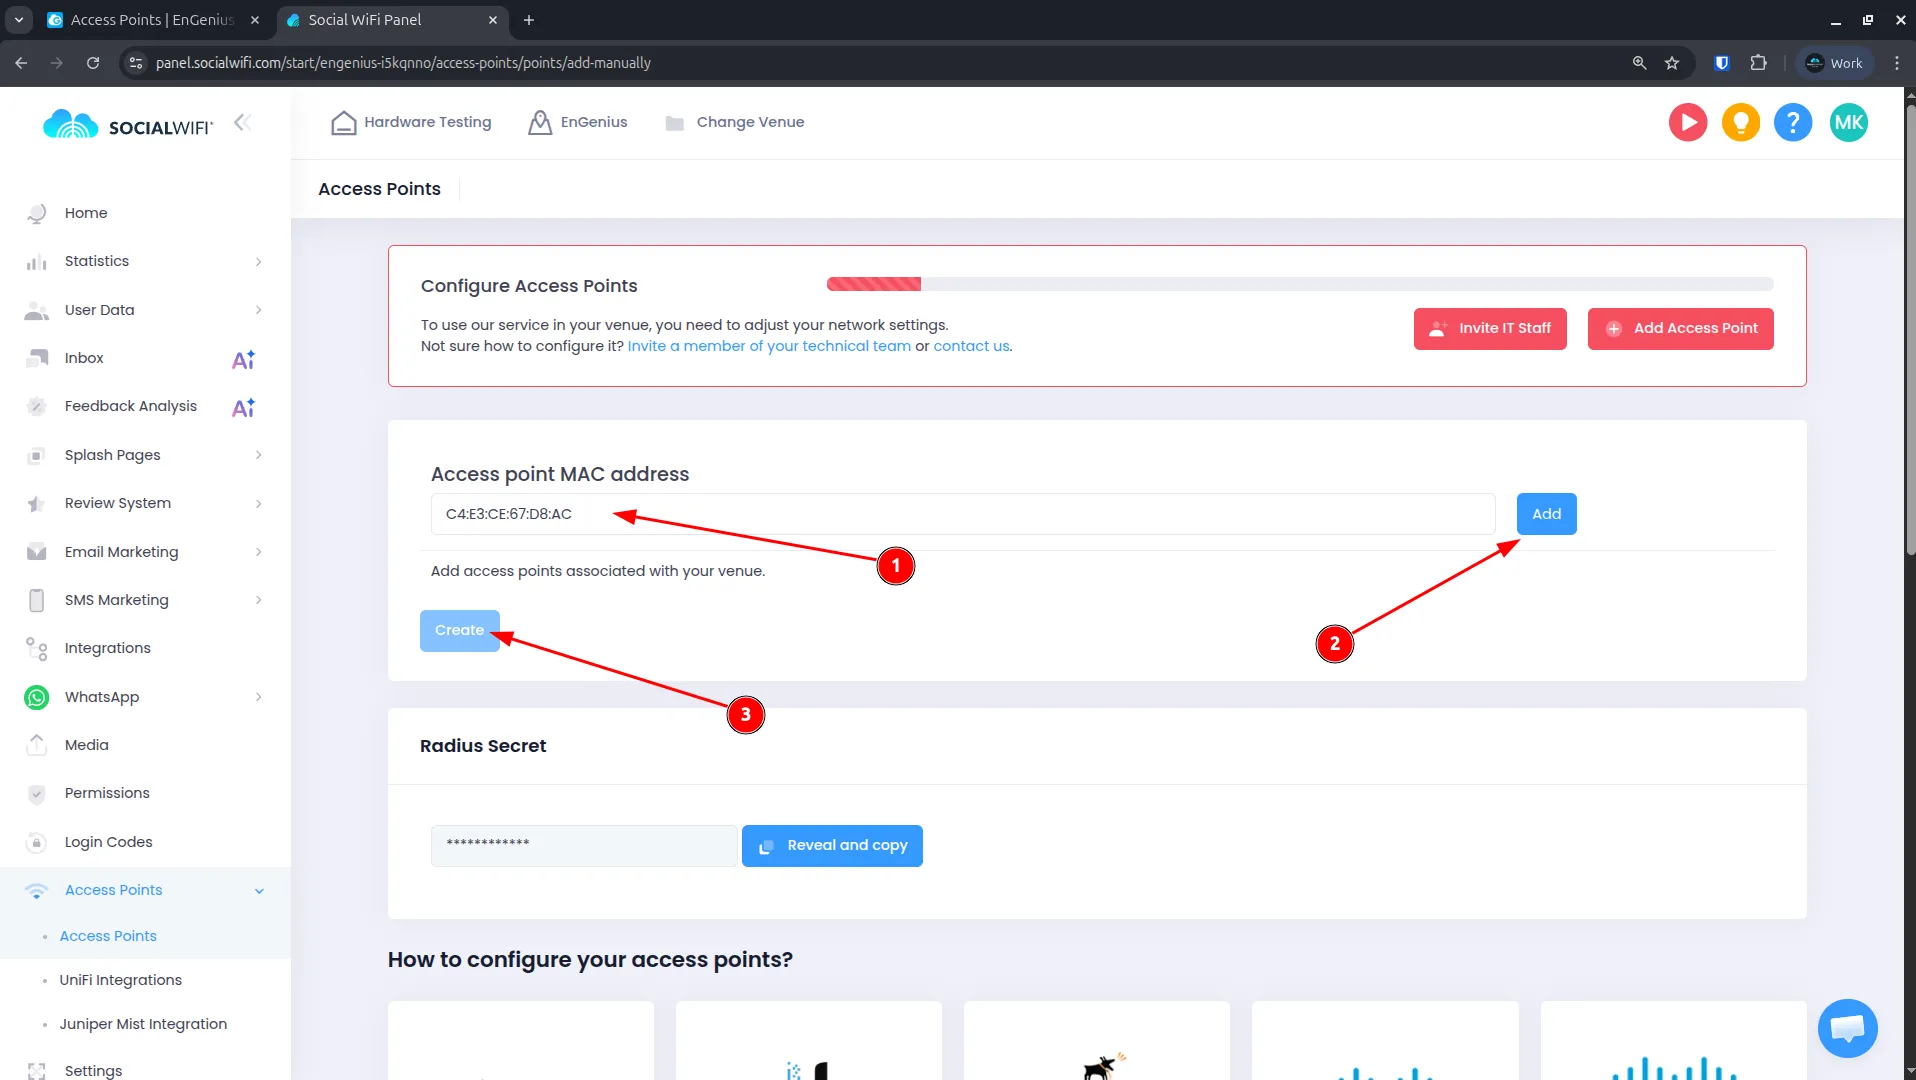
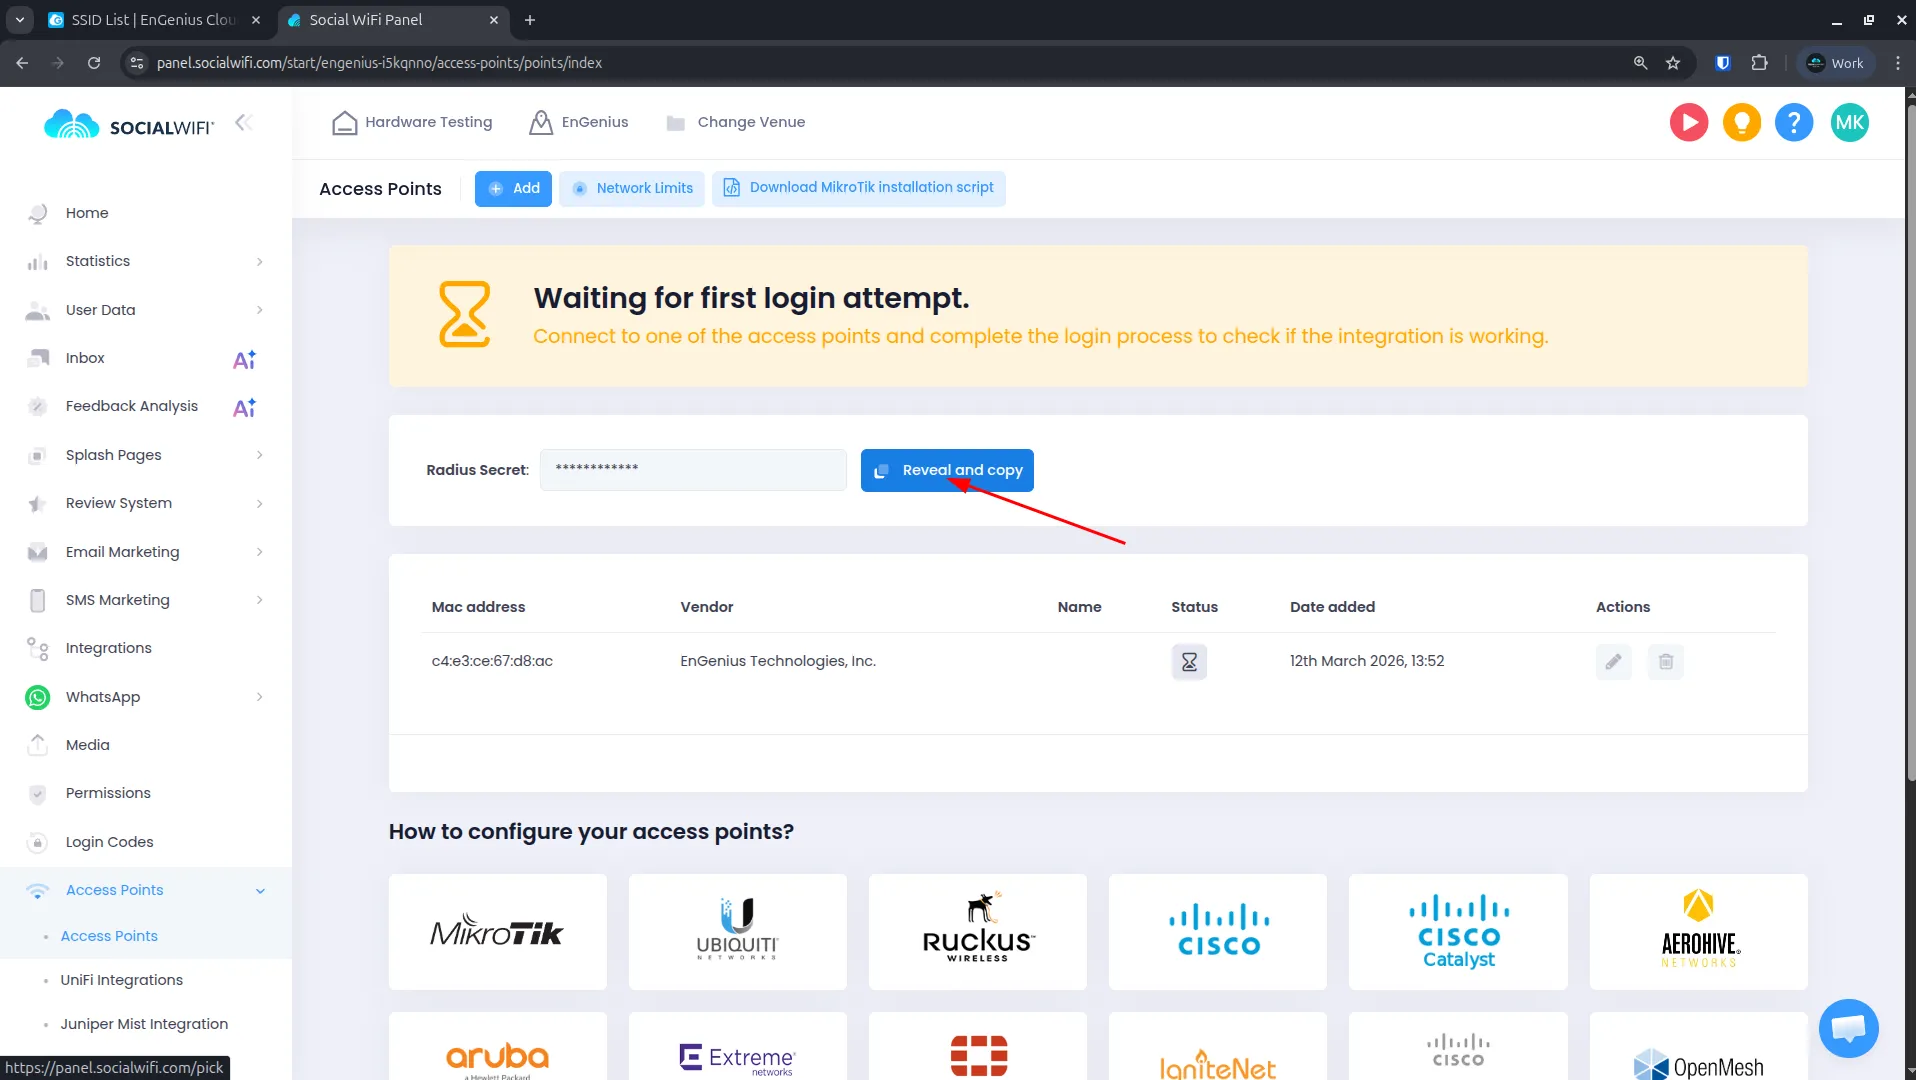
- After adding the access point, copy the provided RADIUS Secret. You will need it in one of the next steps.
SSID Configuration
Return to the EnGenius Cloud portal.
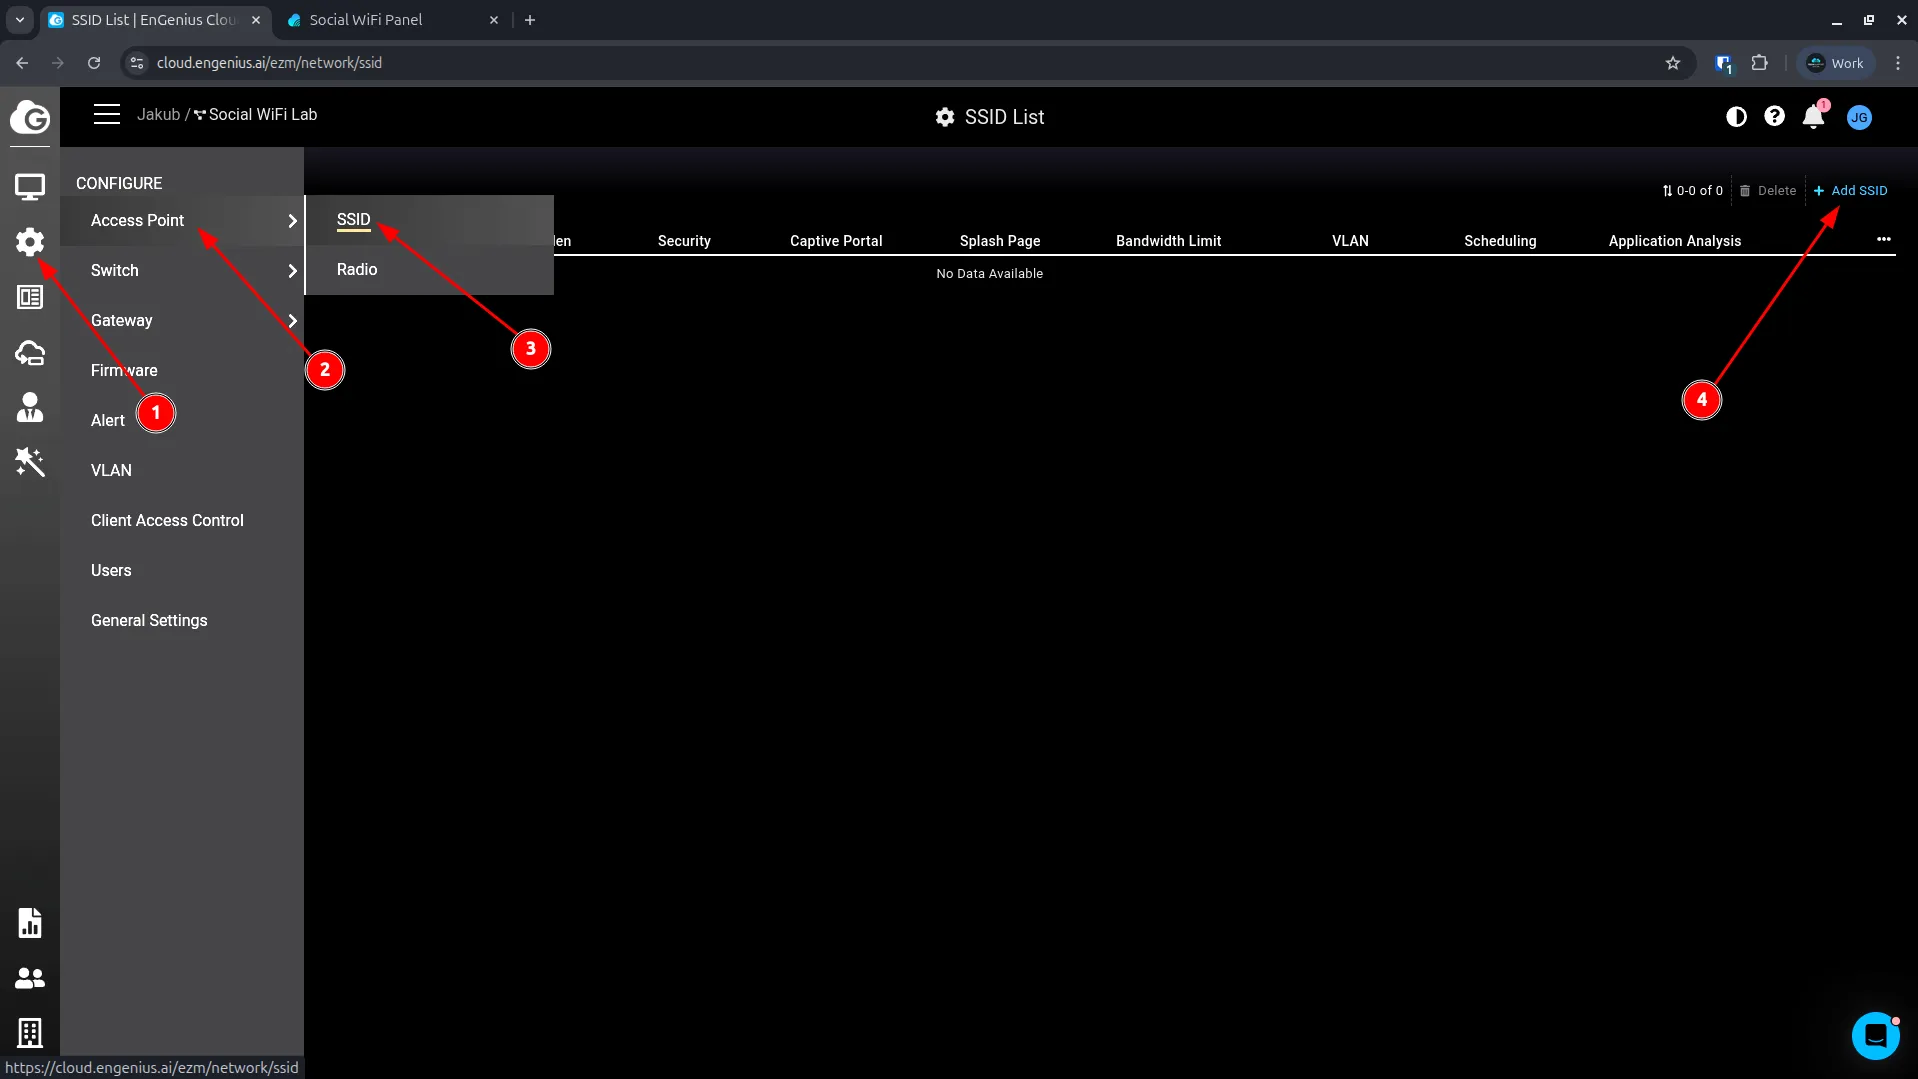
- Navigate to Configure -> Access Point -> SSID.
- Click Add SSID to create a new one, or edit an existing one.
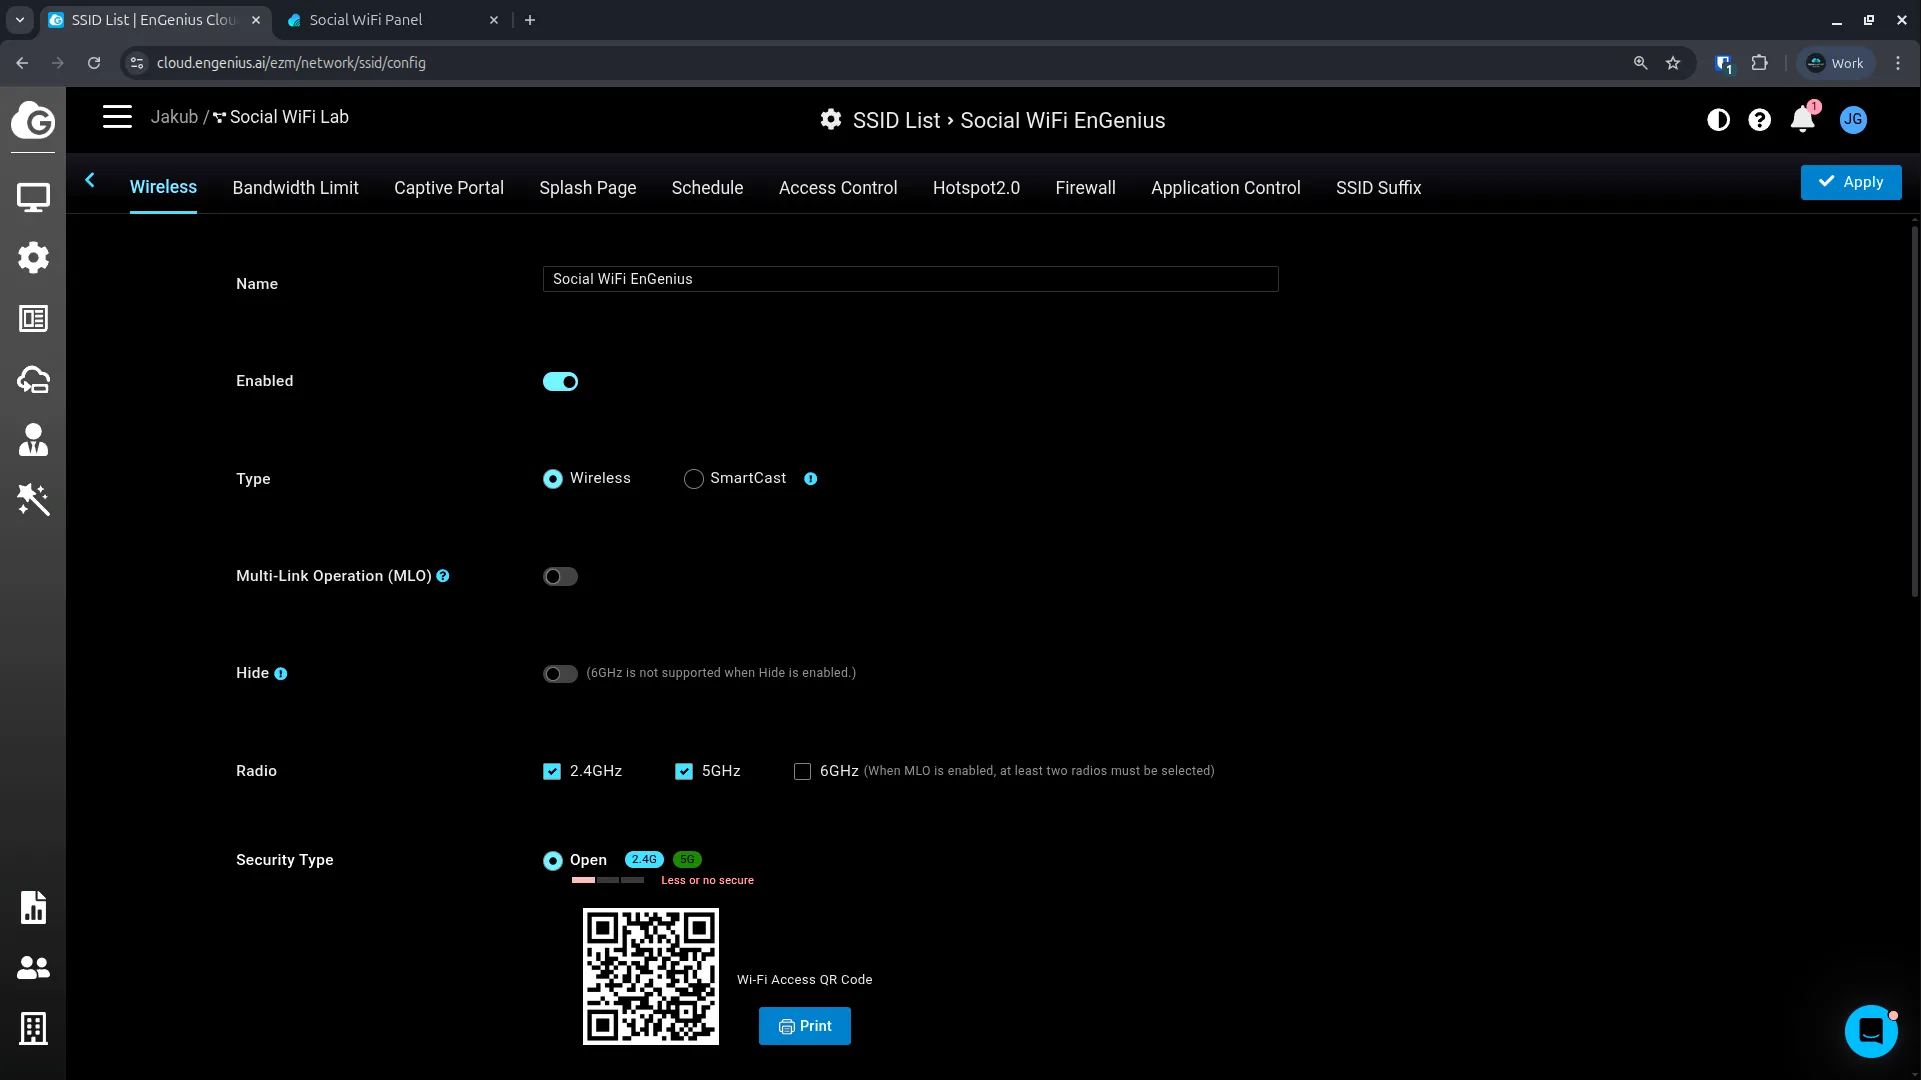
Wireless settings
Use the following settings:
| Name | Display name for the Guest WiFi |
|---|---|
| Enabled | Enabled |
| Type | Wireless |
| Security Type | Open |
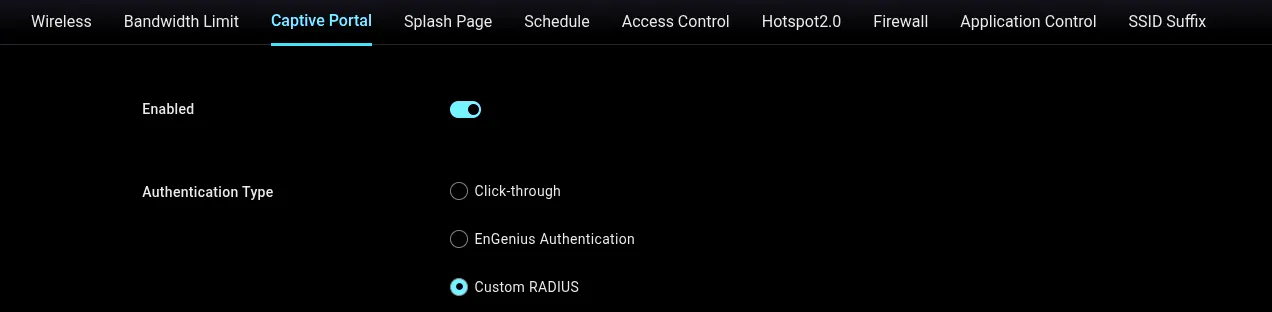
Captive Portal settings
Navigate to Captive Portal settings and use the following settings:
| Enabled | Enabled |
|---|---|
| Authentication Type | Custom RADIUS |
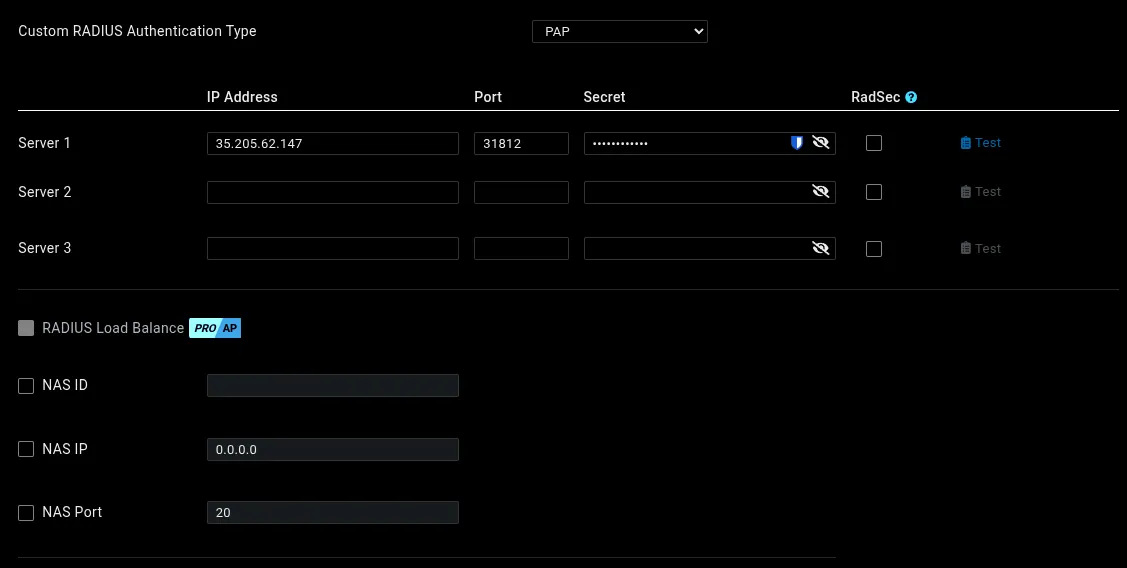
RADIUS server:
| Custom RADIUS Authentication Type | PAP |
|---|---|
| Server 1 IP Address | 35.205.62.147 |
| Server 1 Port | 31812 |
| Server 1 Secret | Paste your RADIUS Secret |
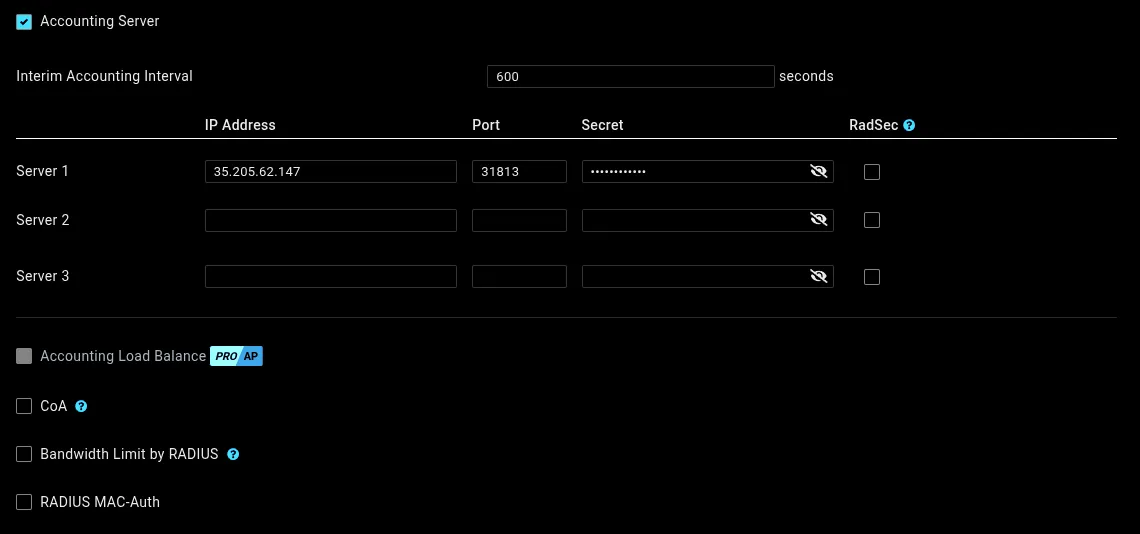
Accounting server:
| Accounting Server | Enabled |
|---|---|
| Server 1 IP Address | 35.205.62.147 |
| Server 1 Port | 31813 |
| Server 1 Secret | Paste your RADIUS Secret |
Redirect URL:
Set this to Redirect to the URL that the user was trying to visit. This ensures the Welcome Splash Screen appears correctly and the access point can verify whether the client was successfully authorized.

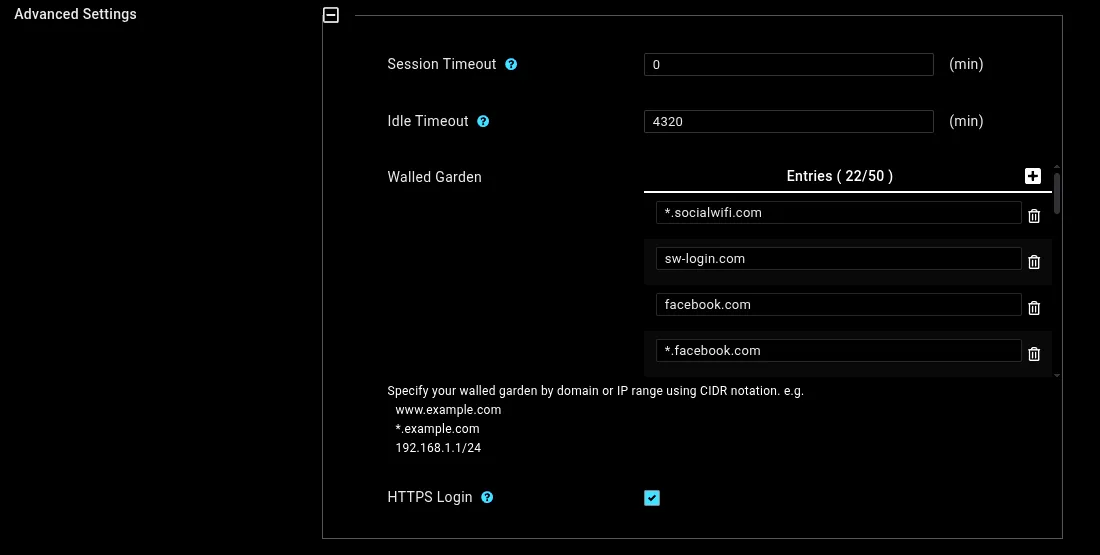
Advanced Settings:
- Session Timeout:
0 - Idle Timeout: Set to 4320 minutes (3 days). This controls when users are required to log in again.
Walled Garden: Add the following domains:
*.socialwifi.comsw-login.comfacebook.com*.facebook.com*.fbcdn.netlinkedin.com*.linkedin.com*.licdn.comtwitter.comapi.twitter.comx.comapi.x.com*.twimg.comwhatsapp.com*.whatsapp.net*.whatsapp.comconnect.facebook.netwww.facebook.comwww.googletagmanager.comwww.googleadservices.comgoogleads.g.doubleclick.net*.youtube.com*.ytimg.com*.googlevideo.comyt3.ggpht.com- HTTPS Login: Leave Enabled.
Splash Page tab
| Splash Page Type | External Splash Page URL |
|---|---|
| External URL | http://login.socialwifi.com/ |

Click Apply to save the SSID configuration.
Test the solution
- Connect a client device to the guest WiFi network. The login page should load automatically.
- Complete the login process.
- Confirm that internet access is available after logging in.
- Open the Social WiFi Panel and verify that the connection and login are shown in the Statistics > Devices graph.