
Integrate with Mailchimp
Introduction
Social WiFi’s integration with Mailchimp makes the exporting of your gathered data instant and automated.
Adding the integration in Social WiFi dashboard
1) Visit the Social WiFi dashboard and go to the venue you’d like to integrate.
2) Go to the Integrations tab and select MailChimp.
3) Click the Add button in the top left corner.
Filling in the data
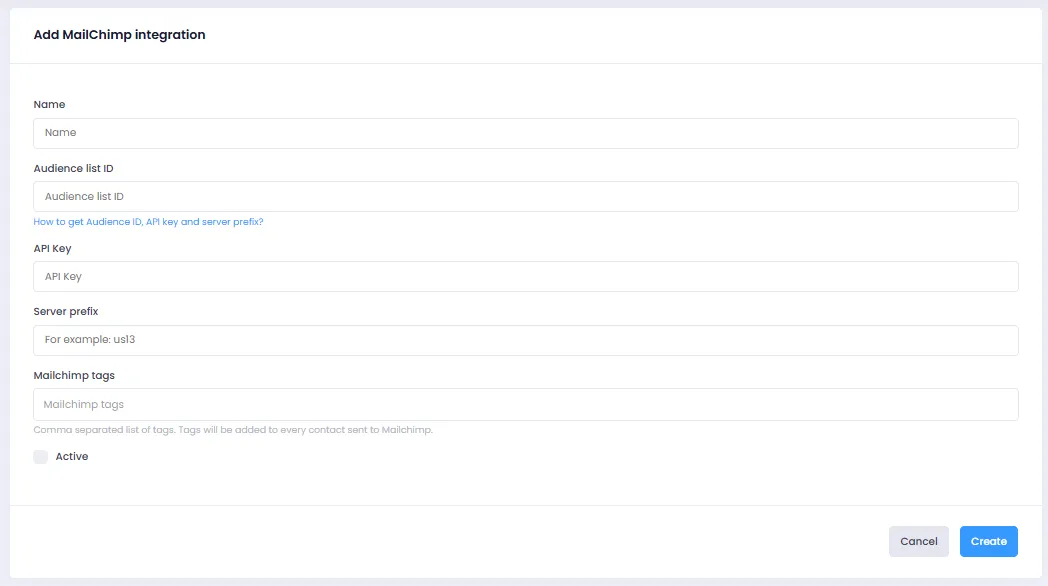
Name: Call your integration however you like. It might be a good idea to mention the specific audience list that the contacts will be going to.
Audience list: To get the audience list, please follow the MailChimp guide on it.
API key: To use an existing API key or generate a new one, please follow the MailChimp guide on it.
Server prefix: Look at the address bar while you’re in the MailChimp dashboard – the first part of the URL before the dot is the server prefix:

Mailchimp tags: When setting up the integration, you can add MailChimp tags directly from the Social WiFi Dashboard. Tags are labels you can use to easily classify user data into groups - for example, if you’d like to know what information in your MailChimp database originated from Social WiFi, you can add a “Social WiFi” or a “WiFi User” tag. A tag can also be a location - if you have multiple venues and would like to know what data comes from where, it might be a good idea to utilise tags to label it as well. Adding tags will allow you to use filters when creating marketing campaigns and segmenting your database. You can learn more about tags in this article.
Active: Please make sure this field is checked for the integration to work.
Click Save – your new users should now be sent to your MailChimp audience automatically.