
Datto
This guide configures a Datto access point to work with the Social WiFi captive portal using the Datto Network Manager web UI and the Social WiFi Panel. Follow the steps in order.
Compatibility
Social WiFi has been tested and works on:
- Datto AP440, Firmware Version 7.0.13
Before you begin
Installation
-
Copy the Access Point MAC address
Retrieves the MAC address required to register the access point in the Social WiFi Panel.
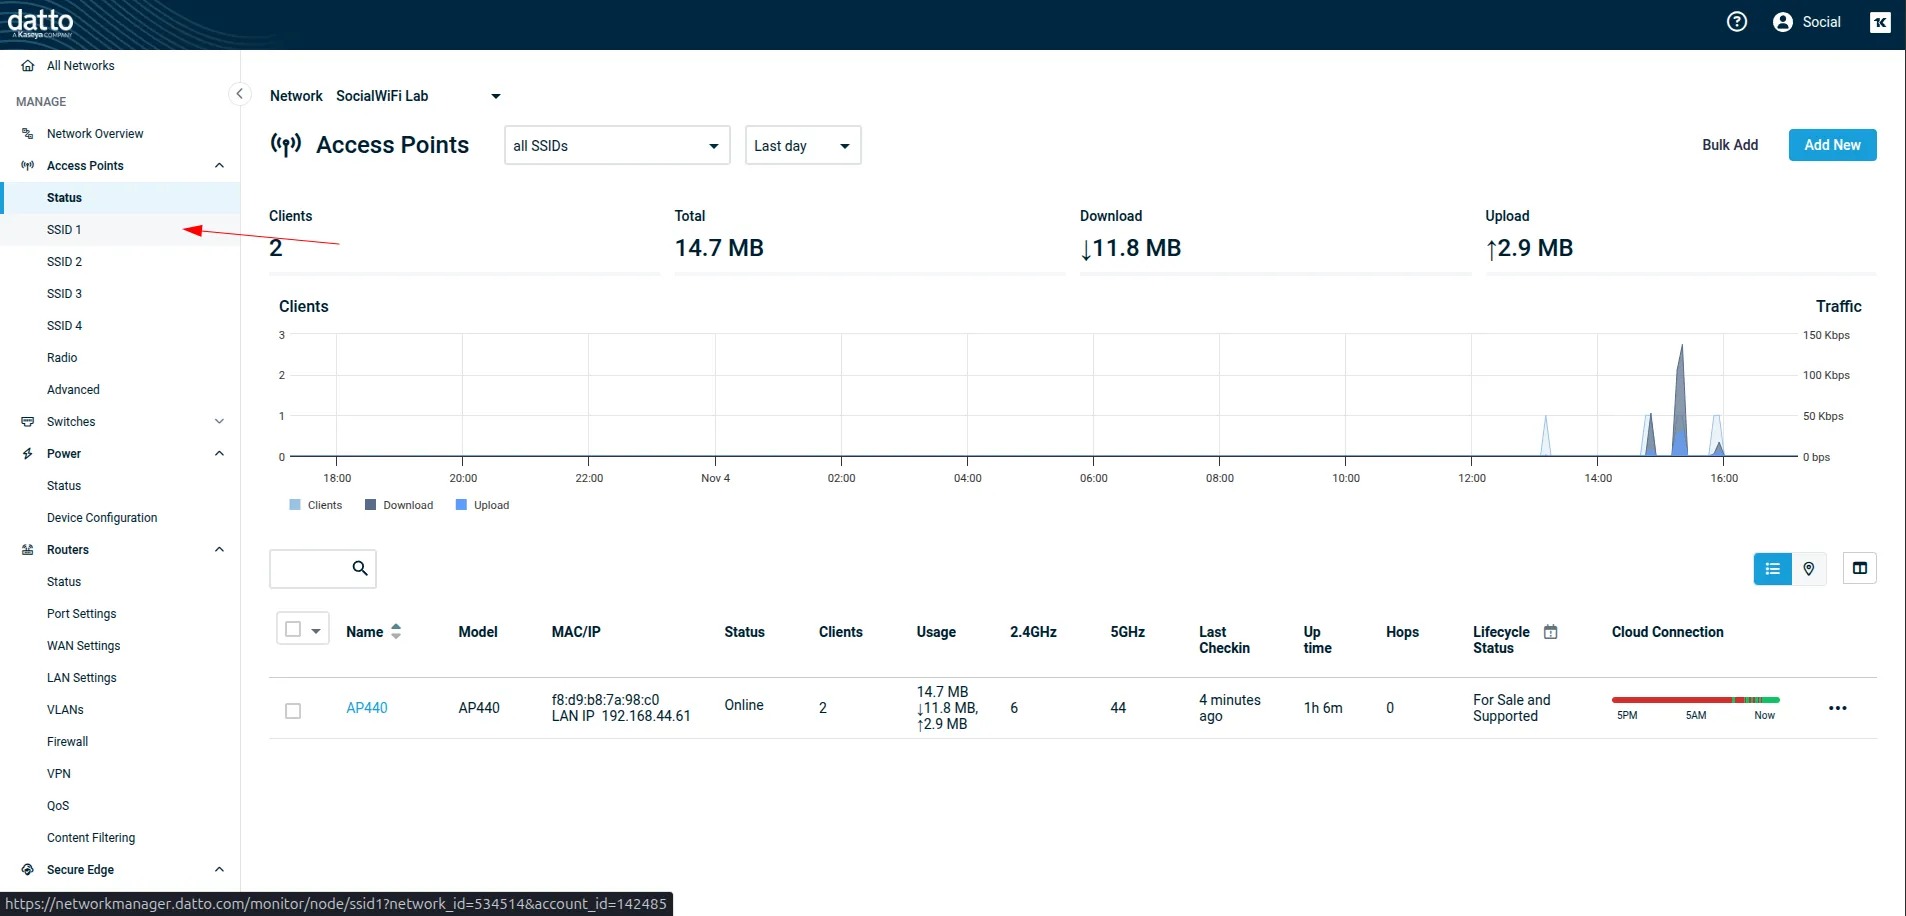
- Log in to the Datto Network Manager.
- Navigate to Access Points -> Status.
- Copy the MAC address of each access point.
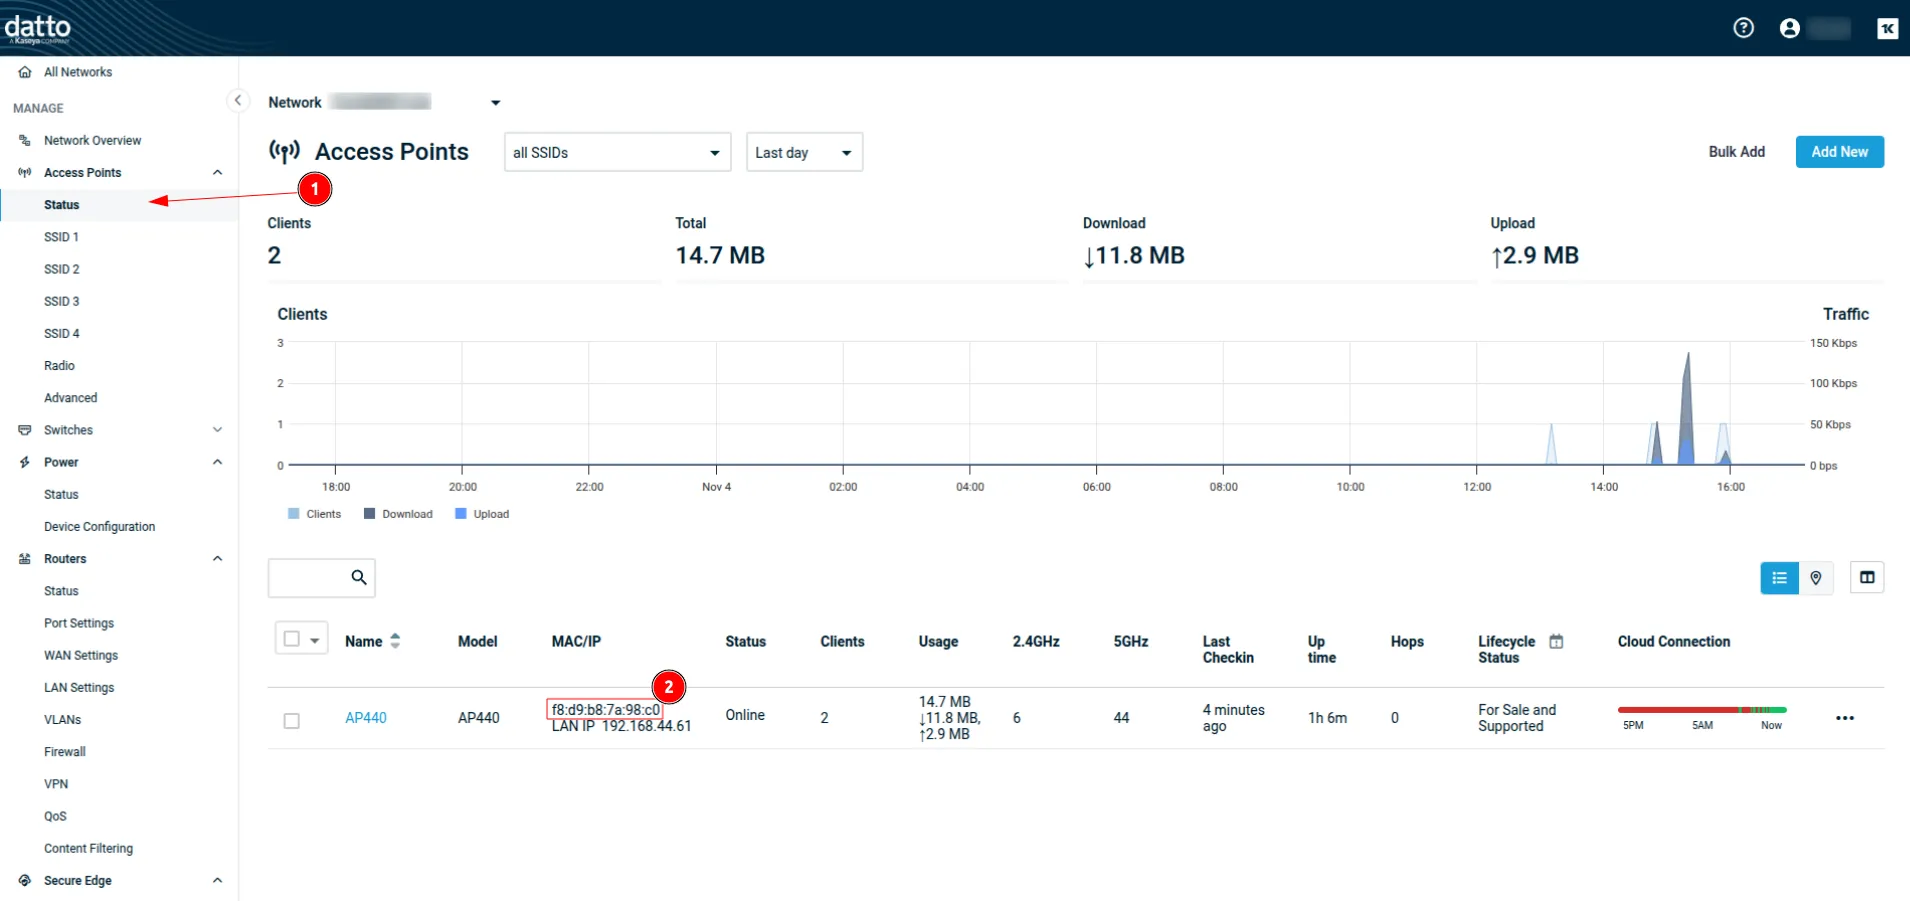
-
Social WiFi Panel configuration
Registers the access point in the Social WiFi Panel and generates the RADIUS Secret.
- Log in to the Social WiFi Panel.
- Navigate to Access Points.
- Click Add Access Points.
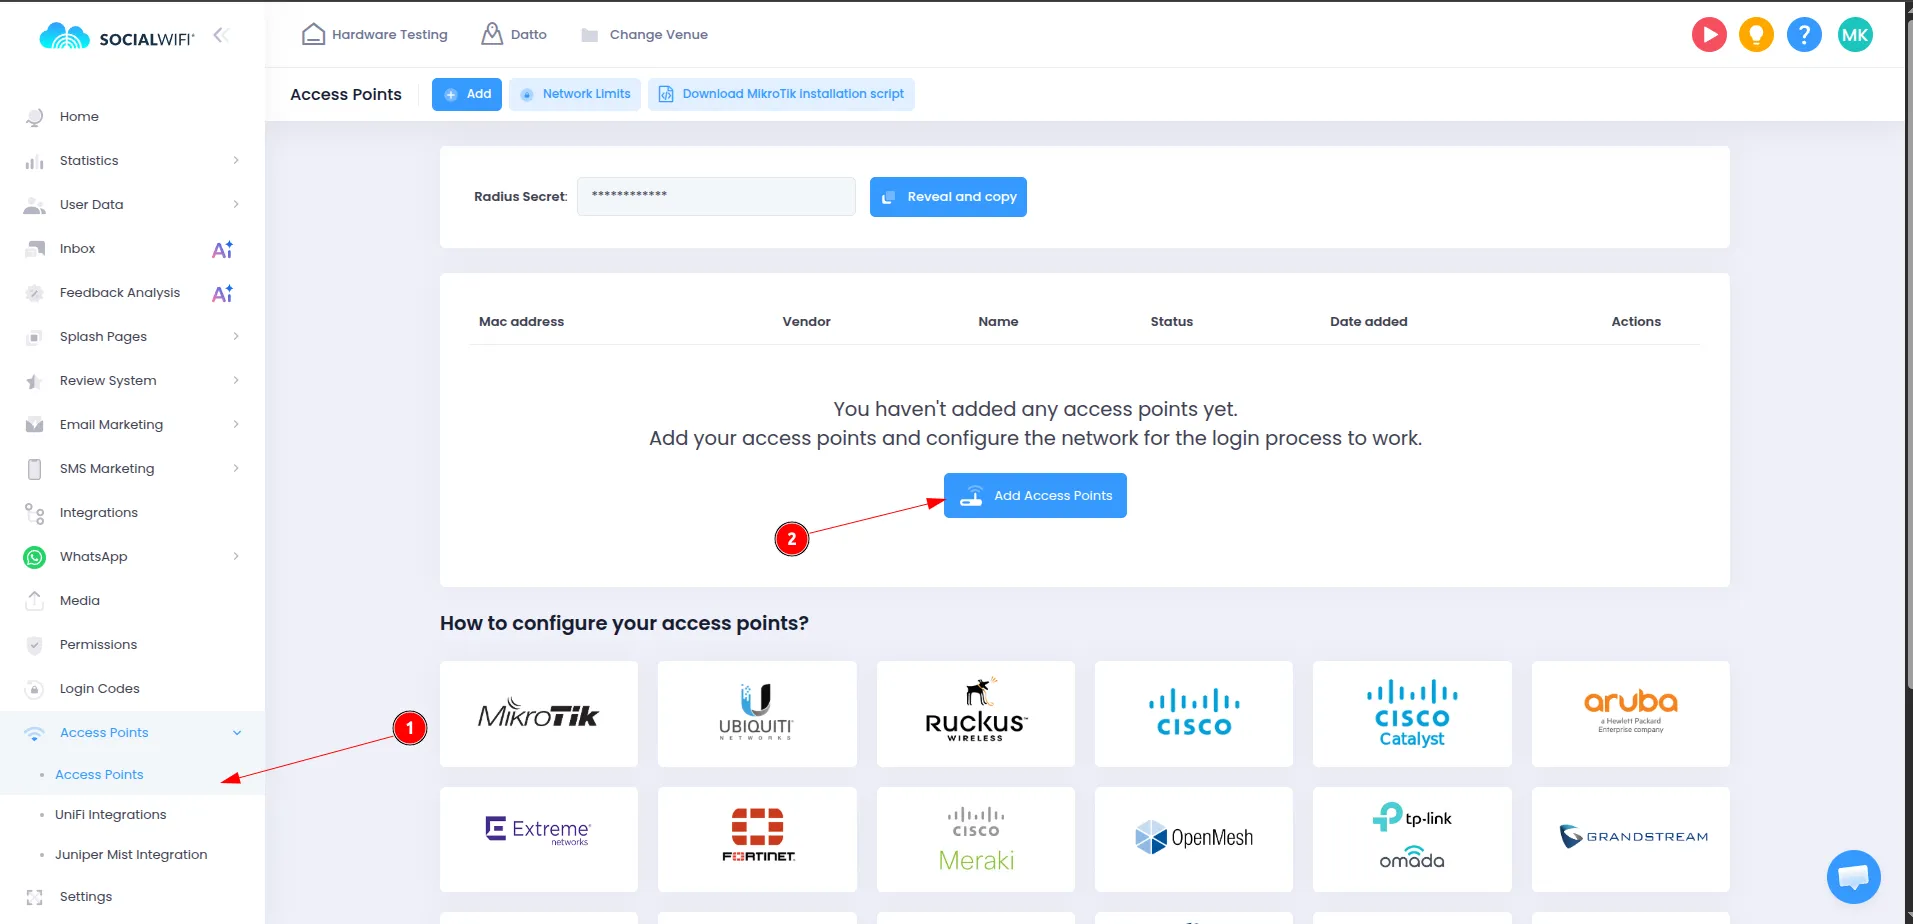
- Paste the MAC address copied from the Datto Network Manager.
- Click Add and then Create.
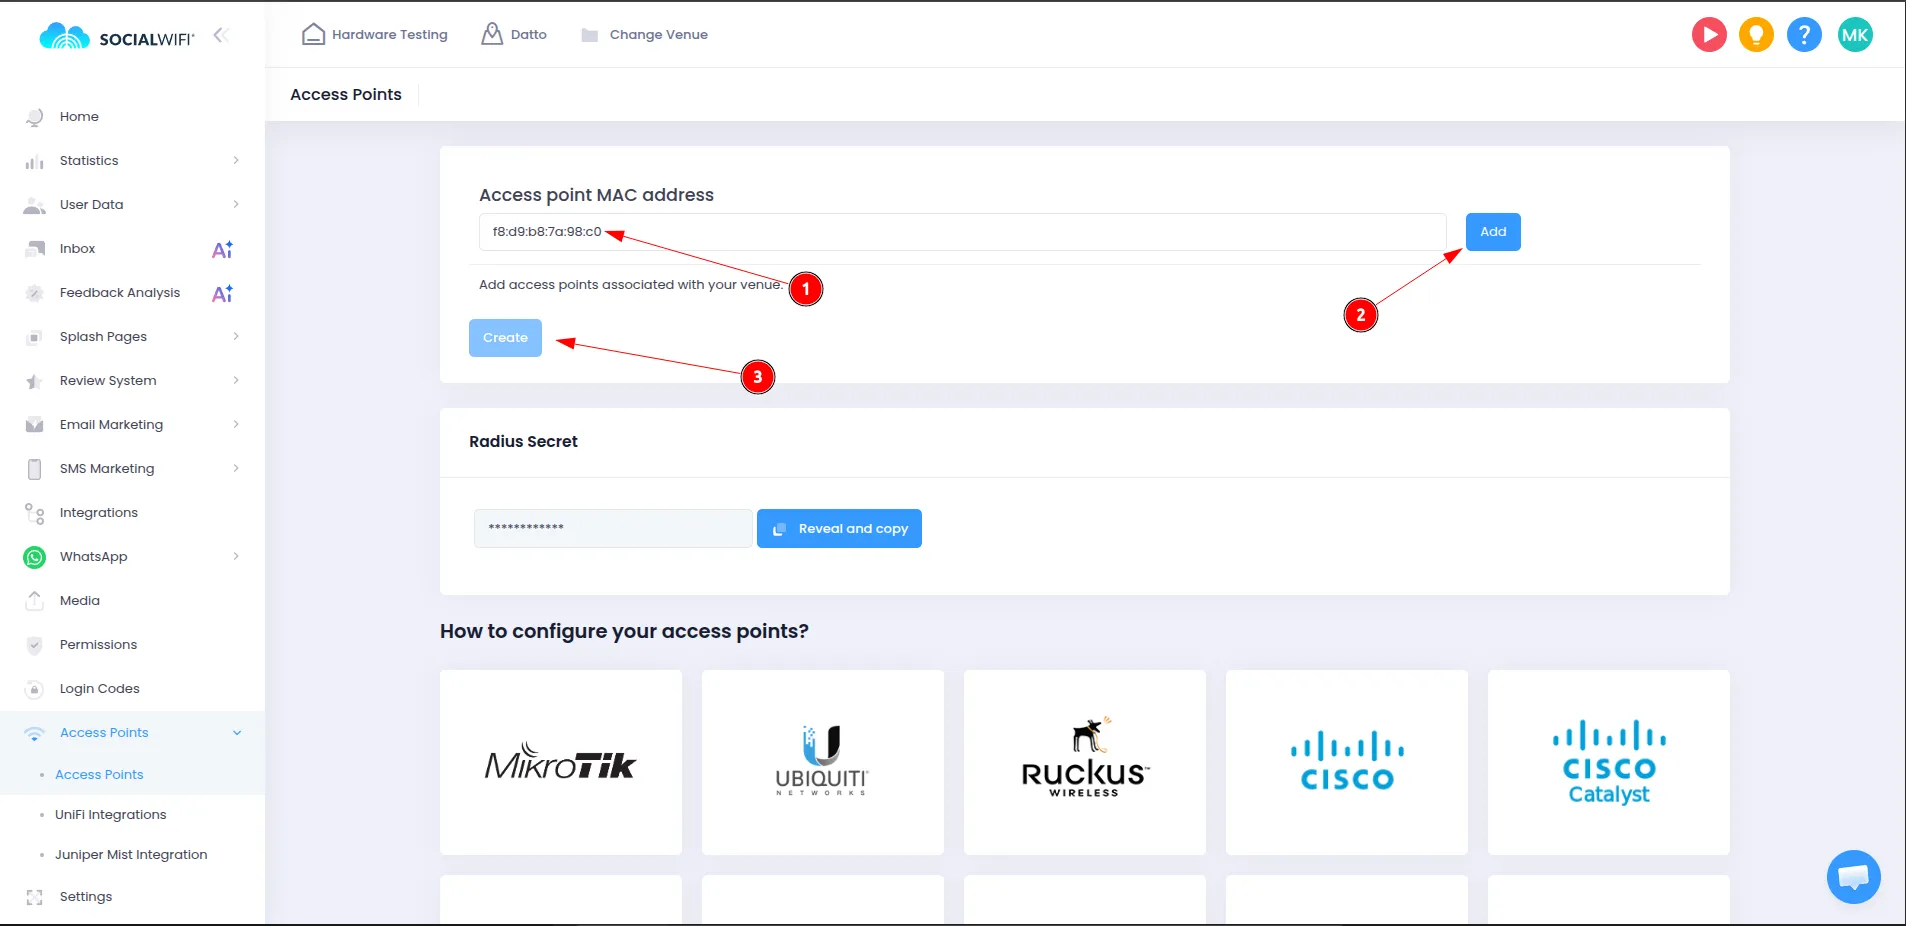
- After adding the access point, copy the provided RADIUS Secret. It is required in step 5.
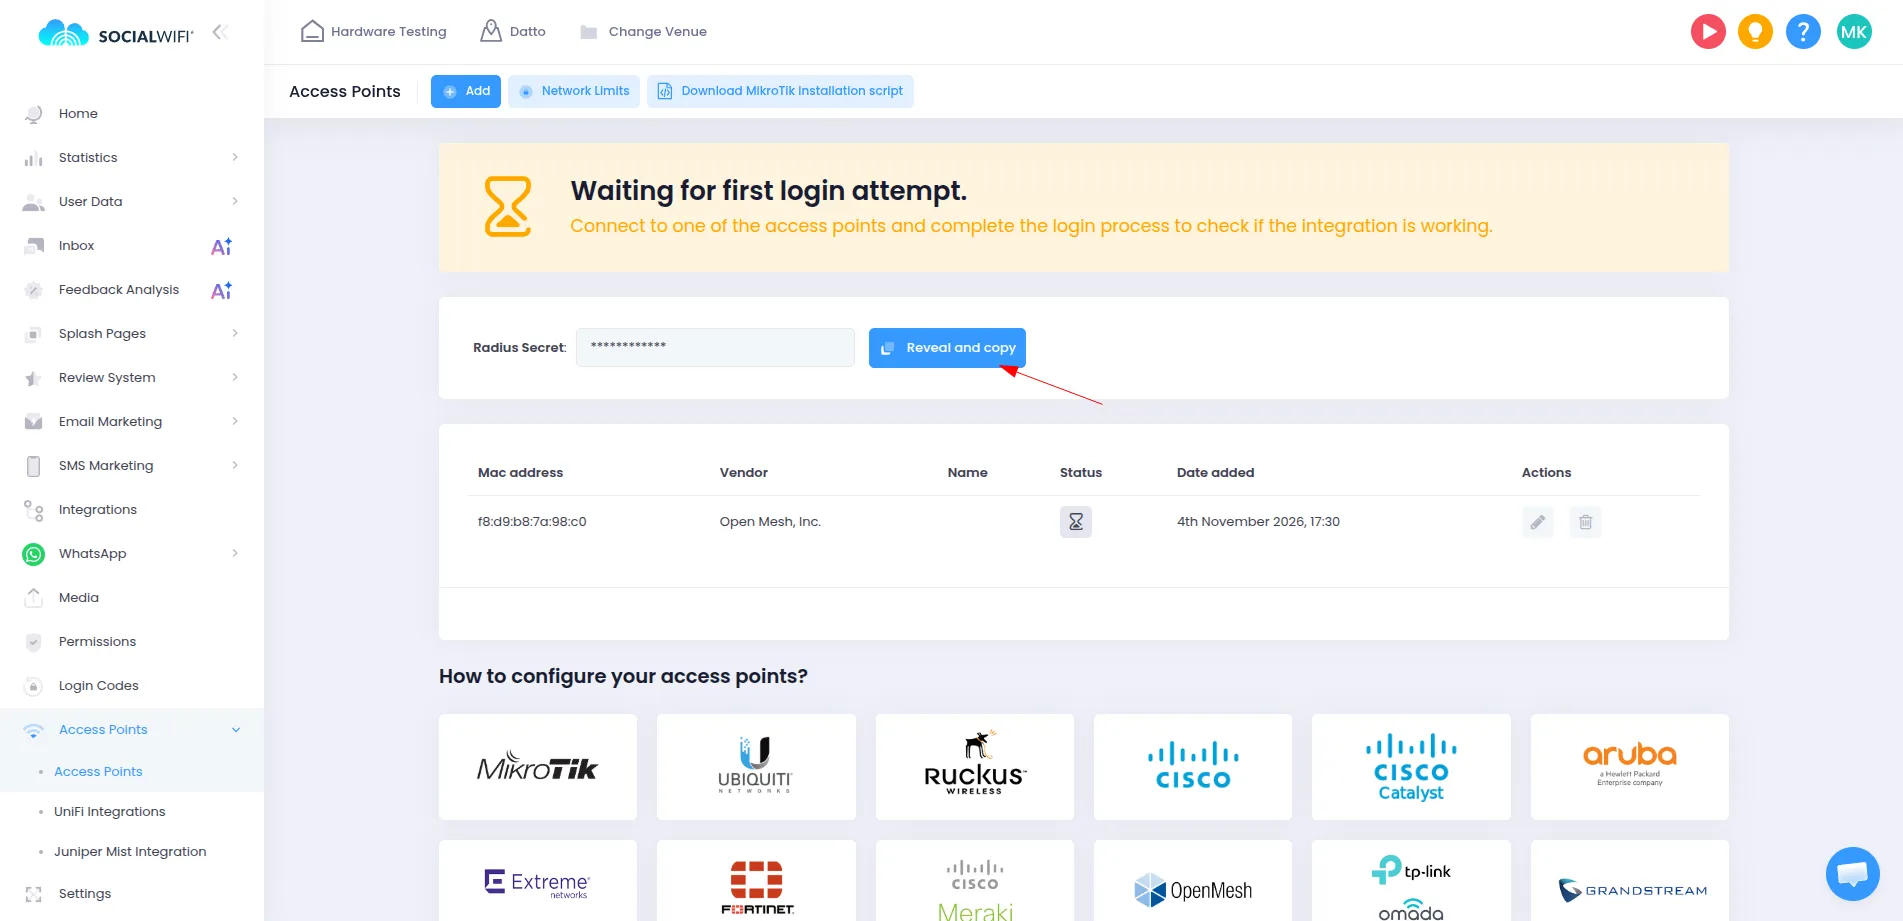
-
Select the SSID
Return to the Datto Network Manager and navigate to Access Points -> SSID. Select a free SSID slot that will become the Guest WiFi.
-
Common SSID settings
Defines the basic parameters of the Guest WiFi network.
SSID Name Display name for the Guest WiFi Enabled Enabled Visible Enabled Band All - Combined SSID Authentication type Open 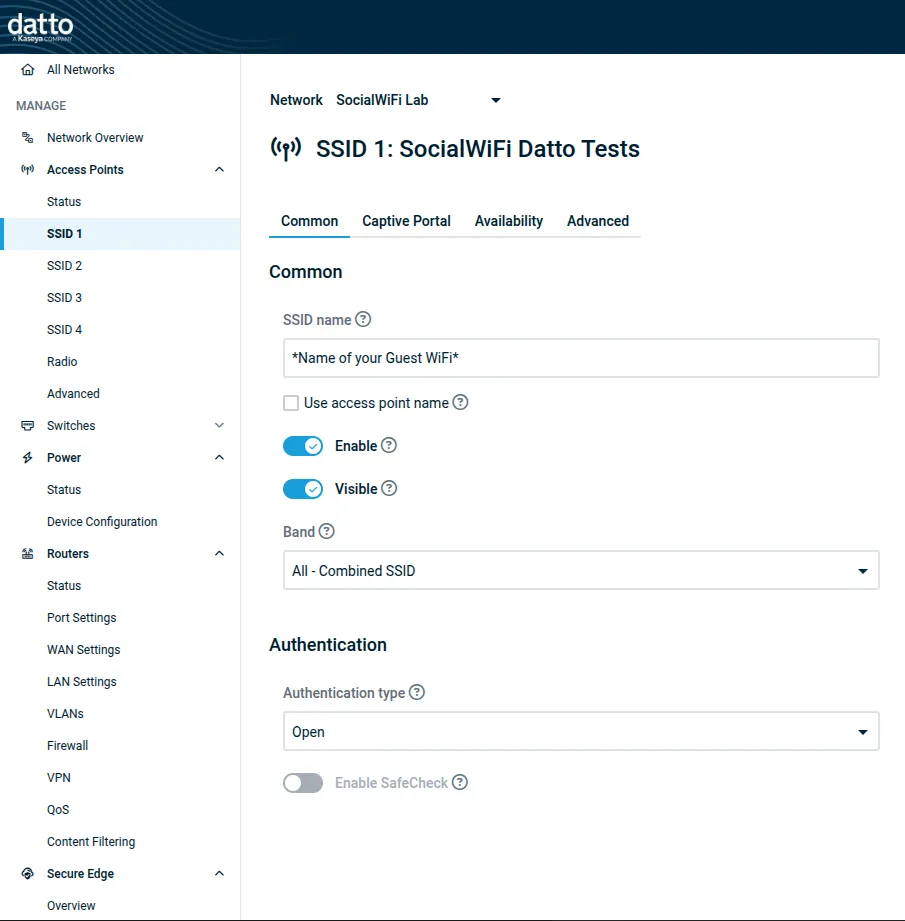
-
Captive Portal settings
Points the SSID to the Social WiFi splash page and RADIUS server. Navigate to Captive Portal settings and use the following settings.
Splash Page
Splash page Enabled Splash page type Hosted remotely Splash page URL http://login.socialwifi.com/Splash page secret Leave blank 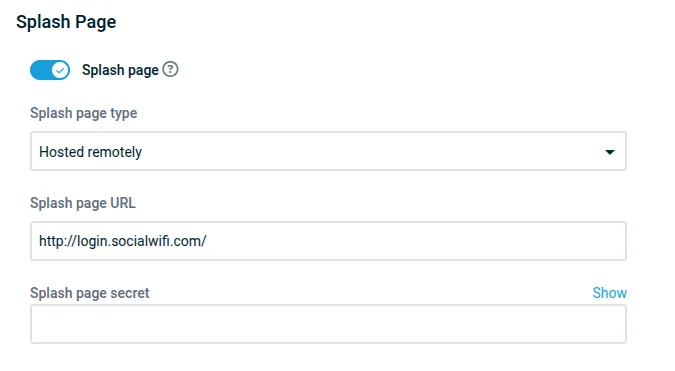
Splash Page Authentication
Splash page authentication type RADIUS Server address 1 35.205.62.147 Server address 2 Leave blank Server secret Paste your RADIUS Secret NAS ID Leave blank Use MAC addr for password Disabled Authentication Port 31812 Accounting Port 31813 Block clients after X invalid authentication attempts 3 (default) Block duration of X minutes 30 (default) Client force timeout (minutes) 2880 (default) Enable failsafe mode Enabled (default) 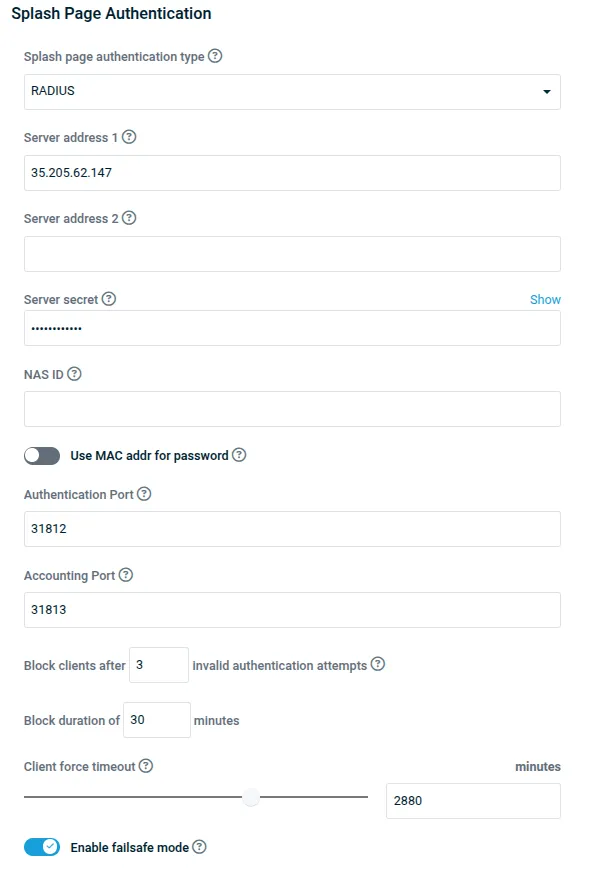
Splash Page Behavior
Block unauthenticated users Enabled Whitelist Enter a list of devices that are skipped from authentication, e.g. smart TVs Walled garden Copy and paste a list from below socialwifi.comsw-login.comfacebook.comfbcdn.netlinkedin.comlicdn.comtwitter.comx.comtwimg.comwhatsapp.netwhatsapp.comconnect.facebook.netwww.facebook.comwww.googletagmanager.comwww.googleadservices.comgoogleads.g.doubleclick.netyoutube.comytimg.comgooglevideo.comyt3.ggpht.com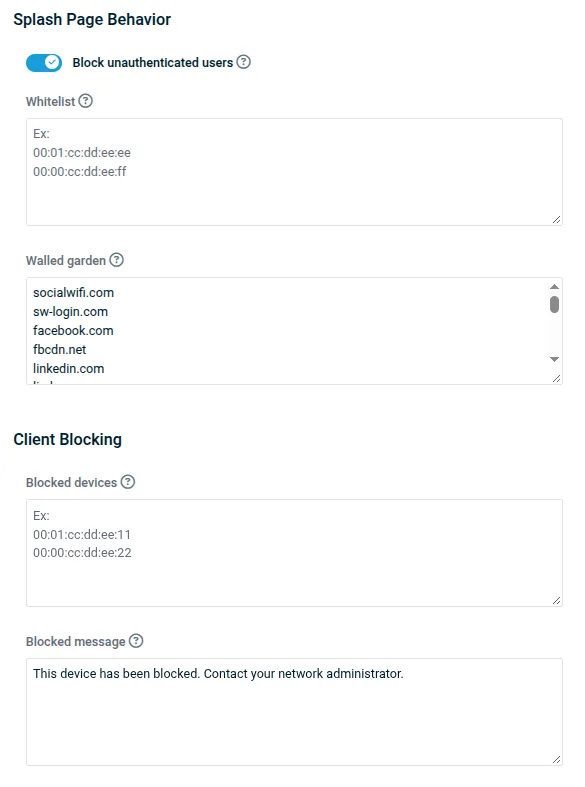
-
Save the configuration
Applies the SSID configuration.
Scroll up and click Save Changes to save the SSID configuration.
Final steps
Test the solution
Wait until the configuration is applied on the access points, then:
- Connect a client device to the guest WiFi network. The login page should load automatically.
- Complete the login process.
- Confirm that internet access is available after logging in.
- Open the Social WiFi Panel and verify that the connection and login are shown in the Statistics > Devices graph.