Ruijie
Ta treść nie jest jeszcze dostępna w Twoim języku.
Compatibility
Social WiFi has been tested and is proven to work on the following configurations:
ReyeeOS
- ReyeeOS 2.283 and higher
Reyee EG
- EG105G-V3, EG210G-V3, EG209GS, EG305GH-E, EG310GH-E, EG1510XS (this also applies for POE models of the devices)
An example working setup consists of an Access Point RAP2260(G) and a gateway EG209GS.
Configure the SSID
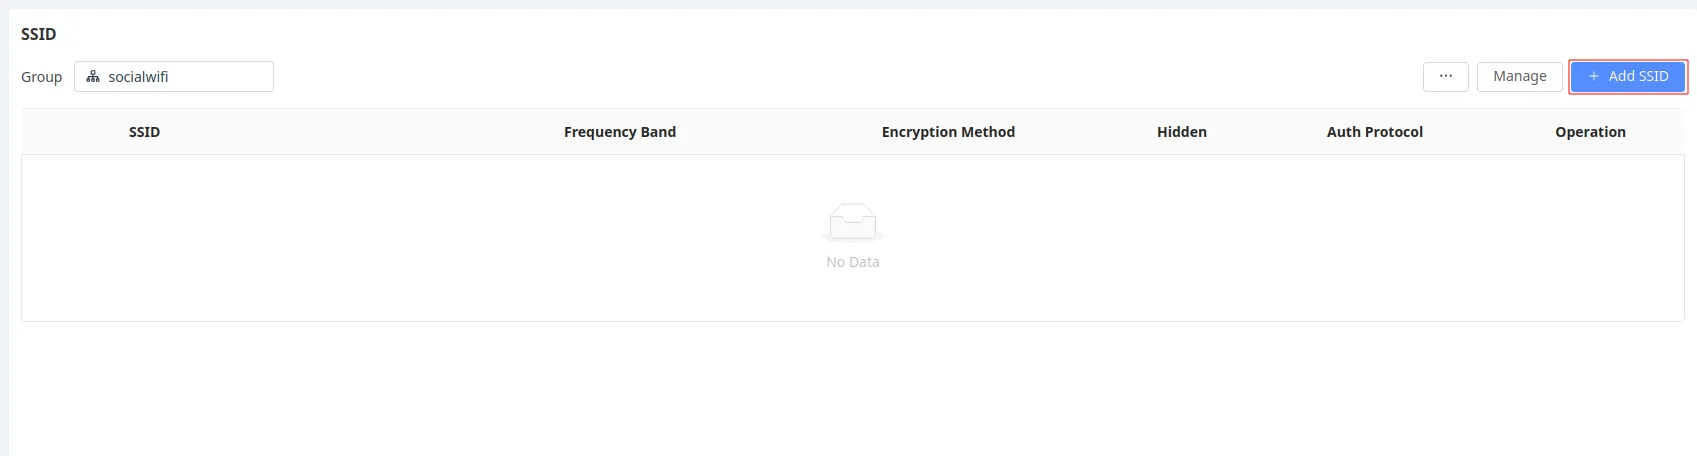
In the Ruijie Cloud, go to the Device Config -> SSID.
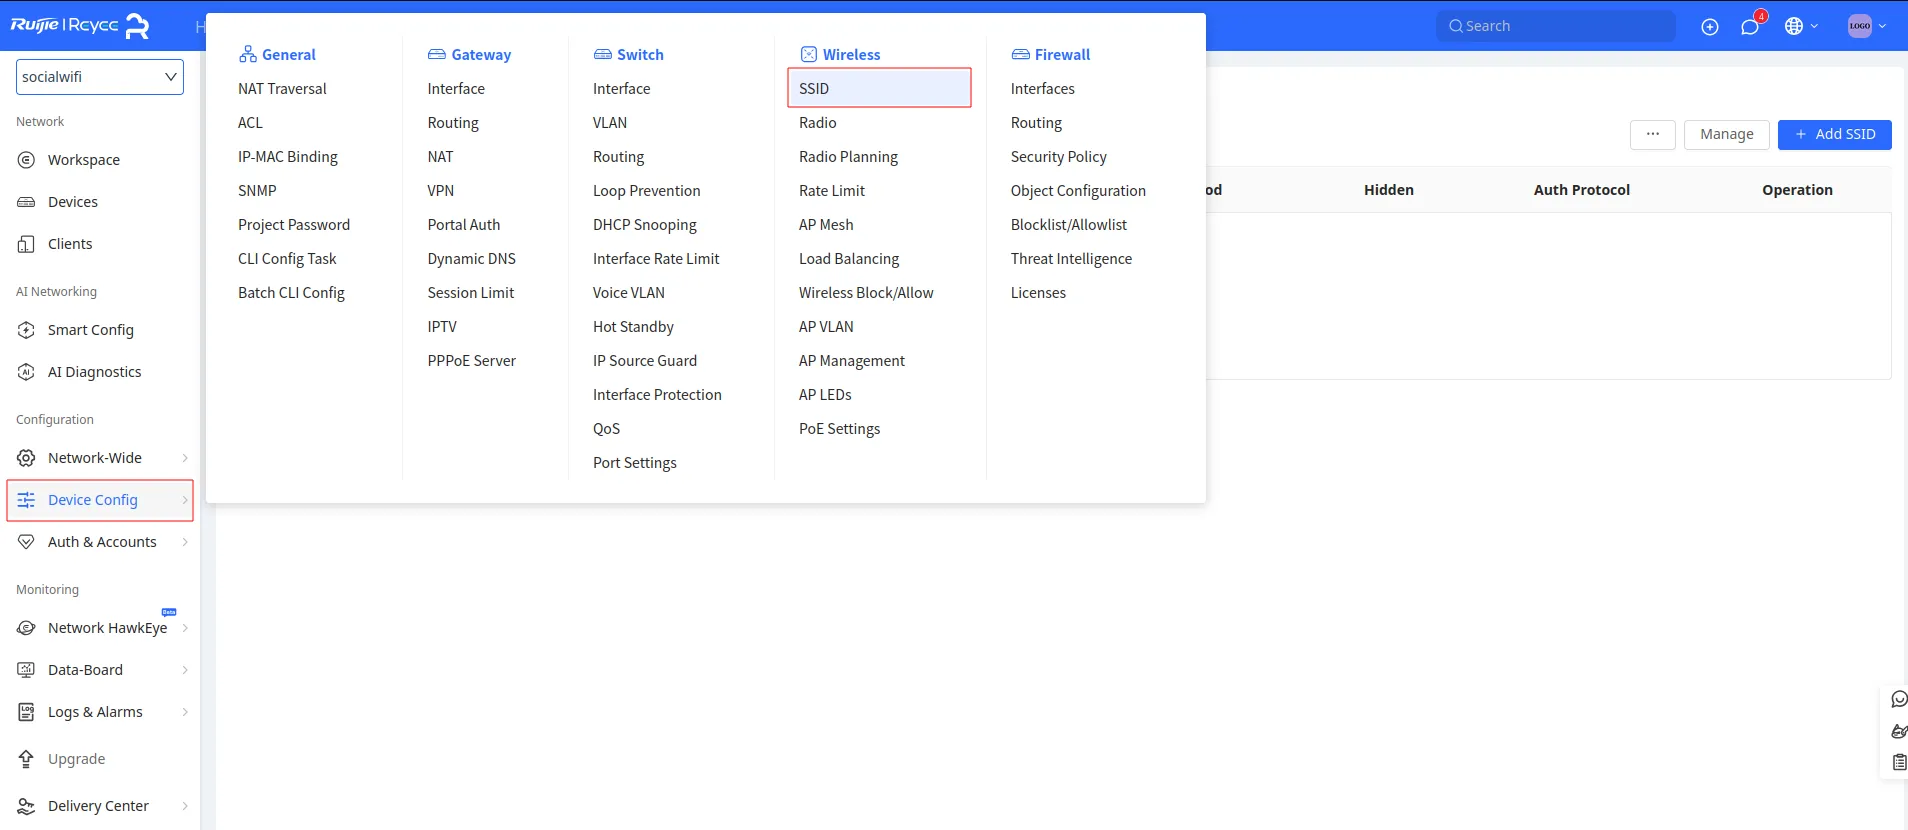
Click on + Add SSID.
Configure as follows:
| SSID | *Your SSID name* |
|---|---|
| Purpose | General |
| Frequency Band | Leave default |
| Encryption Option | Do Not Encrypt |
| Encryption Method | OPEN (Open) |
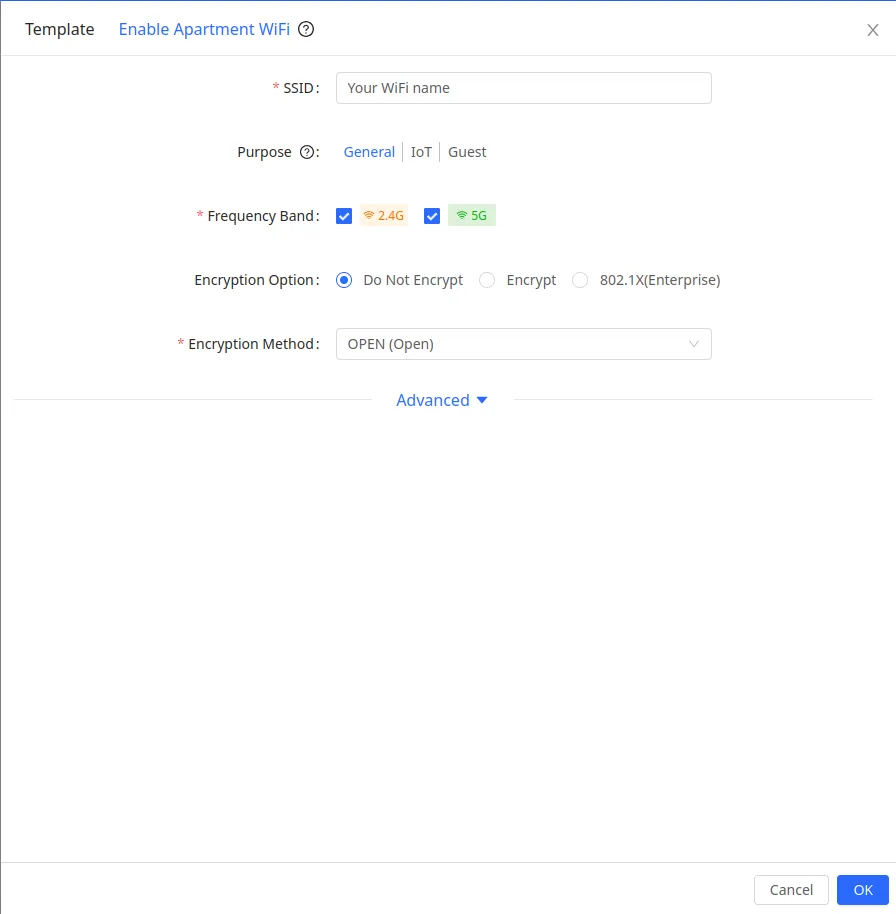
Click OK.
Configure Social WiFi
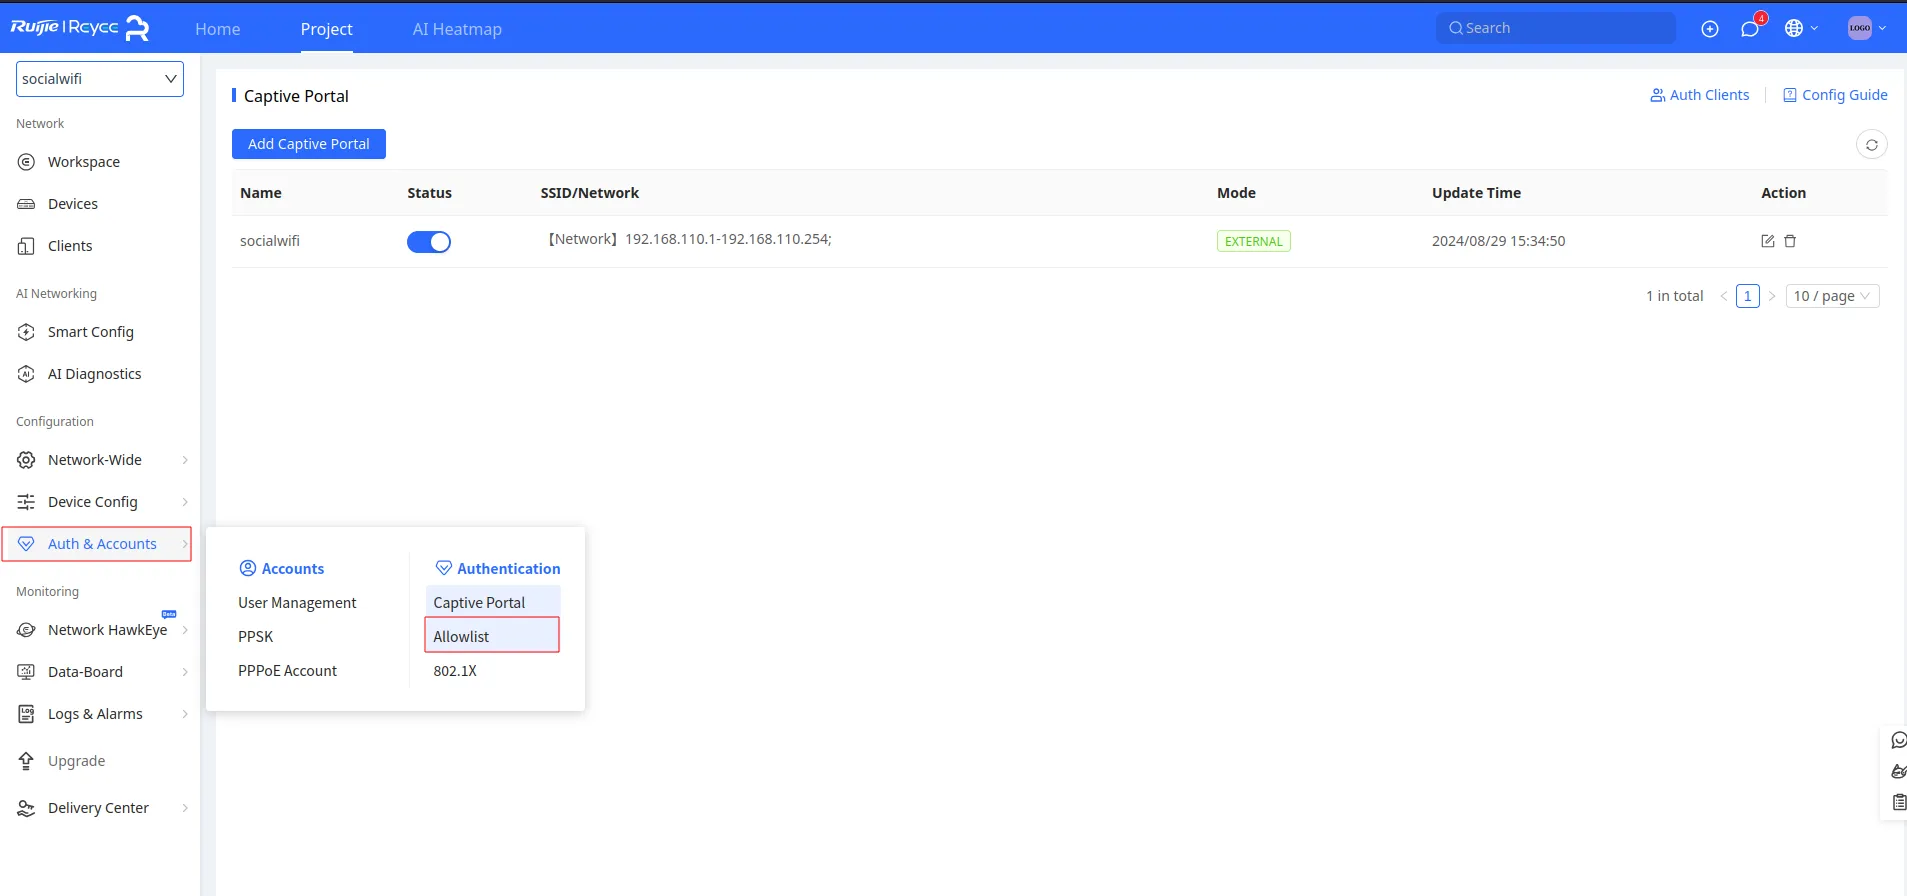
After configuring the WiFi network, go to the Auth & Accounts -> Captive Portal.
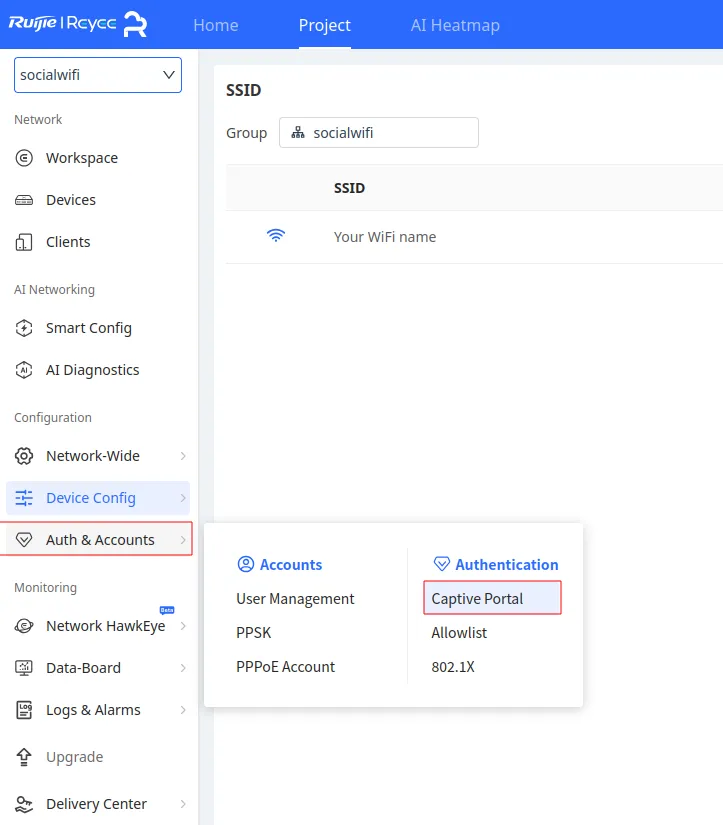
Click on Add Captive Portal.

Now, click on External and Edit in the “Auth Server Method”.
In the pop up window, click on Add.

Configure as follows:
| Server Group Name | socialwifi |
|---|---|
| Server IP Address | 35.205.62.147 |
| Server Name | socialwifi |
| Authentication Port | 31812 |
| Accounting Port | 31813 |
| Shared Key | RADIUS Secret is available in Access Points tab of the Social WiFi Panel |
| Match Order | 0 |
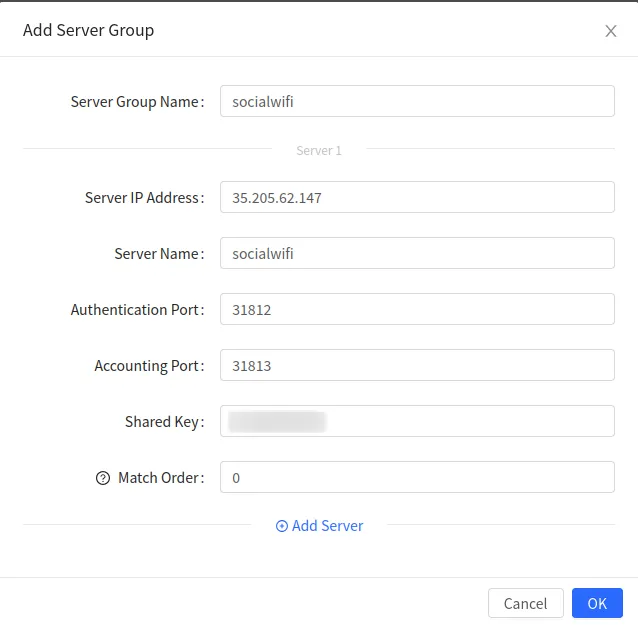
Click OK.
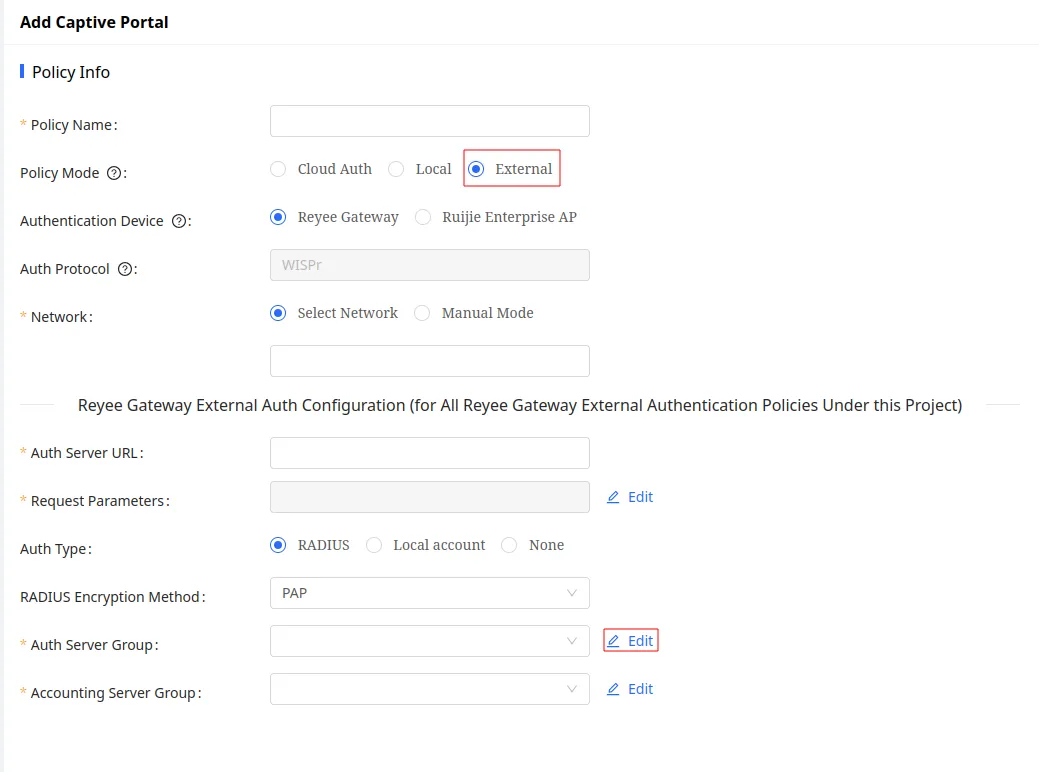
After configuring the server , configure the Captive Portal page as follows:
| Policy Name | socialwifi |
|---|---|
| Policy Mode | External |
| Authentication Device | Reyee Gateway |
| Auth Protocol | WISPr |
| Network | Select your network used for the SSID (Default is VLAN233) |
| Auth Server URL | http://login.socialwifi.com |
| Request Parameters | Edit -> Ruijie -> Ok |
| Auth Type | RADIUS |
| RADIUS Encryption Method | PAP |
| Auth Server Group | socialwifi |
| Accounting Server Group | socialwifi |
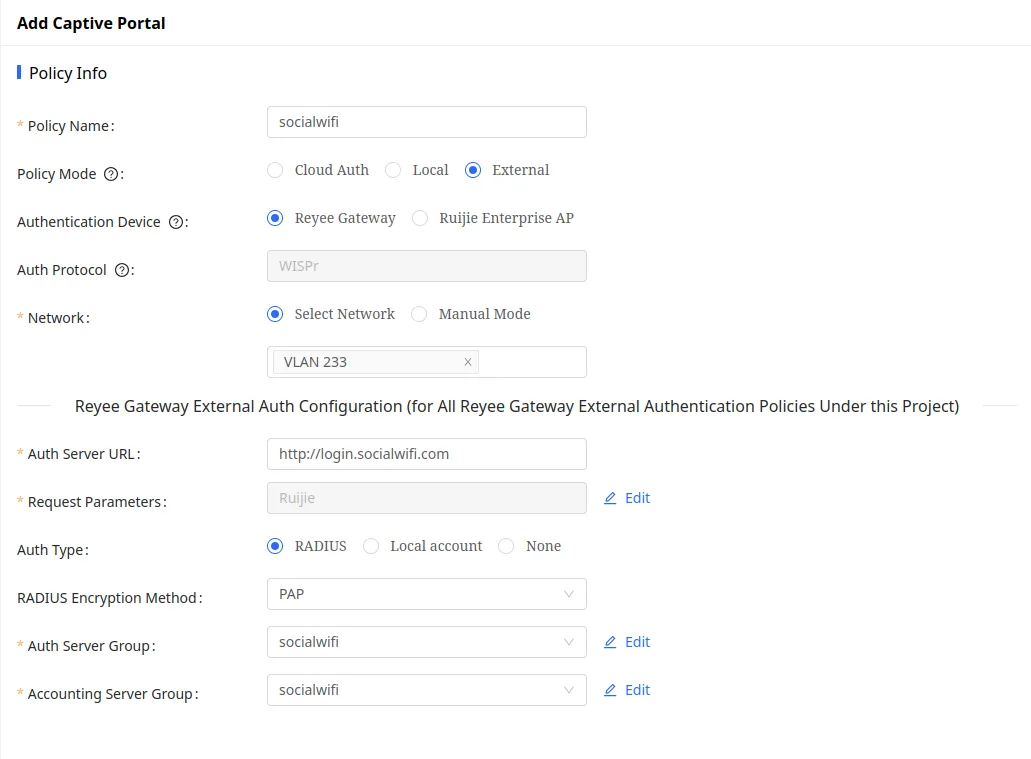
Click OK.
Walled Garden
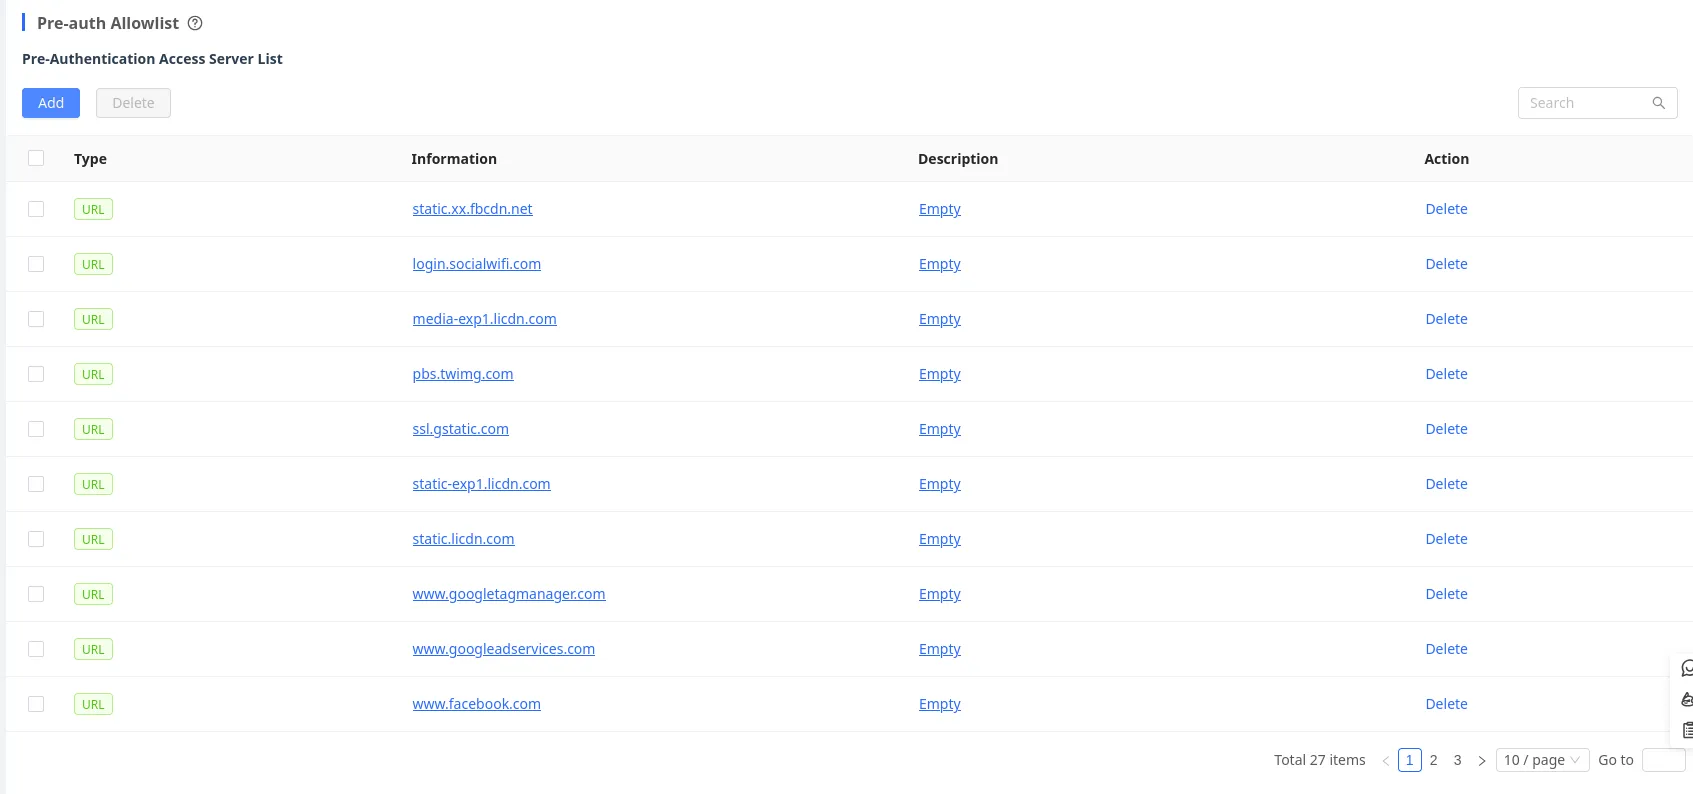
Go to Auth & Accounts -> Allowlist.
In the Pre-auth Allowlist tab click on Add. Click on ”+” to add multiple domains at once. Copy and paste each domain:
login.socialwifi.comsw-login.comwww.facebook.comfacebook.comstatic.xx.fbcdn.netexternal-frt3-2.xx.fbcdn.netwww.linkedin.comstatic-exp1.licdn.commedia-exp1.licdn.comstatic.licdn.comtwitter.comapi.twitter.comx.comapi.x.compbs.twimg.comabs-0.twimg.comabs.twimg.comwhatsapp.netwhatsapp.commmx-ds.cdn.whatsapp.netchat.cdn.whatsapp.netscontent.whatsapp.netconnect.facebook.netwww.facebook.comwww.googletagmanager.comwww.googleadservices.comgoogleads.g.doubleclick.net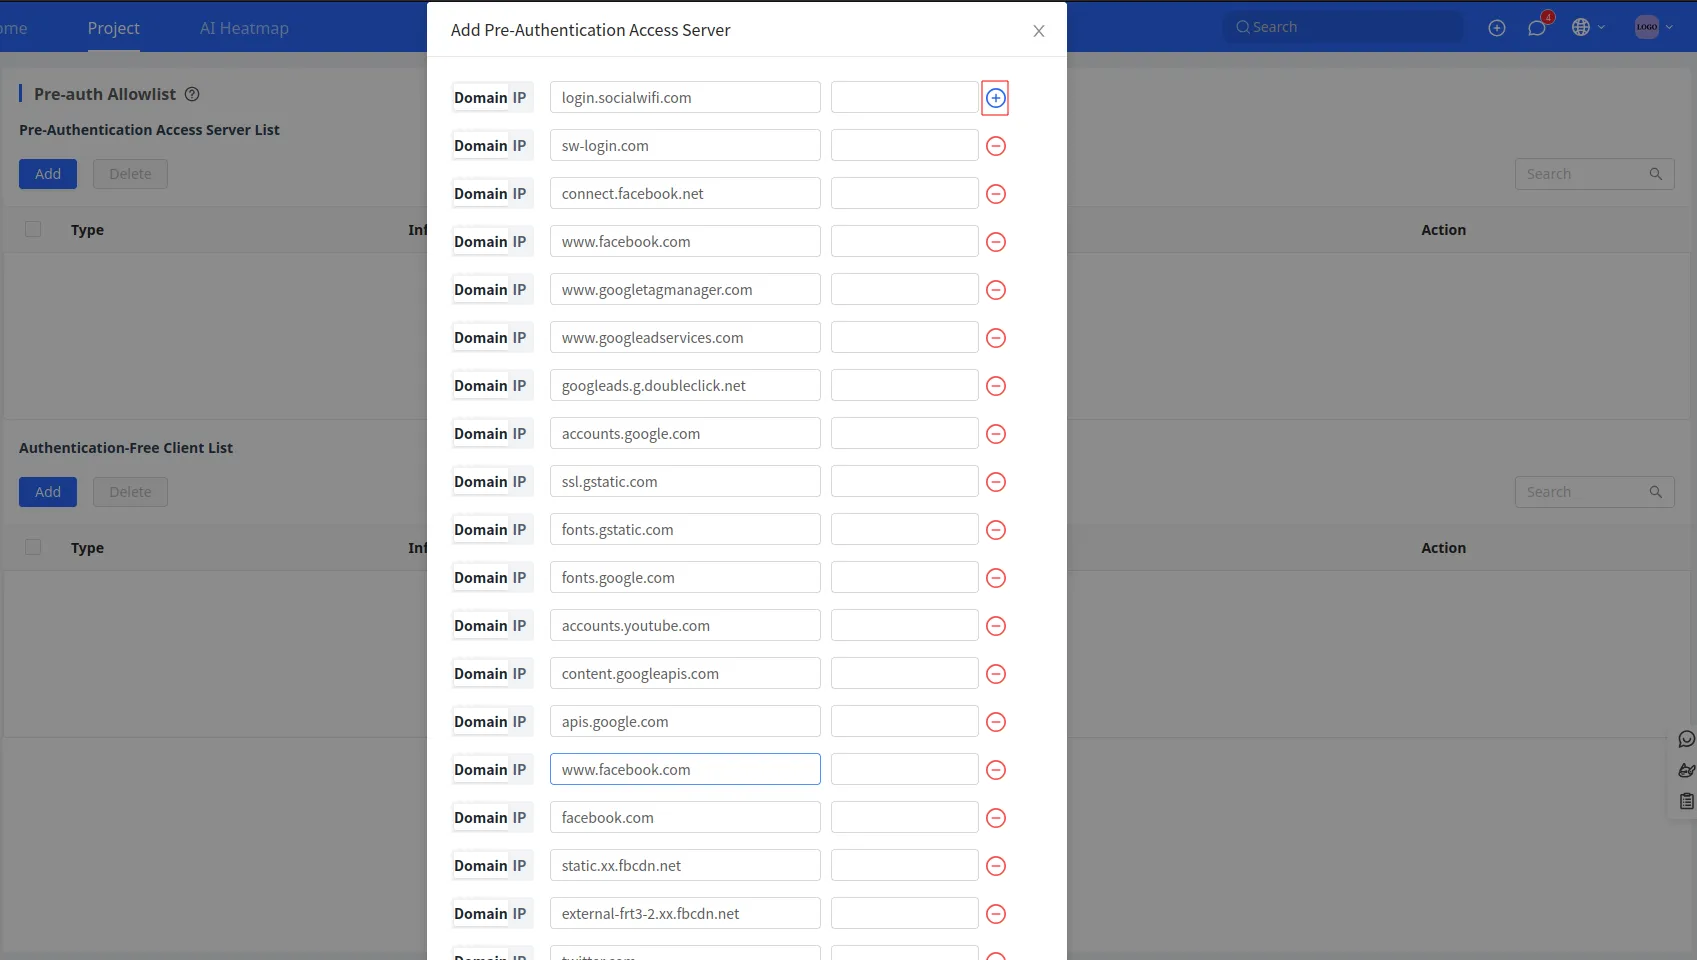
Click OK.
Adding the MAC address to the panel
Go to Devices and copy the MAC address of the your EG. Screenshot for reference below.
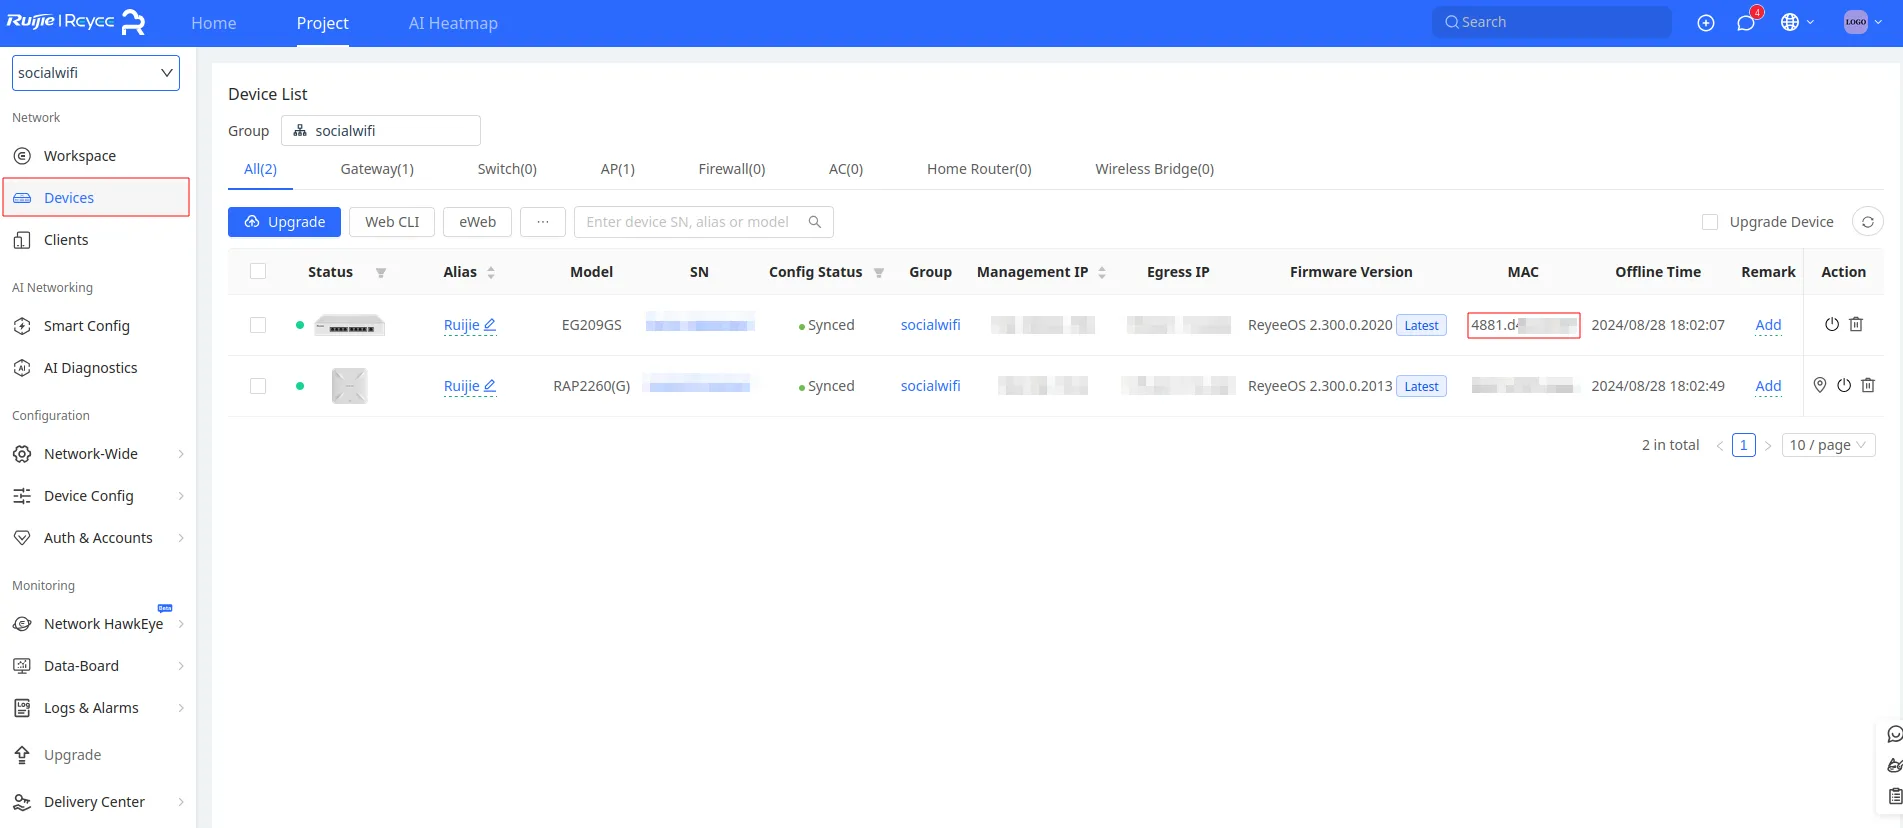
Now, switch to Social WiFi Panel, go to Access Points tab, click the Add button and paste the MAC addresses of your Ruijie Gateway. Click Create.
Test the solution
Connect with the WiFi network. You should see a login page. Go through the login process and, once finished, you should have internet access. You should see first connections and authorizations in the Social WiFi Panel’s statistics section.