Huawei eKit
Esta página aún no está disponible en tu idioma.
Compatibility
Social WiFi has been tested and is proven to work on the following configurations:
Huawei AP361
Software version >= V200R023C00SPC200
Accessing the Huawei eKit Controller
This guide uses the Huawei eKit web interface. To access it:
- Navigate to the login page.
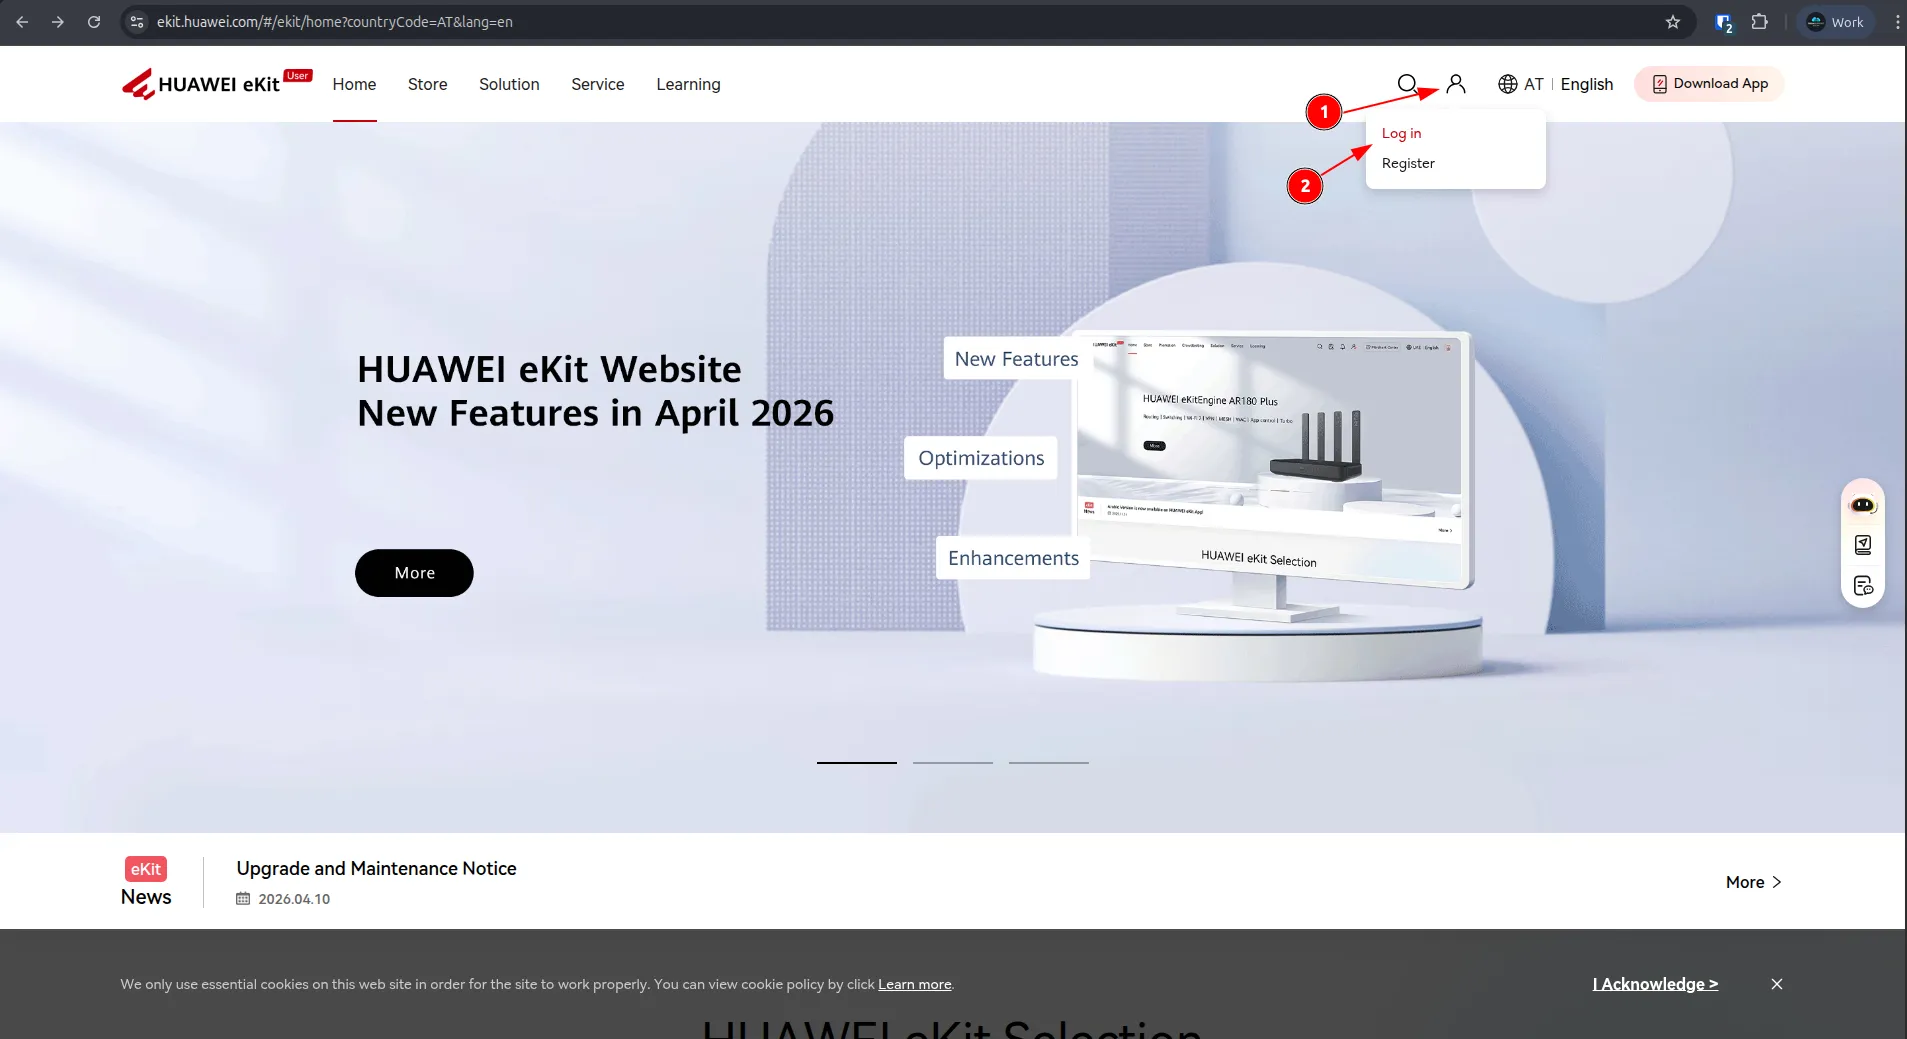
- Log in using your credentials, or create an account if you don’t have one.
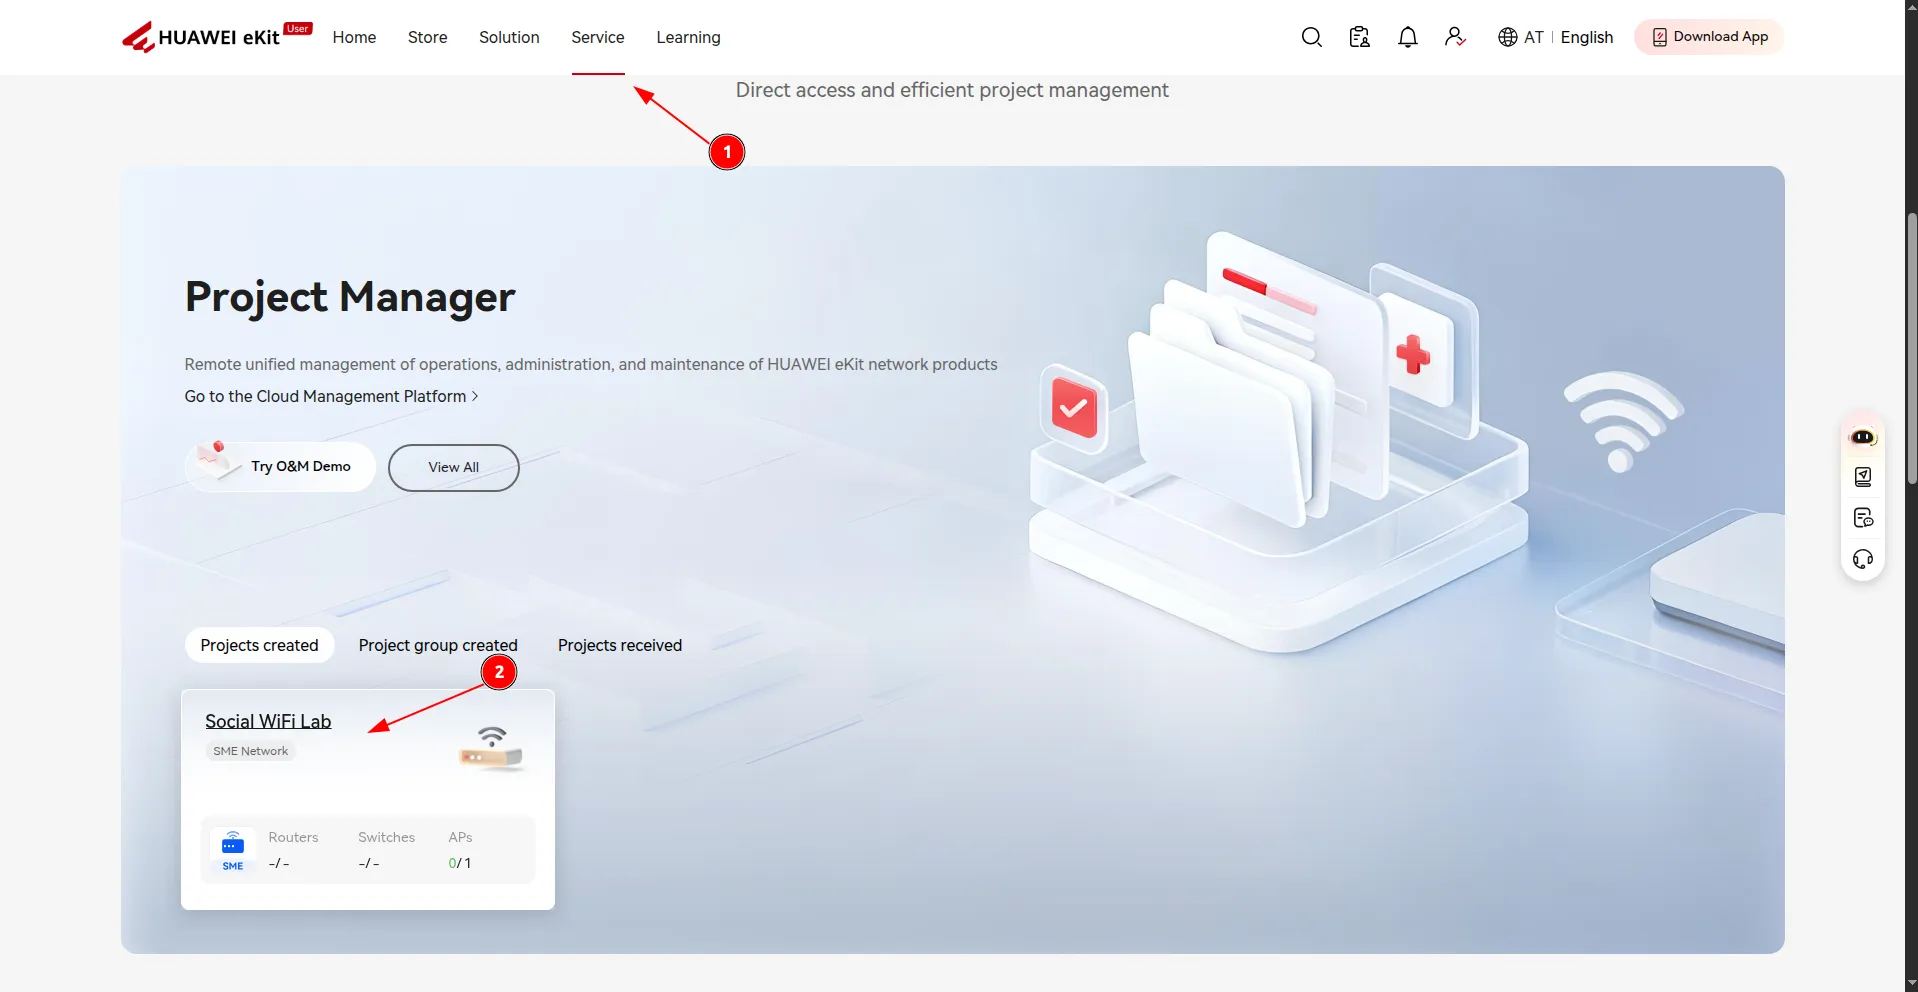
- After logging in, navigate to the Service tab, scroll down to the Cloud Management Platform section, find your project and select it.
Installation
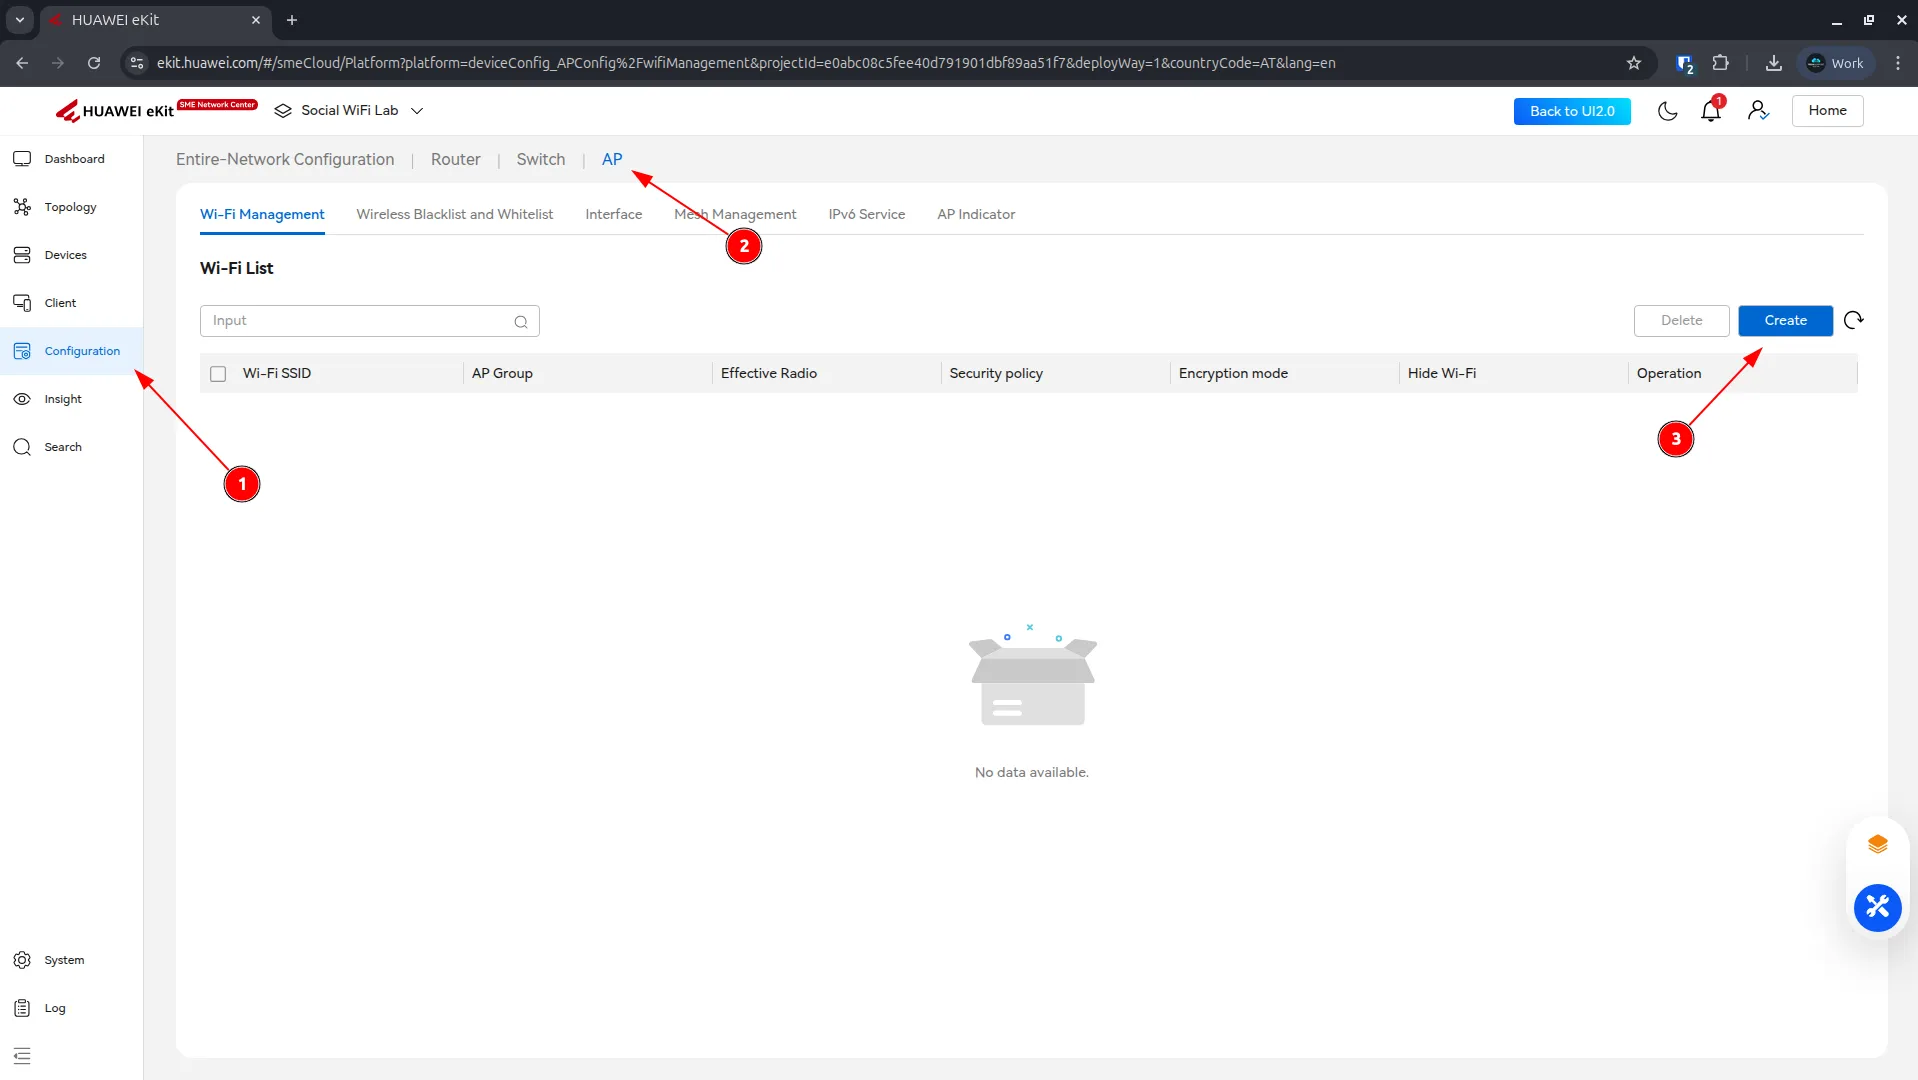
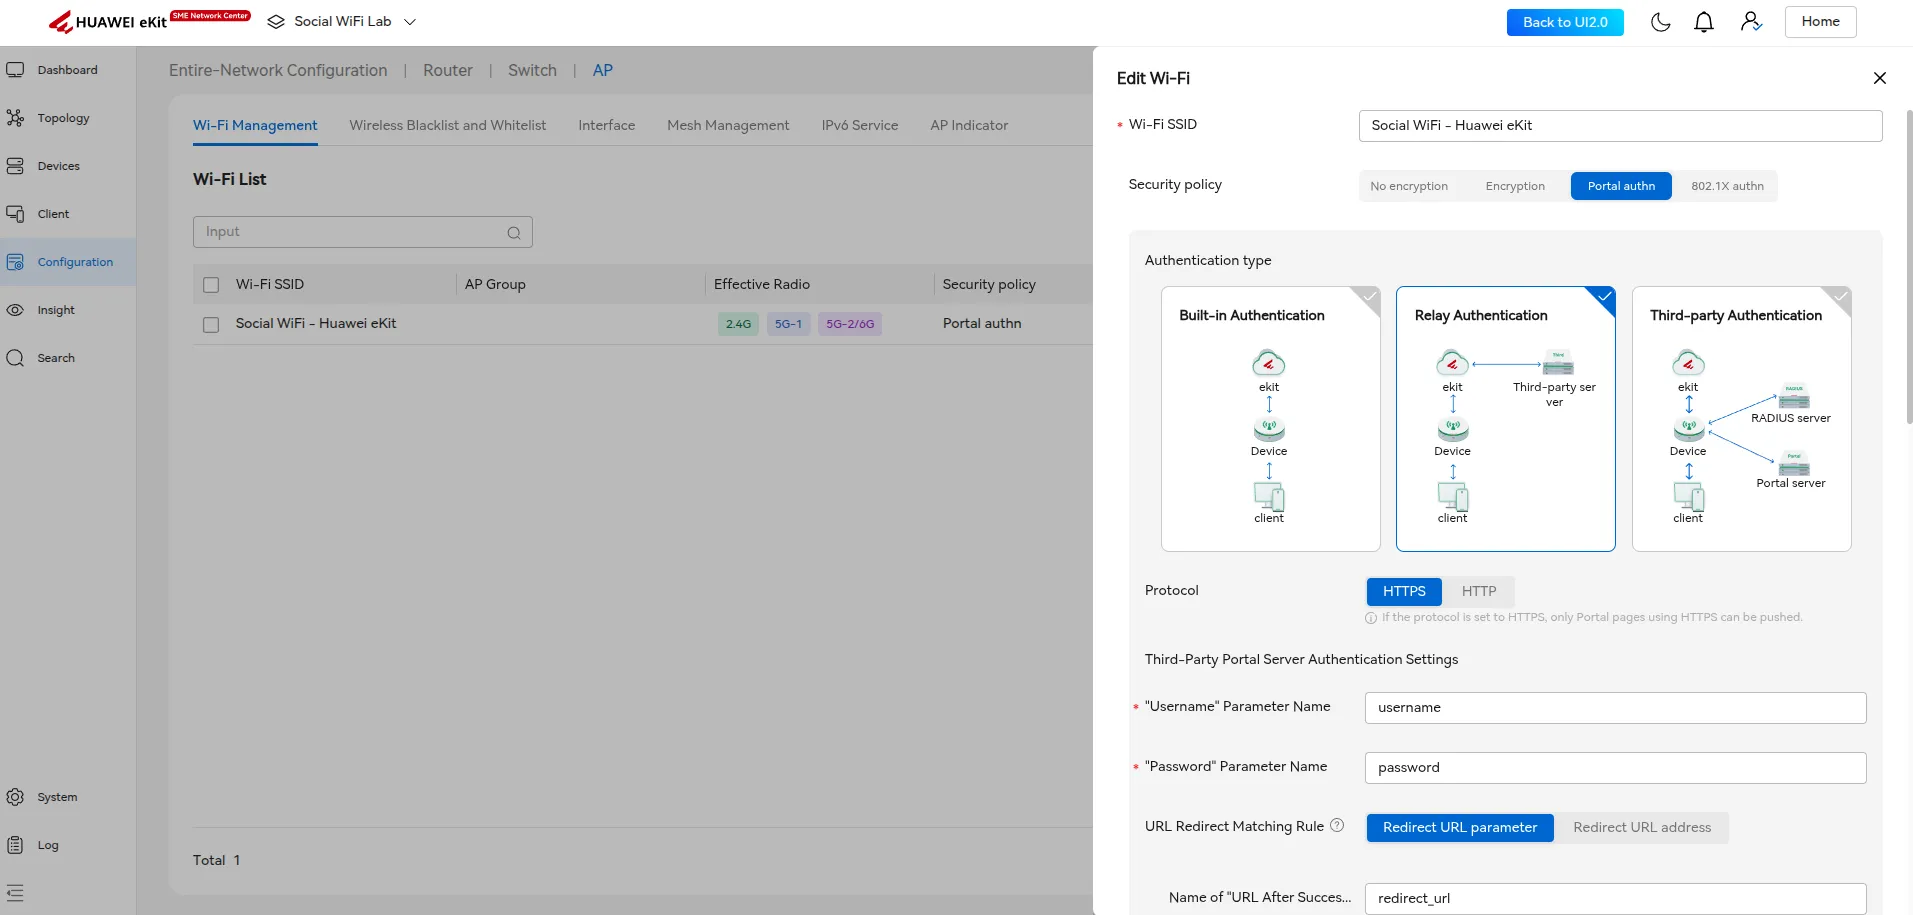
Navigate to Configuration -> AP, then open the Wi-Fi Management tab and click Create.
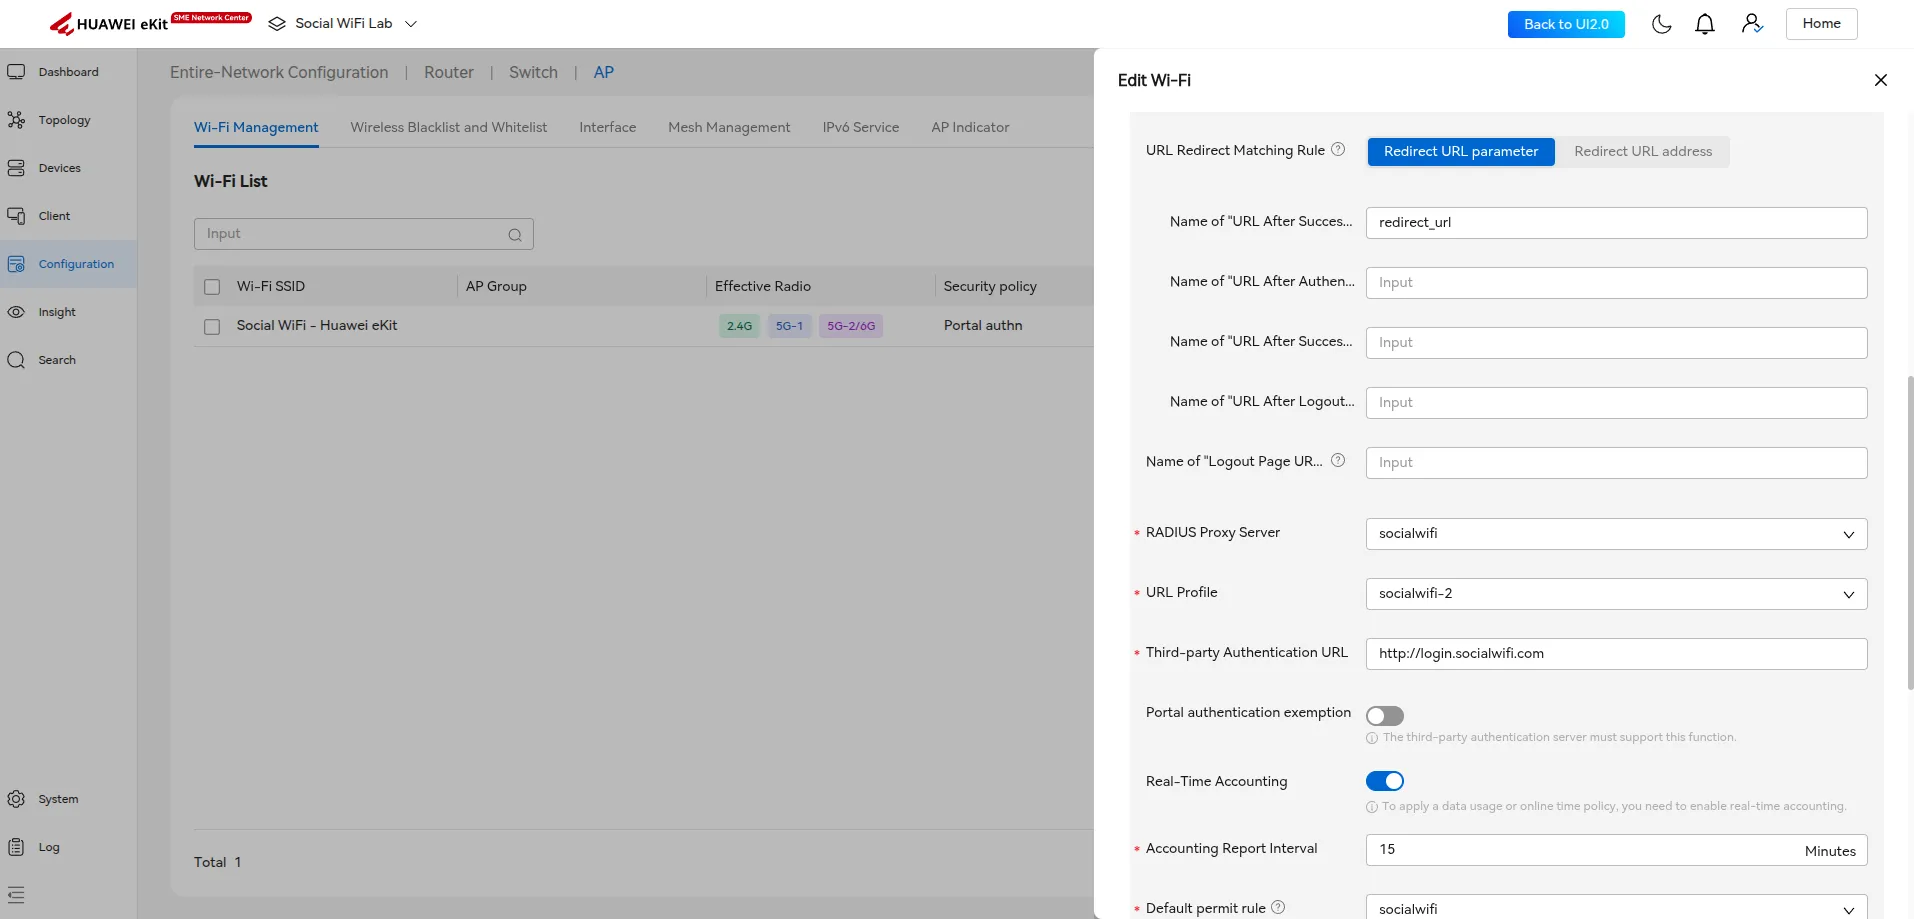
The Edit Wi-Fi panel will open. Configure the network according to the table below. Three fields - RADIUS Proxy Server, URL Profile, and Default permit rule - require creating new sub-configurations first. Follow the subsections below to create each one, then return here to finalize and save the form.
| Wi-Fi SSID | Visible name of your guest network |
|---|---|
| Security policy | Portal authn |
| Authentication type | Relay Authentication |
| Protocol | HTTPS |
| ”Username” Parameter Name | username |
| ”Password” Parameter Name | password |
| URL Redirect Matching Rule | Redirect URL parameter |
| Name of “URL After Successful Authentication” Parameter | redirect_url |
| Name of “URL After Authentication Failure” Parameter | (leave blank) |
| Name of “URL After Successful Logout” Parameter | (leave blank) |
| Name of “URL After Logout Failure” Parameter | (leave blank) |
| Name of “Logout Page URL” Parameter | (leave blank) |
| RADIUS Proxy Server | Create new - see Create RADIUS Proxy Server |
| URL Profile | Create new - see Create URL Template |
| Third-party Authentication URL | http://login.socialwifi.com |
| Portal authentication exemption | Disabled |
| Real-Time Accounting | Enabled |
| Accounting Report Interval | 15 minutes |
| Default permit rule | Create new - see Create Default Permit Rule |
| Bypass policy | Enabled |
Create RADIUS Proxy Server
In the RADIUS Proxy Server field, open the dropdown and click Create. A dialog will appear - configure as follows:
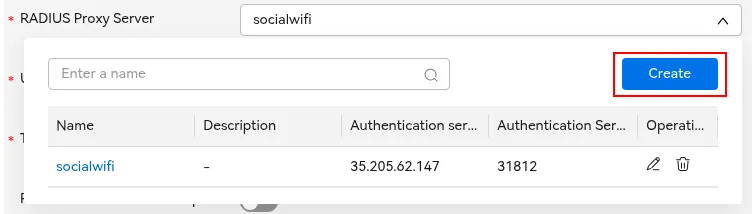
| Name | socialwifi |
|---|---|
| Authentication Server Address | 35.205.62.147 |
| Authentication Server Port | 31812 |
| Authentication Protocol | PAP |
| Accounting Server Address | 35.205.62.147 |
| Accounting Server Port | 31813 |
| Timeout | 5 |
| MAC Address Format Set | Enabled |
| MAC Address Case | Uppercase |
| MAC Address Separator | Hyphen (-) |
| MAC Address Format | XX-XX-XX-XX-XX-XX |
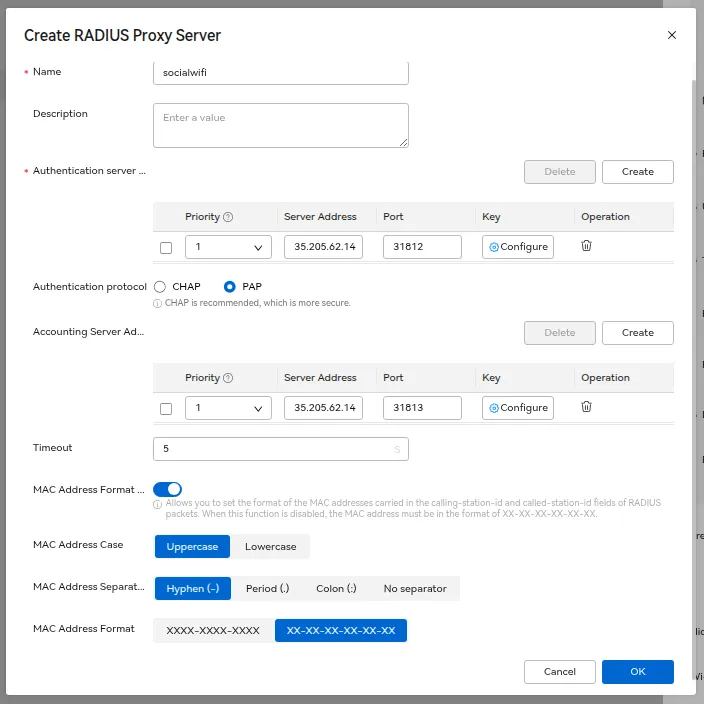
Click OK. You will return to the Edit Wi-Fi form with the RADIUS Proxy Server field populated.
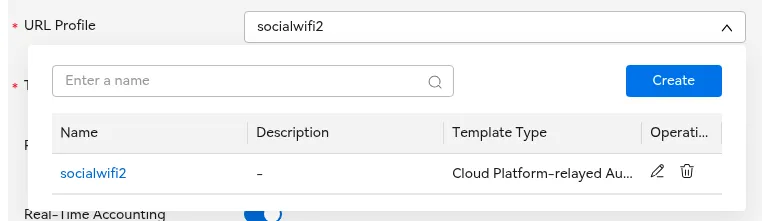
Create URL Template
In the URL Profile field, open the dropdown and click Create. A dialog will appear - set the name and MAC address format as follows:
| Name | socialwifi |
|---|---|
| MAC Address Format Set | Enabled |
| MAC Address Case | Uppercase |
| MAC Address Separator | Hyphen (-) |
| MAC Address Format | XX-XX-XX-XX-XX-XX |
Under Template Parameters, confirm that the following four entries are present:
| Value Assignment Mode | Parameter | Parameter Name |
|---|---|---|
| Replace | device-mac | device-mac |
| Replace | user-mac | user-mac |
| Replace | loginurl | loginurl |
| Replace | redirect-url | redirect-url |
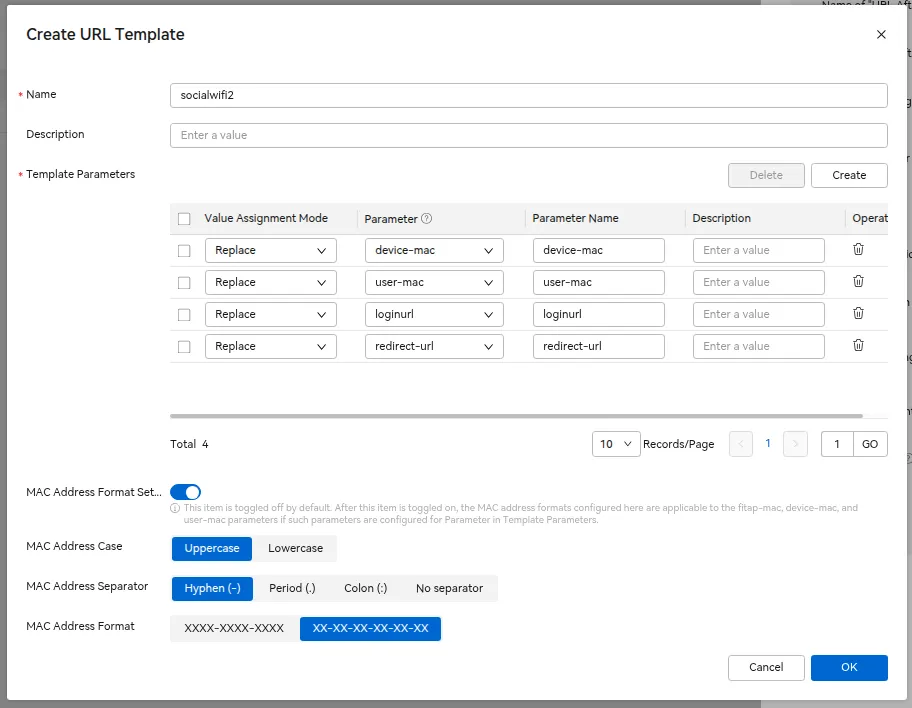
Click OK. You will return to the Edit Wi-Fi form with the URL Profile field populated.
Create Default Permit Rule
In the Default permit rule field, open the dropdown and click Create. A dialog will appear - configure as follows:
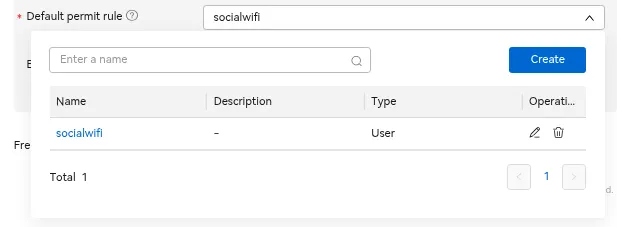
| Name | socialwifi |
|---|---|
| IPv4 rule: Address Type: Domain name: Protocol: Address Type: Domain name: Protocol: Address Type: Domain name: Protocol: Address Type: Domain name: Protocol: Address Type: Domain name: Protocol: Address Type: Domain name: Protocol: Address Type: Domain name: Protocol: Address Type: Domain name: Protocol: Address Type: Domain name: Protocol: Address Type: Domain name: Protocol: Address Type: Domain name: Protocol: Address Type: Domain name: Protocol: Address Type: Domain name: Protocol: Address Type: Domain name: Protocol: Address Type: Domain name: Protocol: Address Type: Domain name: Protocol: Address Type: Domain name: Protocol: Address Type: Domain name: Protocol: Address Type: Domain name: Protocol: Address Type: Domain name: Protocol: Address Type: Domain name: Protocol: Address Type: Domain name: Protocol: Address Type: Domain name: Protocol: Address Type: Domain name: Protocol: Address Type: Domain name: Protocol: | Domain name *.socialwifi.comAny Domain name sw-login.comAny Domain name facebook.comAny Domain name *.facebook.comAny Domain name *.fbcdn.netAny Domain name linkedin.comAny Domain name *.linkedin.comAny Domain name *.licdn.comAny Domain name twitter.comAny Domain name api.twitter.comAny Domain name x.comAny Domain name api.x.comAny Domain name *.twimg.comAny Domain name whatsapp.comAny Domain name *.whatsapp.netAny Domain name *.whatsapp.comAny Domain name connect.facebook.netAny Domain name www.facebook.comAny Domain name www.googletagmanager.comAny Domain name www.googleadservices.comAny Domain name googleads.g.doubleclick.netAny Domain name *.youtube.comAny Domain name *.ytimg.comAny Domain name *.googlevideo.comAny Domain name yt3.ggpht.comAny |
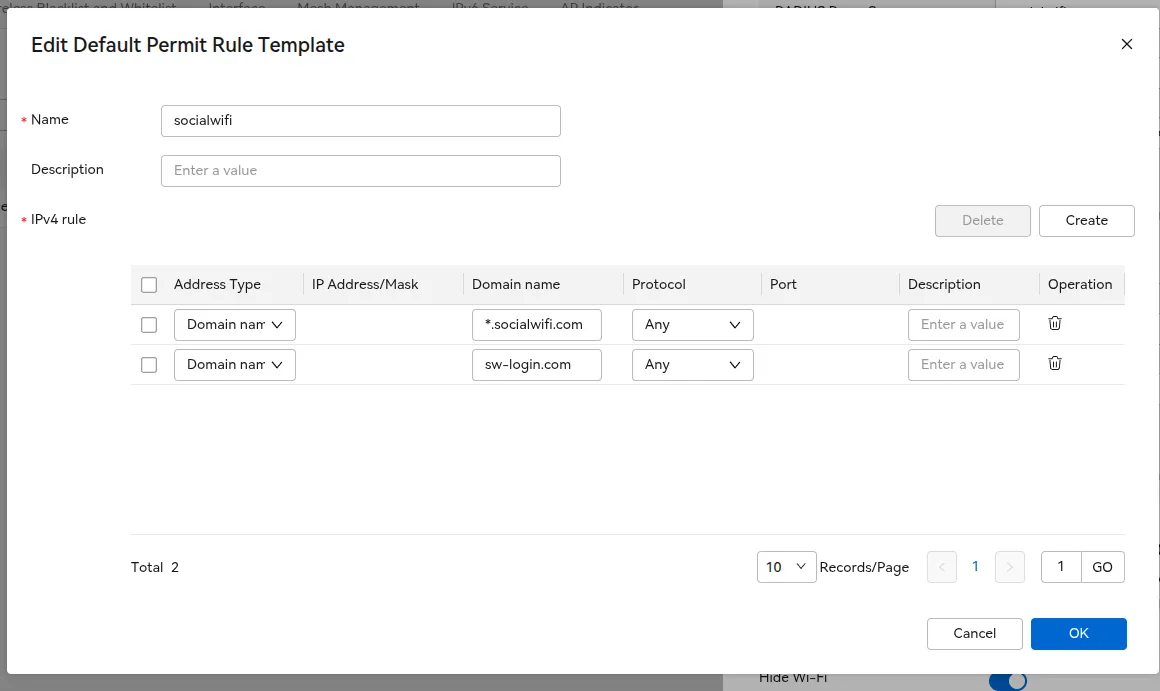
Click OK. You will return to the Edit Wi-Fi form with the Default permit rule field populated.
Finalizing the configuration
With all three sub-configurations in place, verify that the remaining settings in the lower part of the form match the table above.
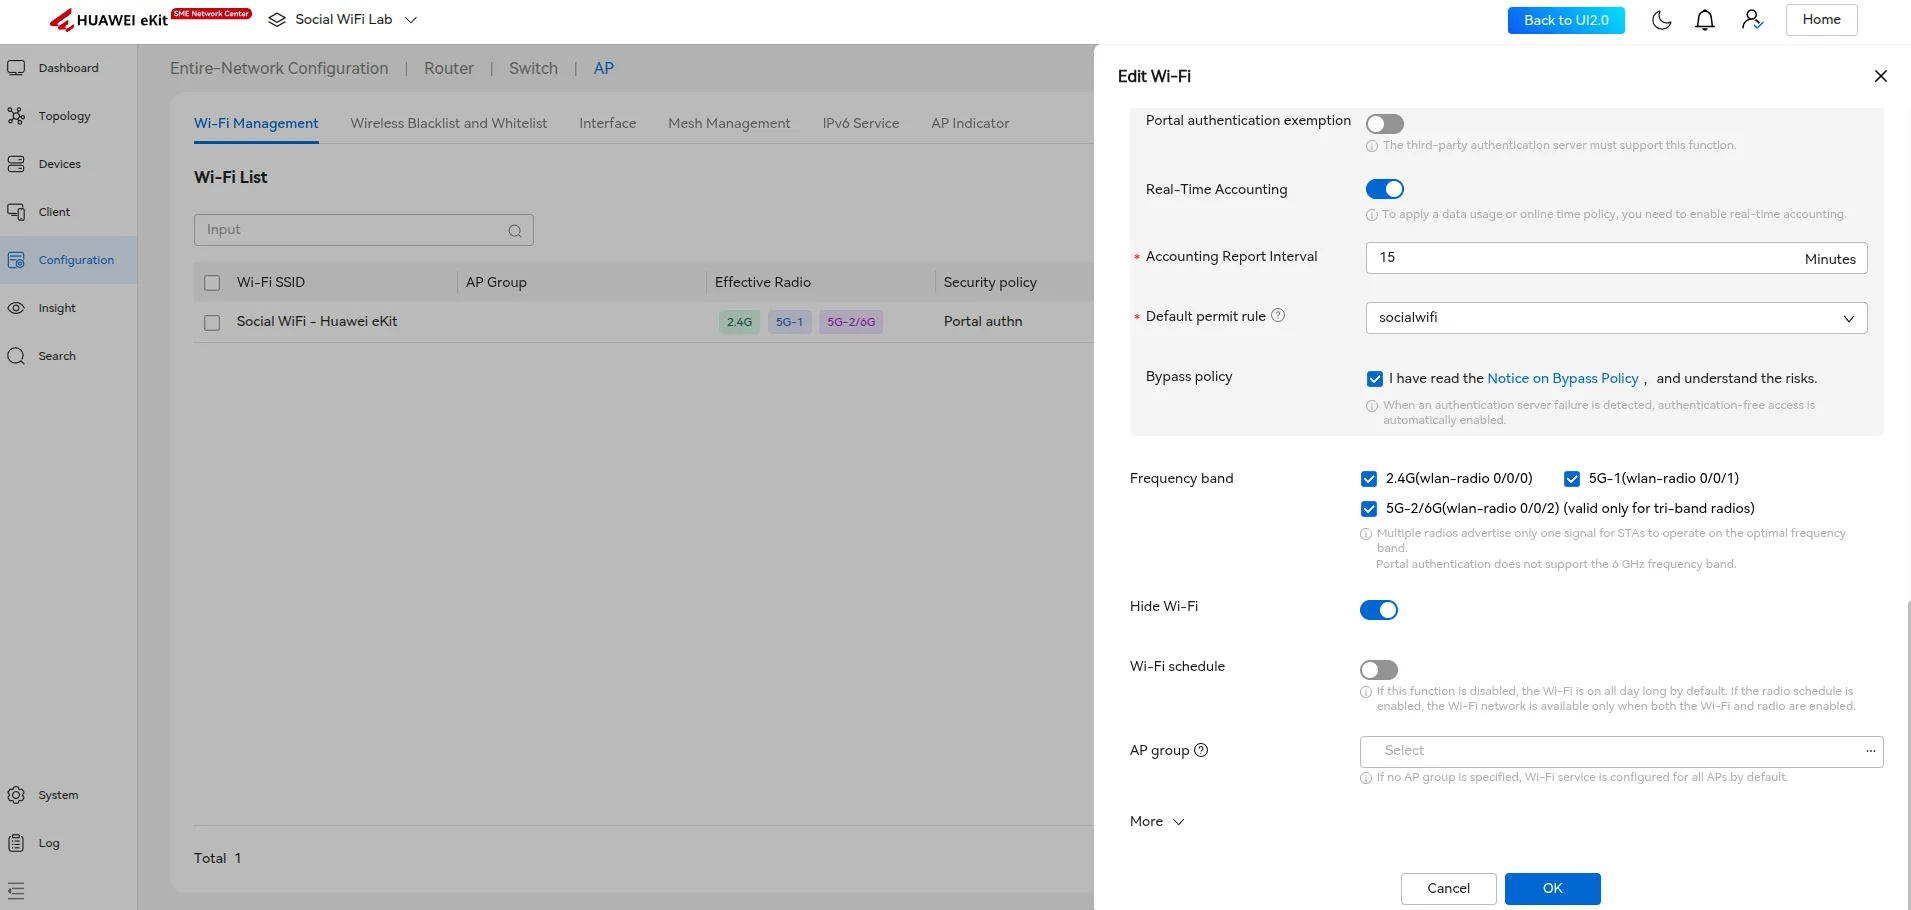
Click OK to create the Wi-Fi network.
Add the access point to Social WiFi Panel
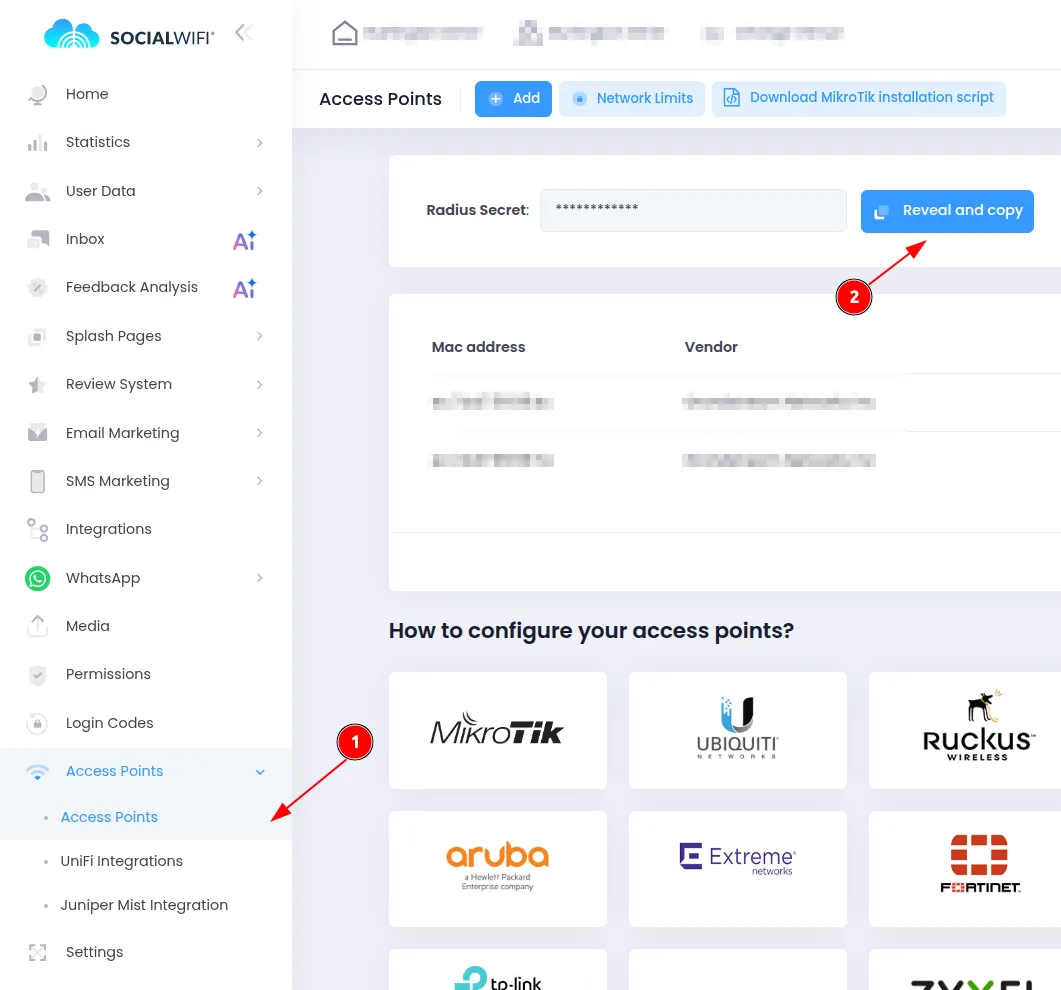
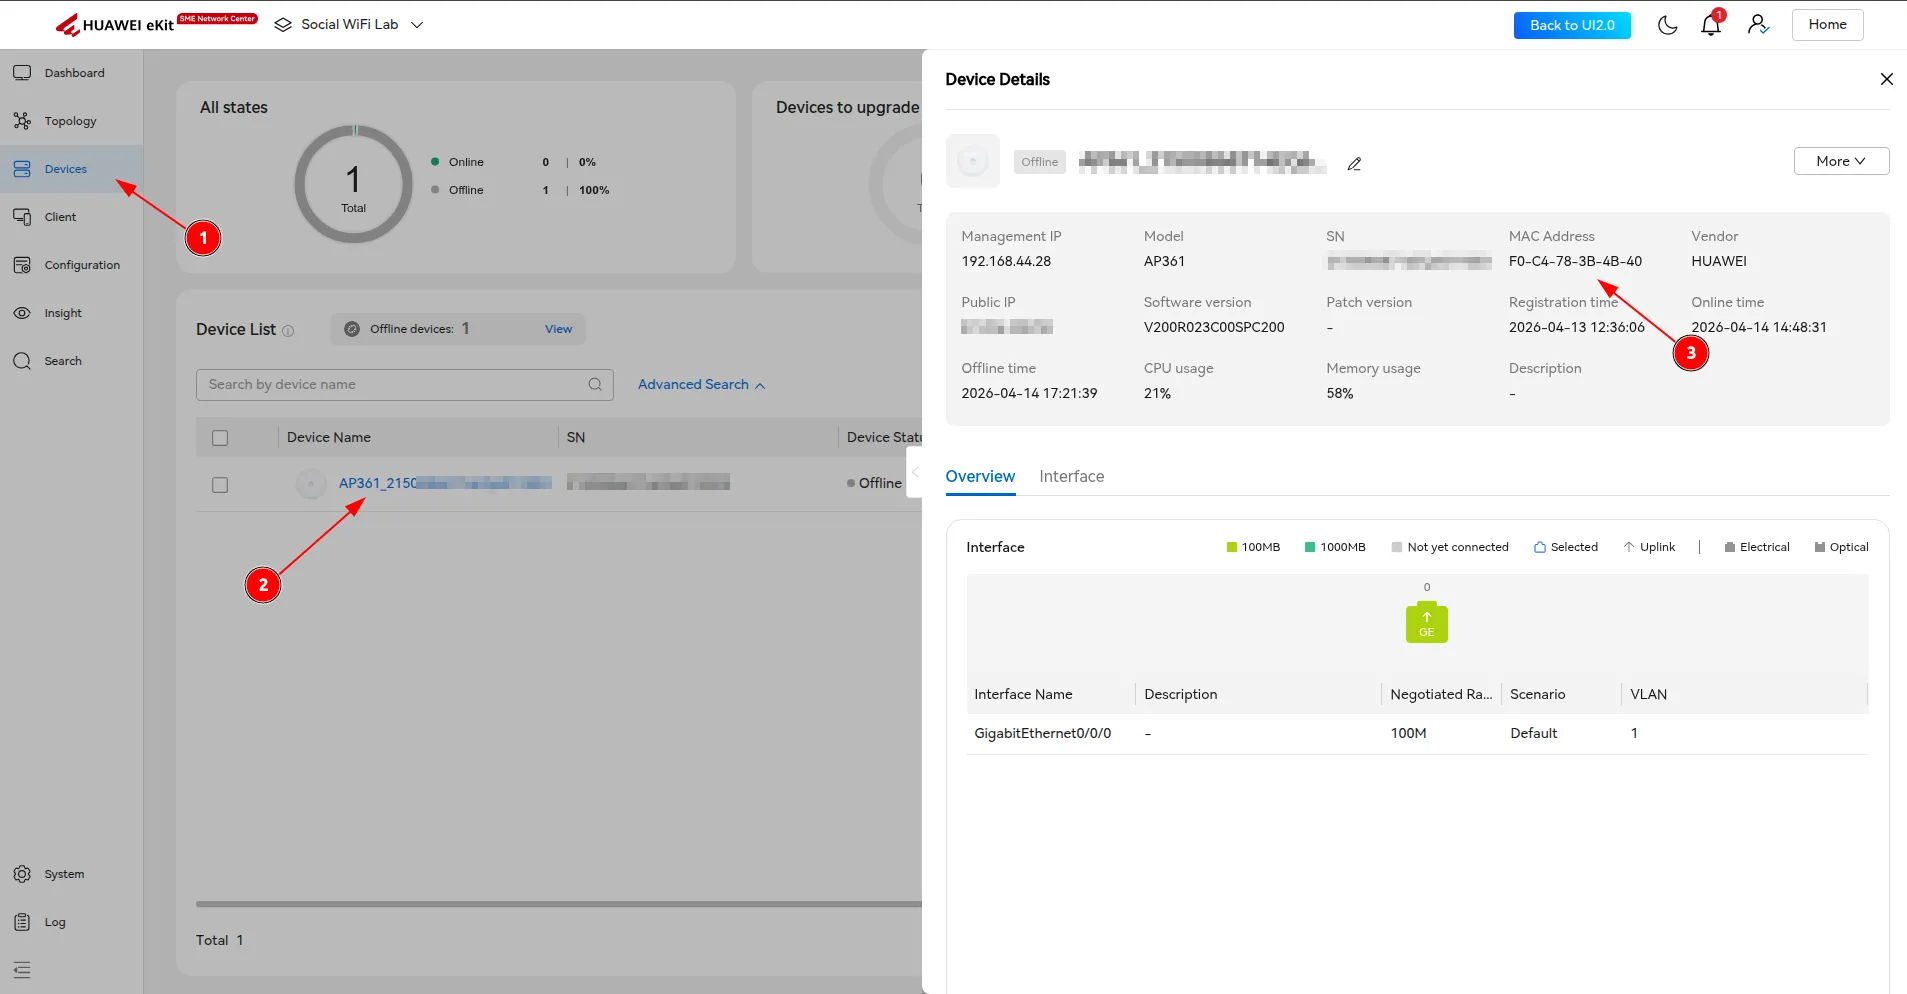
To find your device’s MAC address, go to the Devices section and click on AP that is to be added. Copy its MAC Address
Log in to the Social WiFi Panel, go to the Access Points tab and click Add new.
Test the solution
Connect to the Wi-Fi network. You should be redirected to the login page. Complete the login process - once done, you should have internet access. Your first connections and authorizations will appear in the Statistics section of the Social WiFi Panel.