Guest network for physical ports
Ta treść nie jest jeszcze dostępna w Twoim języku.
Prerequisites
While majority of customers want to install Social WiFi on a particular SSID, there are a few cases where installing on a physical network layer (using VLAN) could be desired as well. An example scenario is where you want to provide guest internet access via Ethernet connections in addition to Wi-Fi.
To enable this functionality, you can create a new network on a supported UniFi Gateway, including:
- UniFi Dream Machine (Pro, Pro Max, Special Edition)
- UniFi Gateway (Max, Ultra)
- UniFi Express
- UniFi Dream Router
- UniFi Dream Wall
Supported Network Application versions: 7.4 and higher.
Configuration process
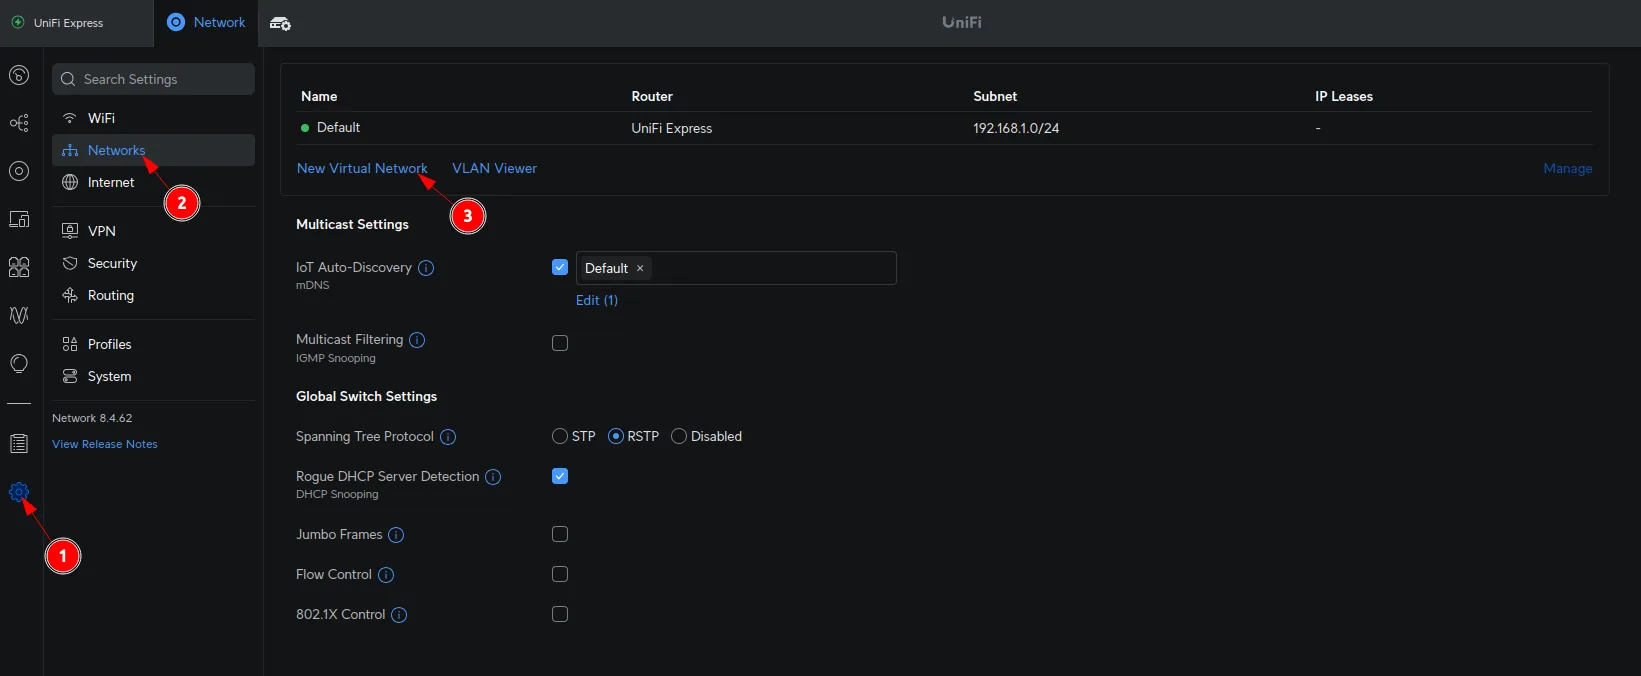
In order to configure the solution, go to Settings -> Networks in your Network App and click on New Virtual Network.
Now, configure as follows:
| Network Name | *set a name for your network* |
|---|---|
| Advanced | Manual |
| VLAN ID | *select your VLAN ID* (can be anything, just make sure it doesn’t exist yet) |
| Guest Network | Enabled |
If something wasn’t mentioned, leave it as default (unless you know what you’re doing).
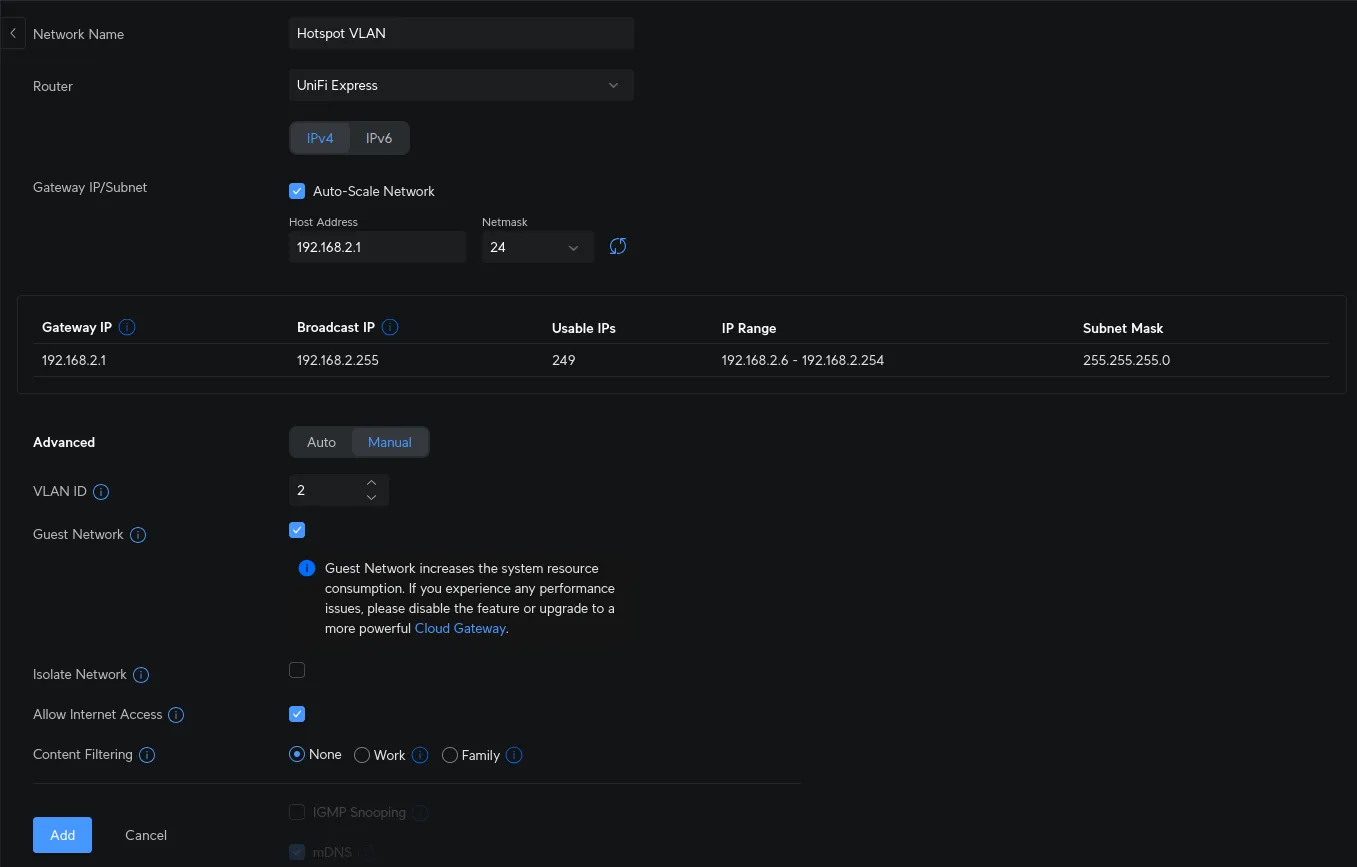
Click Add in the bottom right corner of the page. You should see the new VLAN created in your port configuration:

Example usage
Consider a scenario where you want to provide guest internet access via Ethernet connections in addition to Wi-Fi. A common approach is to configure a trunk port on your UniFi switch to carry the VLAN traffic from the Gateway. You can then create access ports on the same switch, assigning them to the guest VLAN. Guests can then connect to these access ports using Ethernet cables and be seamlessly redirected to your Social WiFi captive portal for authentication and access.
Here’s a more detailed breakdown of the setup:
- Create Guest VLAN: Configure a new VLAN-only network on your UniFi Gateway for guest access as shown in the guide.
- Configure Trunk Port: Set the port connecting your UniFi switch to the gateway as a trunk port to carry the guest VLAN.
- Configure Access Ports: Set the Ethernet ports for guest access as access ports and assign them to the guest VLAN.
- Guest Connection: Guests connect via Ethernet and are redirected to your Social WiFi captive portal.
This setup is particularly useful in environments like:
- Conference rooms: Providing wired internet access for presenters or attendees.
- Hotel rooms: Offering both wired and wireless internet options for guests.
- Shared office spaces: Enabling guest access without relying solely on Wi-Fi.