Aruba Central
Ta treść nie jest jeszcze dostępna w Twoim języku.
Compatibility
Social WiFi has been tested and is proven to work on the following configurations:
Access Point - IAP-325
Firmware - 8.x and higher (tested up to 8.10.0.9_88493 LSR)
Configuring Hotspot
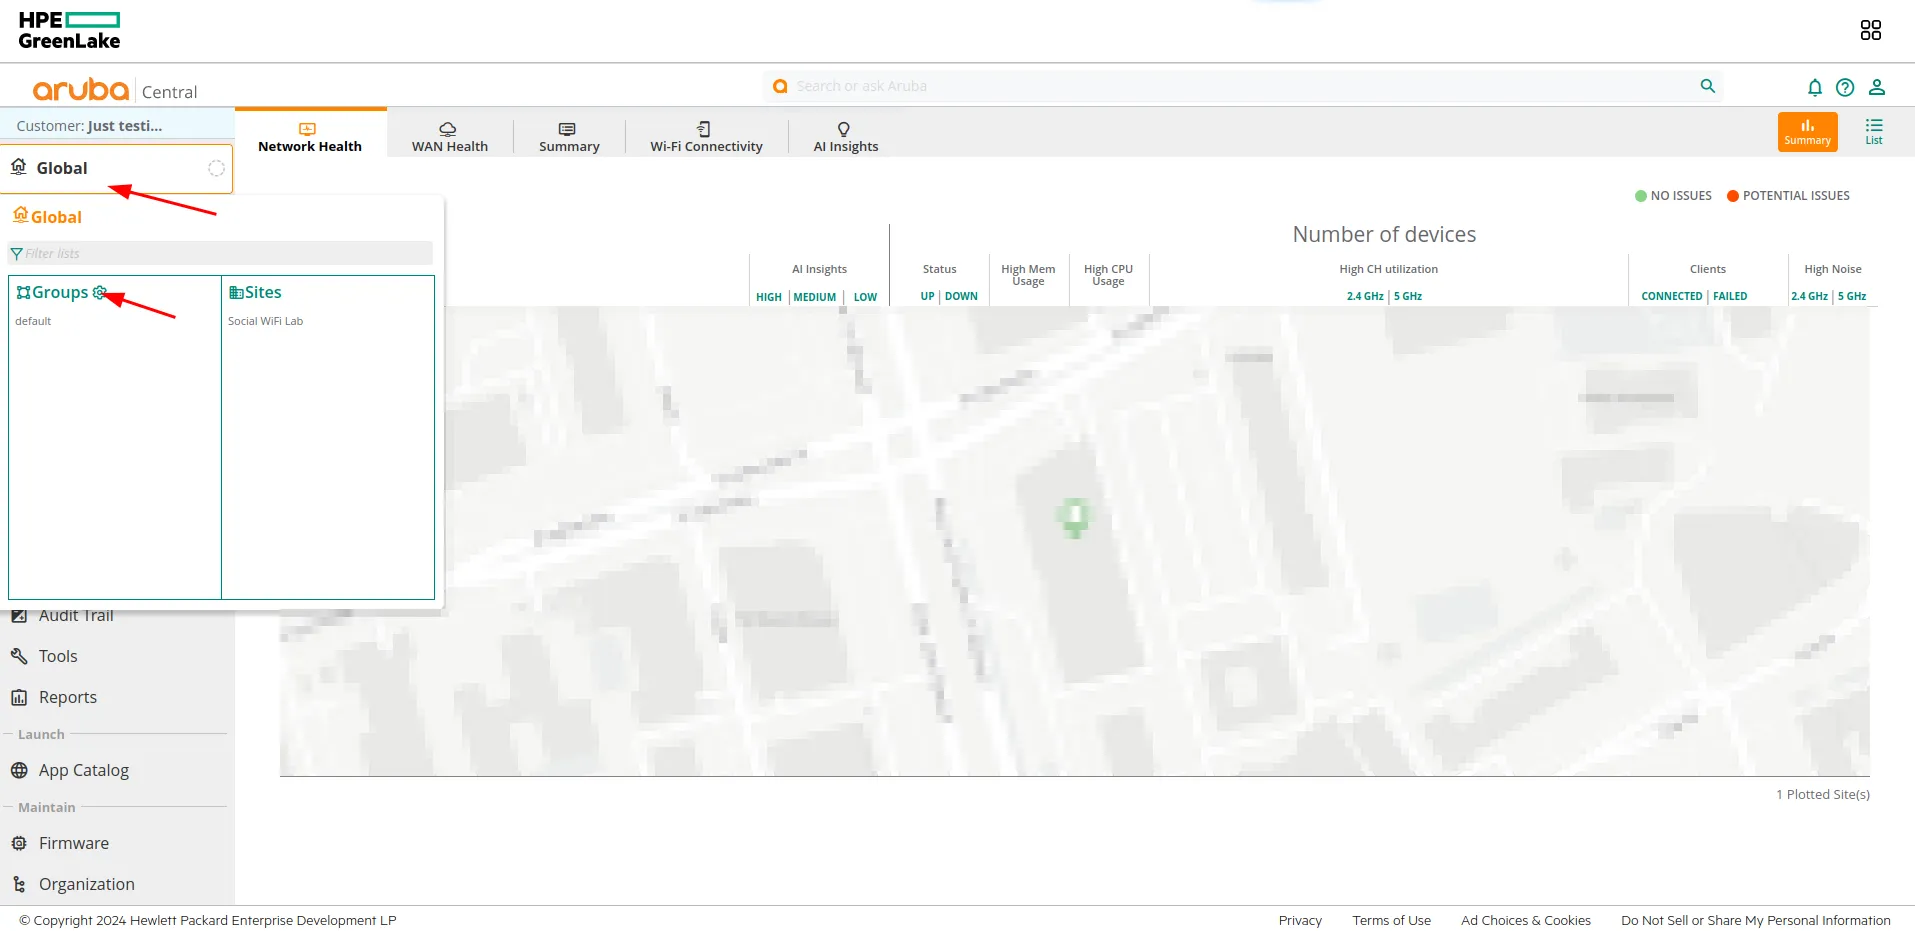
Once you see the Global dashboard, click on Global on the left and click on the gear icon near the “Groups” section.
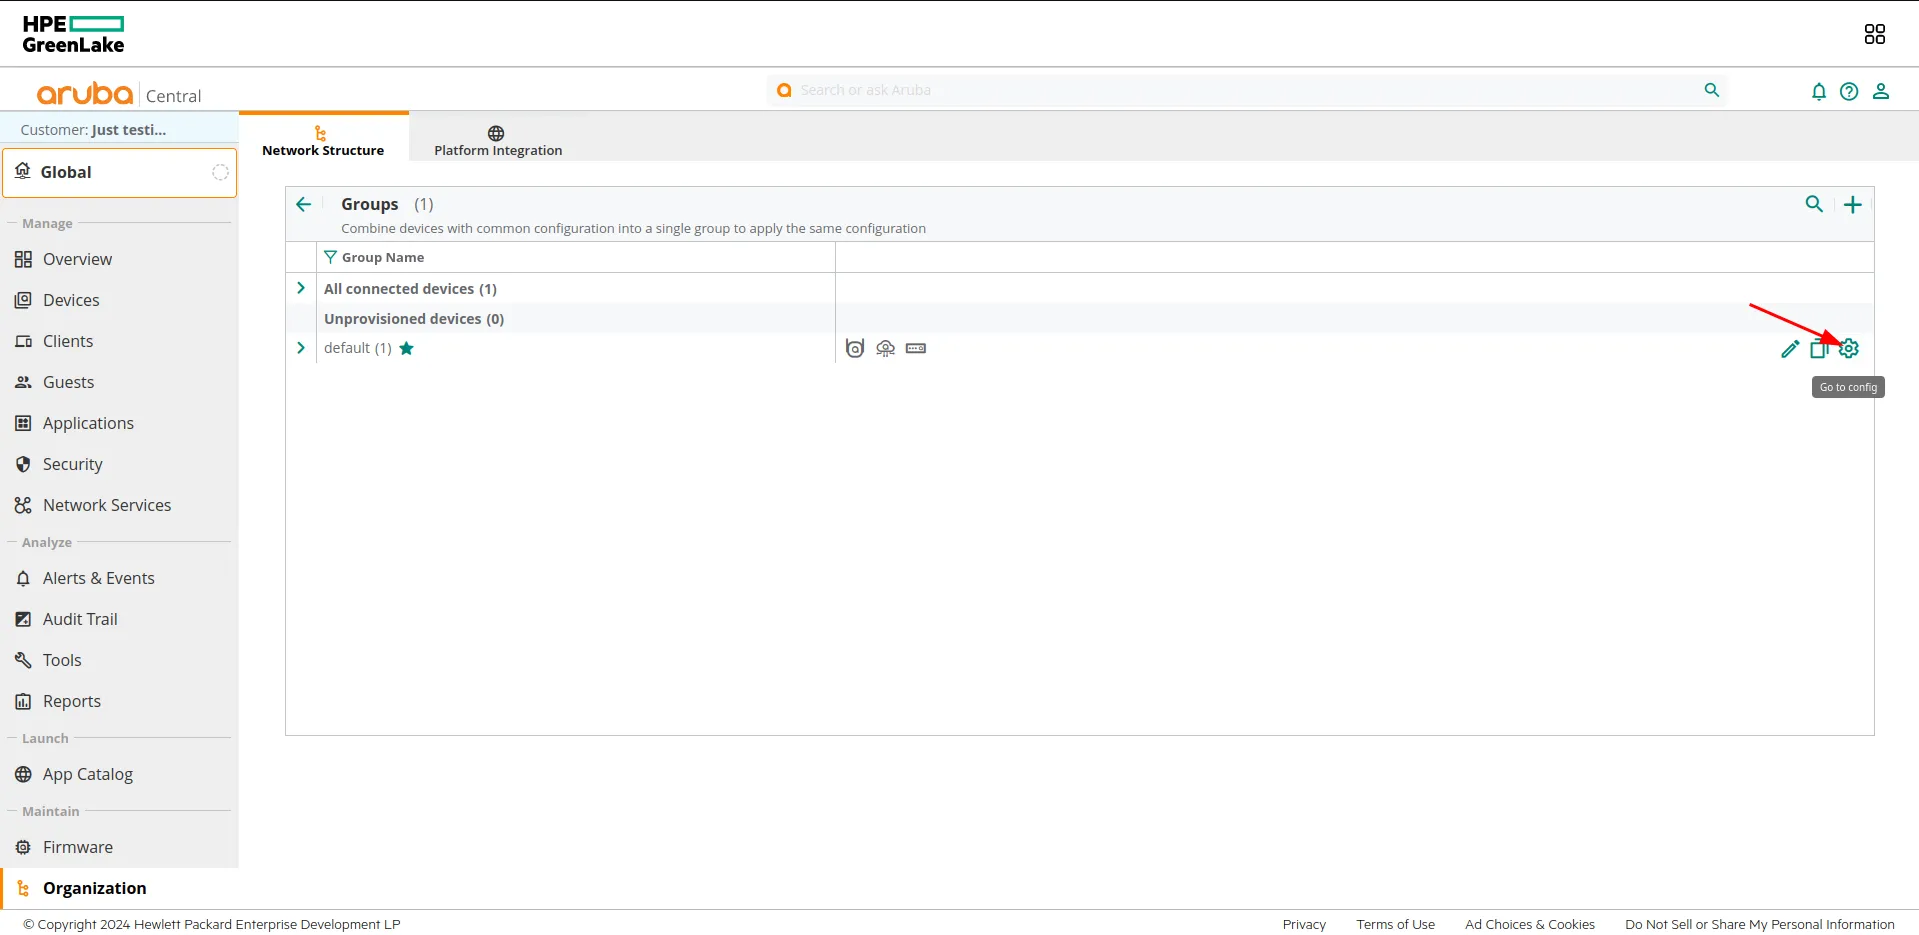
Now, select your AP group you want to configure and click on the gear icon on the right side to access configuration.
Creating Wireless Network
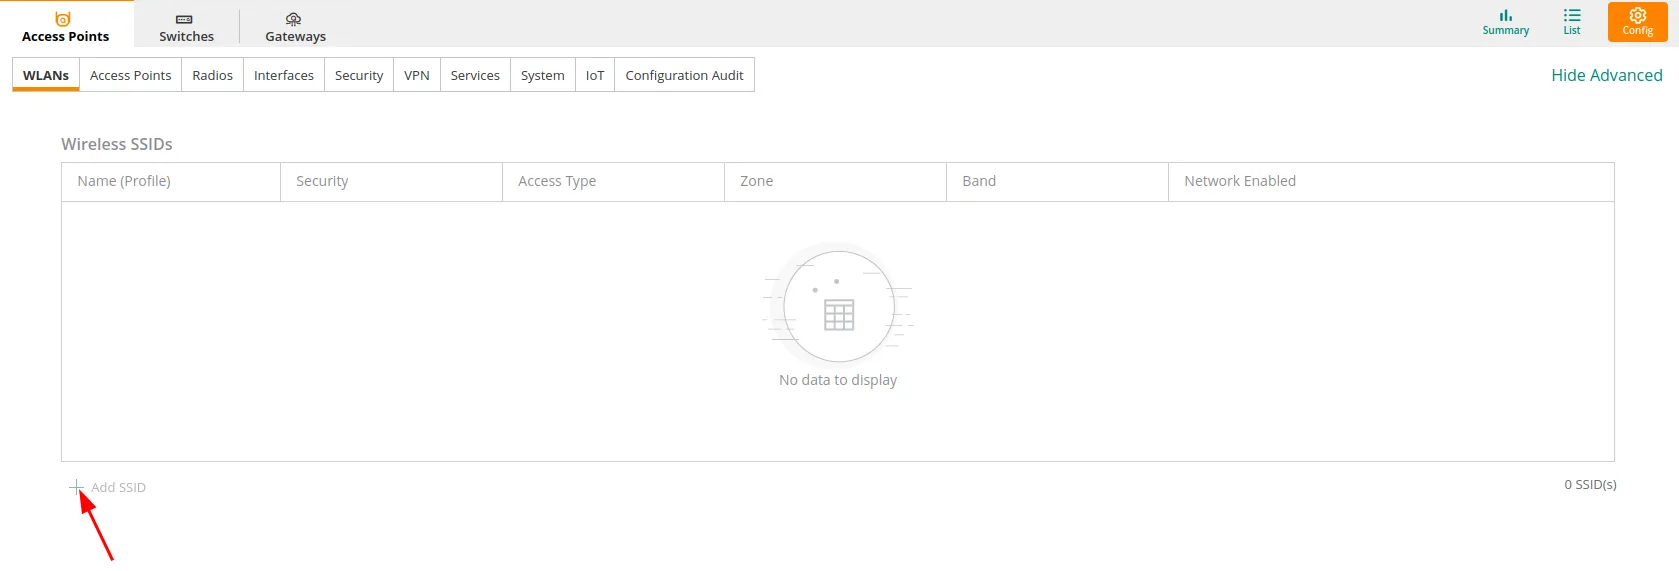
You should be redirected to the page below. Inside Access Points -> WLANs tab, click on + Add SSID and go through the configuration process.
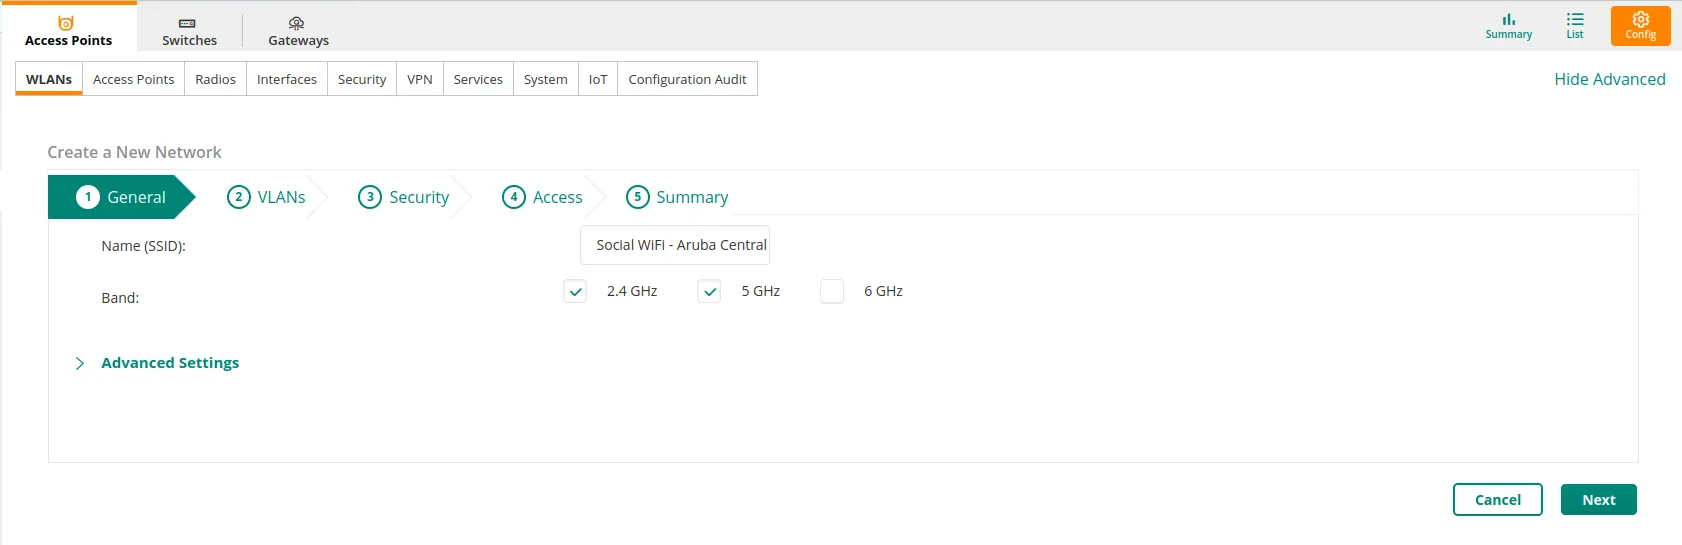
In the “General” section
| Name | Your network name |
|---|---|
| Band | For this guide we’ll proceed with the defaults, but feel free to select whichever you prefer. |
Click Next in the lower right corner.
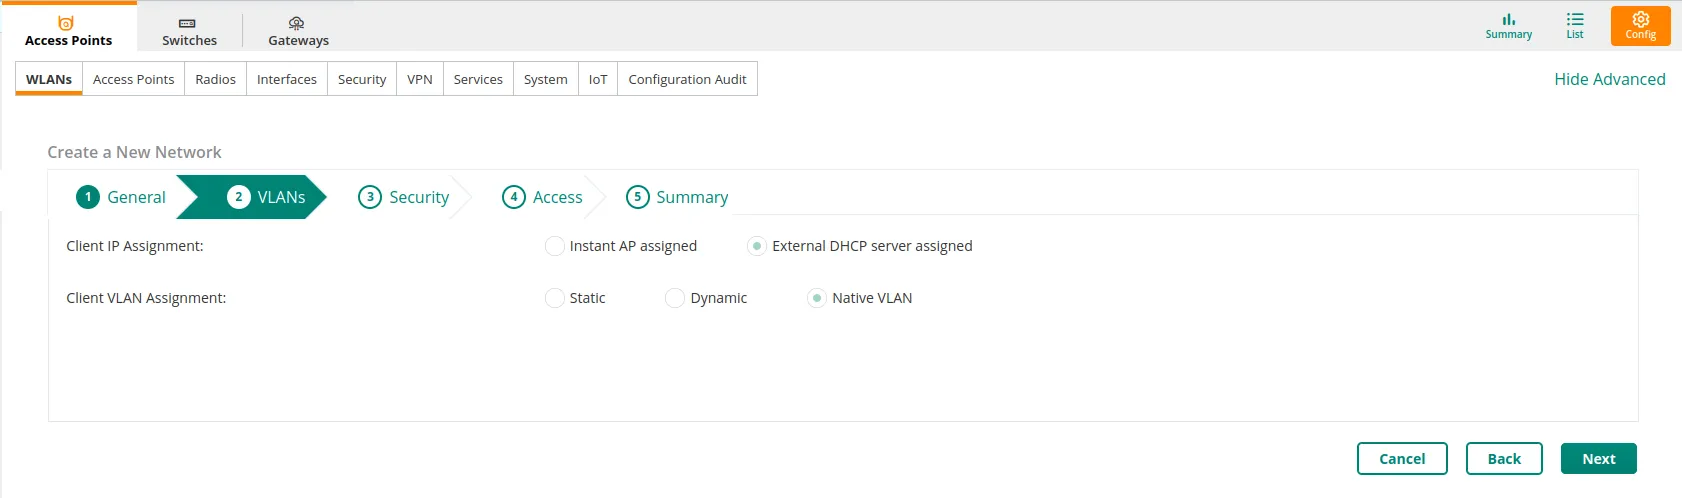
In the “VLANs” section, configure according to your network. For this guide we’ll proceed with default settings.
Click Next in the lower right corner.
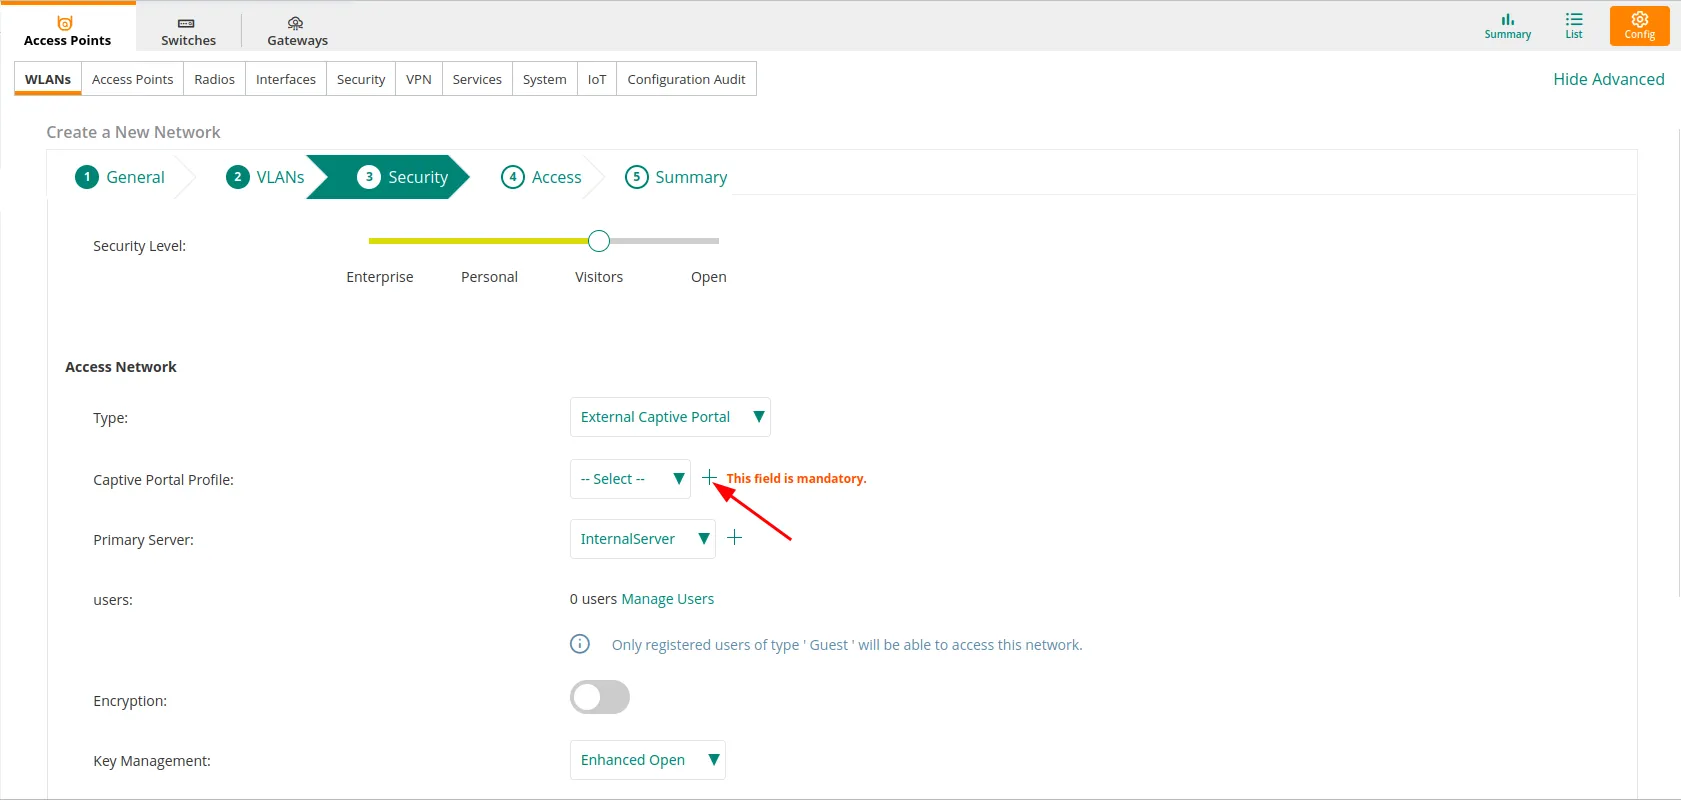
In the “Security” settings, configure as follows:
| Security level | Visitors |
|---|---|
| Type | External Captive Portal |
Next in the Captive Portal Profile section, click on + as marked at the screenshot below.
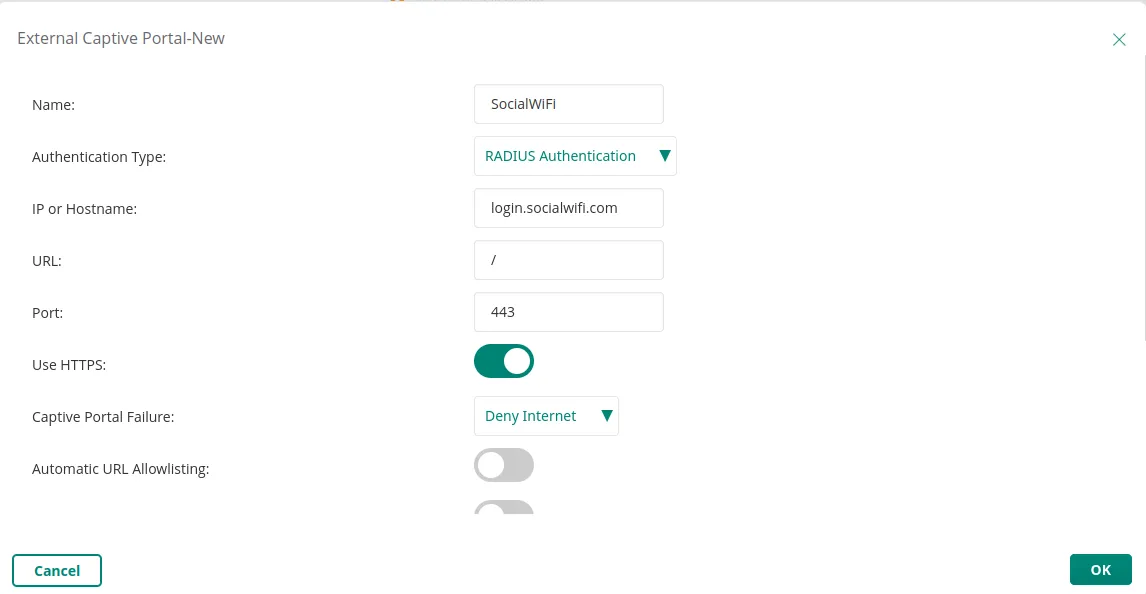
You should see a pop up window appear, configure as follows:
| Name | SocialWiFi |
|---|---|
| Type | RADIUS Authentication |
| IP or hostname | login.socialwifi.com |
| URL | / |
| Port | 443 |
| Use HTTPS | Enabled |
| Captive portal failure | Deny Internet |
| Automatic URL Whitelisting | Disabled |
| Server offload | Disabled |
| Prevent frame overlay | Disabled |
| Use VC IP in Redirect URL | Disabled |
| Redirect URL | Leave empty |
Click OK in the lower right corner.
Now, in the Primary Server section, click on + as marked at the screenshot below.
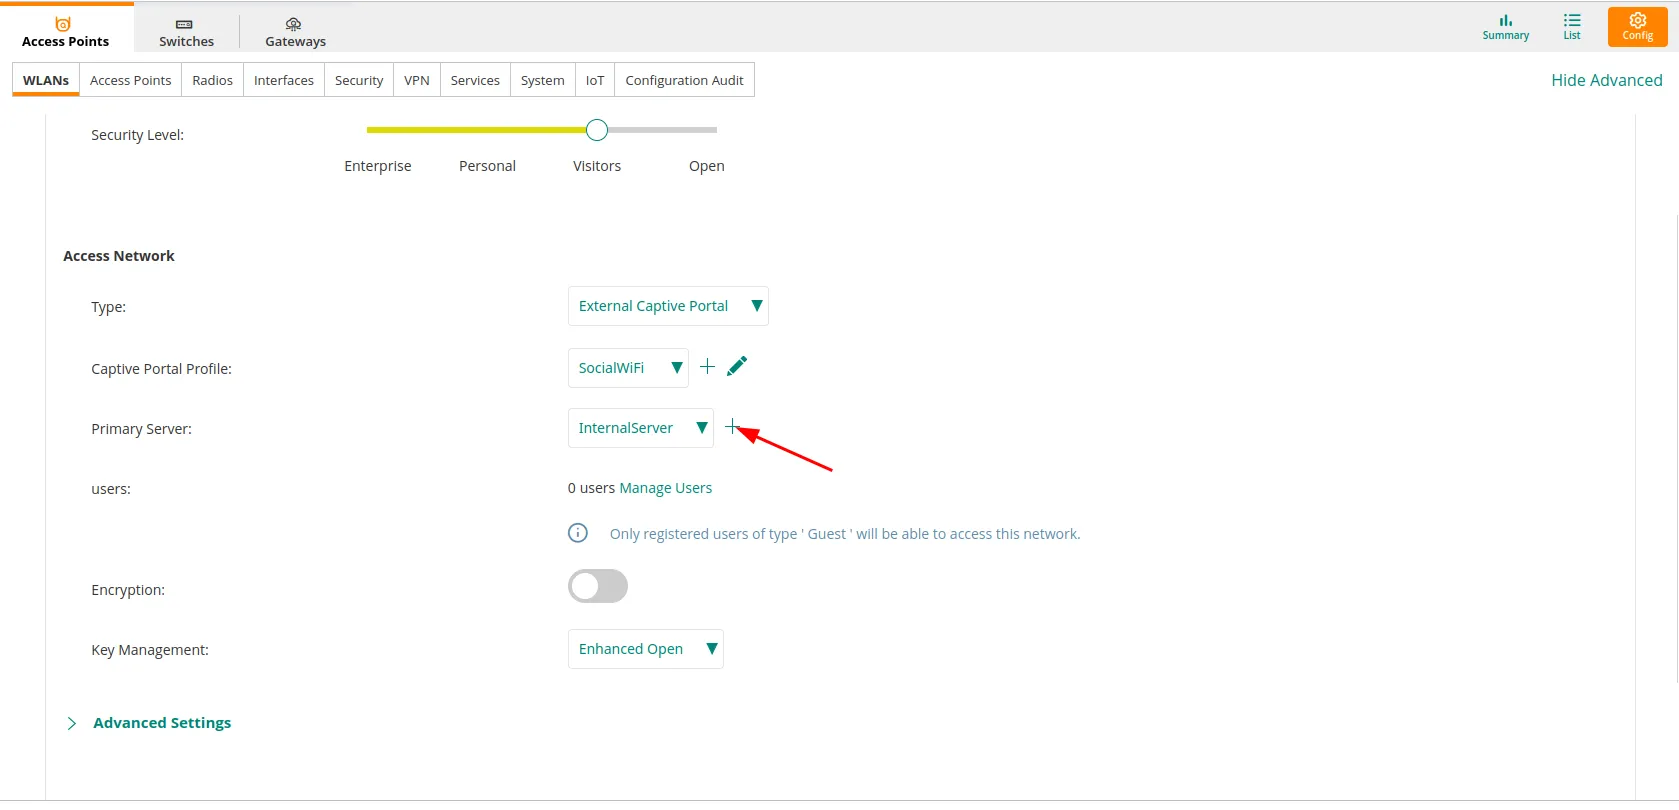
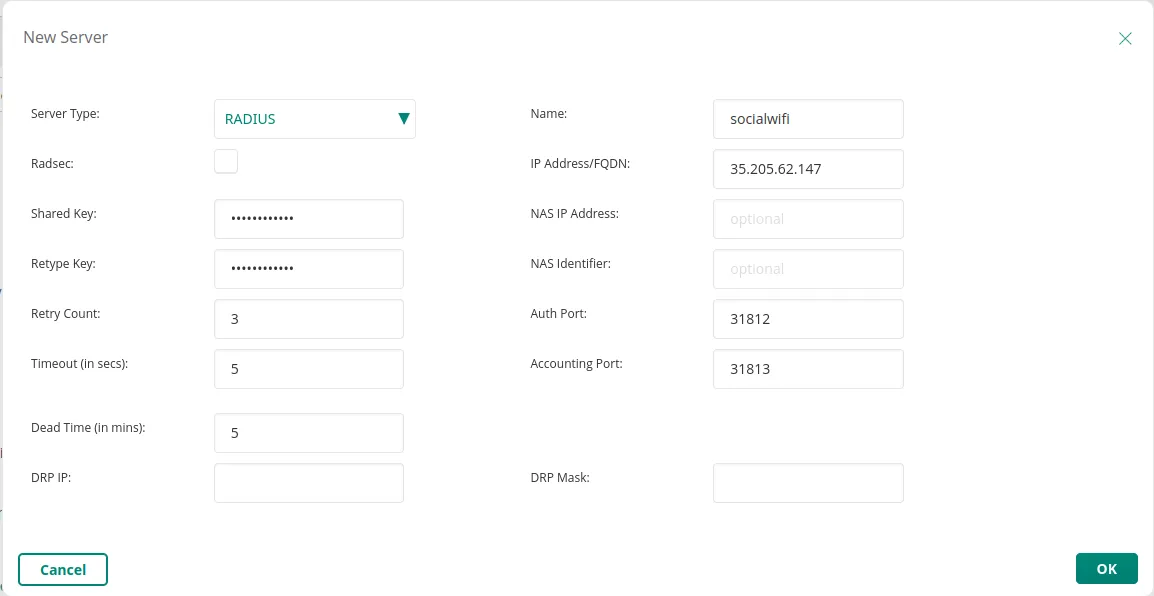
You should see a pop up window appear, configure as follows:
| Type | RADIUS |
|---|---|
| Name | socialwifi |
| RadSec | Disabled |
| IP Address | 35.205.62.147 |
| Auth Port | 31812 |
| Accounting Port | 31813 |
| Shared Key | Radius Secret available in Access Points tab of the Social WiFi Panel |
| Retype Key | Repeat above |
| Timeout | 5 sec |
| Retry Count | 3 |
Click OK in the lower right corner.
Walled Garden
Next, scroll down and in the “Advanced Settings” section, open “Walled Garden”.
Under “Allowlist” click on + Add.
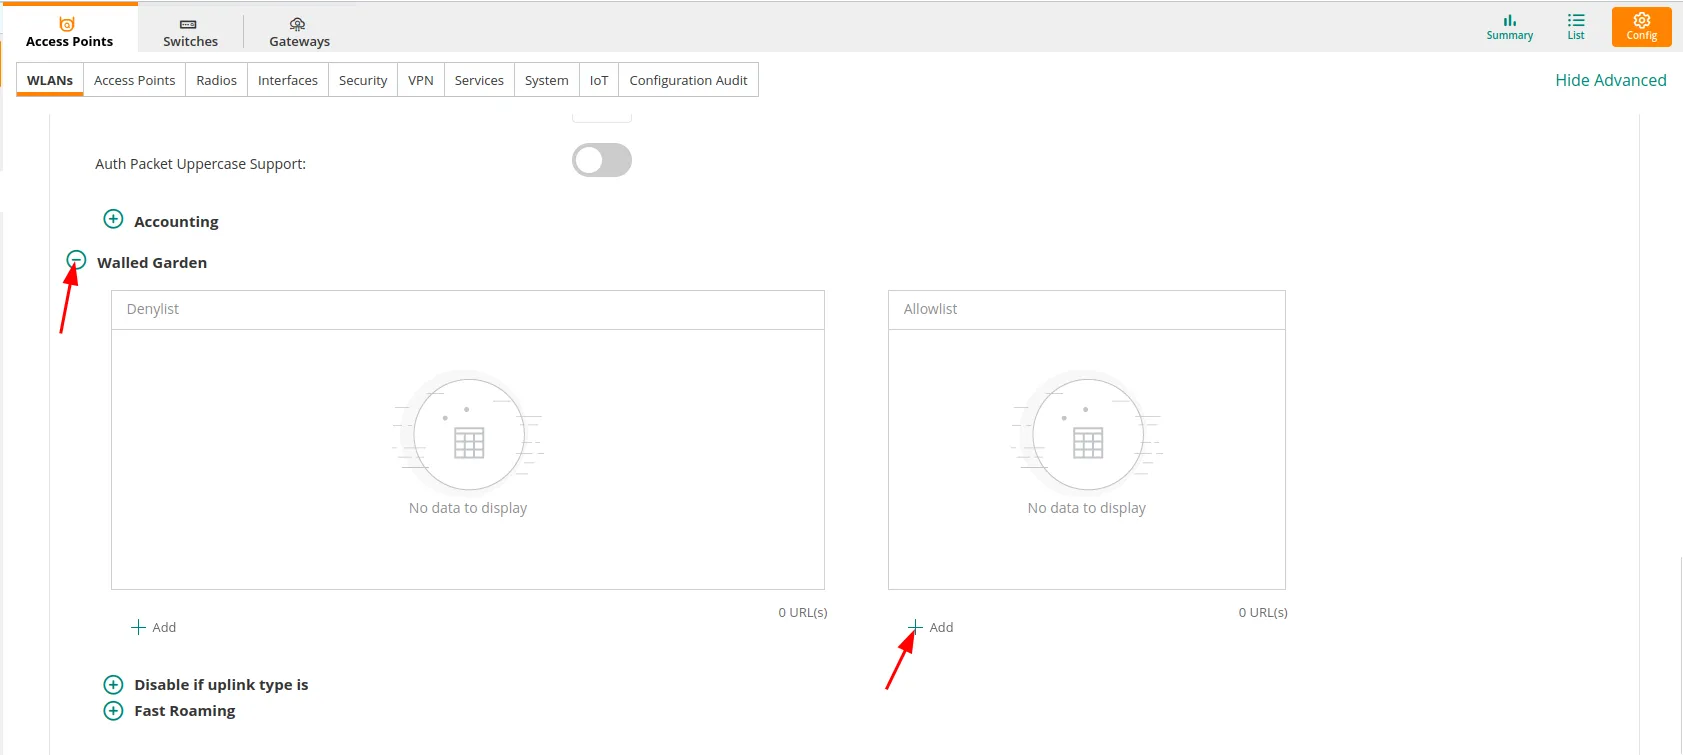
You should see the pop up window. Add the domains one by one and confirm by click on OK for each domain listed below.
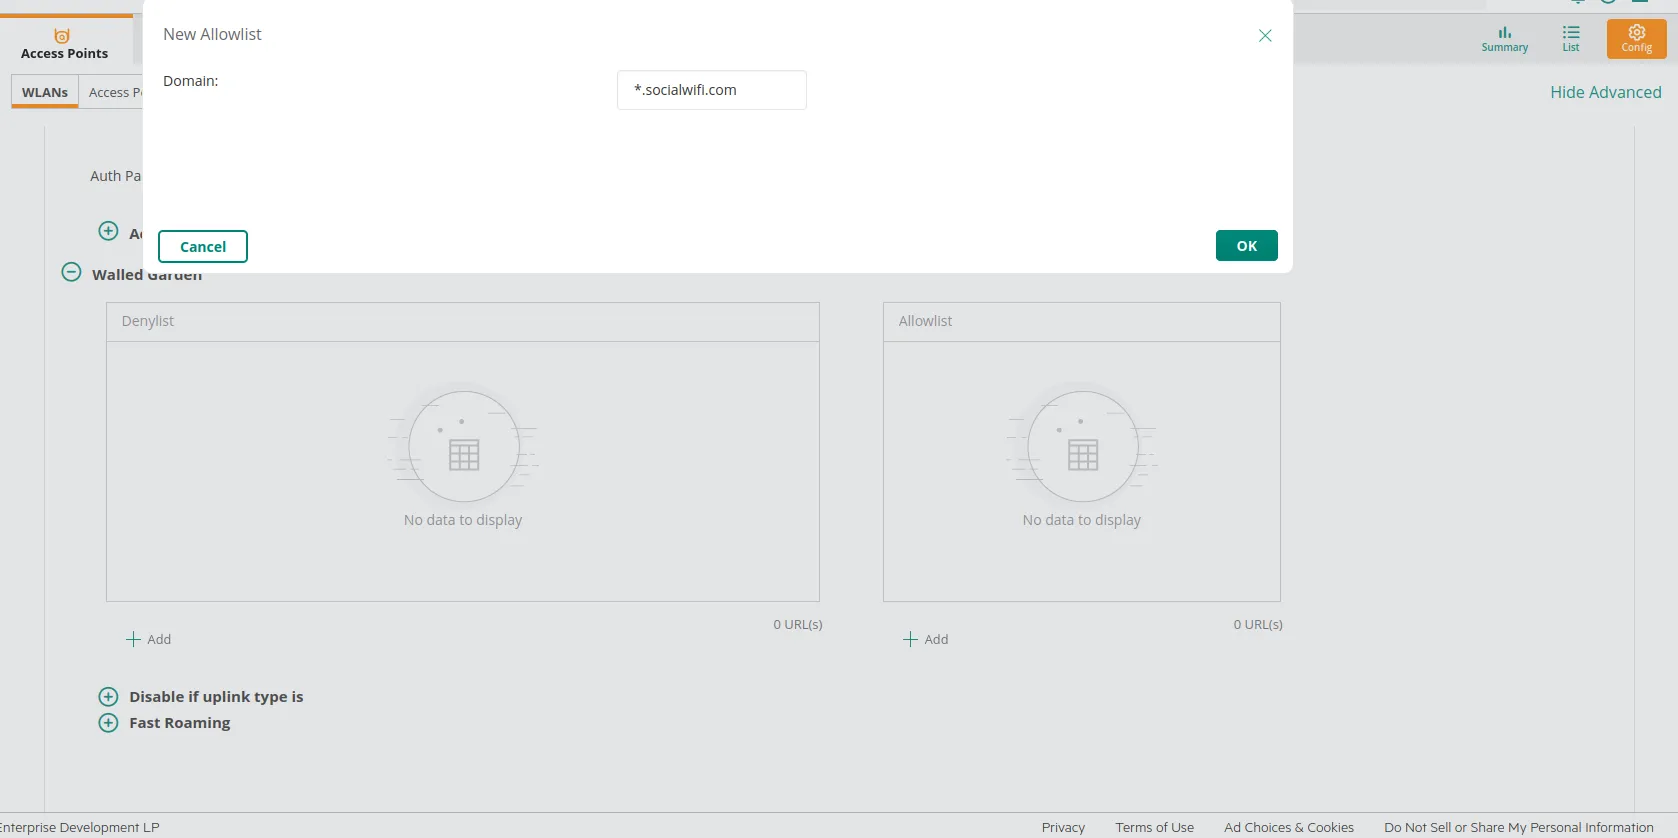
*.socialwifi.comsw-login.comfacebook.com*.facebook.com*.fbcdn.netlinkedin.com*.linkedin.com*.licdn.comtwitter.comapi.twitter.comx.comapi.x.com*.twimg.comwhatsapp.com*.whatsapp.net*.whatsapp.comconnect.facebook.netwww.facebook.comwww.googletagmanager.comwww.googleadservices.comgoogleads.g.doubleclick.net*.youtube.com*.ytimg.com*.googlevideo.comyt3.ggpht.com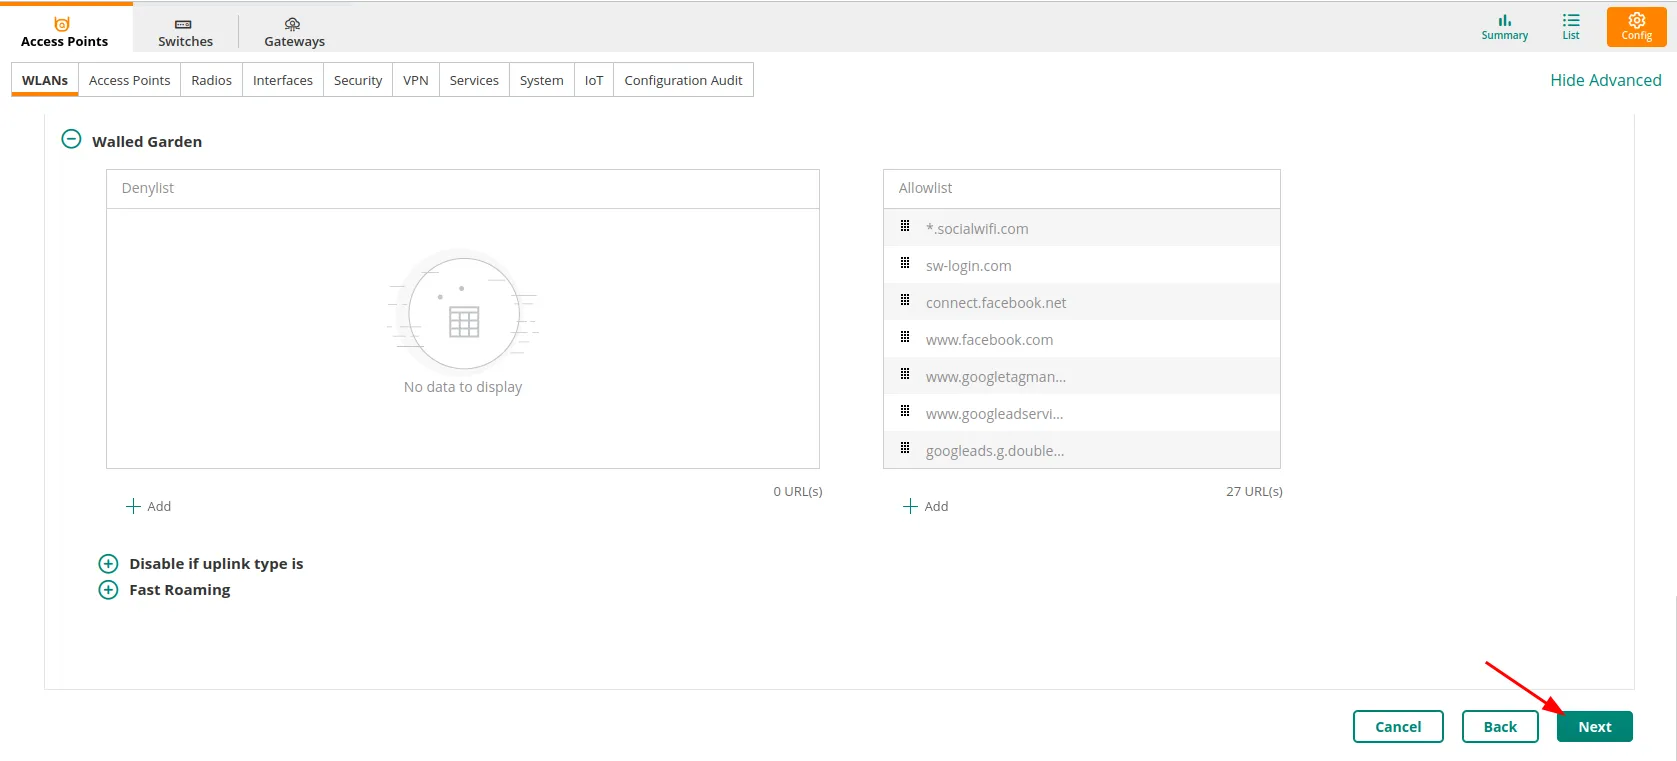
After adding all the domains, click on Next.
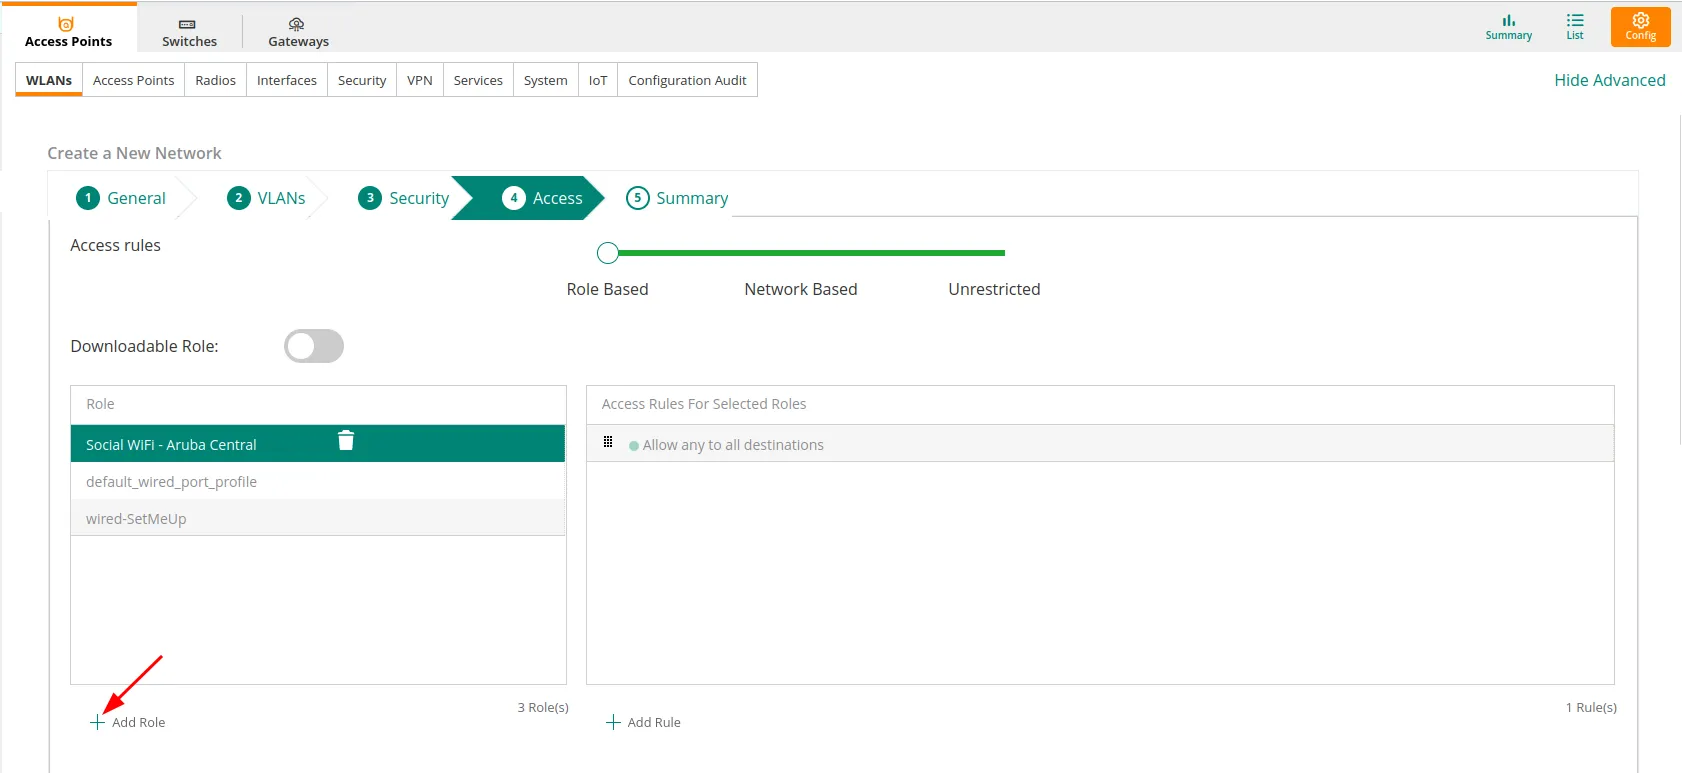
Assign pre-authentication role
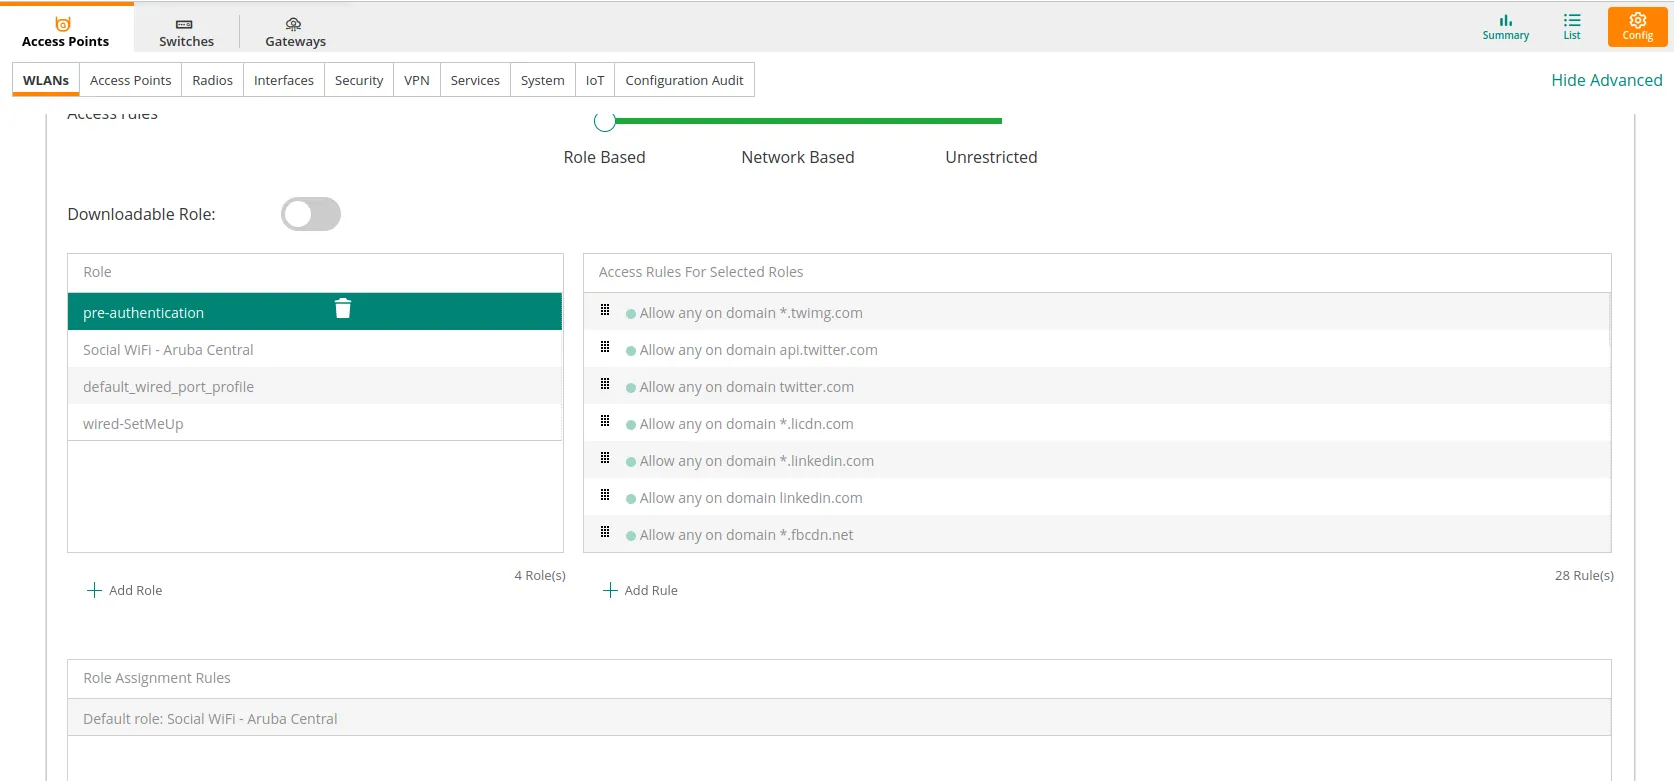
In the “Access” settings, select Role Based.
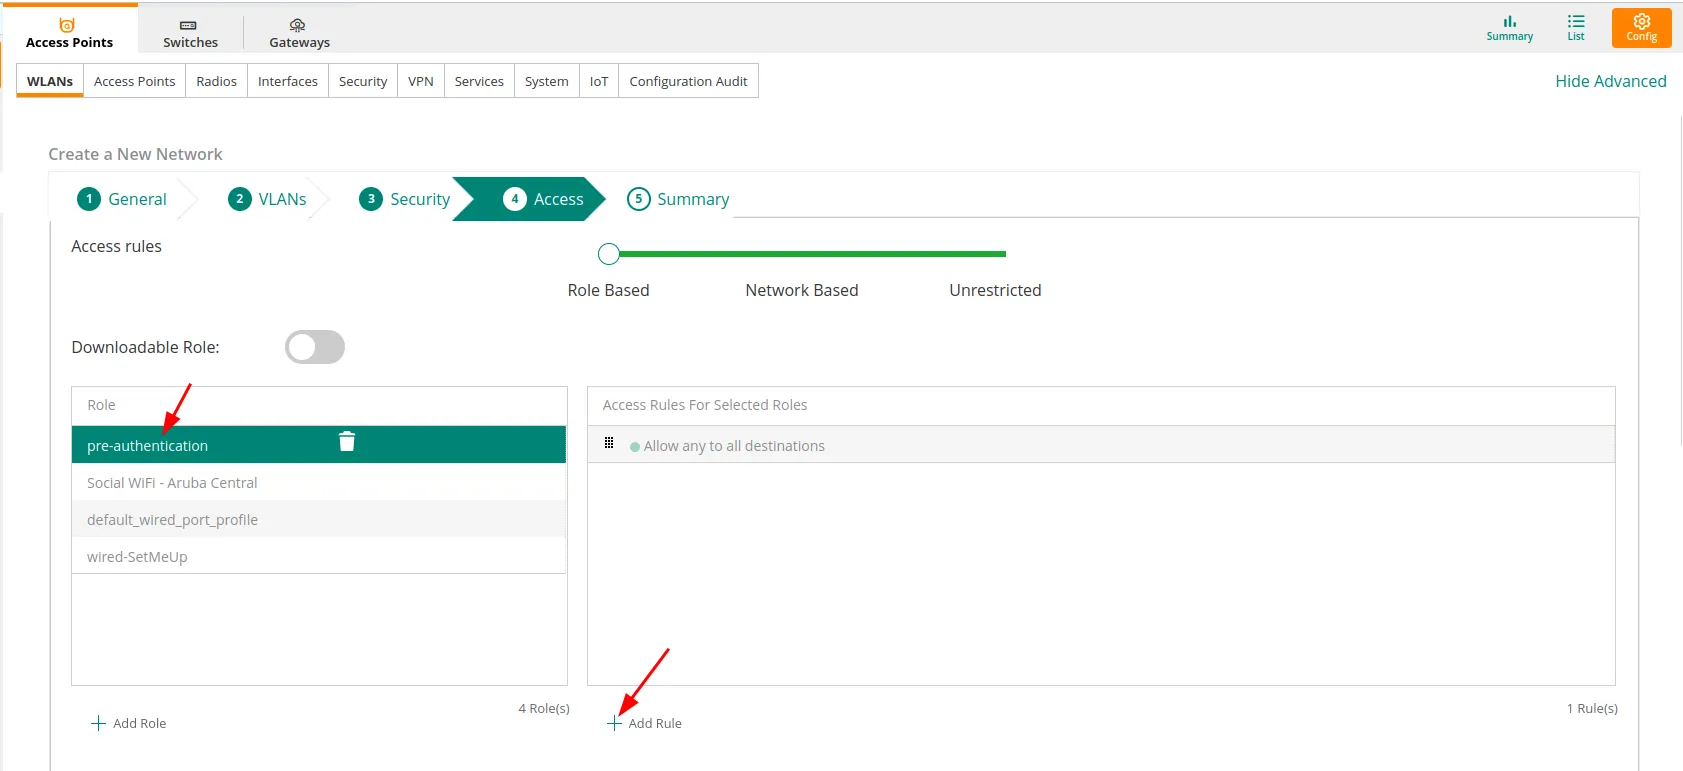
Scroll down and under the “Role” section click on + Add Role. Add the role named “pre-authentication role”.
After creating the role, select it and under “Access Rules For Selected Roles” click on + Add Rule.
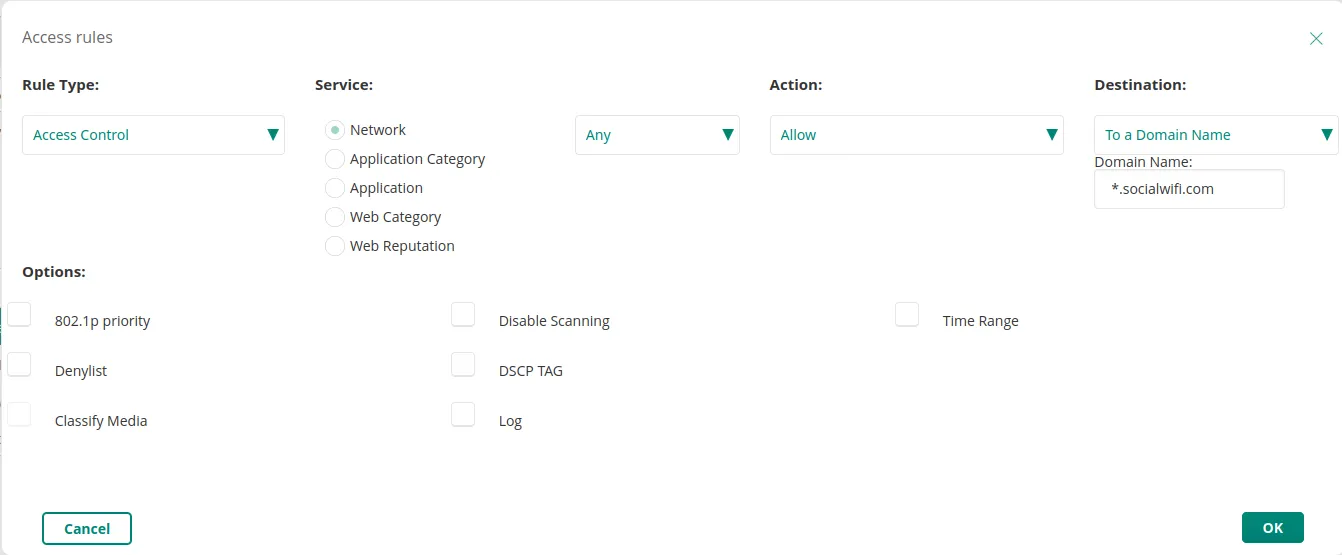
You should see the pop up window. Add each domain from the walled garden with the settings listed below:
| Rule Type | Access Control |
|---|---|
| Service | Network |
| Action | Any, Allow |
| Destination | To a Domain Name |
| Domain name | Add each domain from the Walled Garden section |
Click OK after adding each domain.
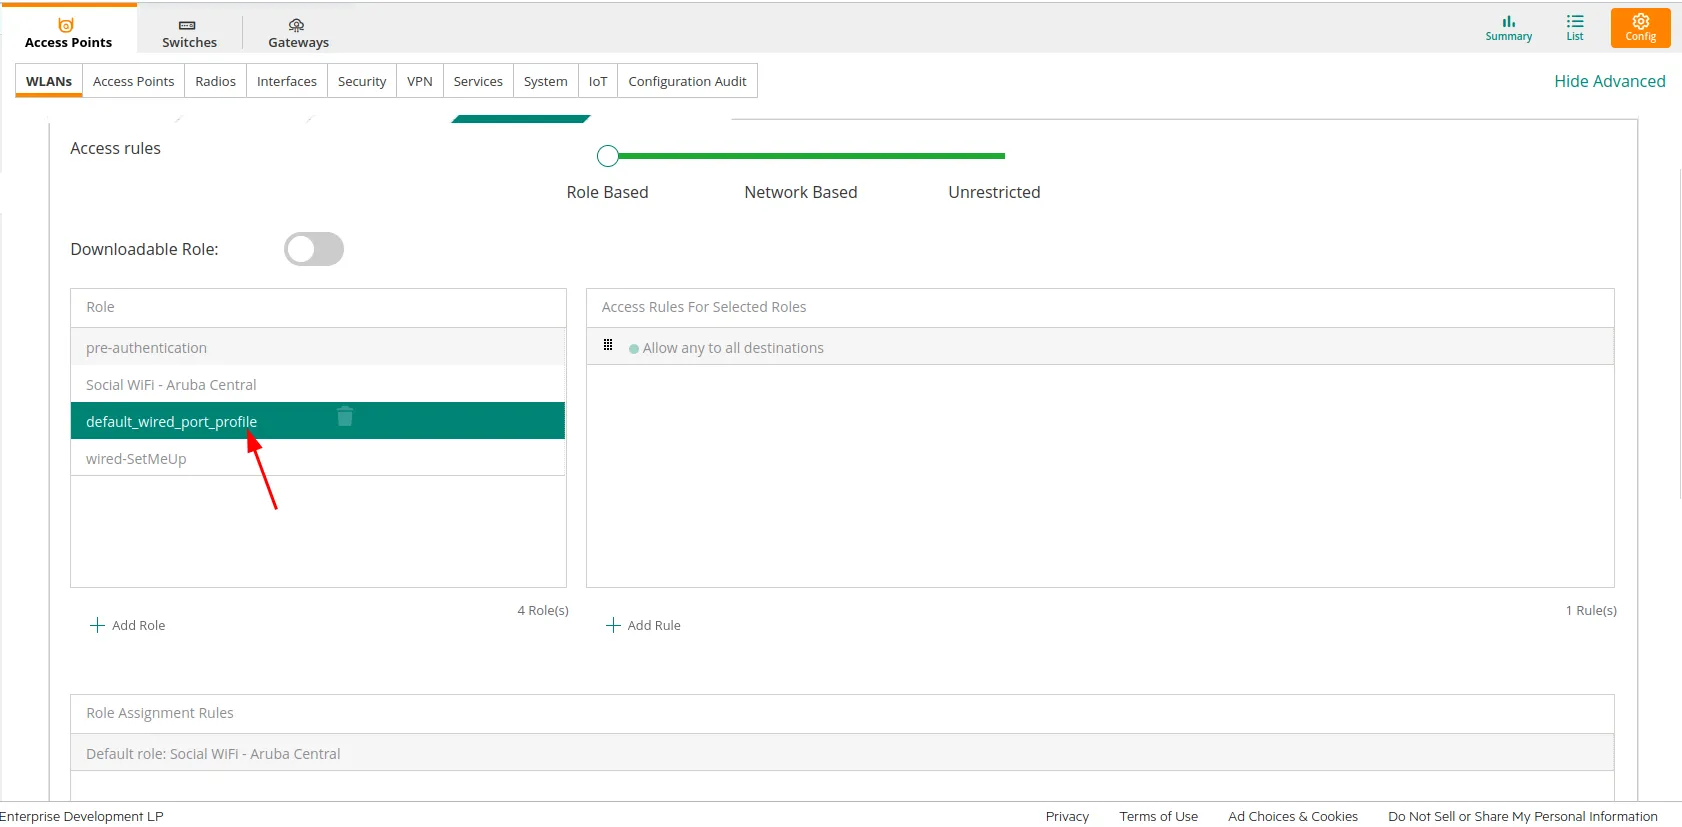
After adding all the domains, select default_wired_port_profile.
Scroll down and for the “Assign Pre-Authentication Role”, make sure the checkbox is enabled and from the drop-down menu select pre-authentication rule created before.
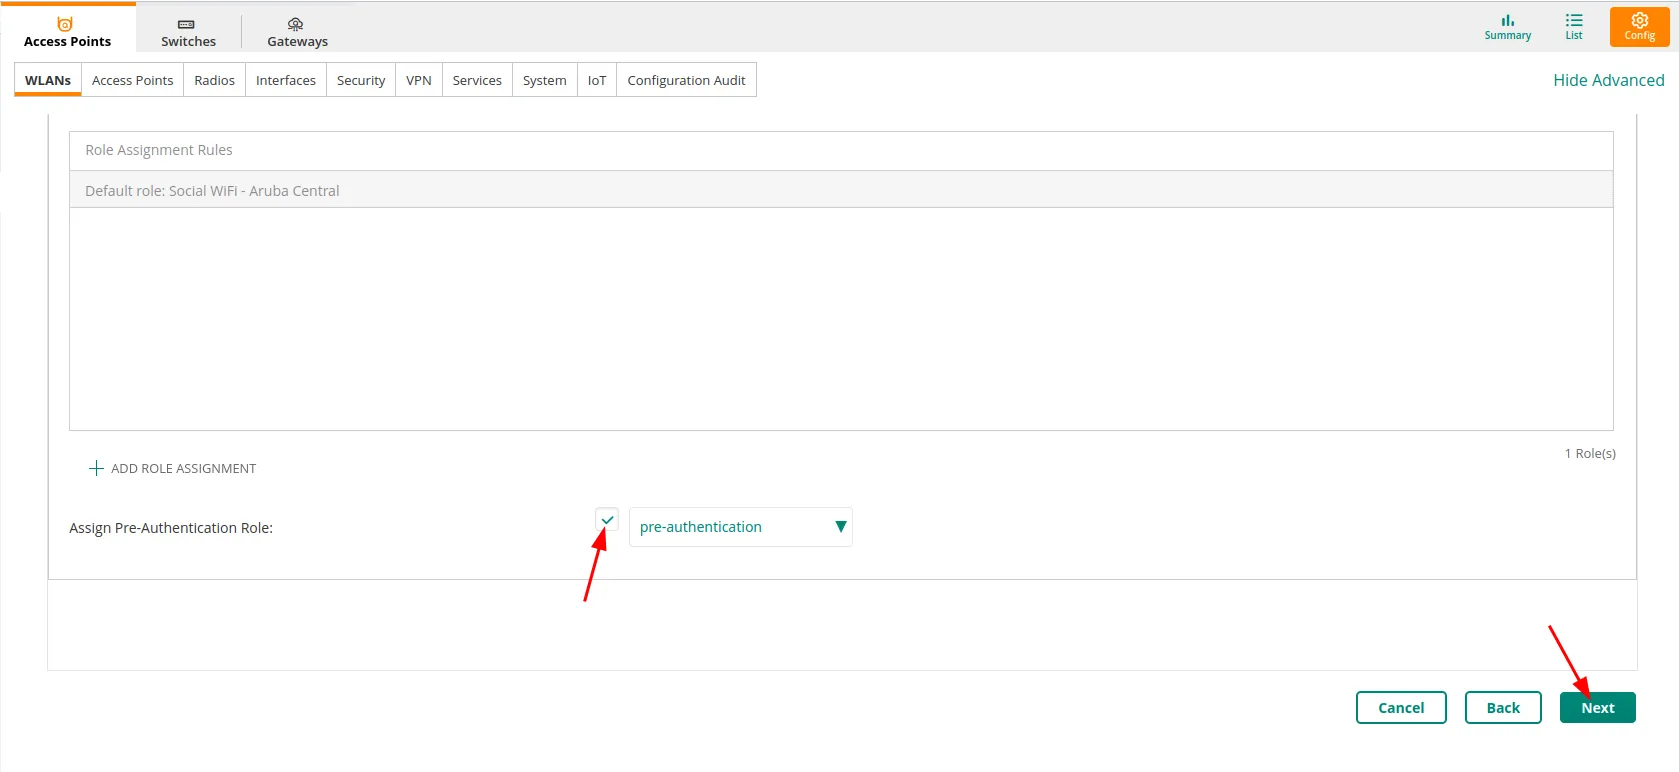
Click Next.
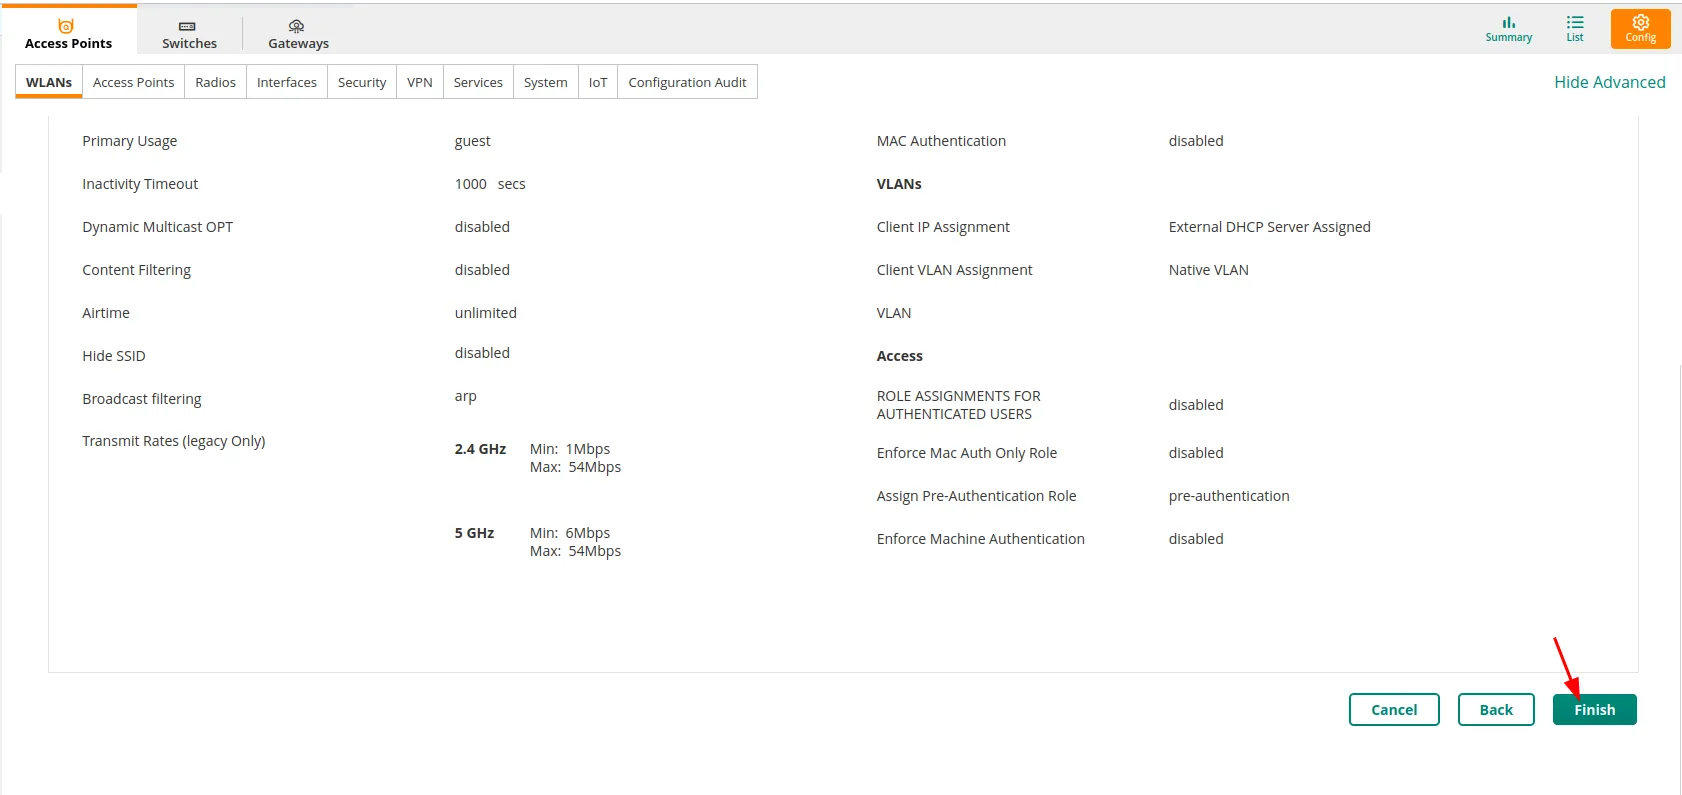
After the configuration, your last screen should look like this. Click Finish to create the network.
Adding AP into Social WiFi Panel
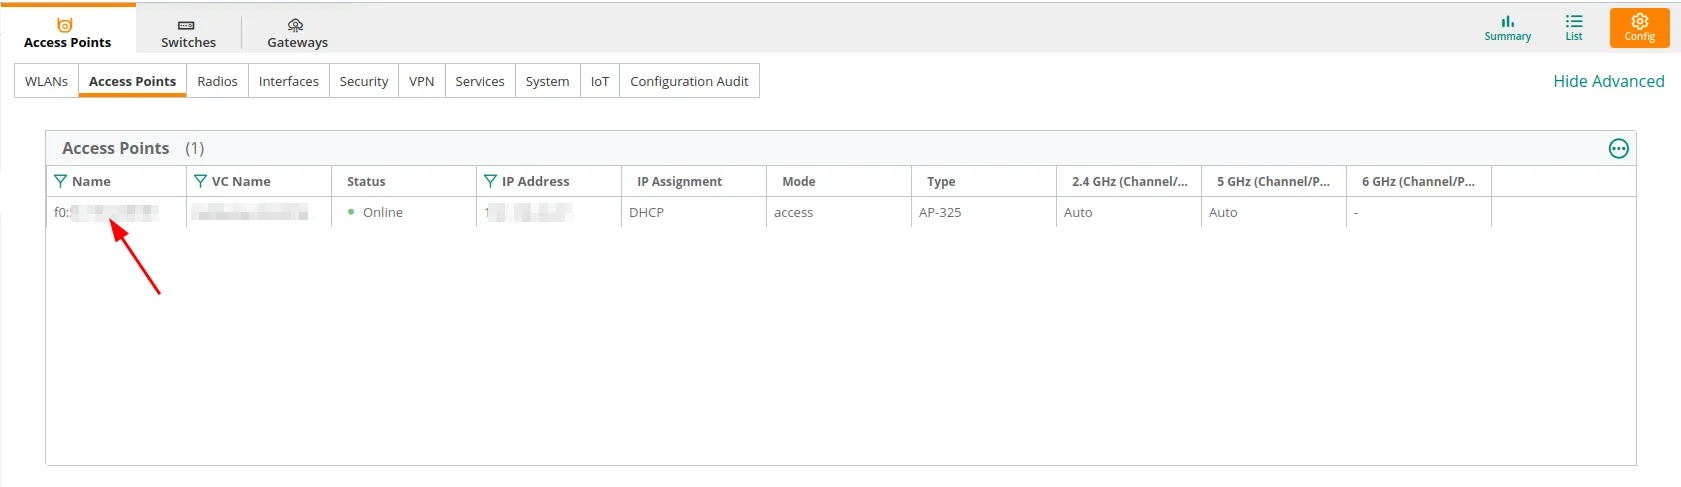
To add your Access Point to Panel, log in to your Social WiFi account, go to Access Points tab and click “Add new”.
Your device’s MAC address can be found in the Access Points section in your AP group.