TP-Link Omada
Compatibility
Social WiFi has been tested and is proven to work on the following configurations:
Omada Cloud-based Controller
- Version 5.15 and above (tested up to 6.0.0.100)
You will need a paid Standard plan on the TP Link Omada Cloud-based controller.
As of September 2024, a new Essentials controller plan is available, but lacks the required functionality to setup a Captive Portal.
Omada Software Controller
- Version 5.15 and above (tested up to 6.0.0.100)
Access Points
All Omada access points are supported. Social WiFi has been tested on:
- EAP620HD v3.20 - firmware version: 1.4.4
- EAP772 v2.2 - firmware version: 5.15.8
- EAP225 v4.0 - firmware version: 5.2.3
- EAP110 v4.0 - firmware version: 5.1.2
Access the administration panel
This guide assumes using the web based UI of the controller, which you can access by entering the IP address of the device in your browser. E.g. if the controller is installed on a local machine, enter: http://127.0.0.1:8088. Alternatively, if your device is managed from Omada Cloud, you can access the management UI from there.
The screenshots are based on a Cloud-based Controller version 5.15.18.40.
Wireless network configuration
If you don’t have a wireless network configured yet, go to Settings (1) → Wired&Wireless Networks → WLAN (2).
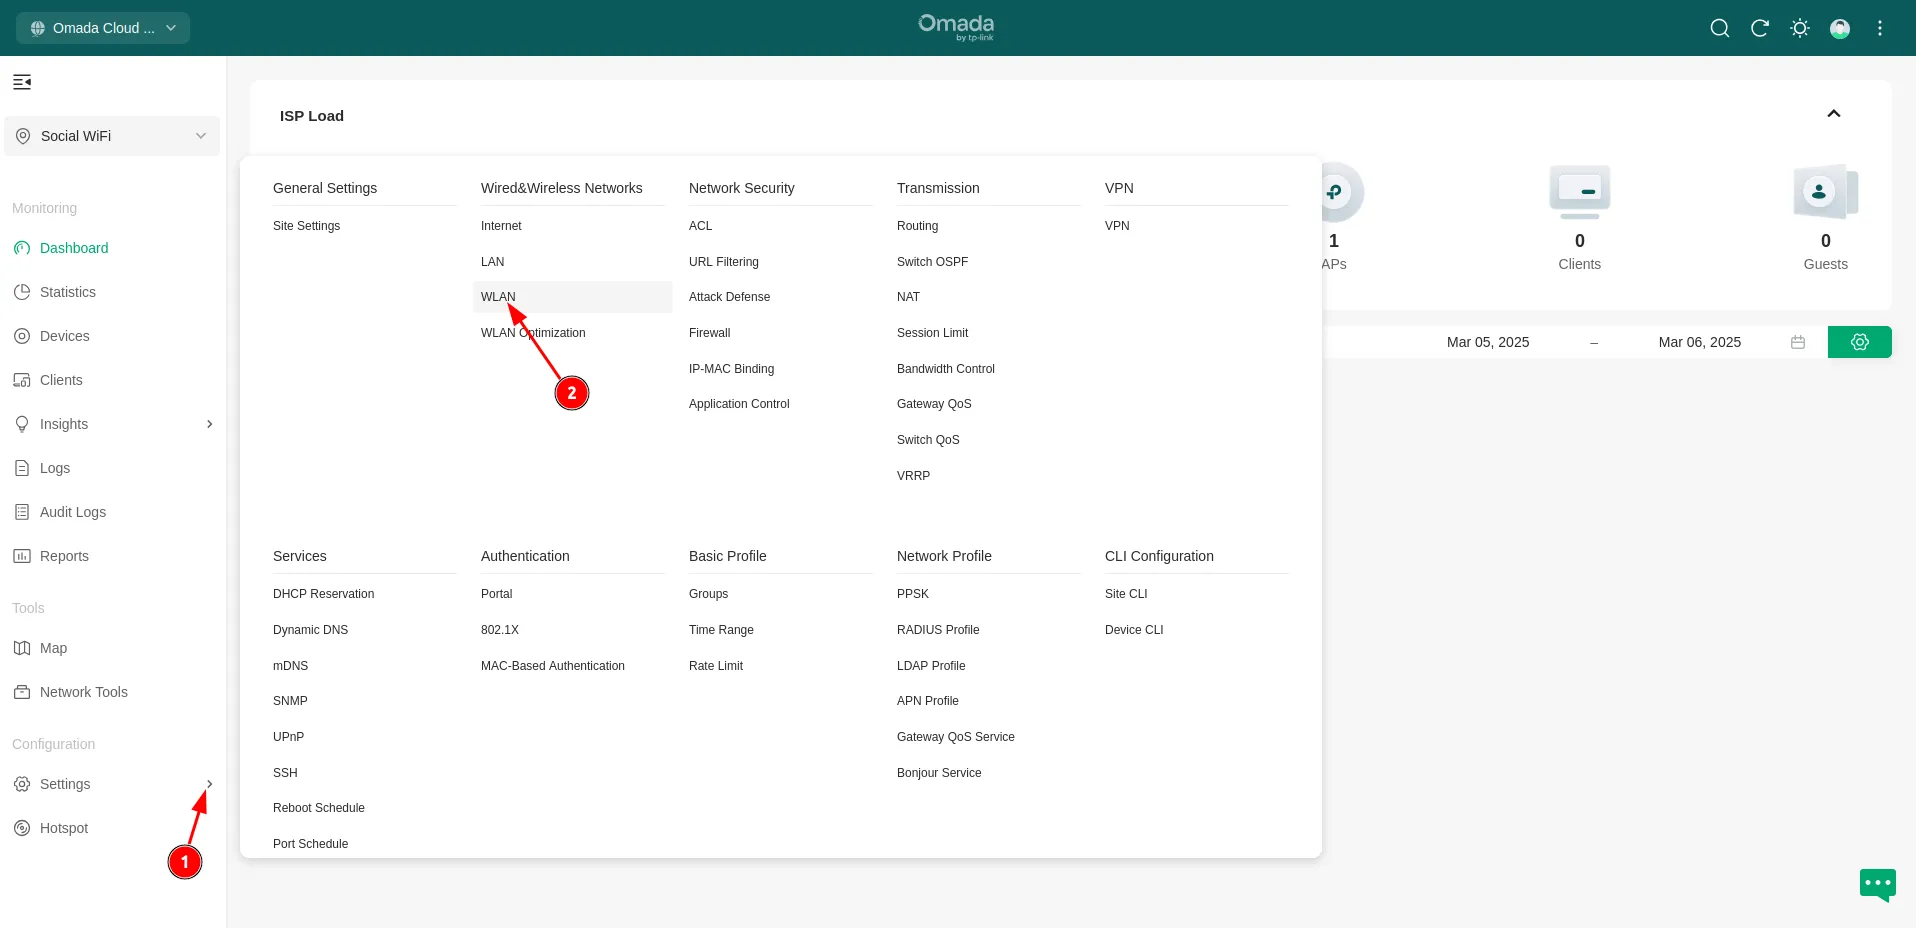
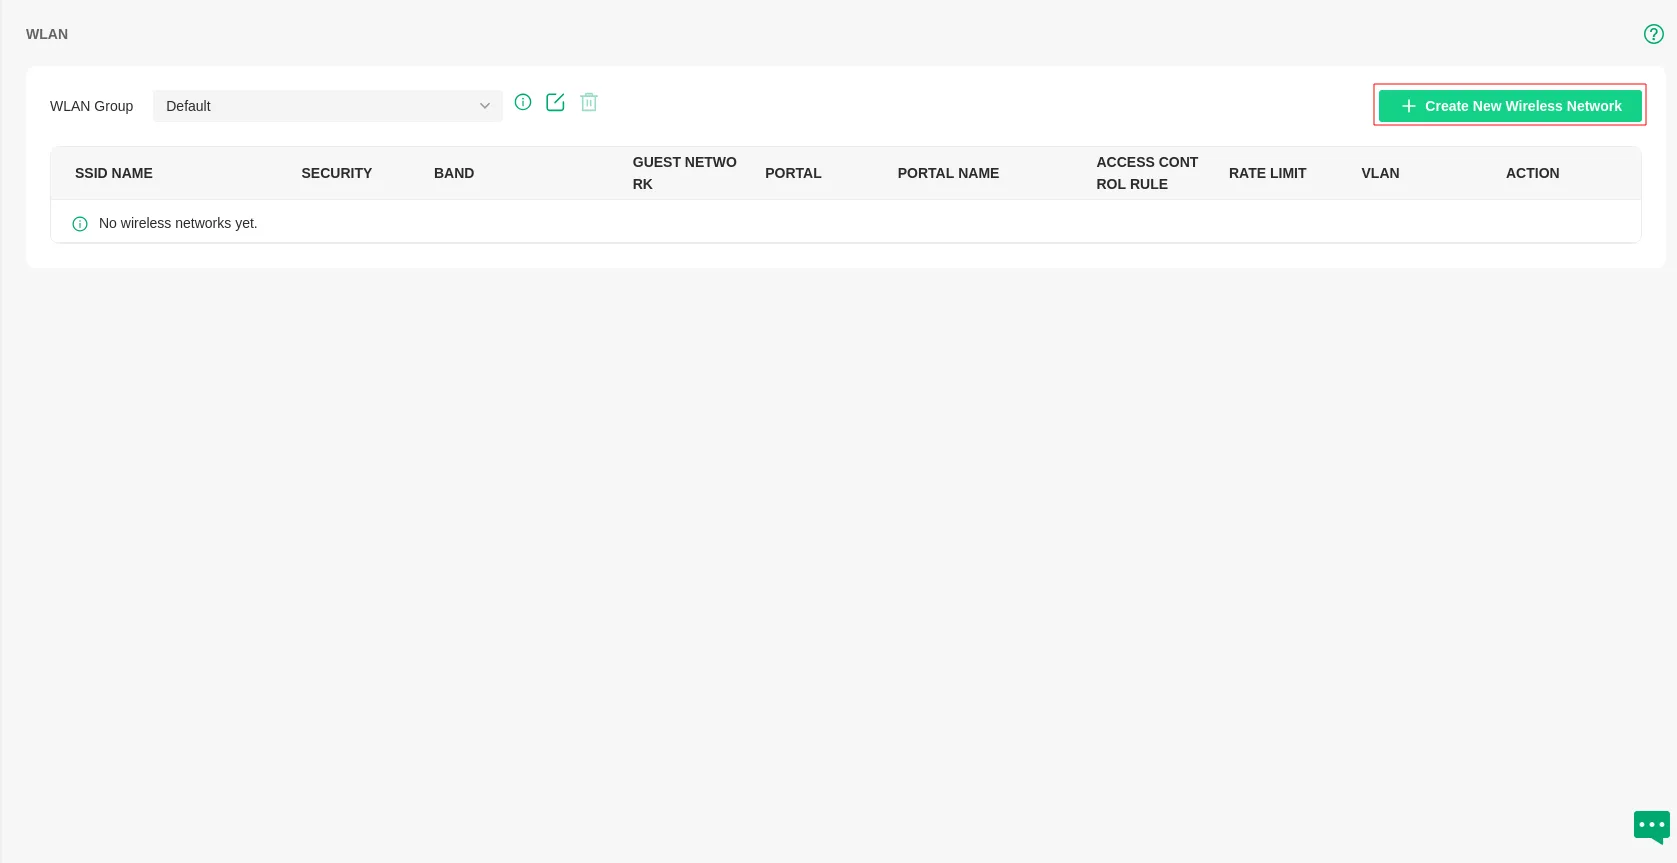
Click ”+ Create New Wireless Network”.
Configure as follows:
| Network Name (SSID) | e.g. “Social WiFi” (or any name that you want) |
|---|---|
| Device Type | EAP * |
| Band | 2.4GHz and 5GHz (or only one of them, if you prefer) |
| Guest Network | Enable |
| Security | None (preferred for guest WiFi) |
| OWE | Unchecked |
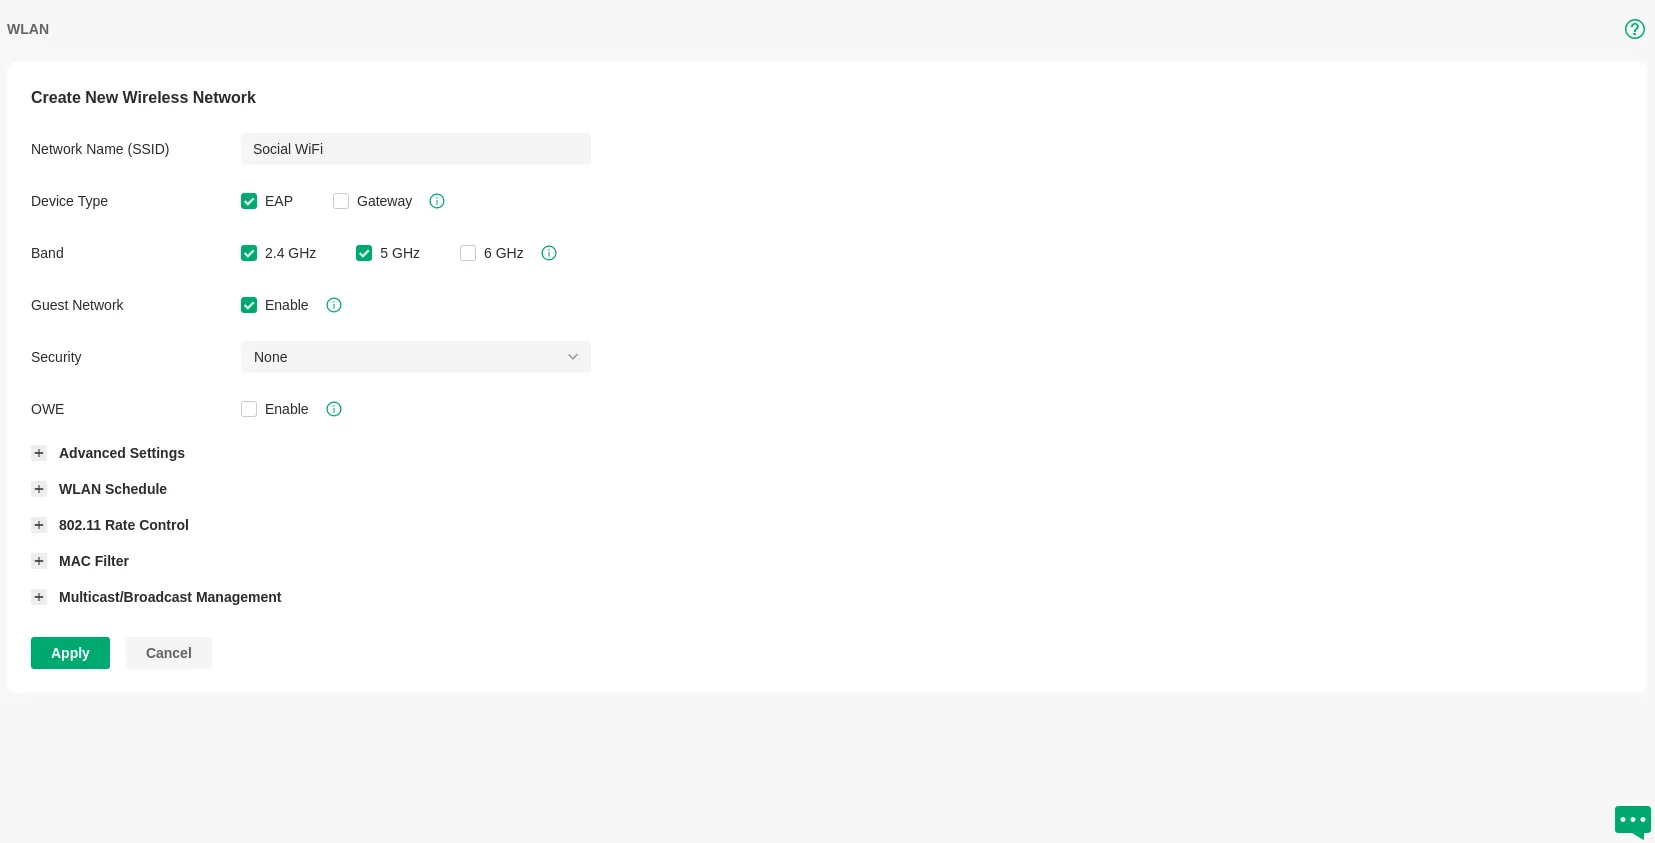
Click Apply.
RADIUS configuration
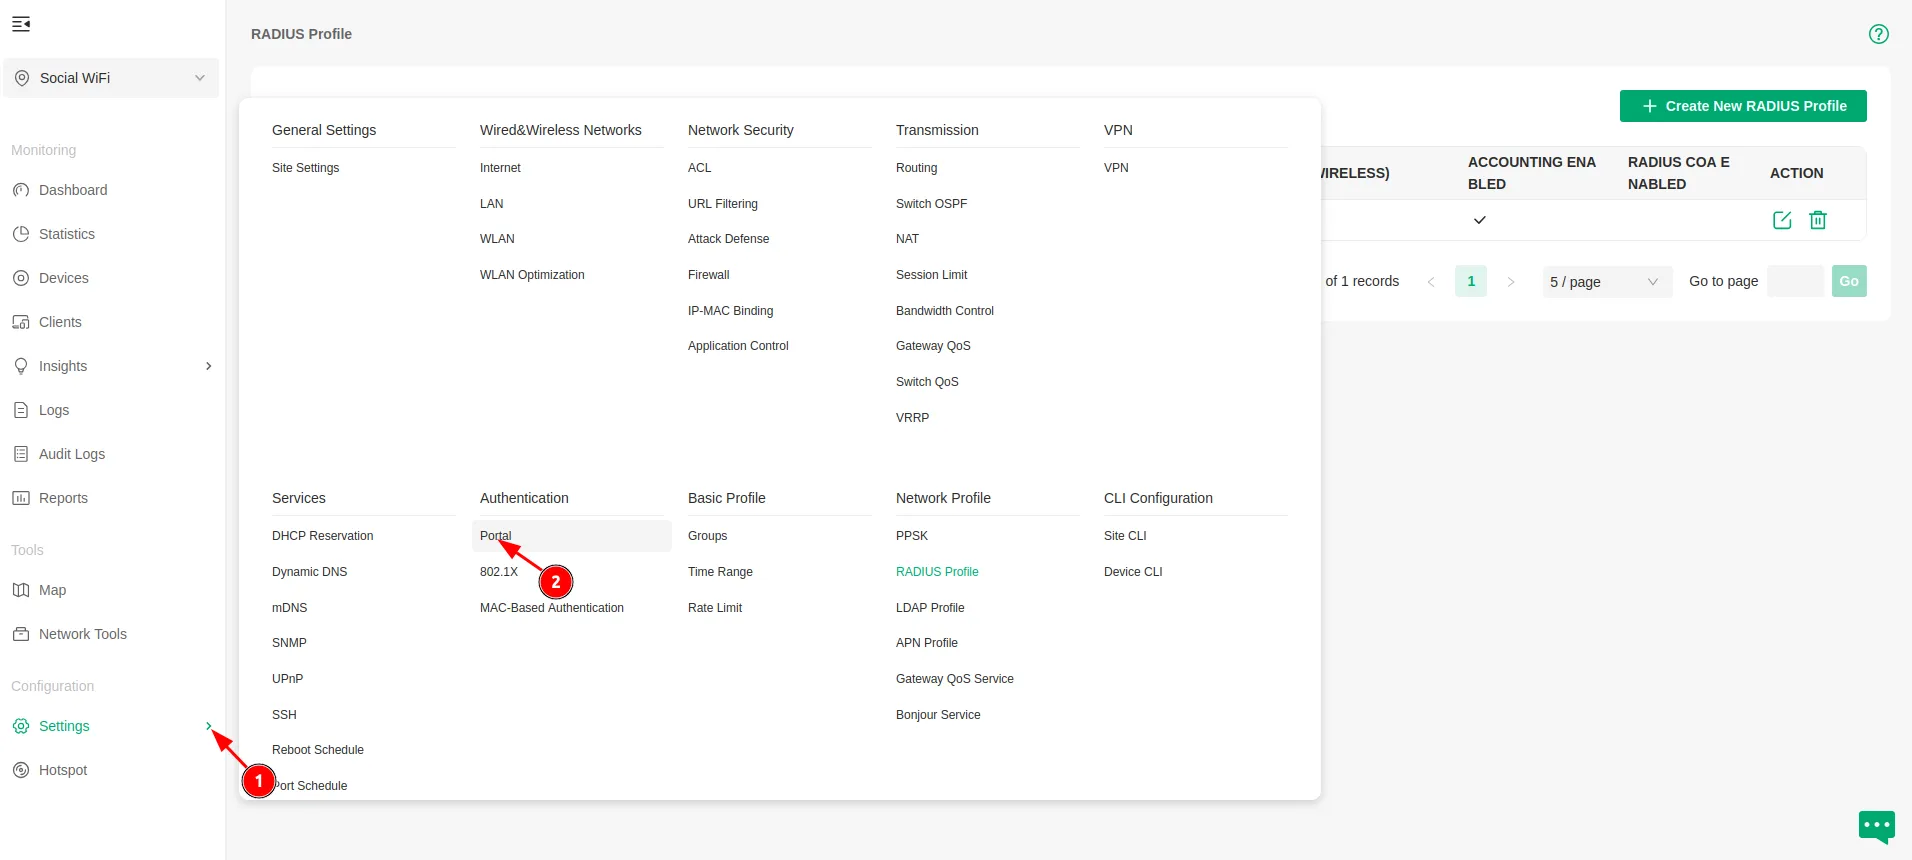
Go to Settings (1) → Network Profile → RADIUS Profile (2).
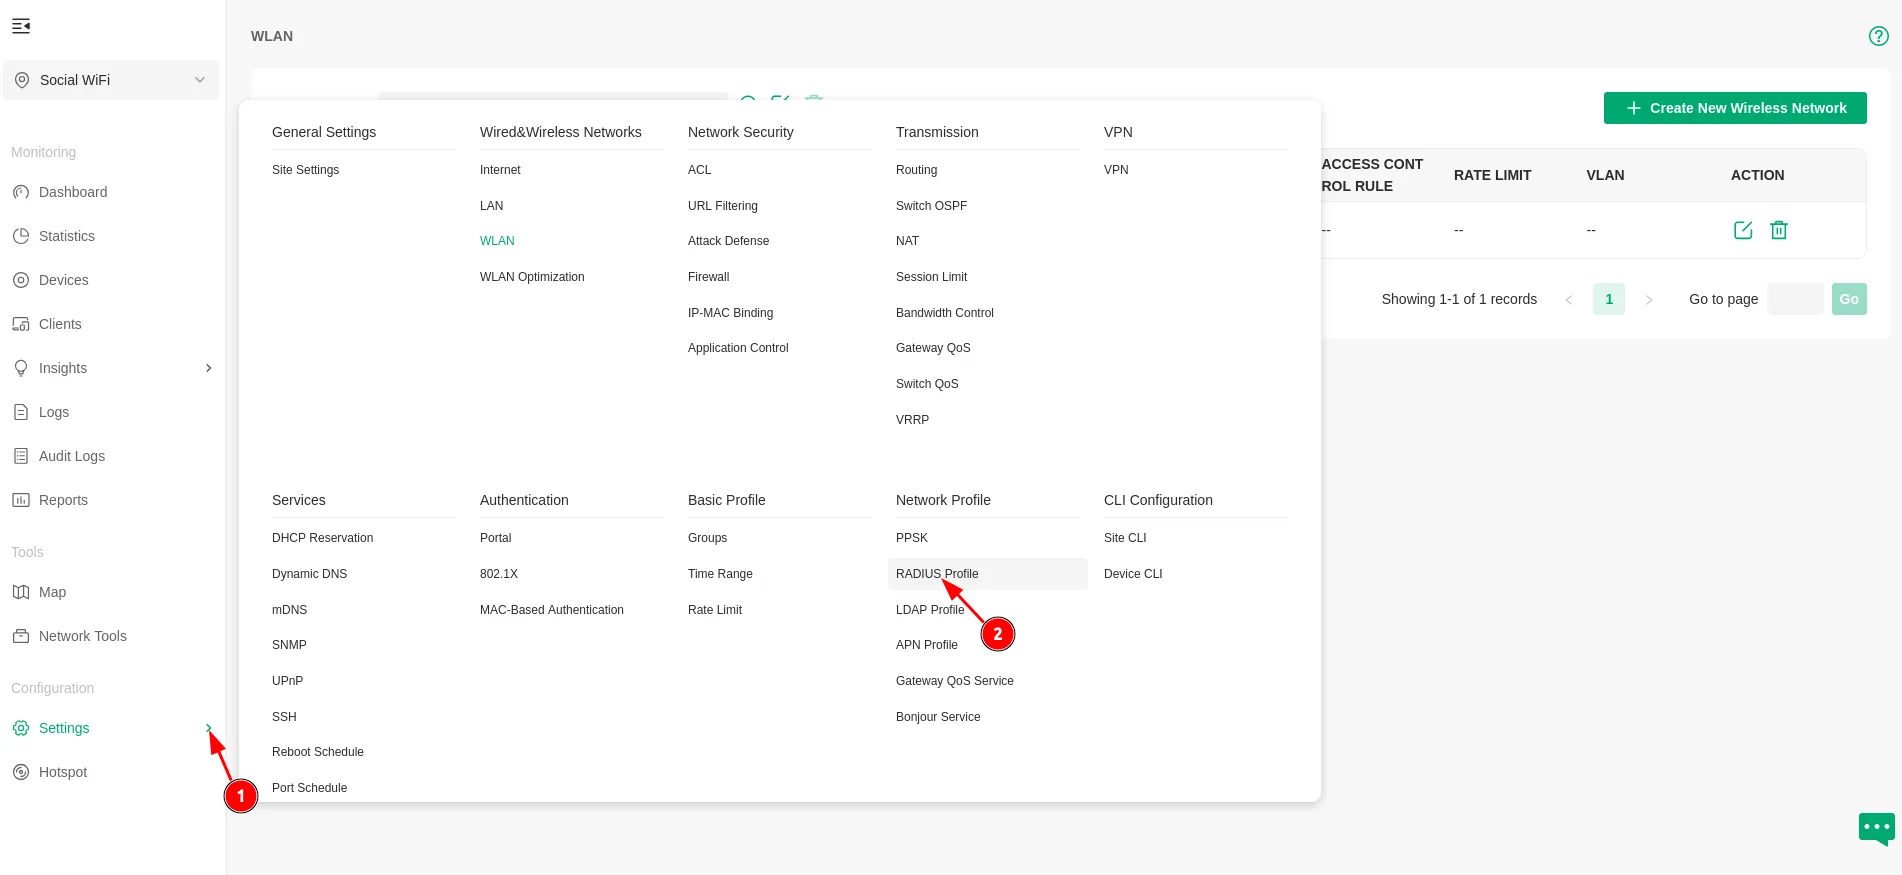
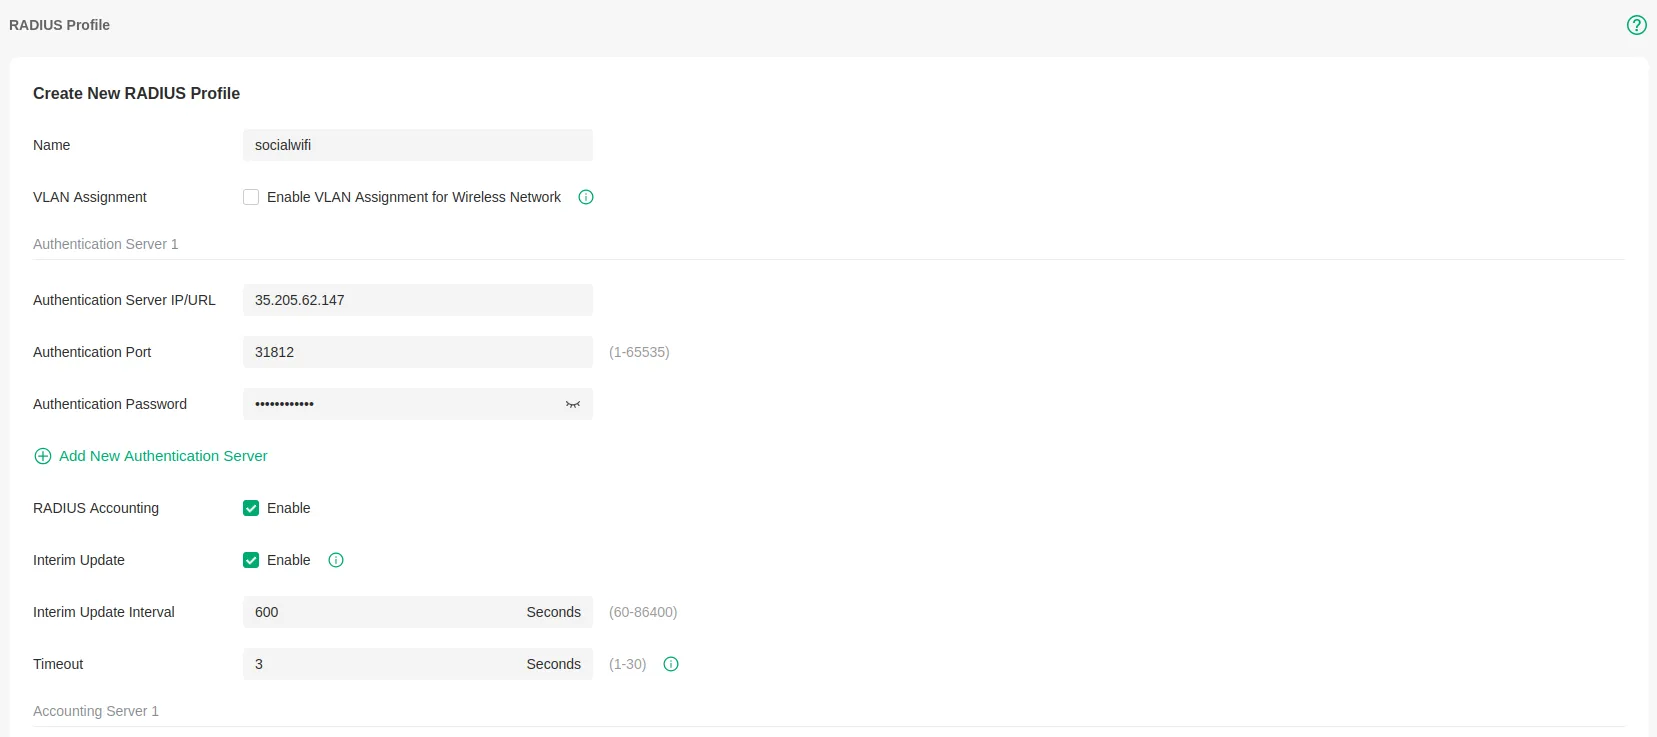
Click ”+ Create New RADIUS Profile”.

Configure as follows:
| Name | socialwifi |
|---|---|
| Authentication Server IP | 35.205.62.147 |
| Authentication Port | 31812 |
| Authentication Password | RADIUS Secret is available in Access Points tab of the Social WiFi Panel |
| RADIUS Accounting | Enable |
| Interim Update | Enable |
| Interim Update Interval | 600 |
| Timeout | 3 |
| Accounting Server IP | 35.205.62.147 |
|---|---|
| Accounting Port | 31813 |
| Accounting Password: | RADIUS Secret is available in Access Points tab of the Social WiFi Panel |
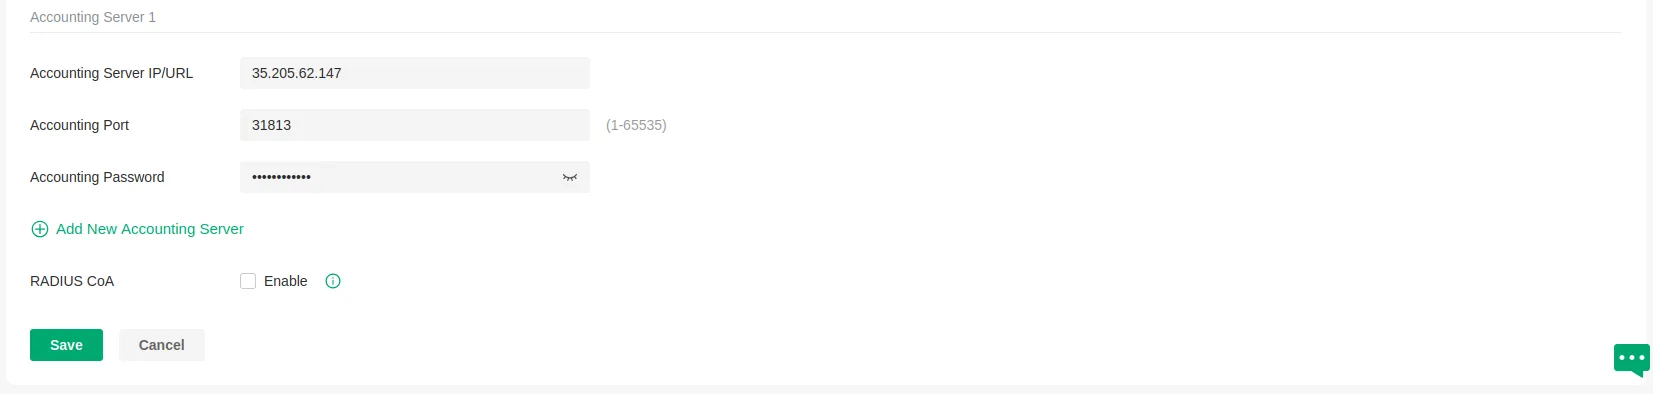
Click Save.
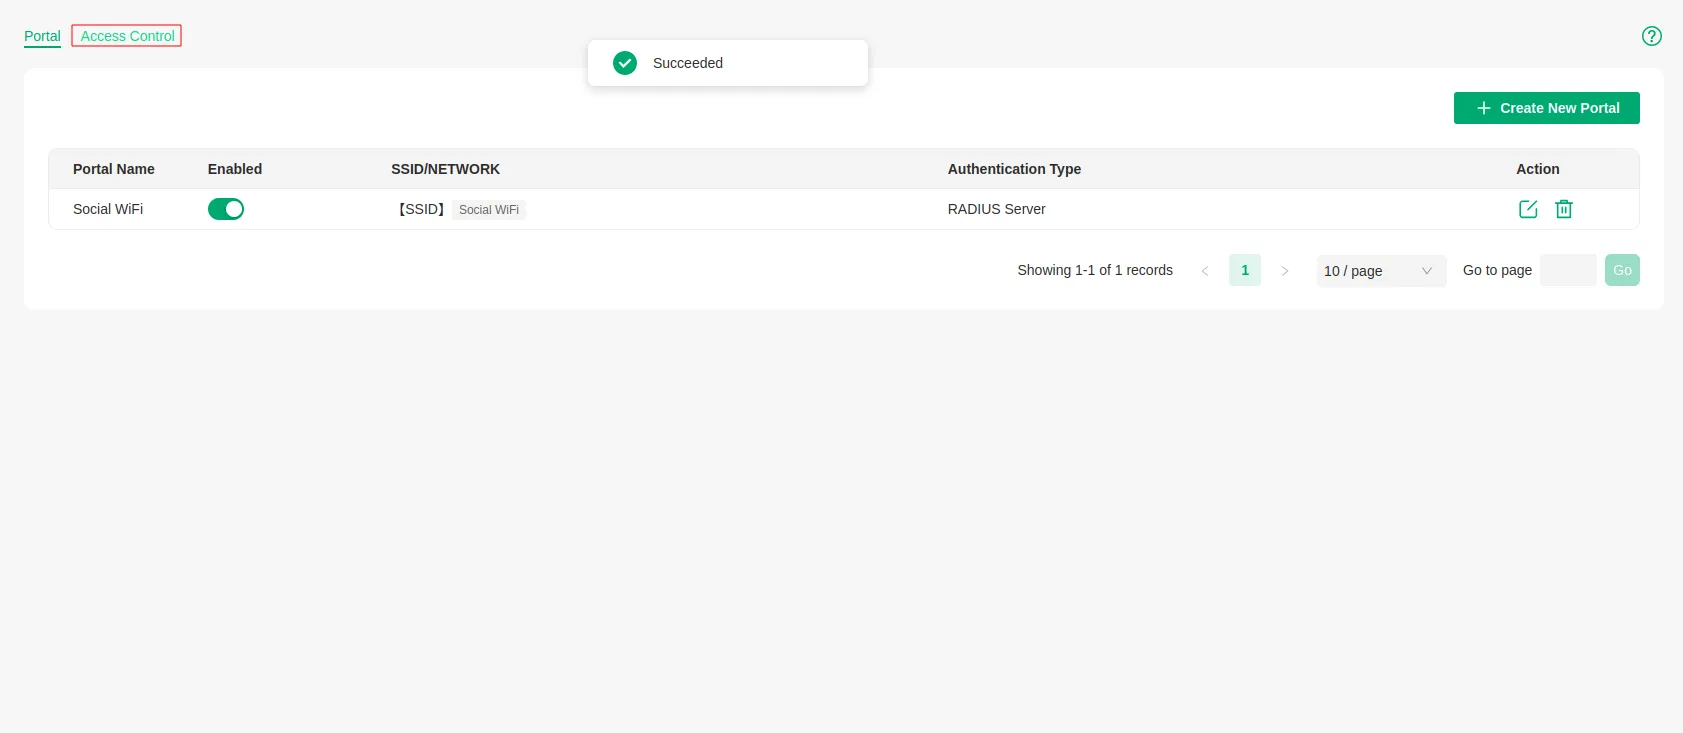
Portal configuration
Go to Settings (1) → Authentication → Portal (2).
Click ”+ Create New Portal”.

Use the following settings:
| Name | Social WiFi |
|---|---|
| Portal | Enable |
| SSID & Network | Social WiFi |
| Authentication Type | RADIUS Server |
| Authentication Timeout | 8 hours (change it, if you want to kick people sooner or later) |
| RADIUS Profile | socialwifi |
| NAS ID | Can be anything, you can leave the default value |
| Portal Logout: | Not Enabled |
| Authentication Mode | PAP |
| Portal Customization | External Web Portal: http://login.socialwifi.com |
| HTTPS Redirection | Not Enabled (recommended) |
| Landing Page | The Original URL |
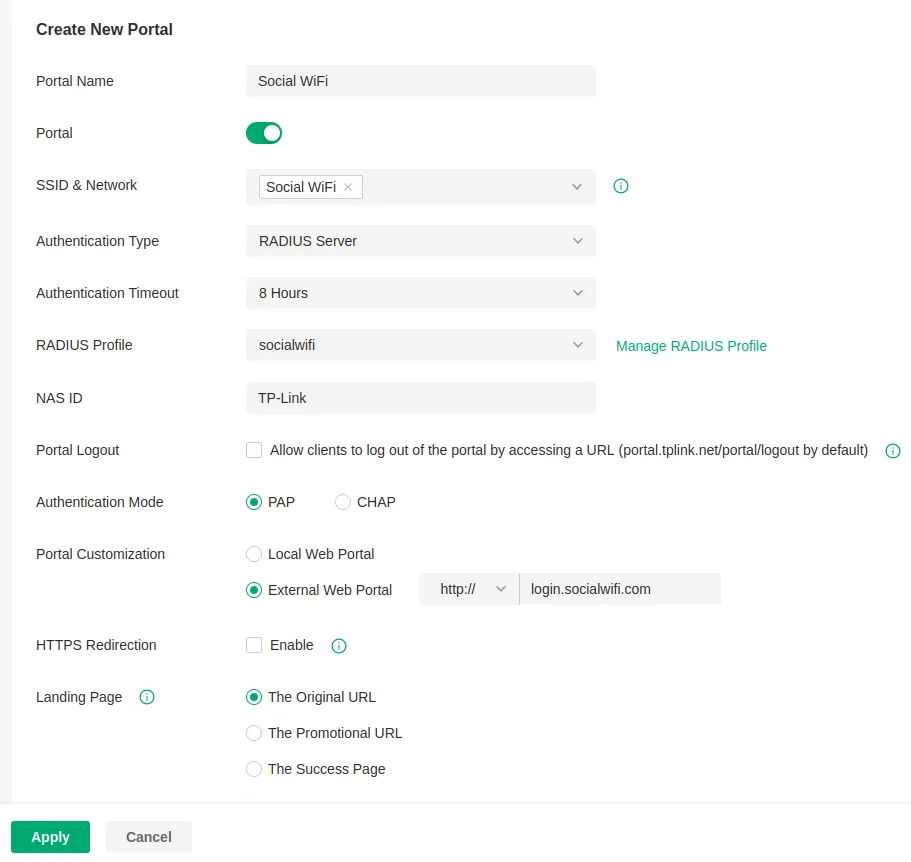
Click Apply.
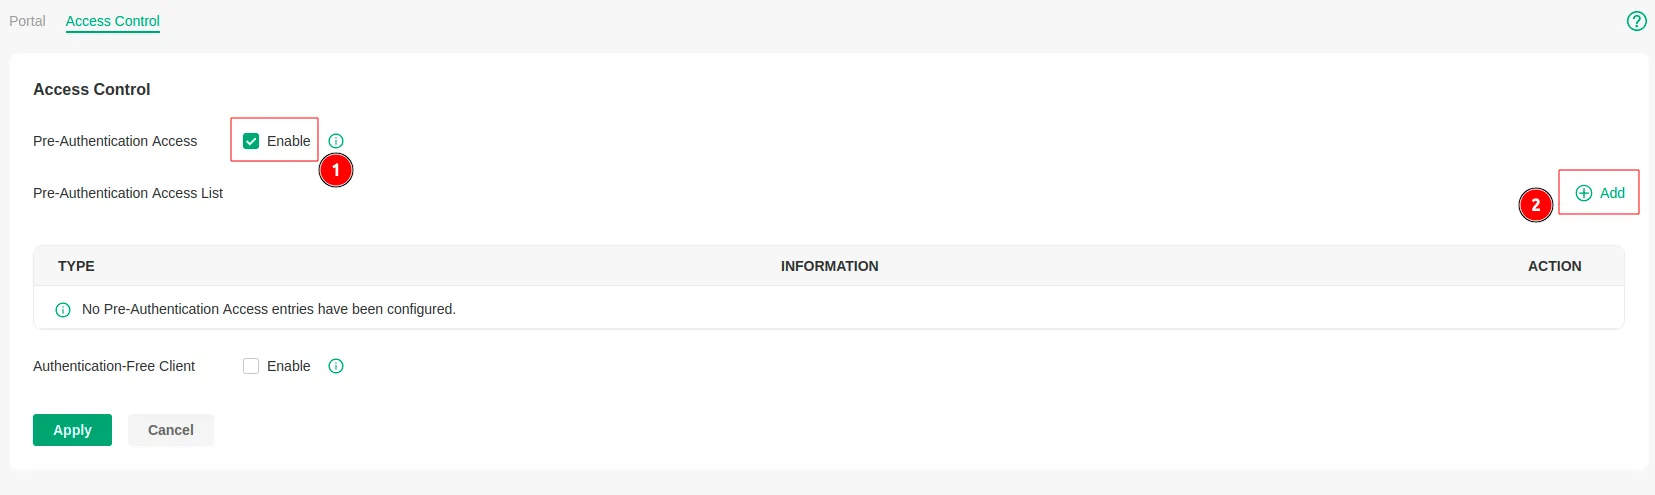
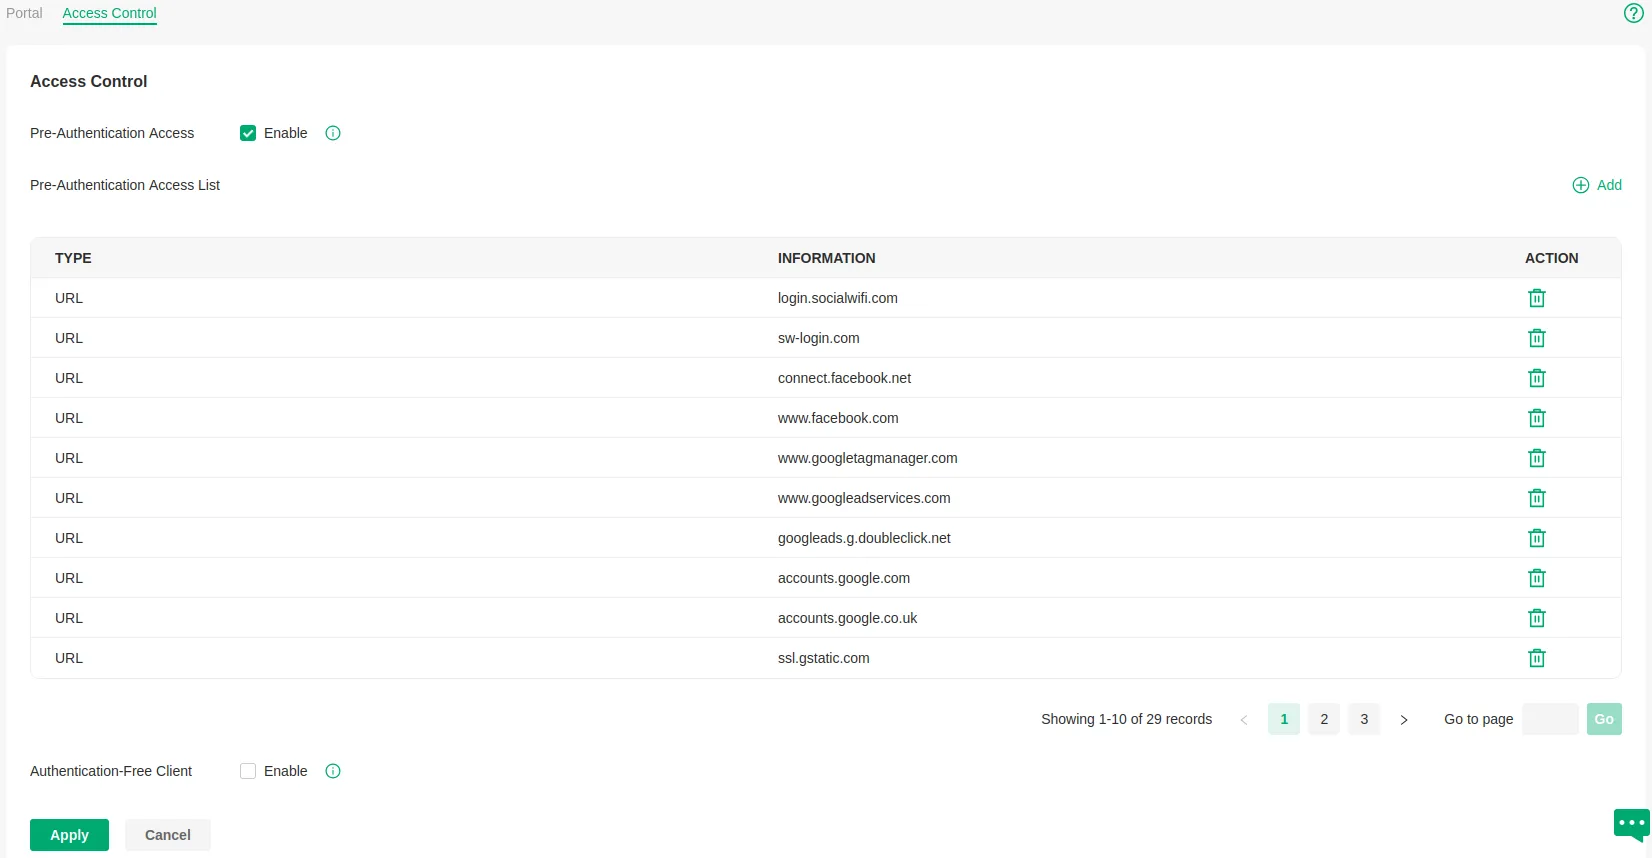
Access Control configuration
After creating a Portal, switch to the Access Control tab on the left upper corner.
Enable Pre-Authenticaton Access (1) and click on + Add (2).
First, add one IP address for Social WiFi service to resolve issues with Omada’s domain resolution like so:
| IP Range | 35.190.70.141 / 32 |
|---|
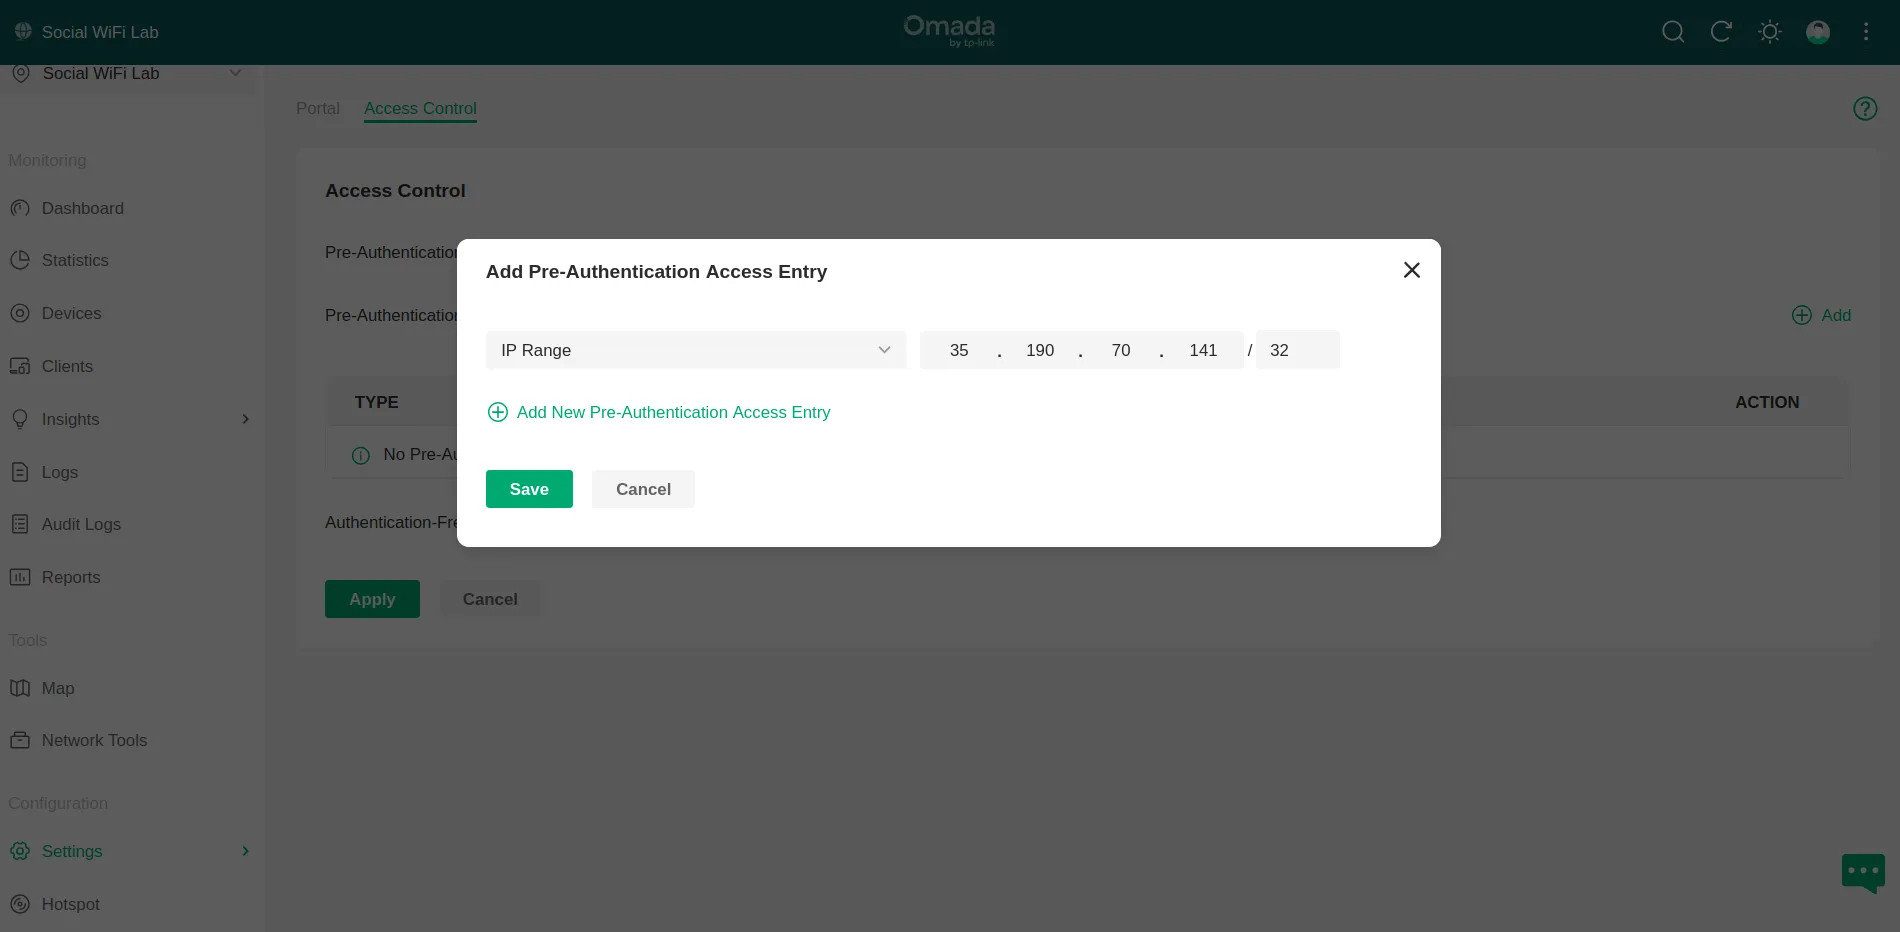
Click Save.
Next, configure as follows:
- Select URL
- Paste in the domain
- Click + Add New Pre-Authentication Access Entry
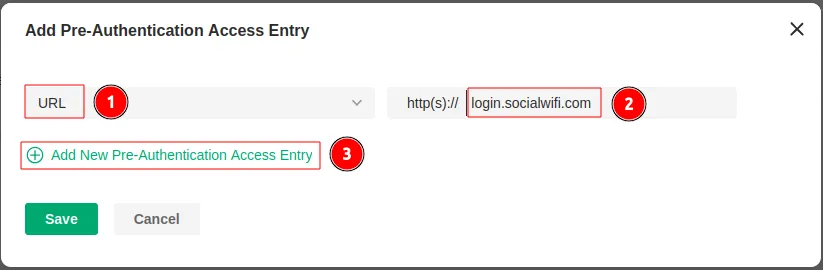
Repeat this step for each domain below:
login.socialwifi.comsw-login.comwww.facebook.comfacebook.comstatic.xx.fbcdn.netexternal-frt3-2.xx.fbcdn.netwww.linkedin.comstatic-exp1.licdn.commedia-exp1.licdn.comstatic.licdn.comtwitter.comapi.twitter.comx.comapi.x.compbs.twimg.comabs-0.twimg.comabs.twimg.comwhatsapp.netwhatsapp.commmx-ds.cdn.whatsapp.netchat.cdn.whatsapp.netscontent.whatsapp.netconnect.facebook.netwww.facebook.comwww.googletagmanager.comwww.googleadservices.comgoogleads.g.doubleclick.netWhen finished, click Save.

Next, click Apply.
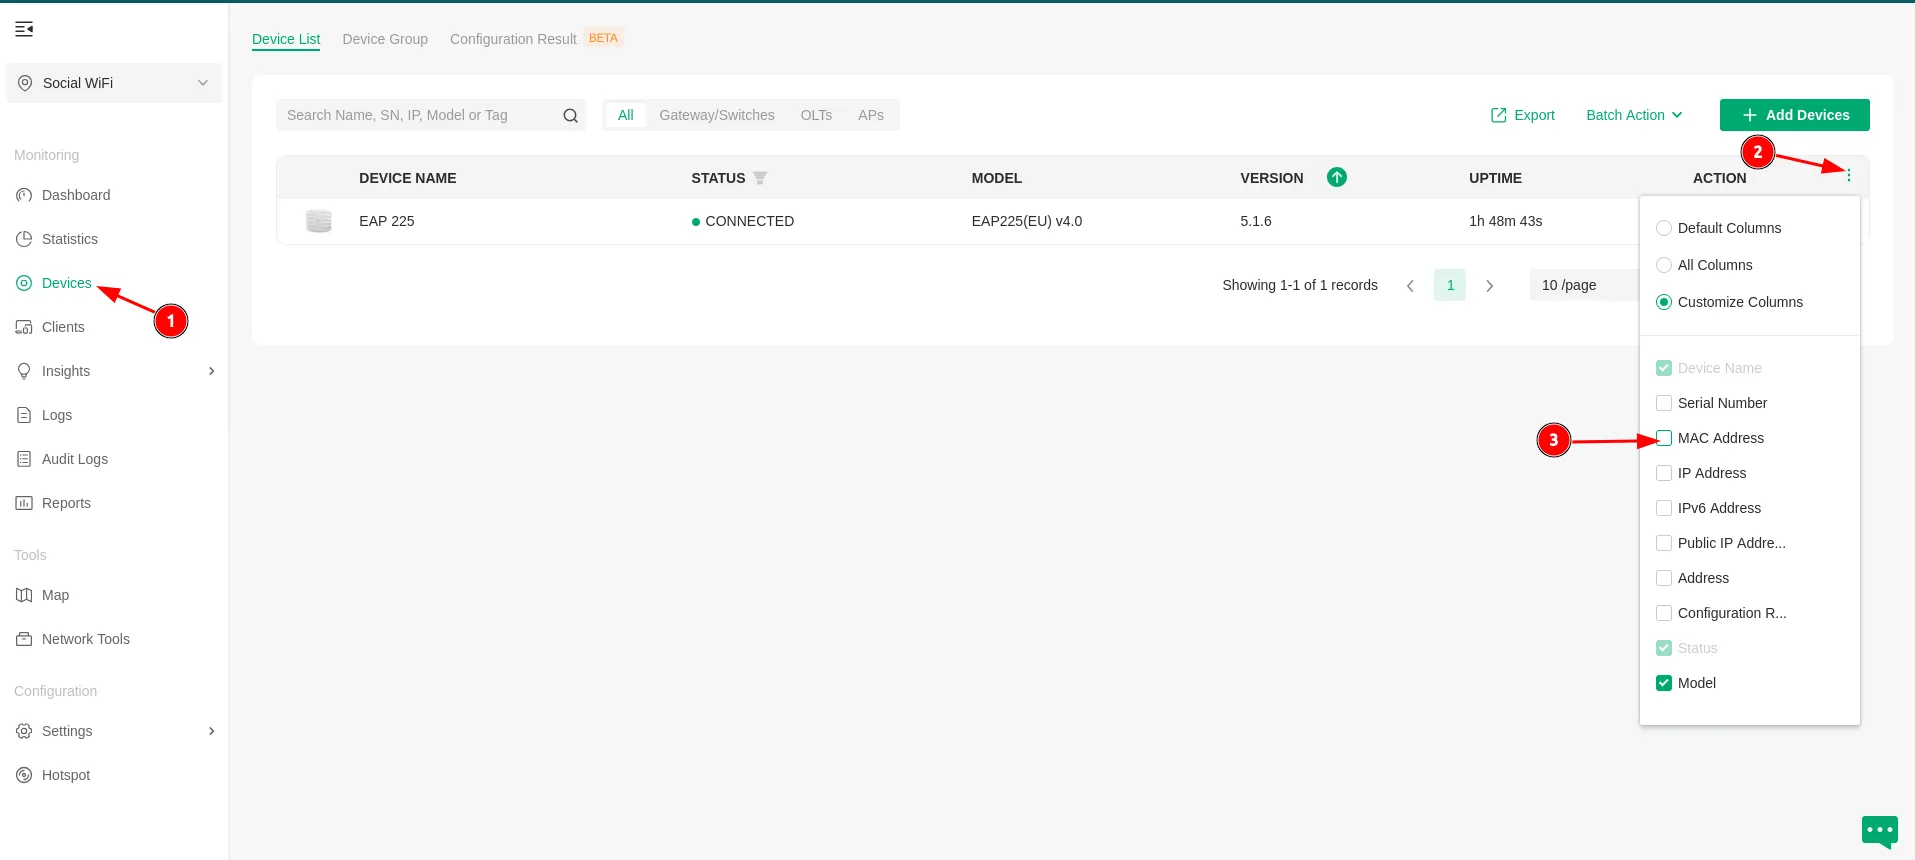
Add the access points to Social WiFi panel
The setup of the controller is now finished. The last step is to add all access points to the Social WiFi platform.
Go to Devices (1) in the menu on the left. We need to display the MAC address for each device. In order to do that, click on the three dots (2) icon and enable the MAC Address (3) checkbox.
The “MAC ADDRESS” column will be added. You will need those MAC addresses in the next step.
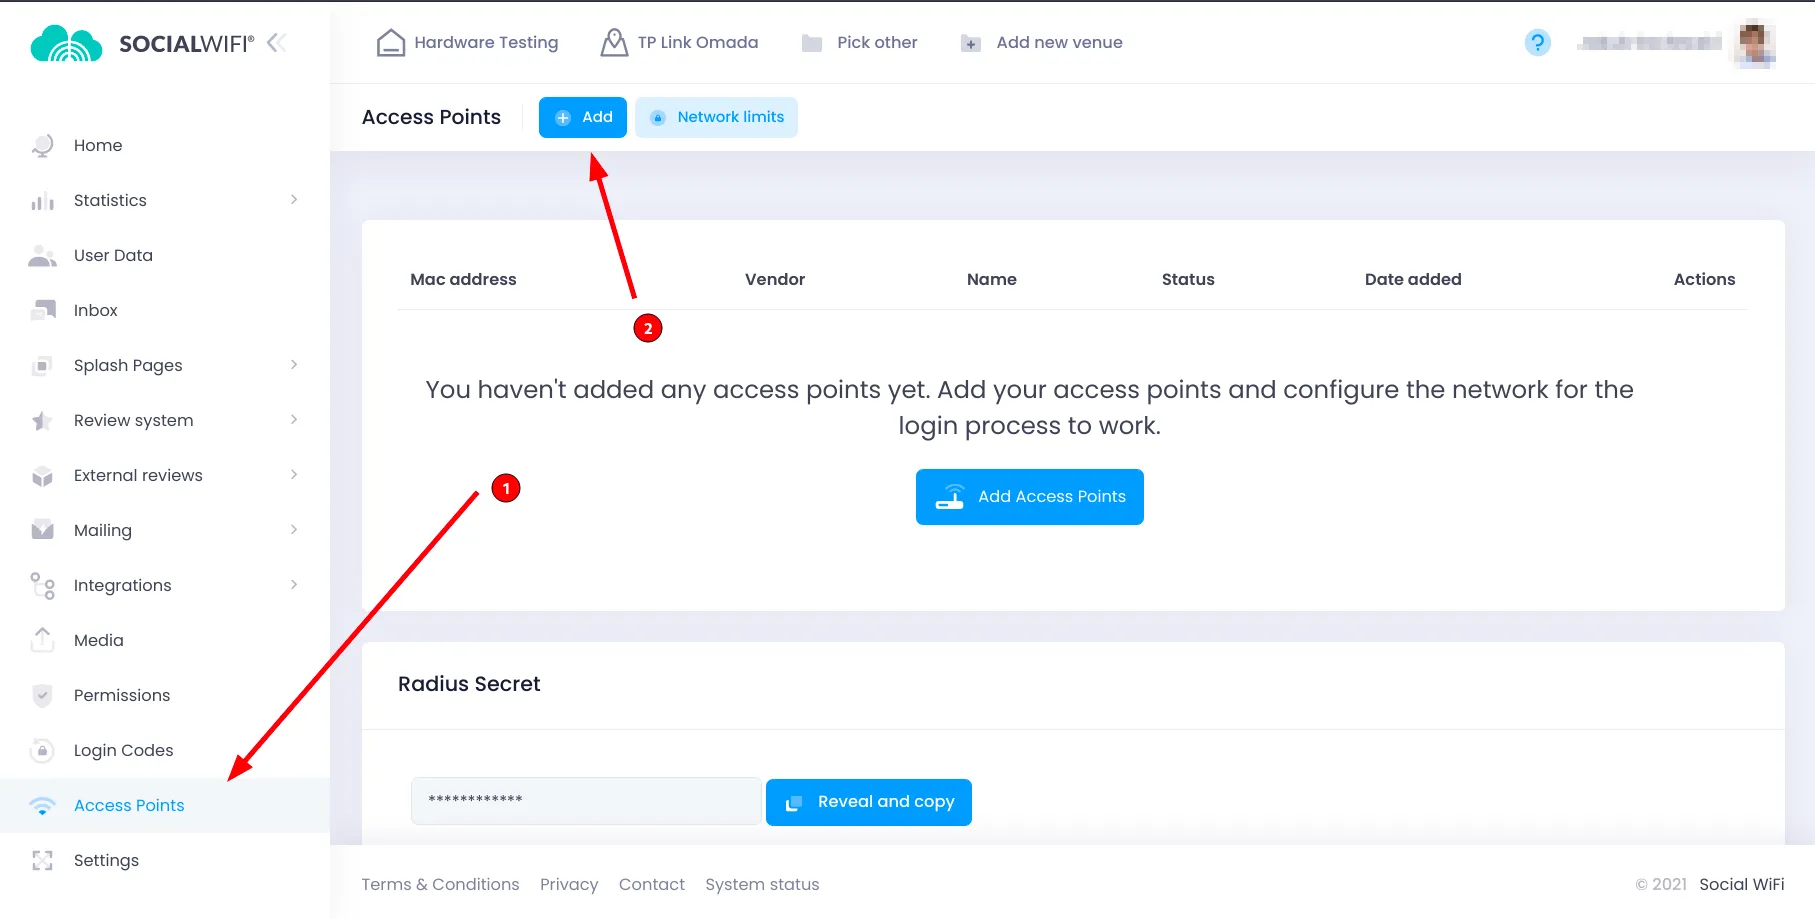
Now, switch to Social WiFi Panel, go to Access Points tab, click the Add button and paste the MAC addresses of all of your access points controlled by the Omada controller. Click Create.
Test the solution
Connect with the WiFi network. You should see a login page. Go through the login process and, once finished, you should have internet access. You should see first connections and authorizations in the Social WiFi Panel’s statistics section.
Firewall troubleshooting
Symptom: after connecting to the WiFi network, on the last step which is clicking the “Connect to the internet button” you’re not getting connected to the internet.
Solution: it might be the case that you have a firewall that blocks traffic between the WiFi device and the controller. You might either have explicit blocking rules on the firewall, or simply have separate VLANs for the guests and the controller and the traffic between them might be blocked as well. In this case you have to unlock specific ports. For example:
- TCP 8088 (When the clients visit the Portal page via an HTTP connection)
- TCP 8843 (When the clients visit the Portal page via an HTTPS connection)
More details on firewall configuration are available under this link: