Ruckus Unleashed
Accessing the device’s administration panel
Log in to your Access Point by opening your web browser and typing in its IP address. By default: 192.168.0.1
Device configuration
Admin & Services section → Services → AAA Servers
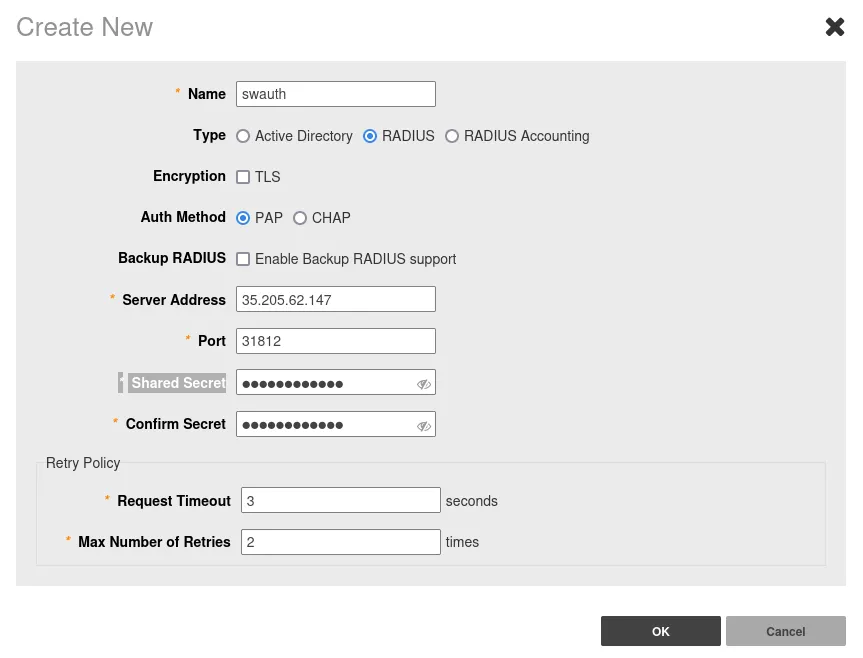
Press “Create New” in the “Authentication Servers” tab and add two new servers:
Authentication
| Name | swauth |
|---|---|
| Type | RADIUS |
| Encryption | Unchecked |
| Auth Method | PAP |
| Backup RADIUS | Unchecked |
| Server Address | 35.205.62.147 |
| Port | 31812 |
| Shared Secret | Radius Secret available in Access Points tab of the Social WiFi Panel |
| Confirm Secret | Re-enter the above |
Press OK.
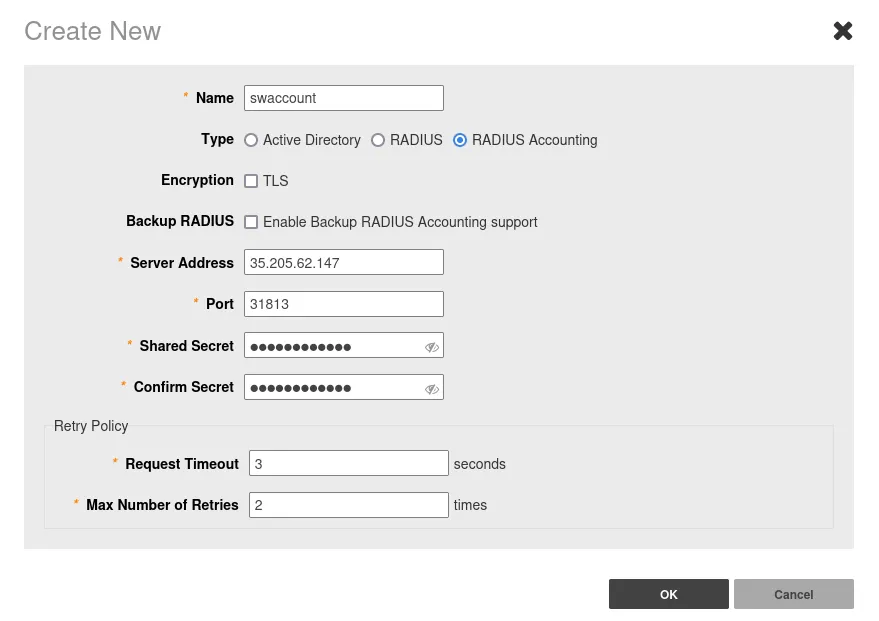
Accounting
| Name | swaccount |
| Type | RADIUS Accounting |
| Encryption | Unchecked |
| Backup RADIUS | Unchecked |
| Server Address | 35.205.62.147 |
| Port | 31813 |
| Shared Secret | Radius Secret available in Access Points tab of the Social WiFi Panel |
| Confirm Secret | Re-enter the above |
Press OK.
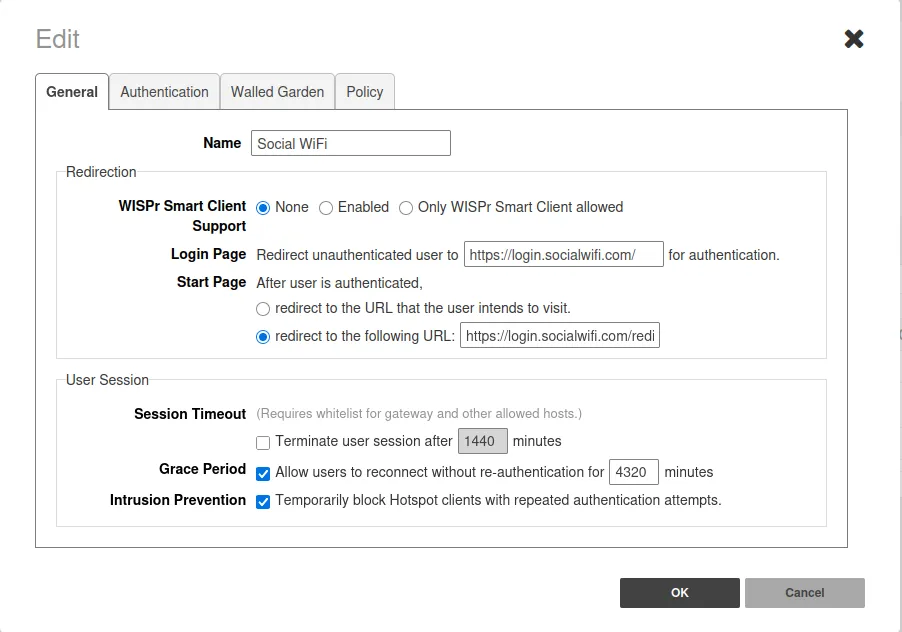
Hotspot Configuration: Admin & Services section → Services → Hotspot Services
Press “Create New” and configure as such:
- General Tab
| Name | Social WiFi |
|---|---|
| WISPr Smart Client Support | None |
| Login Page | https://login.socialwifi.com/ |
| Start Page | redirect to the following URL – https://login.socialwifi.com/redirect/ |
| Grace Period | Enabled - 4320 |
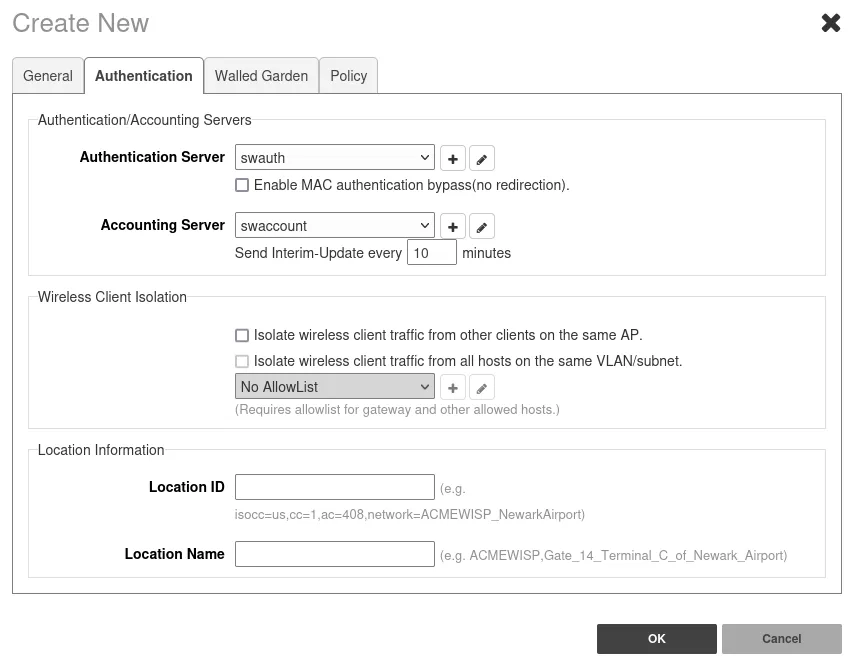
- Authentication Tab
| Authentication Server | swauth (choose from the list) |
|---|---|
| Accounting Server | swaccount (choose from the list) |
- Walled Garden Tab (press “Create New” and input the entries below one by one):
*.socialwifi.comsw-login.comfacebook.com*.facebook.com*.fbcdn.netlinkedin.com*.linkedin.com*.licdn.comtwitter.comapi.twitter.comx.comapi.x.com*.twimg.comwhatsapp.com*.whatsapp.net*.whatsapp.comconnect.facebook.netwww.facebook.comwww.googletagmanager.comwww.googleadservices.comgoogleads.g.doubleclick.net*.youtube.com*.ytimg.com*.googlevideo.comyt3.ggpht.com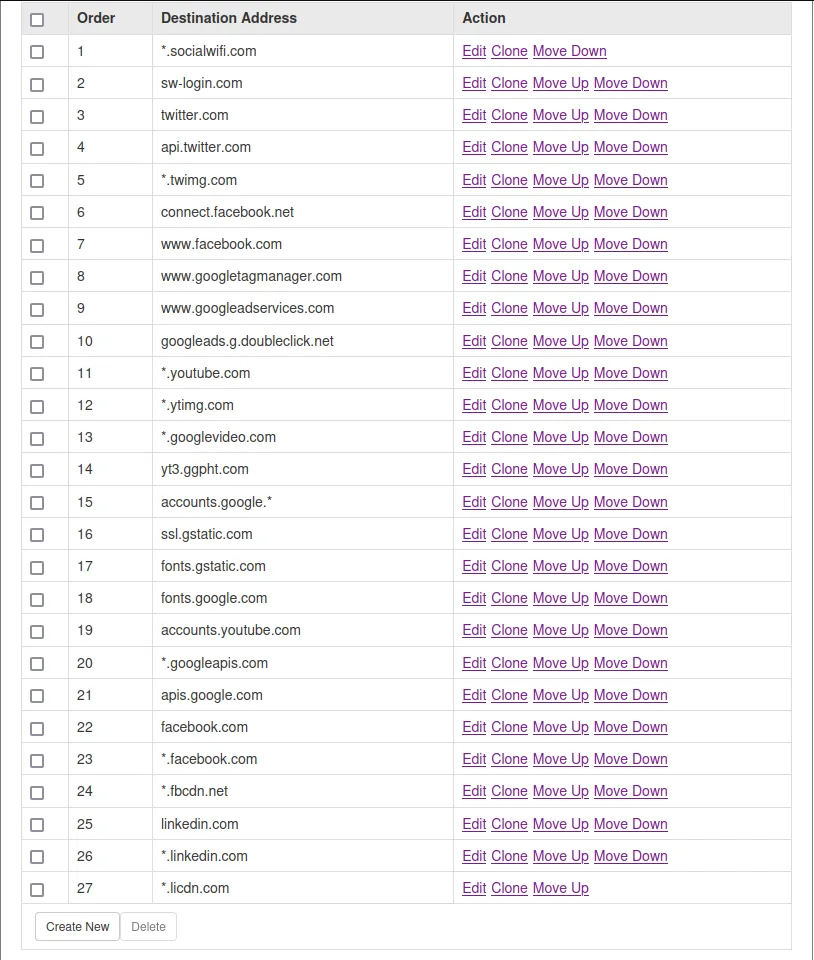
Press OK.
Wireless
Click on the WiFi Networks section and press “Create”.
Configure with the following settings:
| Name | Type in the name of your WiFi network (SSID) |
|---|---|
| Usage Type | Hotspot Service |
| Authentication Method | Open |
| Hotspot Services | socialwifi (choose from the list) |
Adding the AP to Social WiFi Panel
In order to add a device to Social WiFi platform:
- Access your account in the Social WiFi Panel.
- Choose the correct venue to which you would like to add the device.
- In the “Access Points” tab, press “Add” (upper right corner), paste the MAC address of your Access Point (adding a name is optional) and click “Create”.