DrayTek Vigor
Compatibility
Social WiFi has been tested and is proven to work on the following configurations:
Router model and version
- DrayTek Vigor 2862, Firmware Version 3.9.1_STD
Supported versions:
DrayTek Vigor 2862, 3220, 2926, 2952, 2765, 2865, 2866, 2927, 2962, 3910 series.\
Social WiFi configuration
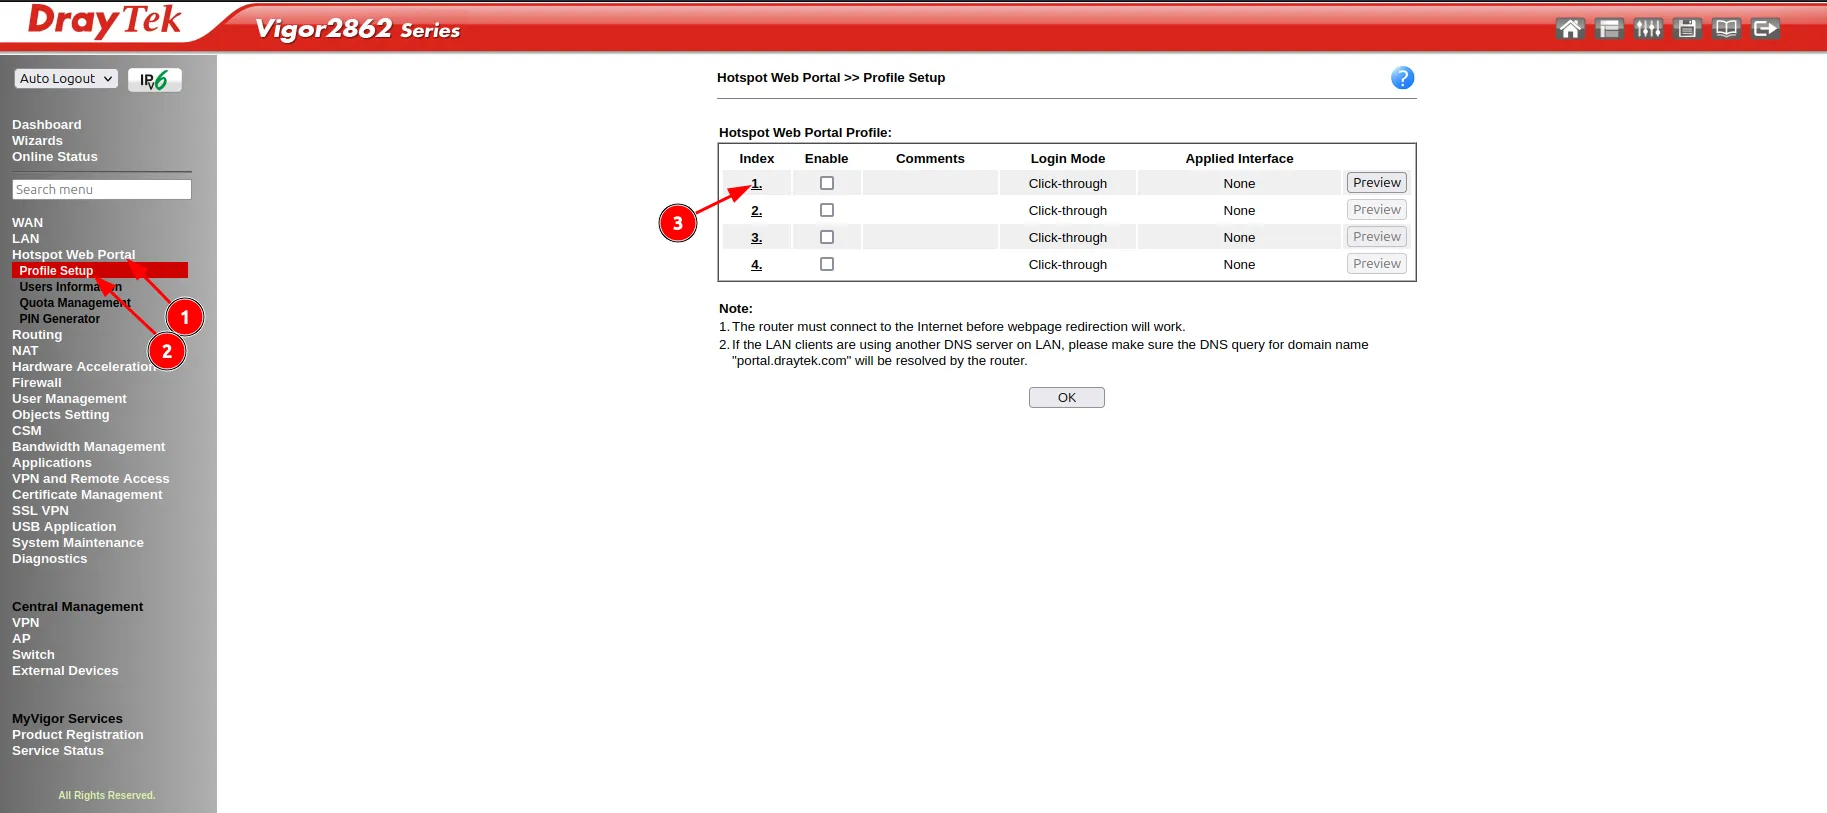
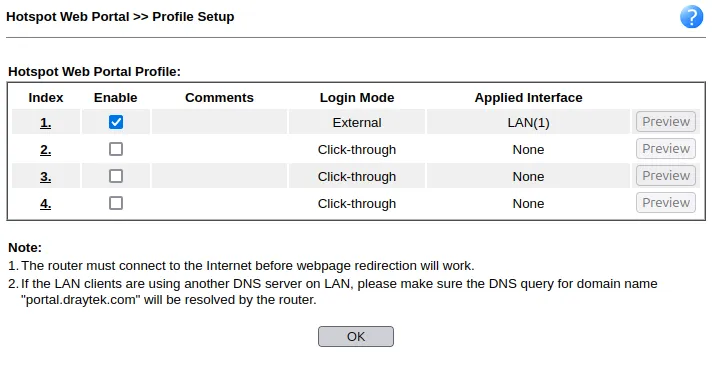
From the menu on the left, select Hotspot Web Portal -> Profile Setup and click on the index 1.
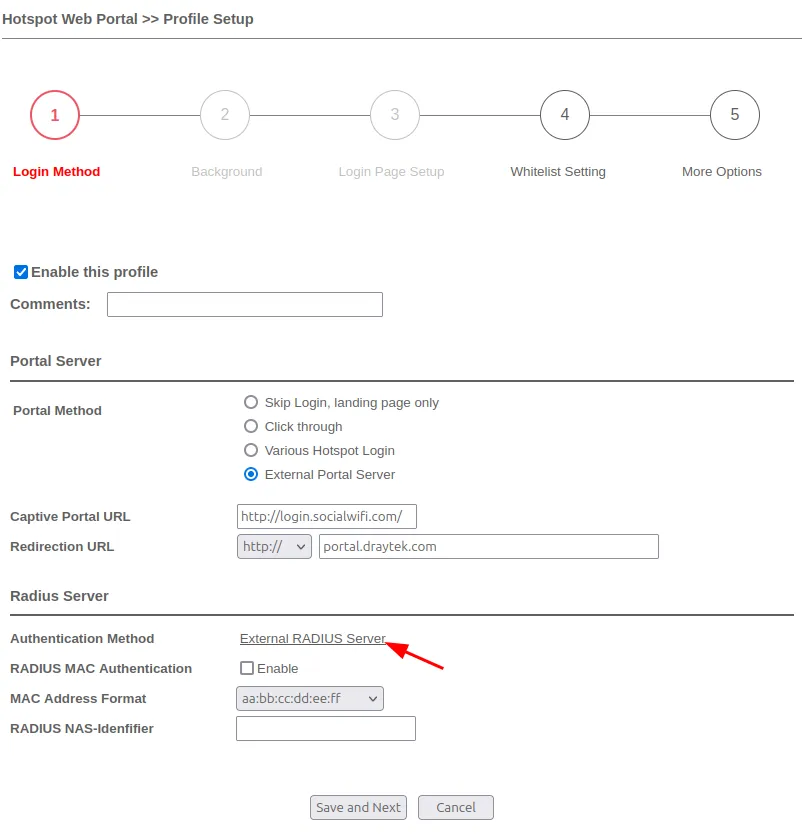
You should see the Hotspot Web Portal profile setup. Configure as follows:
| Enable this profile | Enable |
|---|---|
| Portal Method | External Portal Server |
| Captive Portal URL | http://login.socialwifi.com/ |
| Redirection URL | select http:// from the dropdown menu |
Now, click on External RADIUS Server.
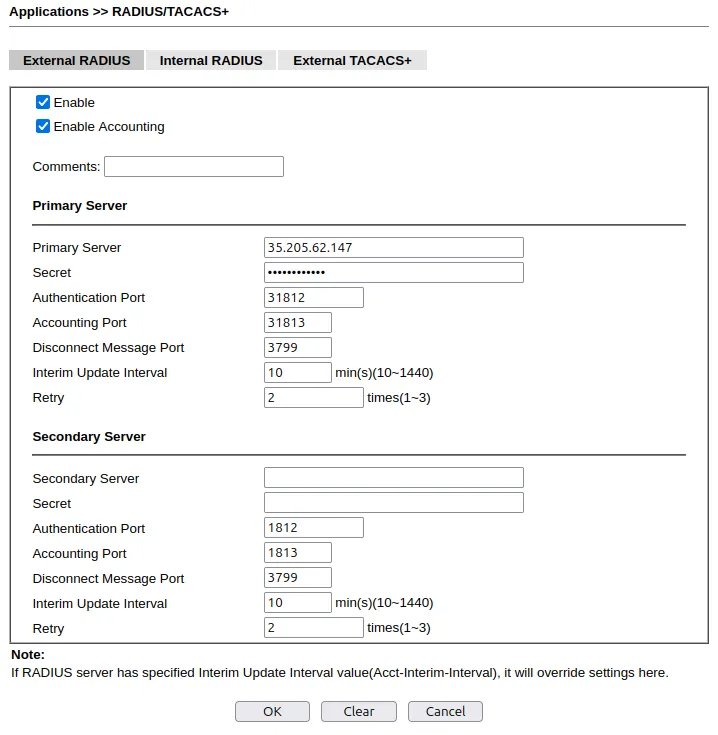
You should see the RADIUS configuration panel. Configure as follows:\
| Enable | Checked |
|---|---|
| Enable Accounting | Checked |
| Primary Server | 35.205.62.147 |
| Secret | Shared key is available in Access Points tab of the Social WiFi Panel |
| Authentication Port | 31812 |
| Accounting Port | 31813 |
Leave rest at default settings.
Click OK. You should see the pop-up window informing you that the router is rebooting.
Now, go back to the Hotspot Web Portal -> Profile Setup and go to Whitelist Setting -> Dest Domain. Now, add all the domains listed below and make sure they’re all Enabled.
*.socialwifi.comsw-login.comfacebook.com*.facebook.com*.fbcdn.netlinkedin.com*.linkedin.com*.licdn.comtwitter.comapi.twitter.comx.comapi.x.com*.twimg.comwhatsapp.com*.whatsapp.net*.whatsapp.comconnect.facebook.netwww.facebook.comwww.googletagmanager.comwww.googleadservices.comgoogleads.g.doubleclick.net*.youtube.com*.ytimg.com*.googlevideo.comyt3.ggpht.com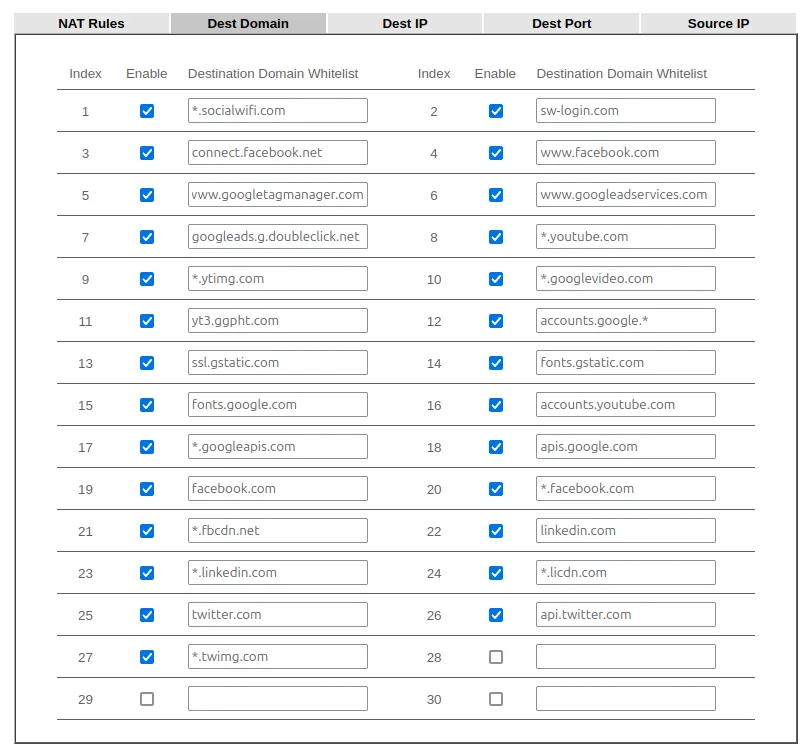
Click Save and Next at the bottom of the page.
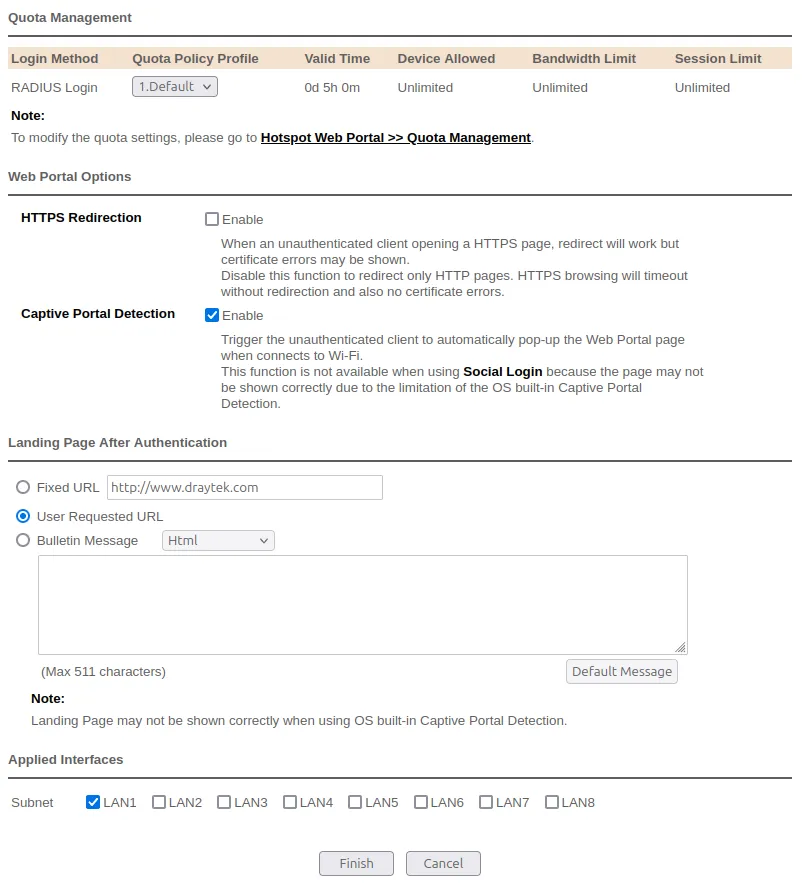
Now, on the las page configure as follows:
| HTTPS Redirection | Disabled |
|---|---|
| Captive Portal Detection | Enabled |
| User Requested URL | Enabled |
| Subnet | *select the network you’re using for Social WiFi* |
Click Finish.
Your Hotspot Web Portal Profile should look like this:
Add the access points to Social WiFi panel
The setup of the router is now finished. The last step is to add all access points to the Social WiFi platform.
Go to Dashboard in the menu on the left. Under the System Information table you will the MAC address of the router in the “LAN MAC Address” column. Copy the MAC address.
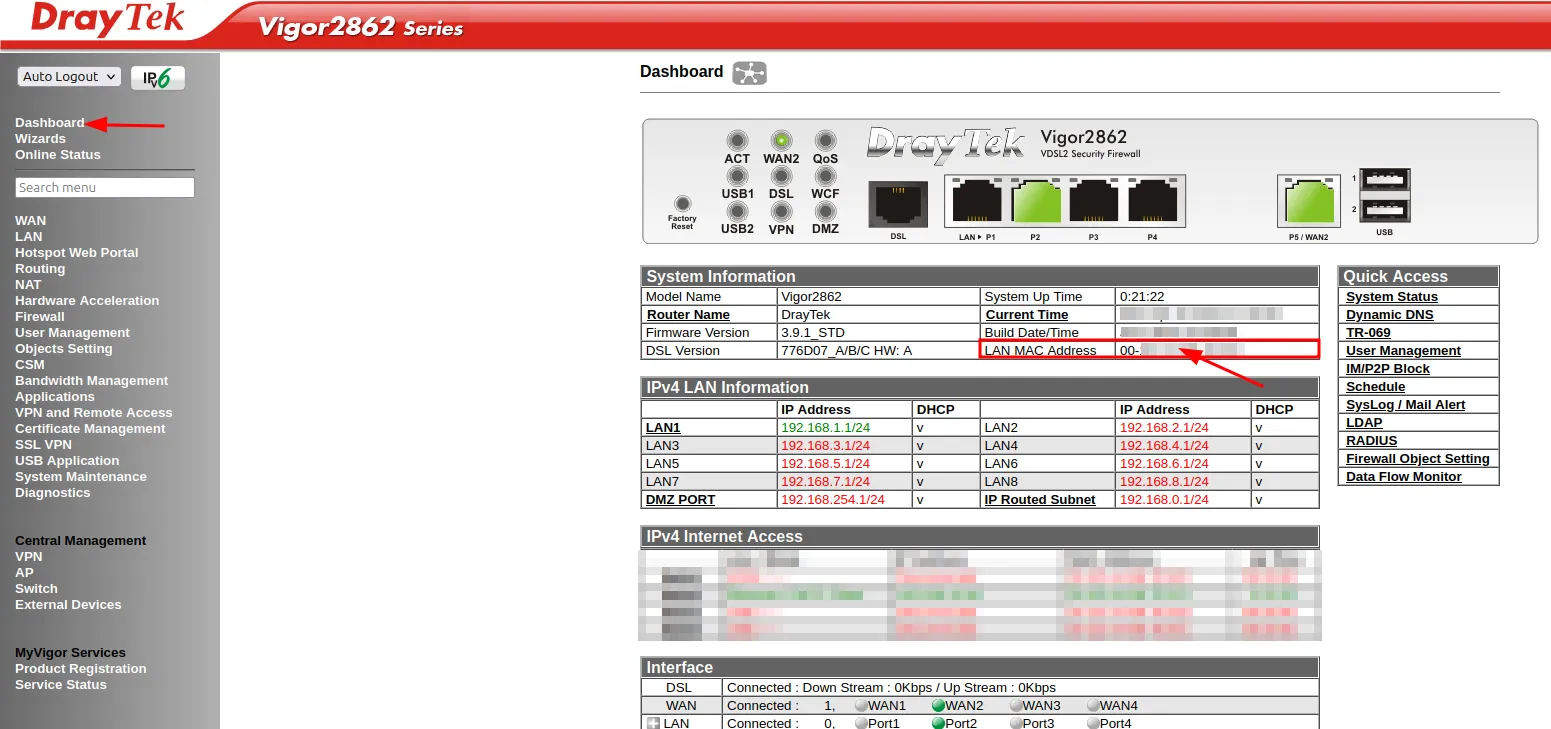
Now, switch to Social WiFi Panel, go to Access Points tab, click the Add button and paste the MAC address of the DrayTek router. Click Create.
Test the solution
Connect with the WiFi network. You should see a login page. Go through the login process and, once finished, you should have internet access. You should see first connections and authorizations in the Social WiFi Panel’s statistics section.