Ubiquiti UniFi
Prerequisites
Social WiFi requires internet access to the controller with a static, public IP and port.
UniFi Network Application needs to be online constantly. Use a hardware controller (e.g., UniFi Dream Machine) or a software controller on a server that you can access.
If you have a public IP address
Usually, this means that you’ll need to configure port-forwarding on your router. If you need, you can whitelist our IP address as well. (read further down the page to learn about the “use proxy” flag).
If you have no public IP address
Please see this article.
Compatibility
Social WiFi has been tested and is proven to work on the following configurations:
UniFi Network Controller
- versions 7.4 and above (tested up to 9.0)
This guide is created using the newest 8.2.93 version.
Access point firmware
- versions 4.0.48 or newer (tested up to 6.6.73)
Social WiFi configuration
WiFi and Hotspot settings
Go to the Settings -> WiFi and create a new WiFi network if you haven’t yet. If you already have an existing guest WiFi network, you can simply edit it.
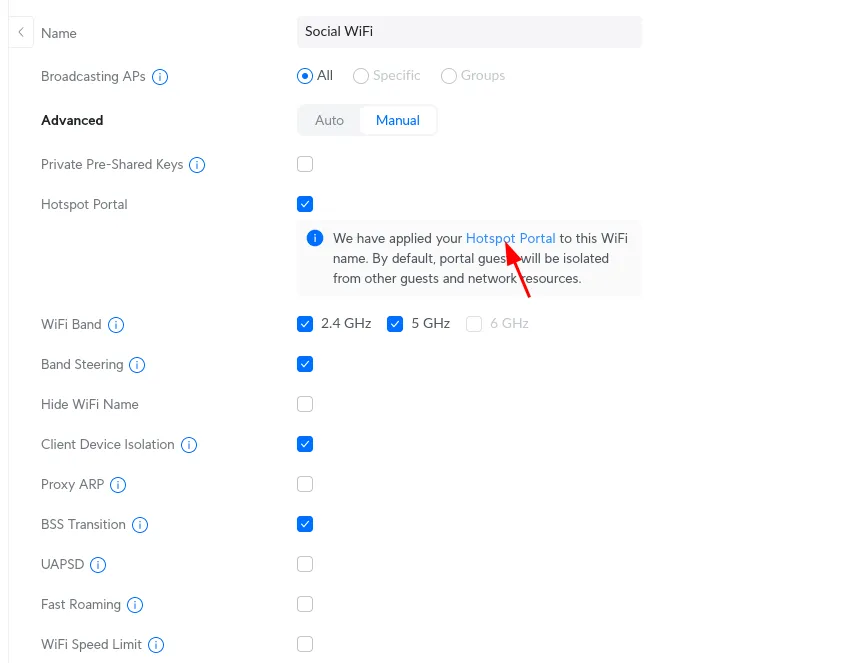
Set your SSID name, go to the “Advanced” tab and select Manual. Make sure that Hotspot Portal is checked.
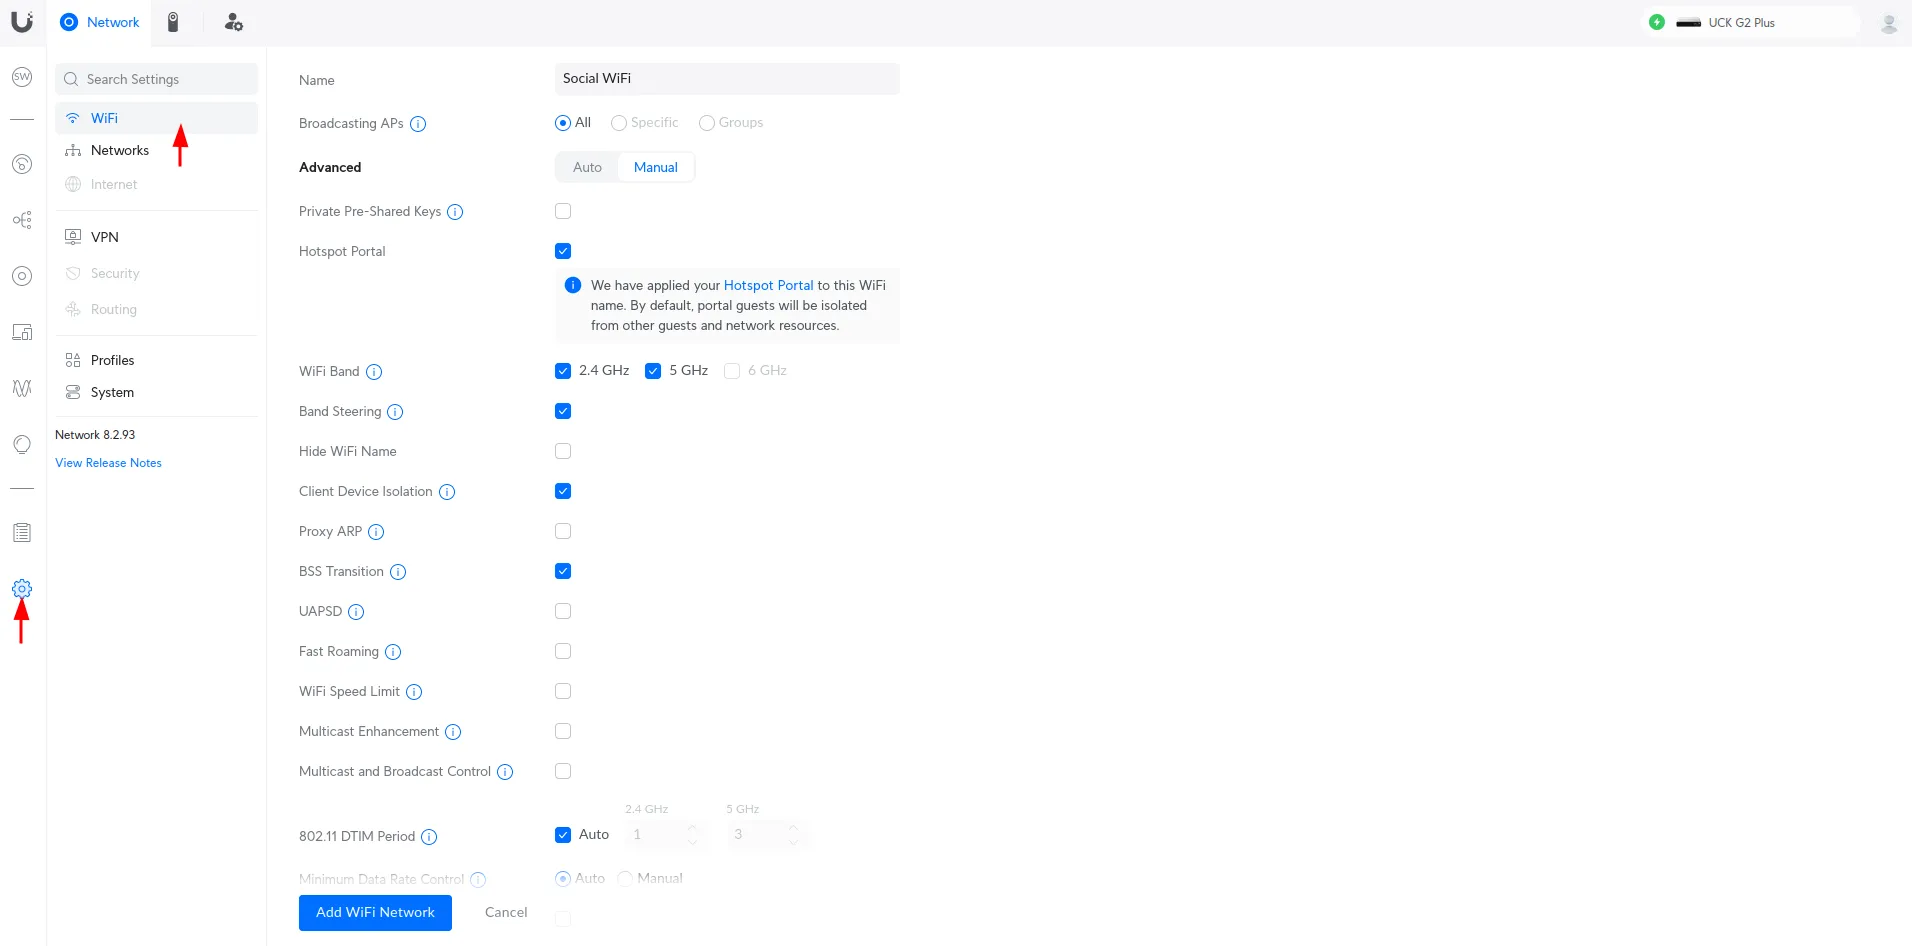
Now, scroll down and set the “Security Protocol” as Open.
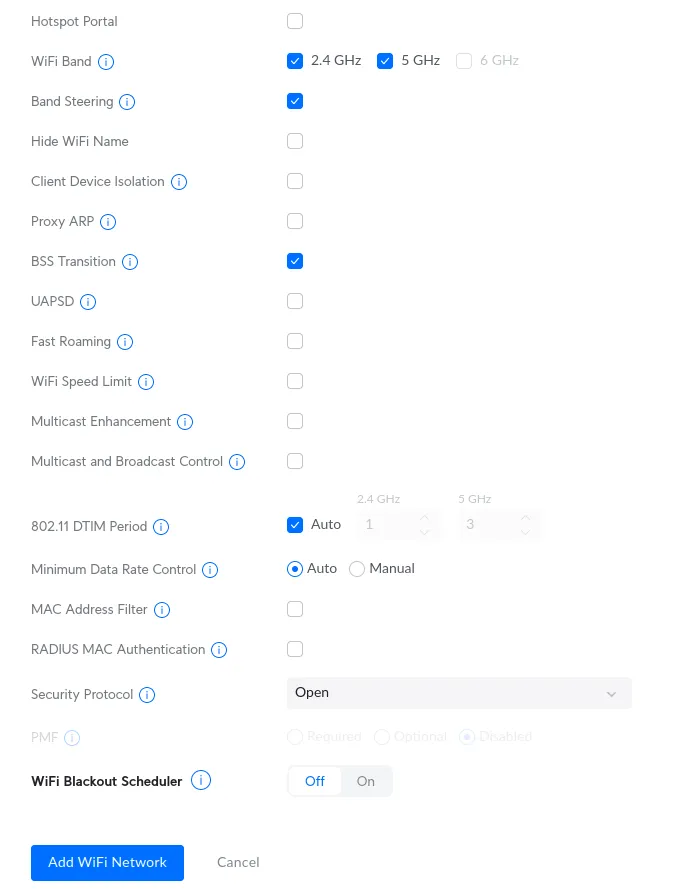
Press Add WiFi Network on the left lower corner.
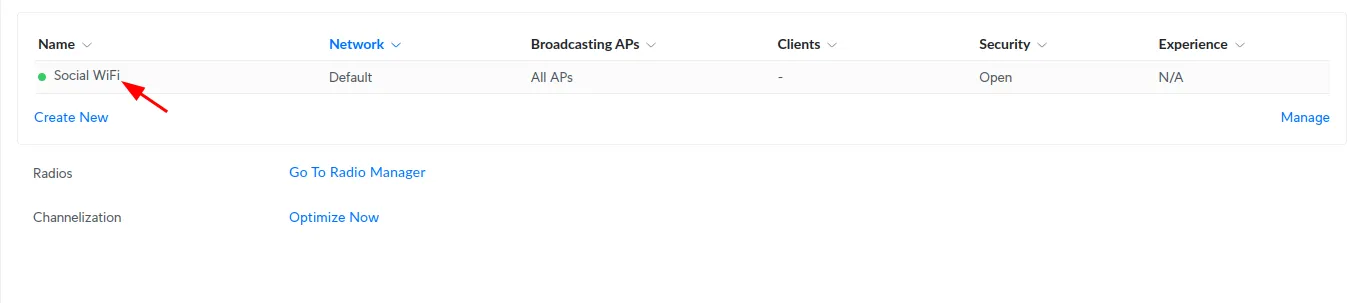
Now, click on the created SSID, and then click on Hotspot Portal:
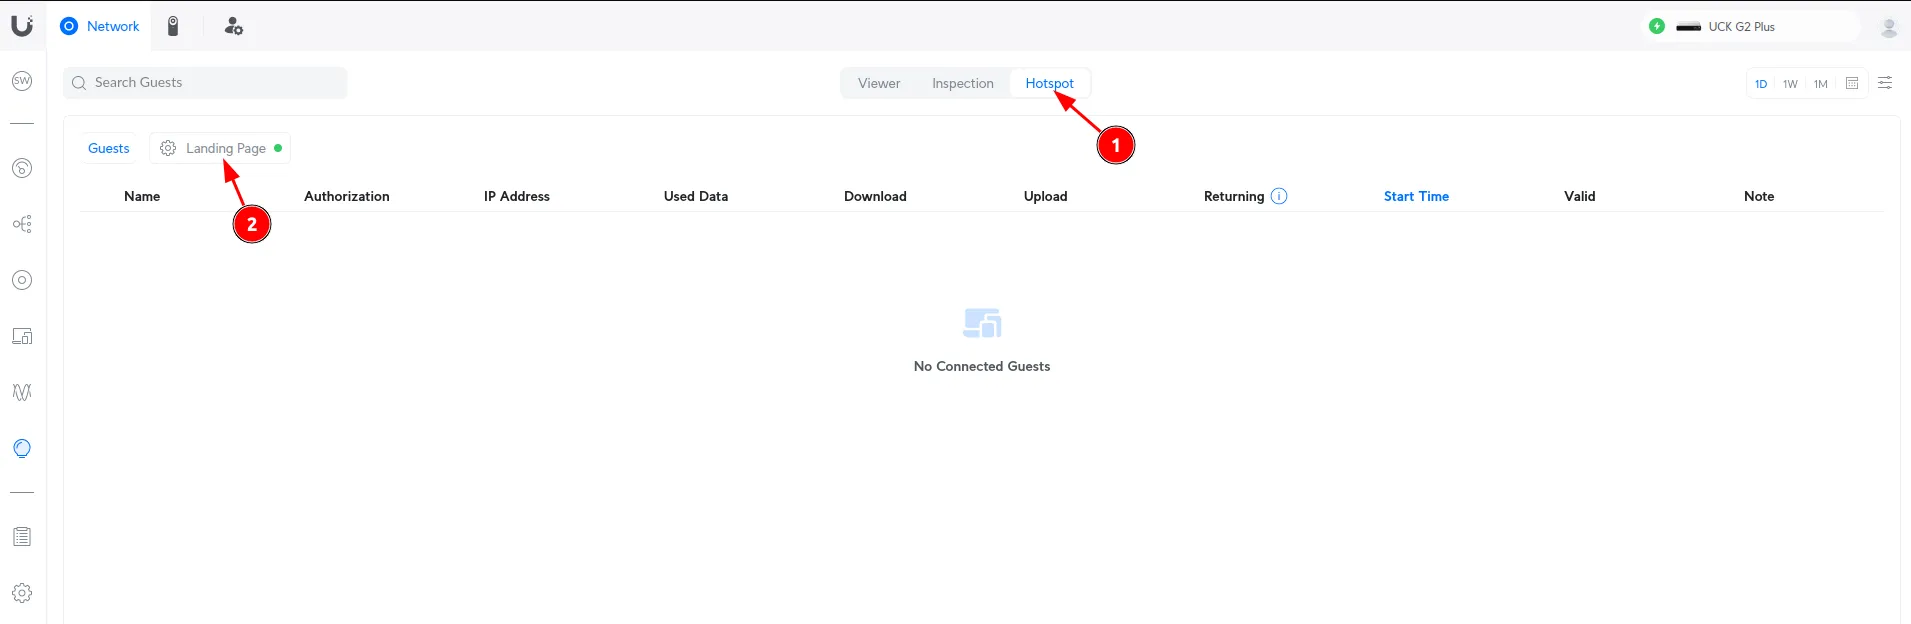
Now, go to Hotspot(1) -> Landing Page(2).
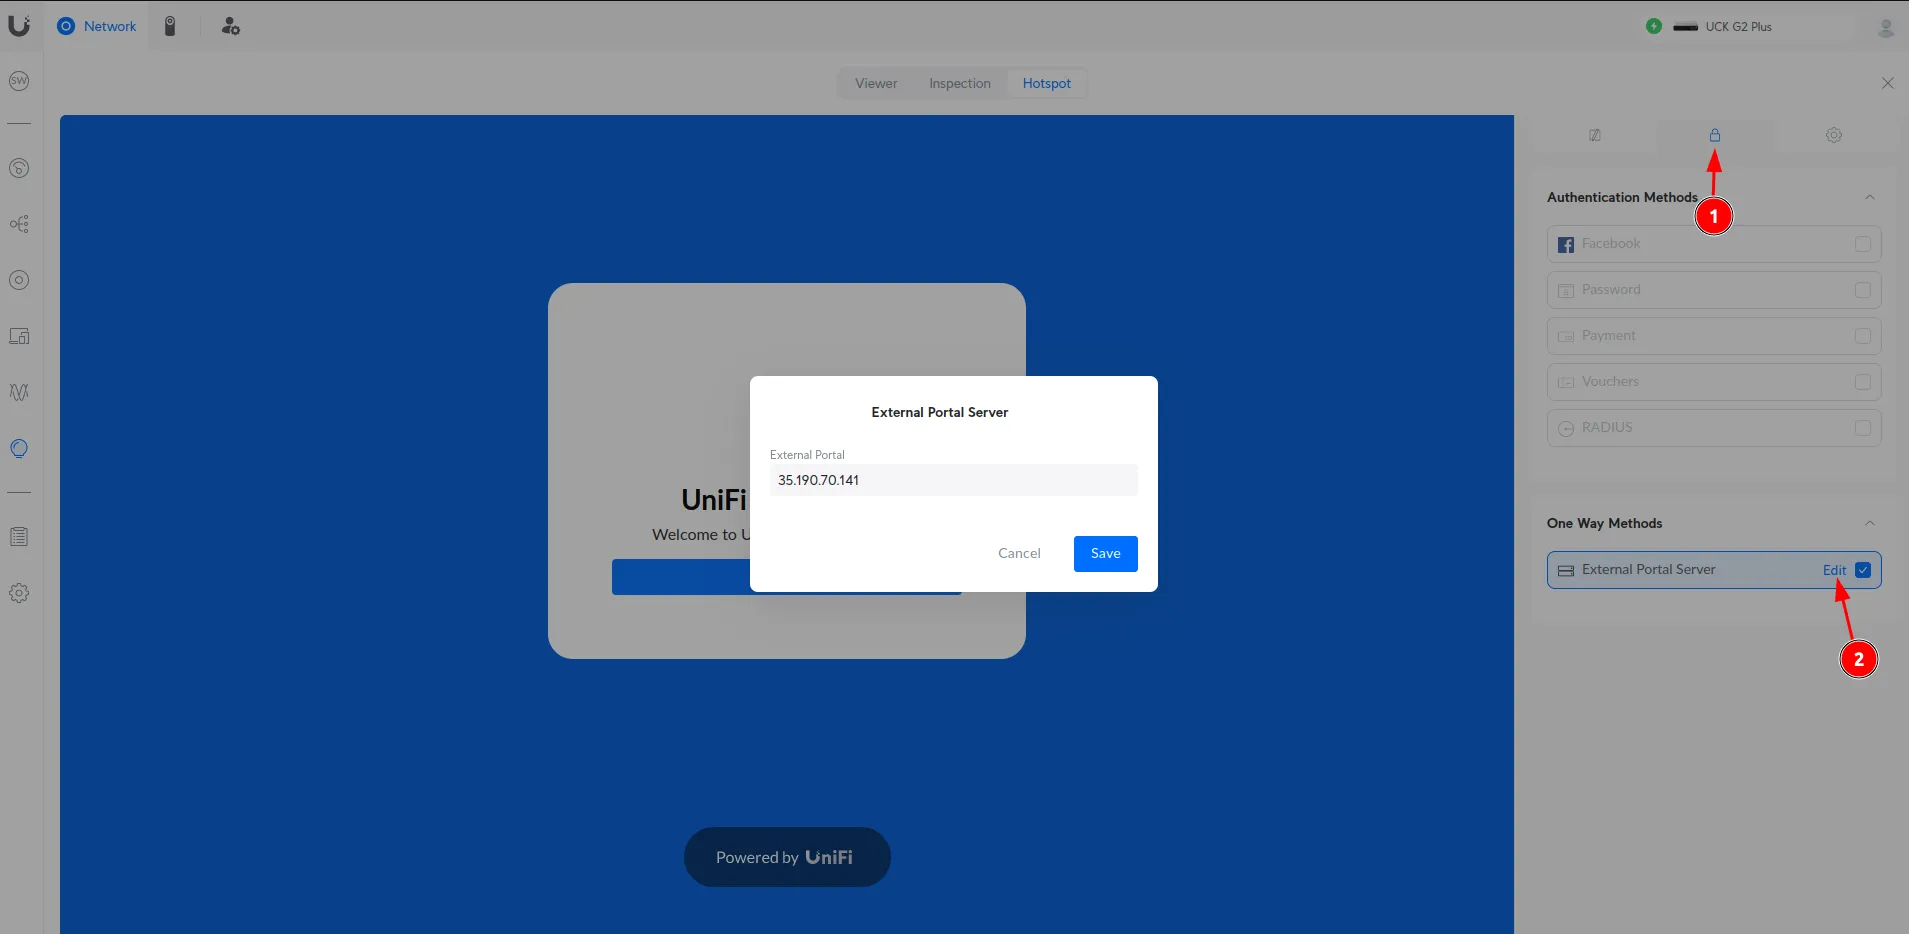
While in the “Hotspot” section, click on the Authentication settings(1) and select External Portal Server(2) at the bottom. Enter the Server IP in the pop up window and press Save.
| One Way Methods | External Portal Server |
|---|---|
| External Portal | 35.190.70.141 |
Now, click Save in the bottom right corner of the window and switch to the “Settings” tab from the menu on the right. Configure as follows:
| Default Expiration | *default is 8h - can be changed if needed |
|---|---|
| Landing Page Settings: Show Landing Page: HTTPS Redirection Support: Encrypted URL: Secure Portal: Domain: | Checked Unchecked Unchecked Unchecked Checked |
| Domain | login.socialwifi.com |
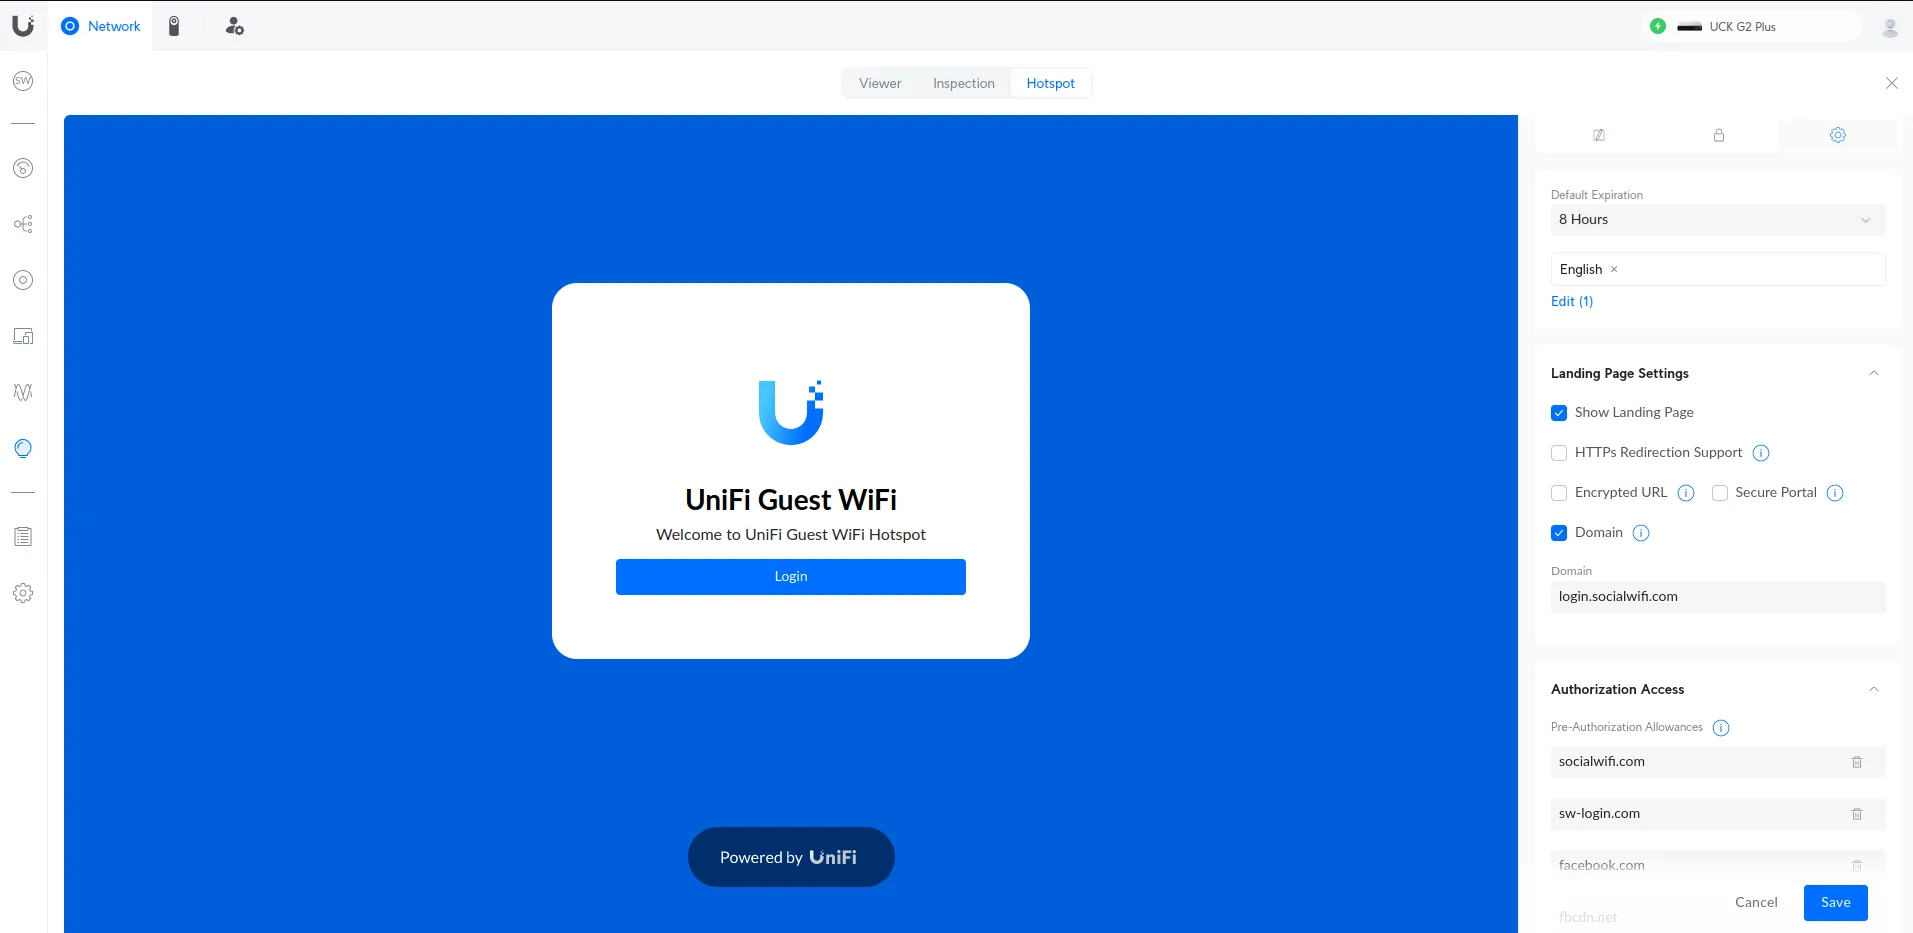
Now, proceed with adding the Allowed Authorization Access entries in the bottom right as described below.
Allowed Authorization Access
Add the following “Allowed Authorization Access” domains:
socialwifi.comsw-login.comfacebook.comfbcdn.netlinkedin.comlicdn.comtwitter.comx.comtwimg.comwhatsapp.netwhatsapp.comconnect.facebook.netwww.facebook.comwww.googletagmanager.comwww.googleadservices.comgoogleads.g.doubleclick.netyoutube.comytimg.comgooglevideo.comyt3.ggpht.com
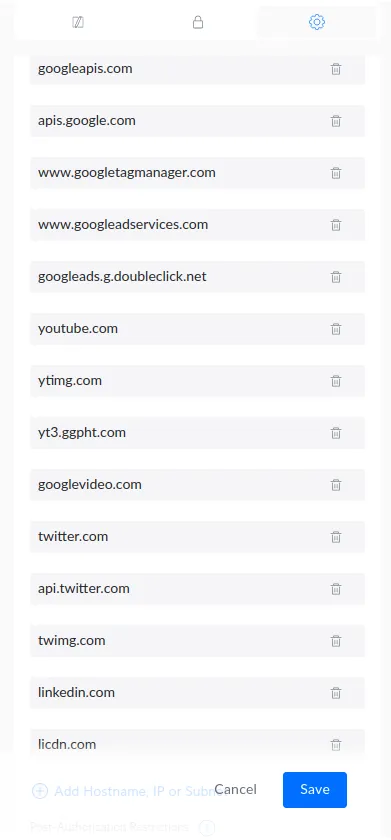
Click Save.
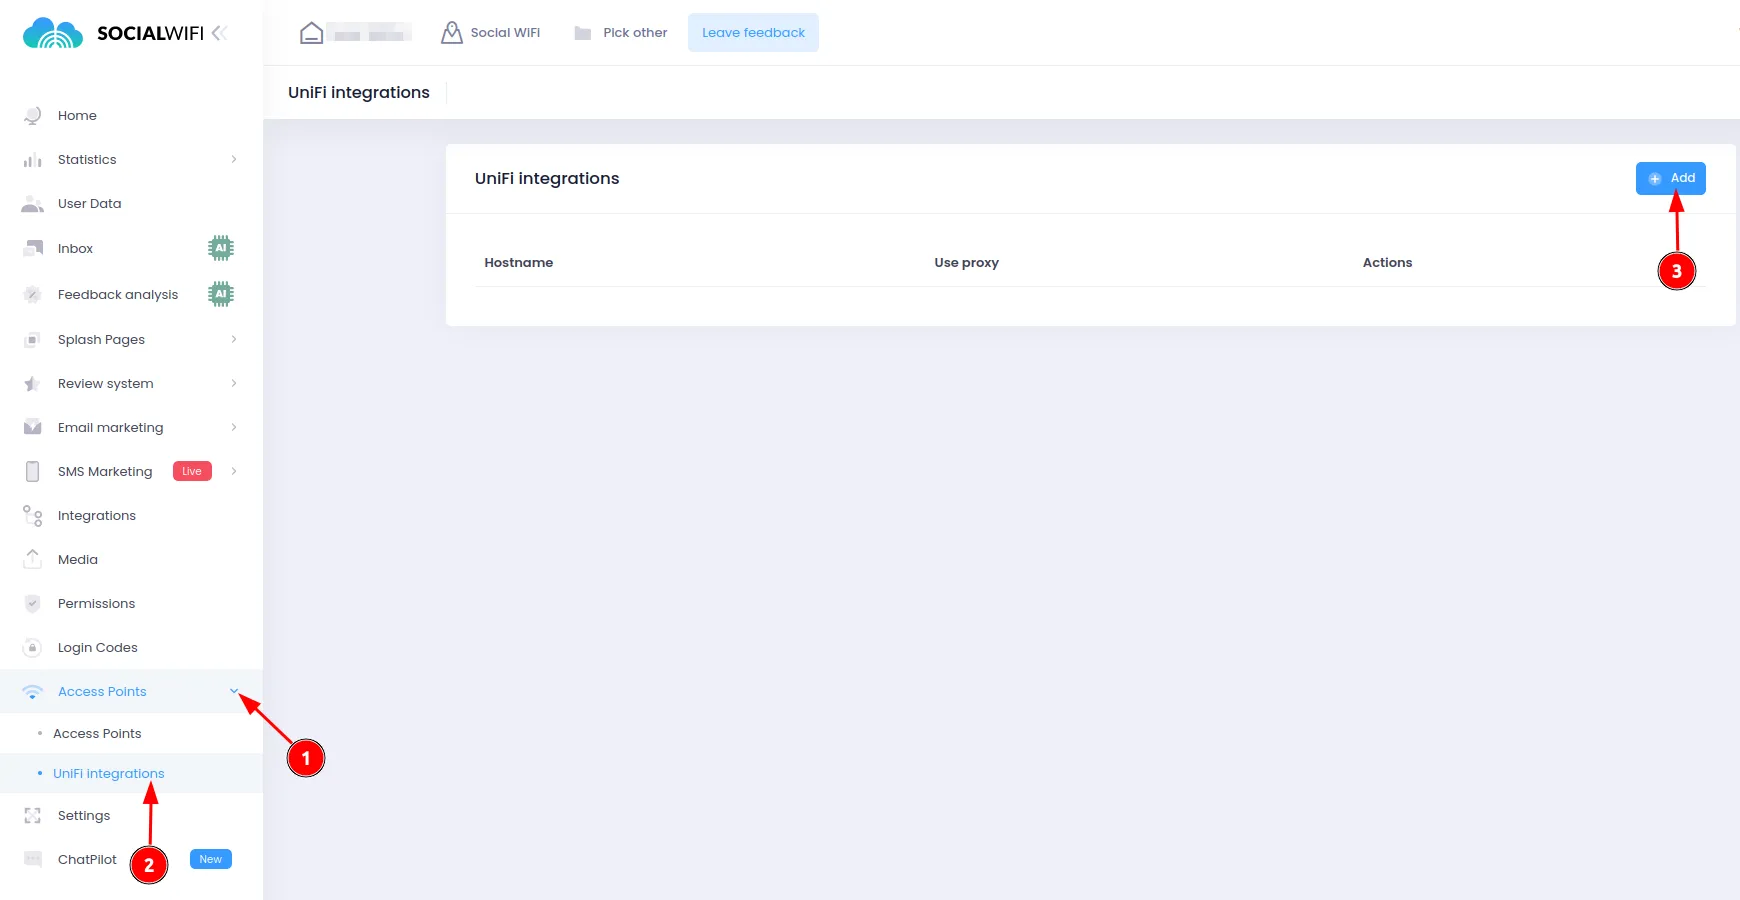
Add controller to the Social WiFi Panel
Now, in your Social WiFi Panel, go to the Access Points -> UniFi Integrations and press Add in the upper right corner.
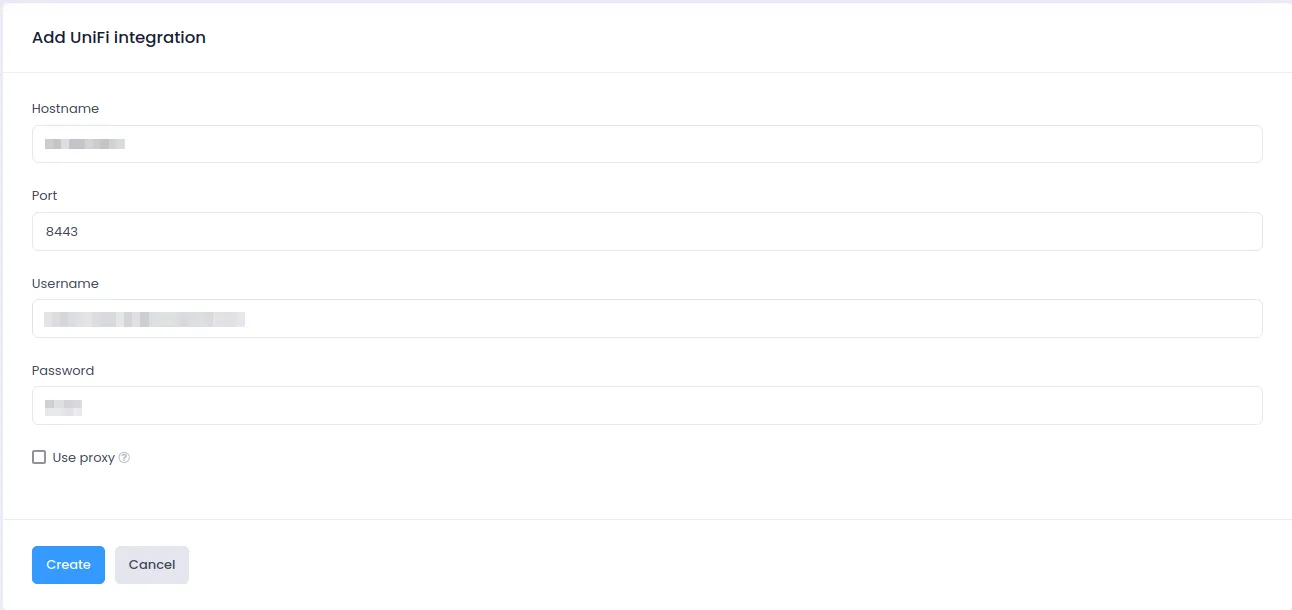
Configure your integration as follows:
| Hostname | Public IP address or hostname of the controller |
|---|---|
| Port | Port of the controller * |
| Username | Your UniFi user login |
| Password | Your UniFi user password |
* Usually 443 (UDM/UDR/CloudKey Gen2) or 8443 (software controller)
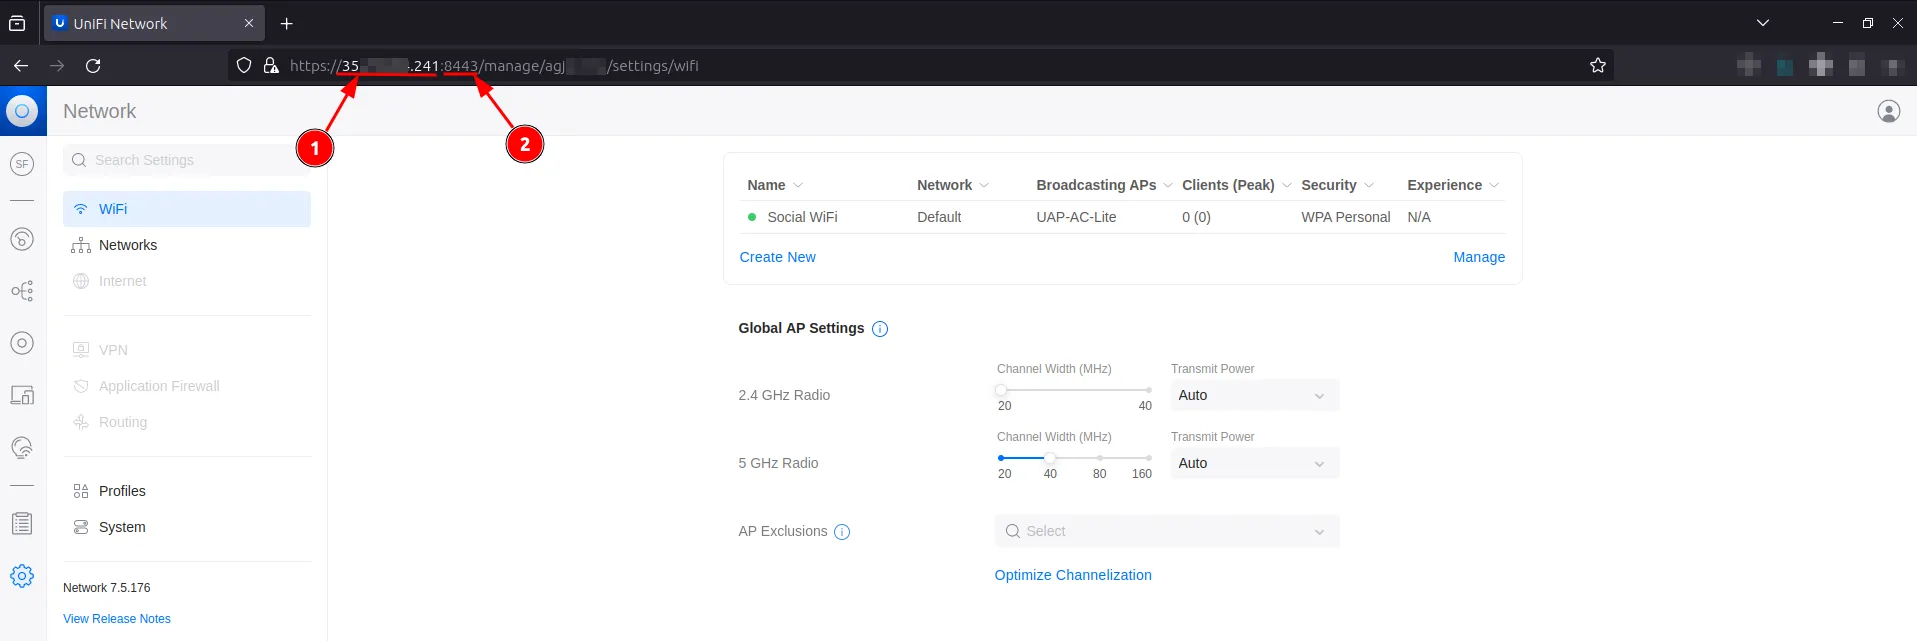
If you don’t know where to find the IP address(1) and Port(2), please look at the screenshot below. Also, please note that in the search bar the IP address and port are separated by the ”:” mark.
After you press Create, you will see a list of sites inside your controller. Pick the site that you’ve configured in the previous steps.
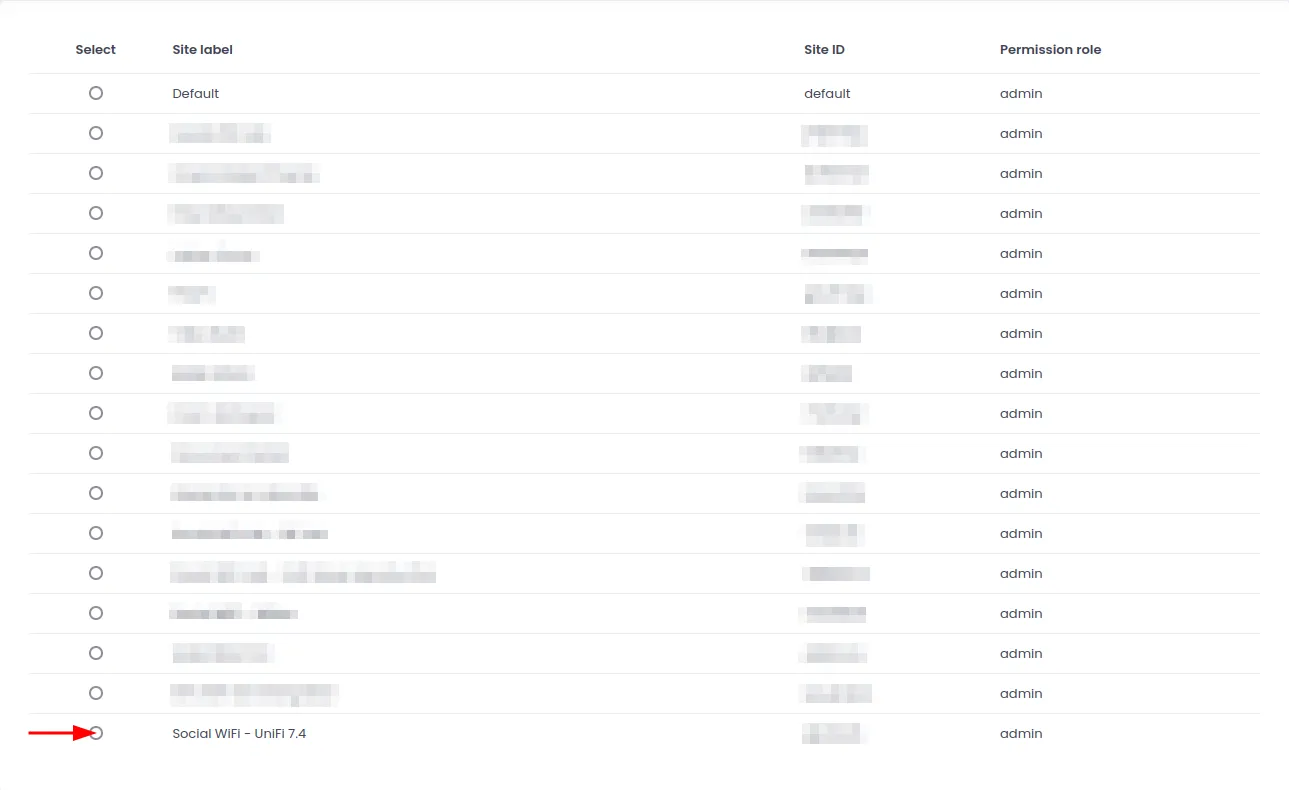
As you select the correct site, press Save selected site on the right lower corner.

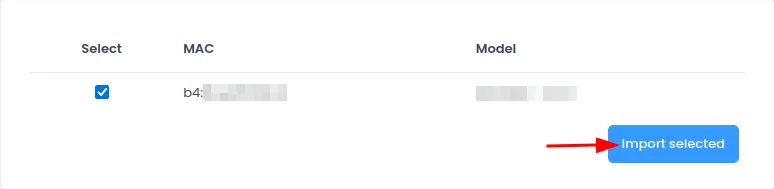
Now, you will see that the integration has been added. Press Import Access Points in order to import all the MAC addresses that you’ve provisioned in the previously set UniFi site.

You will be able to select APs that you want Social WiFi to work on. Press Import selected.
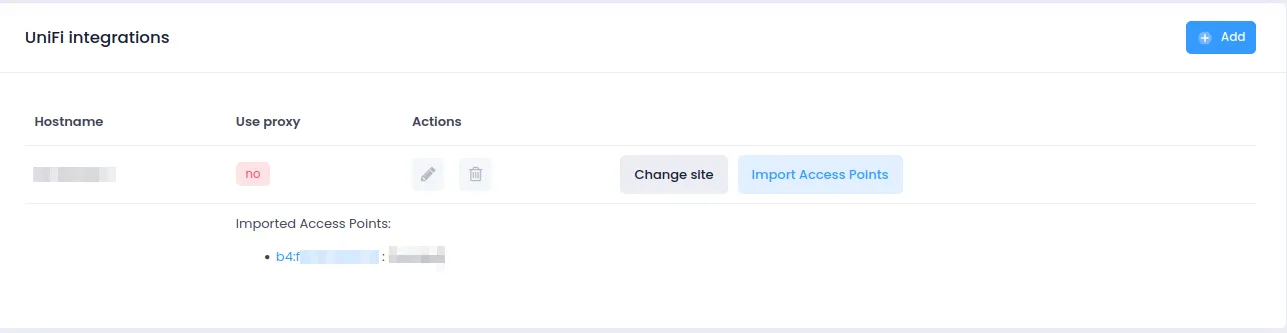
After adding the Access Points, you should see The integration and all the Access Points that are attached to it.
Test the solution
Test the solution Connect with the WiFi network. You should see a login page. Go through the login process and, once finished, you should have internet access. You should see first connections and authorizations in the Social WiFi Panel’s statistics section.
Troubleshooting
Please read the article below to read about common problems and how to fix them.