Ruckus ZoneDirector
Compatibility
Social WiFi has been tested and is proven to work on the following configurations:
Ruckus ZoneDirector1200 Controller
- versions above 10.5.0.0 build 190
Access point firmware
- the same as Controller
An example of working setup consists of a Ruckus R310 Access Point running the same firmware version as Ruckus ZoneDirector1200 controller, which is 10.5.0.0, build 190.
Connecting the device
Connect the Ruckus ZD controller from port 1 on a switch, then connect the PC on which the configuration will take place in such a way that both devices are within the same network.
Accessing the device’s administration panel
Check the IP address received by the controller and log into it from the PC. If the controller has initial configuration on it, it will ask for login and password. If not, it will launch initial configuration procedure. The configuration can be conducted through any web browser.
Device configuration
After logging into the GUI, it is required to configure particular sections.
RADIUS configuration
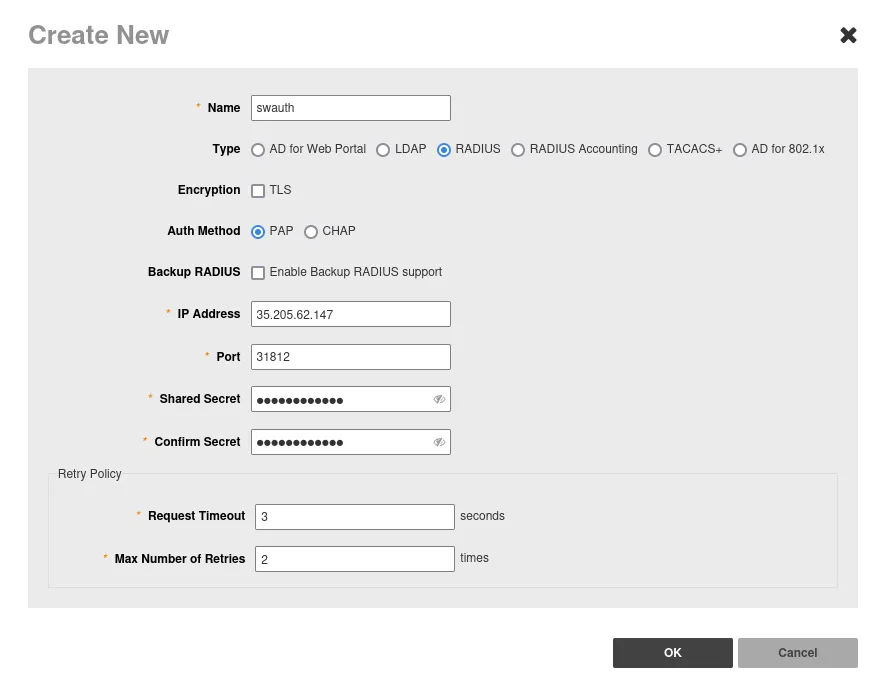
Services & Profiles → AAA Servers → +Create
| Name | swauth |
|---|---|
| Type | RADIUS |
| Encryption | Leave unchecked |
| Auth Method | PAP |
| Backup RADIUS | Leave unchecked |
| IP Address | 35.205.62.147 |
| Port | 31812 |
| Shared Secret | Radius Secret available in Access Points tab of the Social WiFi Panel |
| Confirm Secret | Copy above |
Leave “Request Timeout” and “Max Number of Retries” at default and press OK.
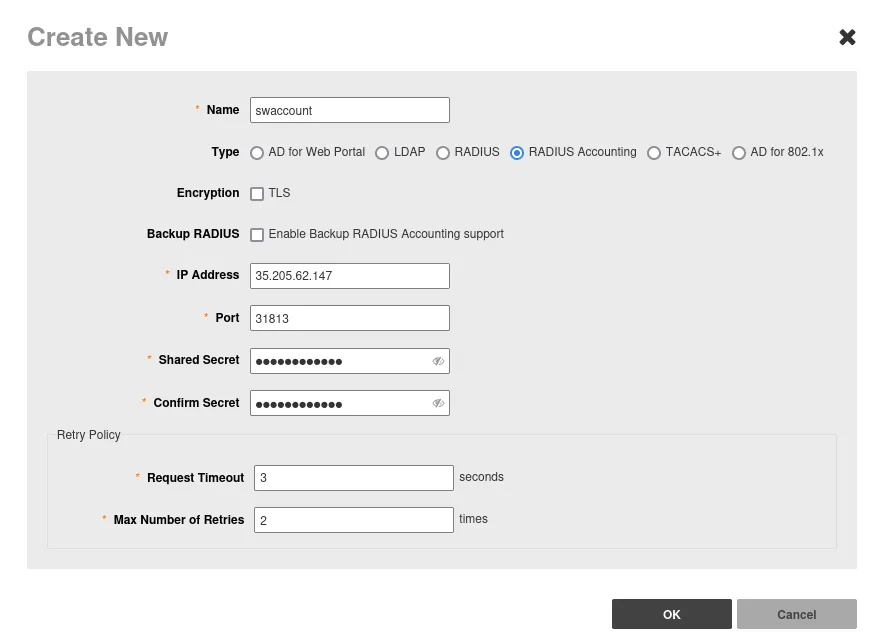
Now add the Accounting server:
Configure → AAA Servers → +Create
| Name | swaccount |
|---|---|
| Type | RADIUS Accounting |
| Encryption | Leave unchecked |
| Backup Radius | Leave unchecked |
| IP Address | 35.205.62.147 |
| Port | 31813 |
| Shared Secret | Radius Secret available in Access Points tab of the Social WiFi Panel |
| Confirm Secret | Copy above |
Leave “Request Timeout” and “Max Number of Retries” at default and press OK.
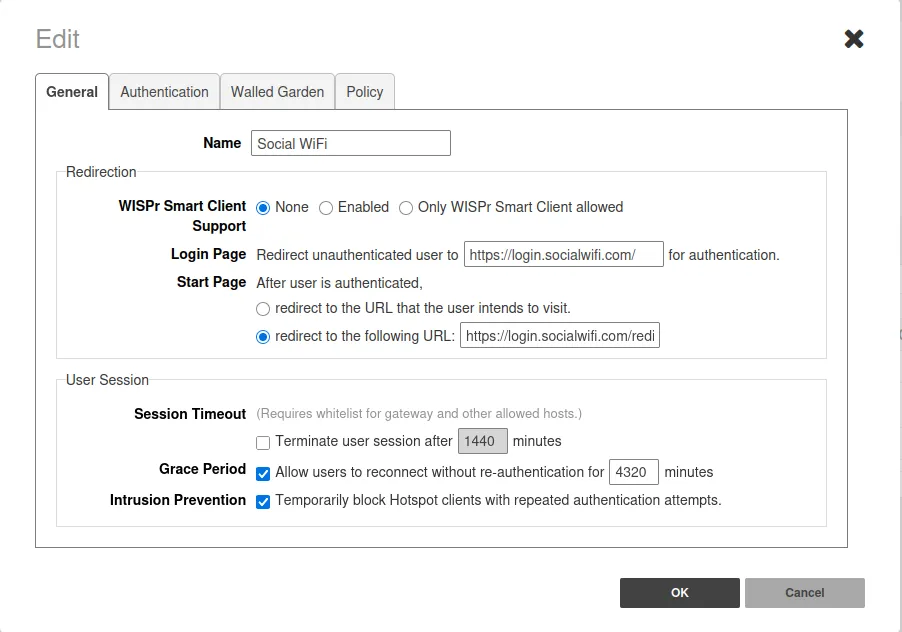
Configuring Hotspot / DNS Walled Garden
Services & Profiles → Hotspot Services → Create
| Name | Social WiFi |
|---|---|
| WISPr Smart Client Support | None |
| Login Page | https://login.socialwifi.com/ |
| Start Page | redirect to the following URL – https://login.socialwifi.com/redirect/ |
| Grace Period | Enabled - 4320 |
Now, switch to the Authentication tab and set up the Authentication/Accounting Servers section as follows:
| Authentication Server | swauth |
|---|---|
| Accounting Server | swaccount |
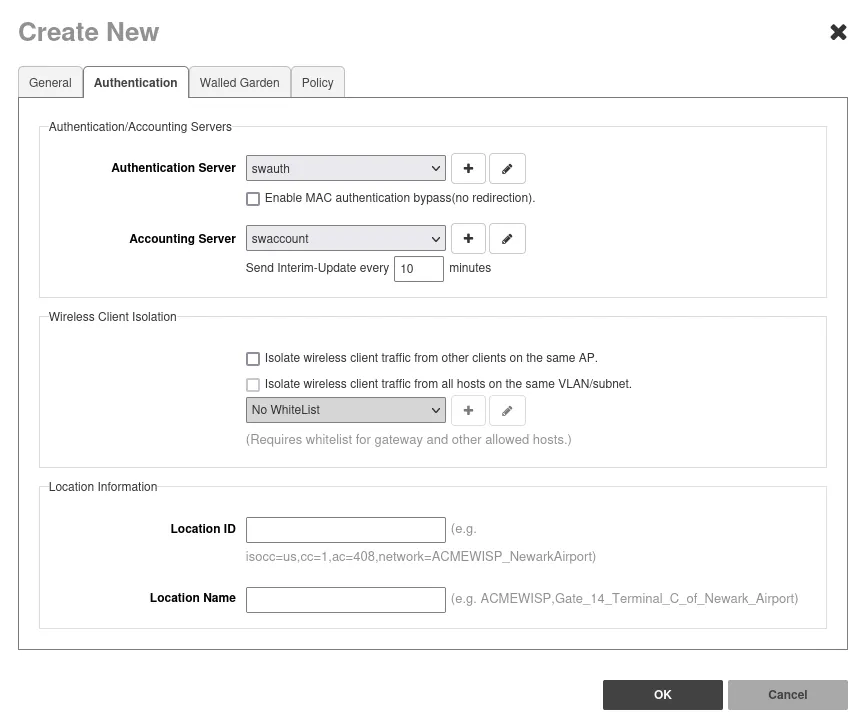
Now, go to the “Walled Garden” tab and click Create New.
Add the following addresses:
*.socialwifi.comsw-login.comfacebook.com*.facebook.com*.fbcdn.netlinkedin.com*.linkedin.com*.licdn.comtwitter.comapi.twitter.comx.comapi.x.com*.twimg.comwhatsapp.com*.whatsapp.net*.whatsapp.comconnect.facebook.netwww.facebook.comwww.googletagmanager.comwww.googleadservices.comgoogleads.g.doubleclick.net*.youtube.com*.ytimg.com*.googlevideo.comyt3.ggpht.com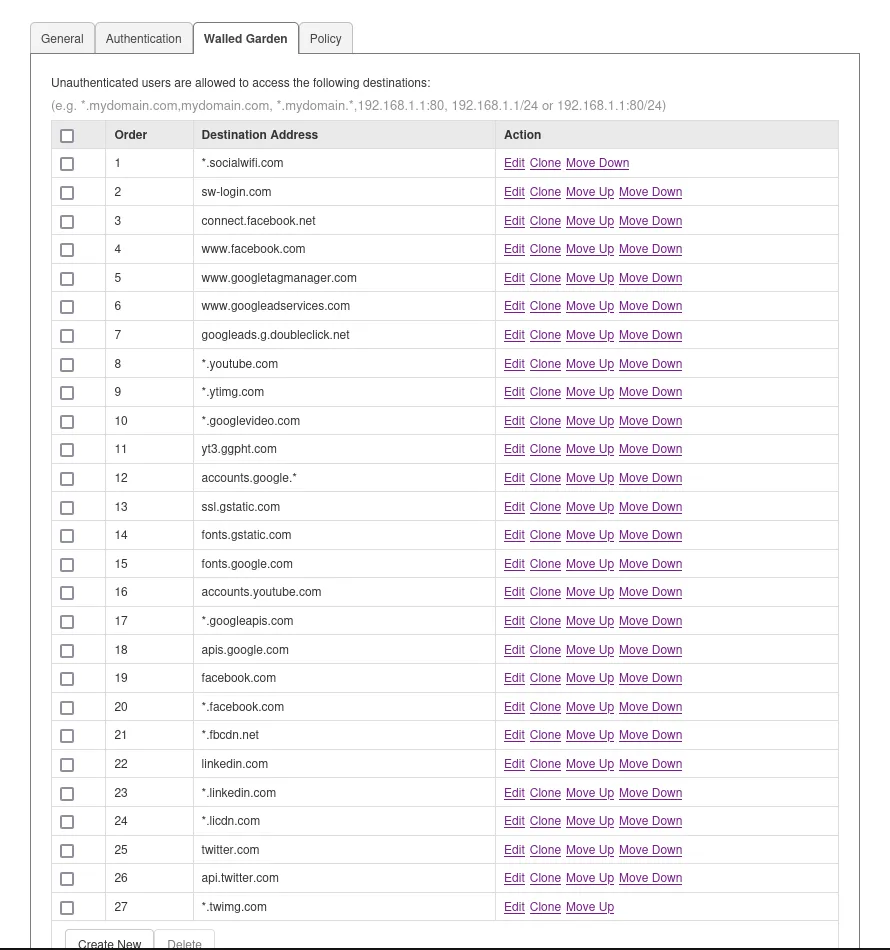
Click OK.
Network configuration
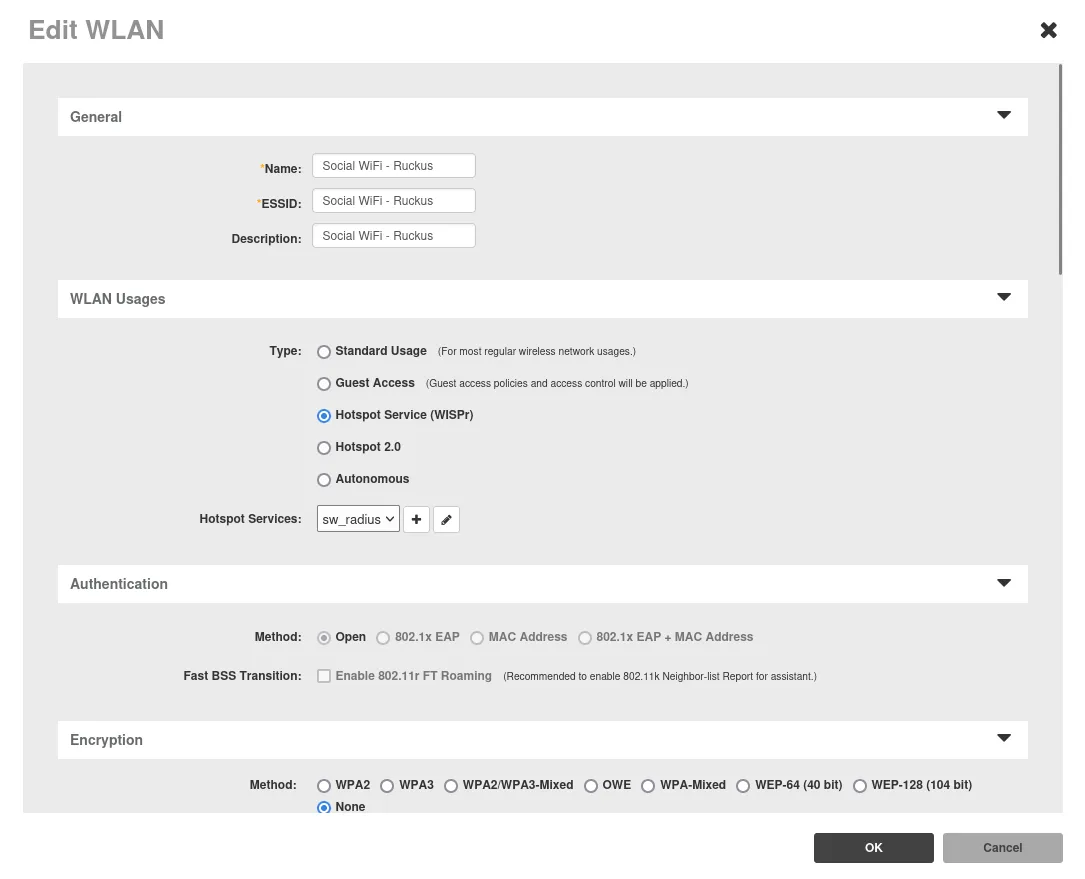
Now, go to “Wireless LANs” and edit or create your Network.
| Name | Type in the name of your network |
|---|---|
| Type | Hotspot Services (WISPr) |
| Hotspot Services | sw_radius |
Then, open “Advanced Options” section and set the “WLAN Priority” on High.
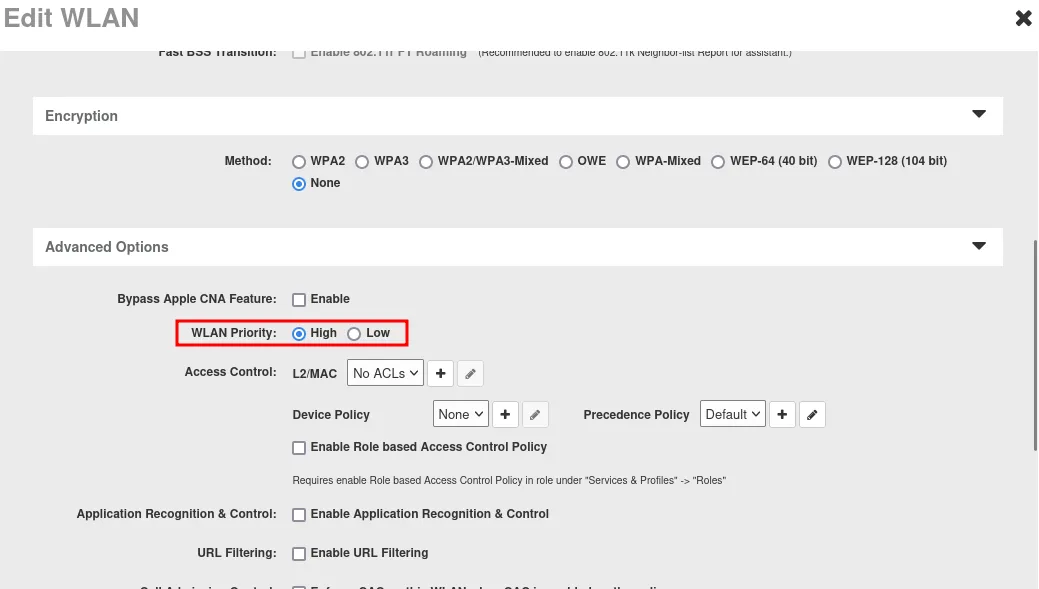
Click OK.
Adding the device to Social WiFi platform
In order to add a device to the Social WiFi platform:
- In the Monitor → Access Points menu, click the AP that you want to add to Social WiFi platform, copy their MAC addresses from AP MAC address field and BSSID column.
- Access your account at the Social WiFi Panel.
- Choose the venue to which you would like to add the device.
- In the “Access Points” tab, press “Add” (upper right corner), paste the MAC address you copied into the form (adding a name is optional) and click “Create”.
- Restart the device.
Firewall troubleshooting
Symptom: after connecting to the WiFi network, on the last step which is clicking the “Connect to the internet button” you’re not getting connected to the internet.
Solution: it might be the case that you have a firewall that blocks traffic between the WiFi device and the controller. You might either have explicit blocking rules on the firewall, or simply have separate VLANs for the guests and the controller and the traffic between them might be blocked as well. In this case you have to unlock specific ports. For example:
- TCP 9997