Add VLAN on MikroTik
Sometimes you might want to separate your guest network from your private network. This guide will help you to set up a VLAN on your Social WiFi network, so that any Access Points connected on a particular physical interface and tagged with the same VLAN tag will relay proper packets where you want them to go.
Run Social WiFi on a VLAN
The installation guide for MikroTik assumes that the hotspot service will be running on physical port 3, handling untagged traffic. Let’s assume, that you want to instead have a hybrid port, where untagged traffic goes to default LAN network (no Social WiFi) and traffic tagged with VLAN ID 20 goes to the guest network (with Social WiFi enabled).
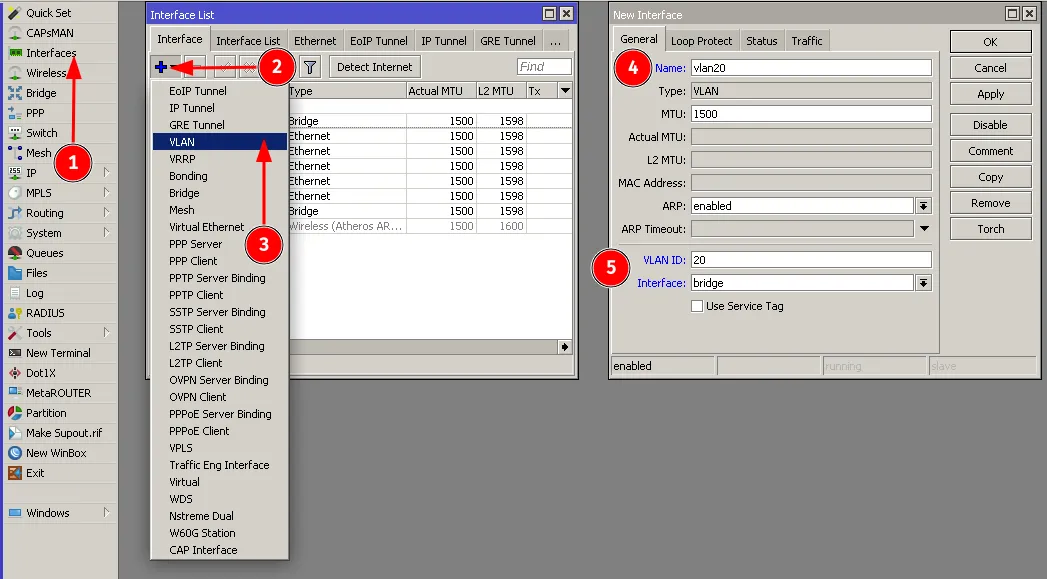
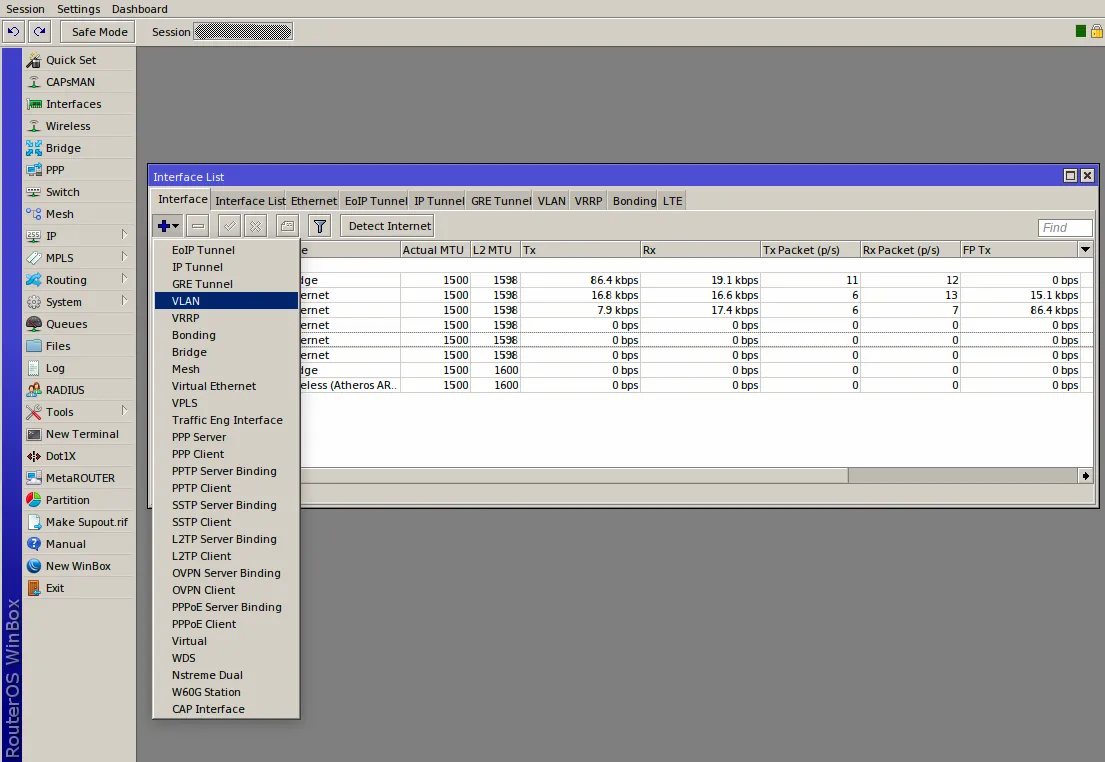
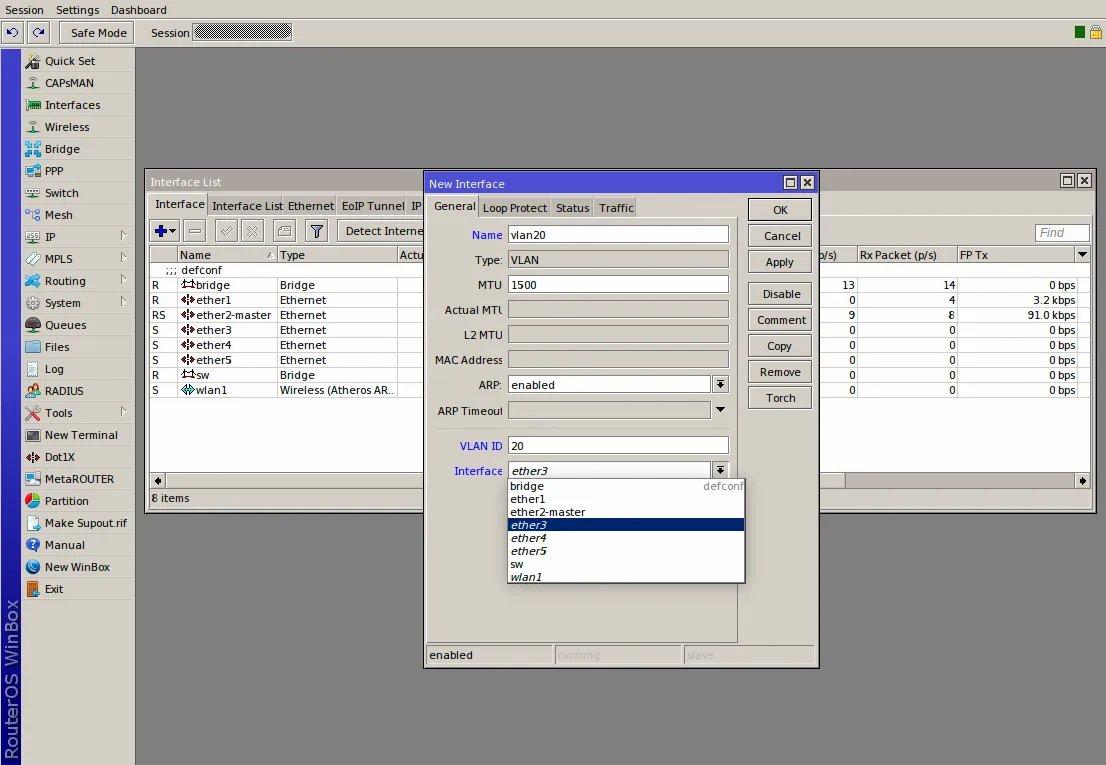
To add a VLAN using this method, please go to Interfaces->”+”->VLAN. Add the name, set your VLAN ID and set interface to “bridge”.
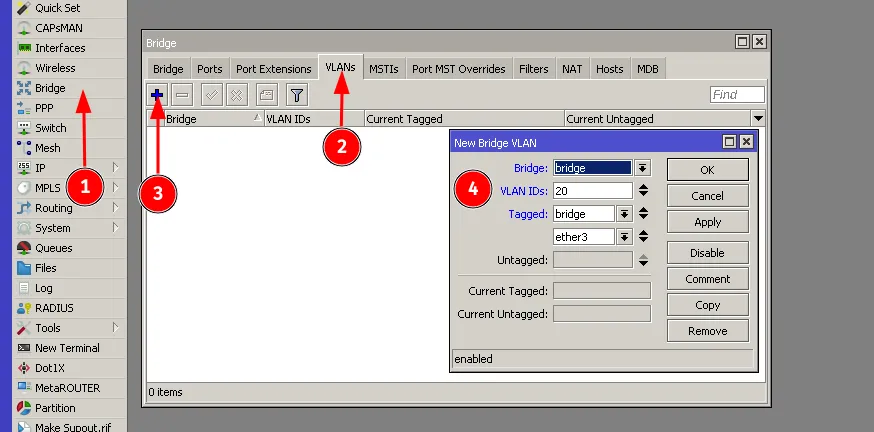
Now, go to Bridge -> VLANs -> ”+” and configure the VLAN filtering as follows:
| Bridge | bridge |
|---|---|
| VLAN IDs | 20 |
| Tagged | bridge, ether3 |
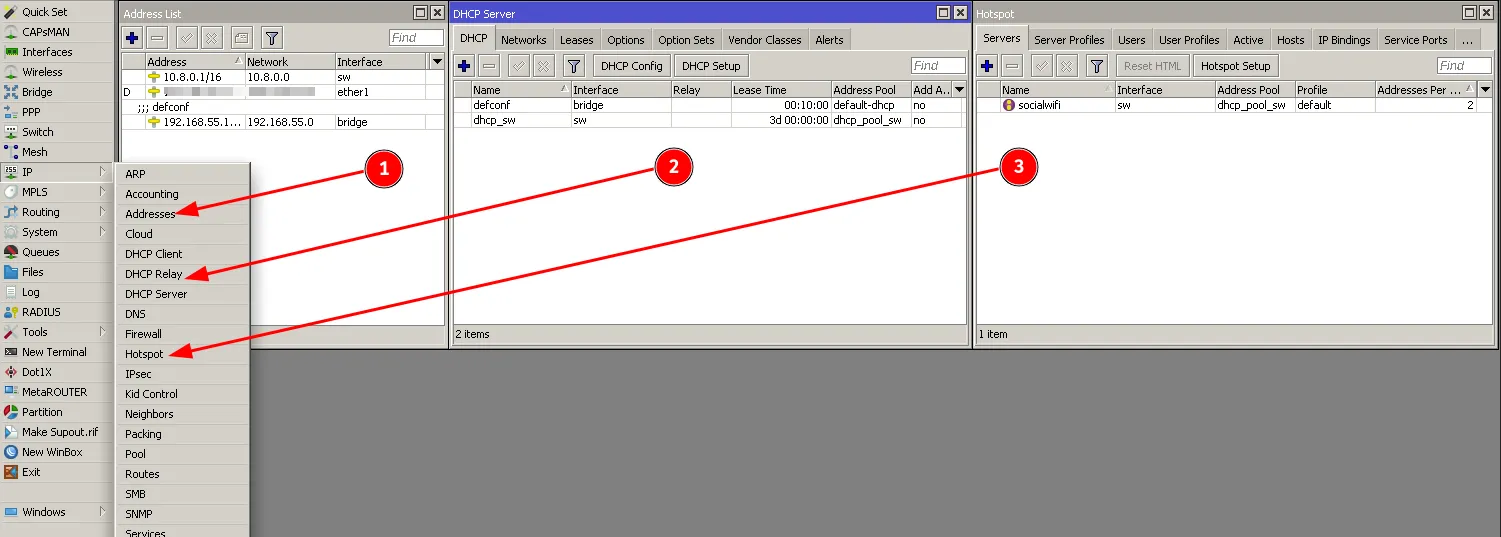
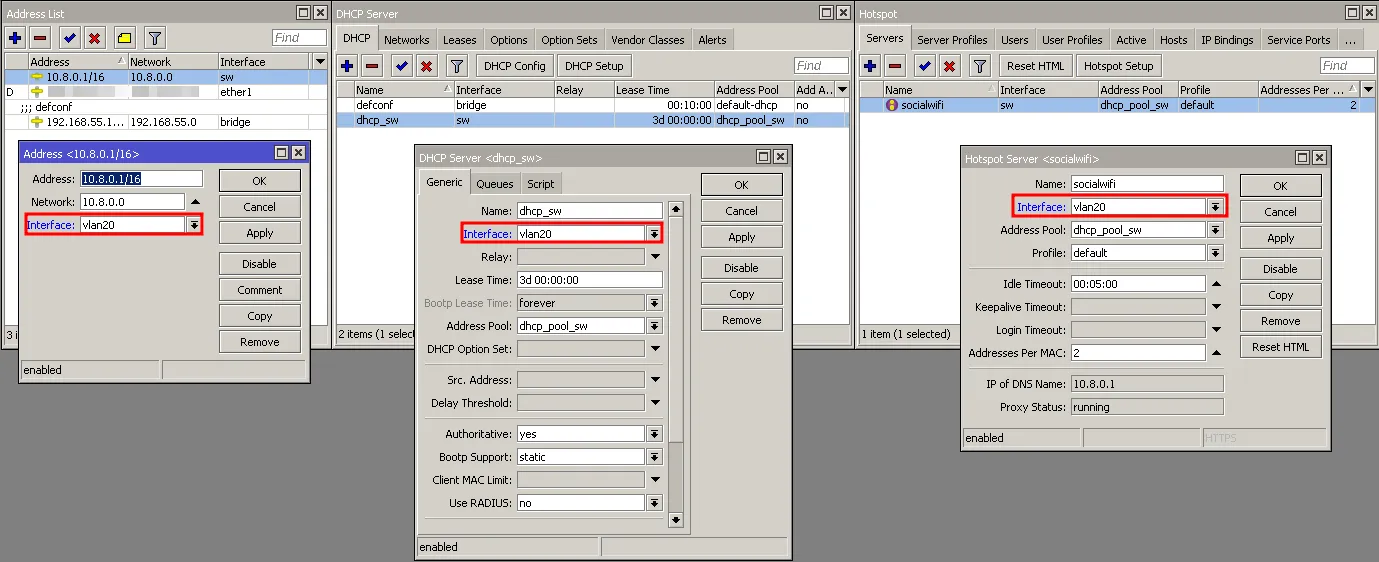
Now, go to IP->Addresses, IP->DHCP-Server, IP->Hotspot and change interfaces from “sw” to “vlan20” for every single window opened as follows:
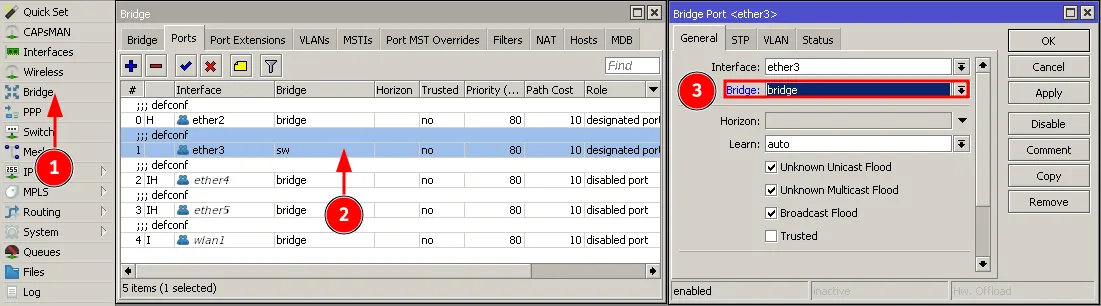
Now, go to Bridge->Ports and change “ether3” bridge from “sw” to “bridge”:
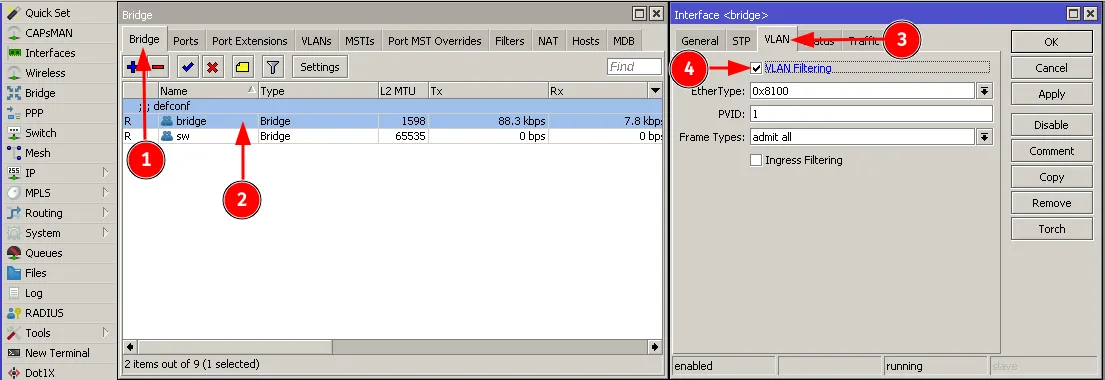
Now, go back to Bridge(1.) and turn on bridge VLAN filtering for “bridge” as follows. Make sure to leave “PVID” at 1.
Everything should be working by now. The last thing left to do is to delete the “sw” bridge, to do that go to the Interfaces->Interface, select the “sw” bridge and press X (3.).
Configuration from the example above to copy and paste to a terminal:
/interface vlan add interface=bridge name=vlan20 vlan-id=20/interface bridge vlan add bridge=bridge tagged=bridge,ether3 vlan-ids=20/ip address set [find interface=sw] interface=vlan20/ip hotspot set [find interface=sw] interface=vlan20/ip dhcp-server set [find interface=sw] interface=vlan20/interface bridge port set [find interface=ether3] bridge=bridge/interface bridge set bridge vlan-filtering=yes/interface bridge remove swDeprecated method of configuring VLAN on your MikroTik router
Interfaces -> Add -> VLAN
| Name | [your desired name] |
|---|---|
| VLAN ID | [your VLAN ID] |
| Interface | [interface on which your APs are connected] |
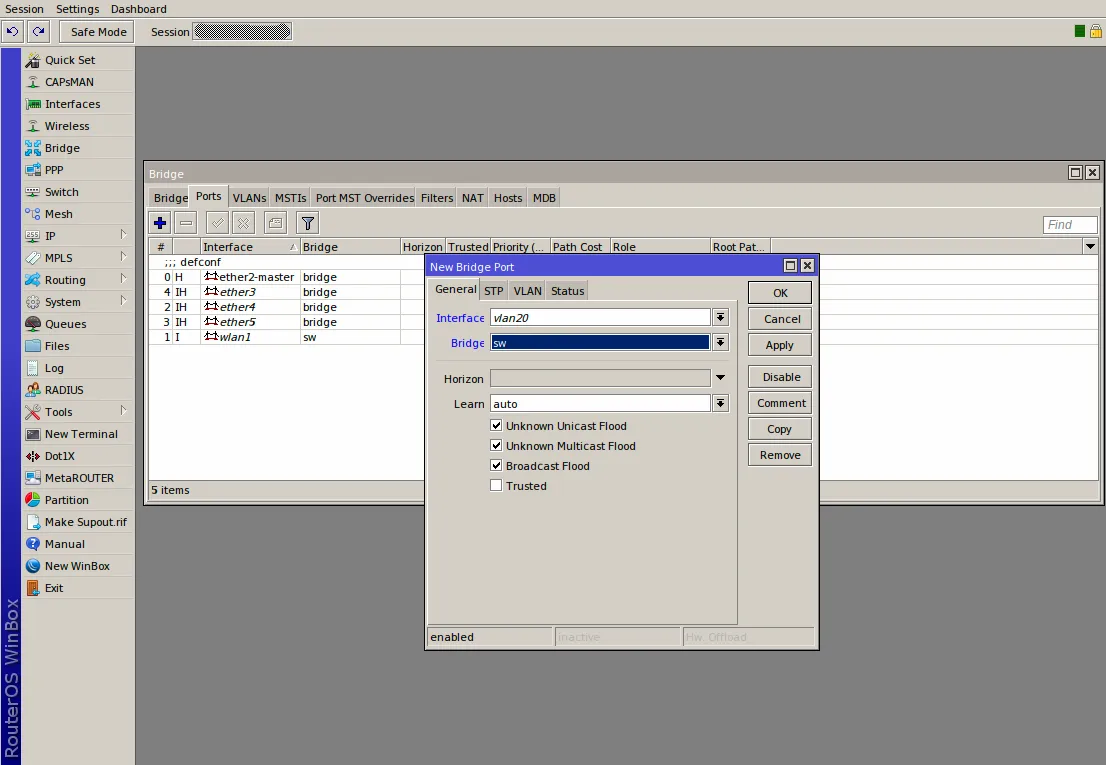
Bridge -> Ports -> Add
| Interface | [choose the VLAN you created] |
| Bridge | sw |
| OK |
If your AP is connected on the port you configured (in this case, ethernet port 3) and has properly set VLAN tagging, then you should be free to enjoy Social WiFi service without impacting your main network!