Extreme Cloud IQ
Compatibility
Social WiFi has been tested and is proven to work on the following configurations:
ExtremeCloud IQ Connect
- Build version 23.3.1.13
Access Point
- Aerohive AP230, OS Version 10.0.7.1
Access the administration panel
Make sure you’re logged on with an account that has administrative privileges and the ability to edit network policy. Also, please make sure that you have your Access Point provisioned with the ExtremeCloud IQ.
Adding Network Policy
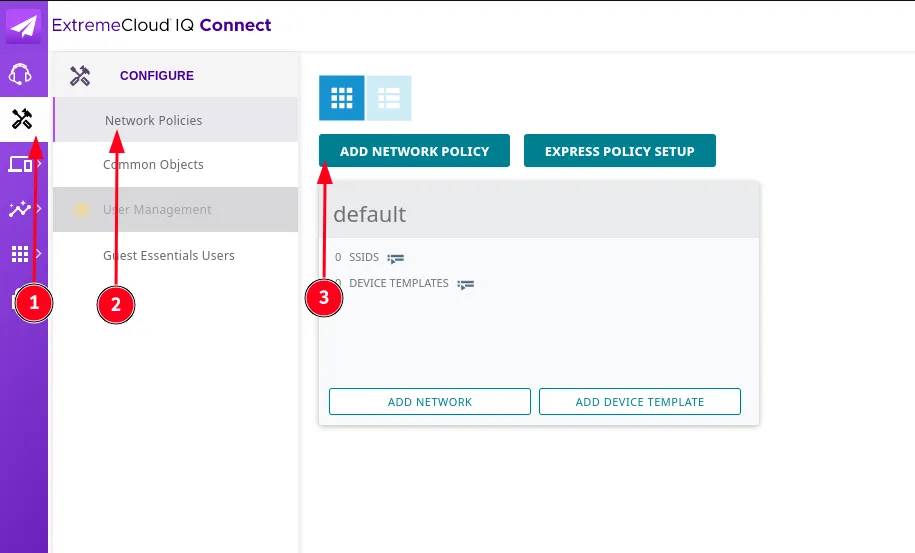
From the menu on the right, go to Configure -> Network Policies -> Add Network Policy.
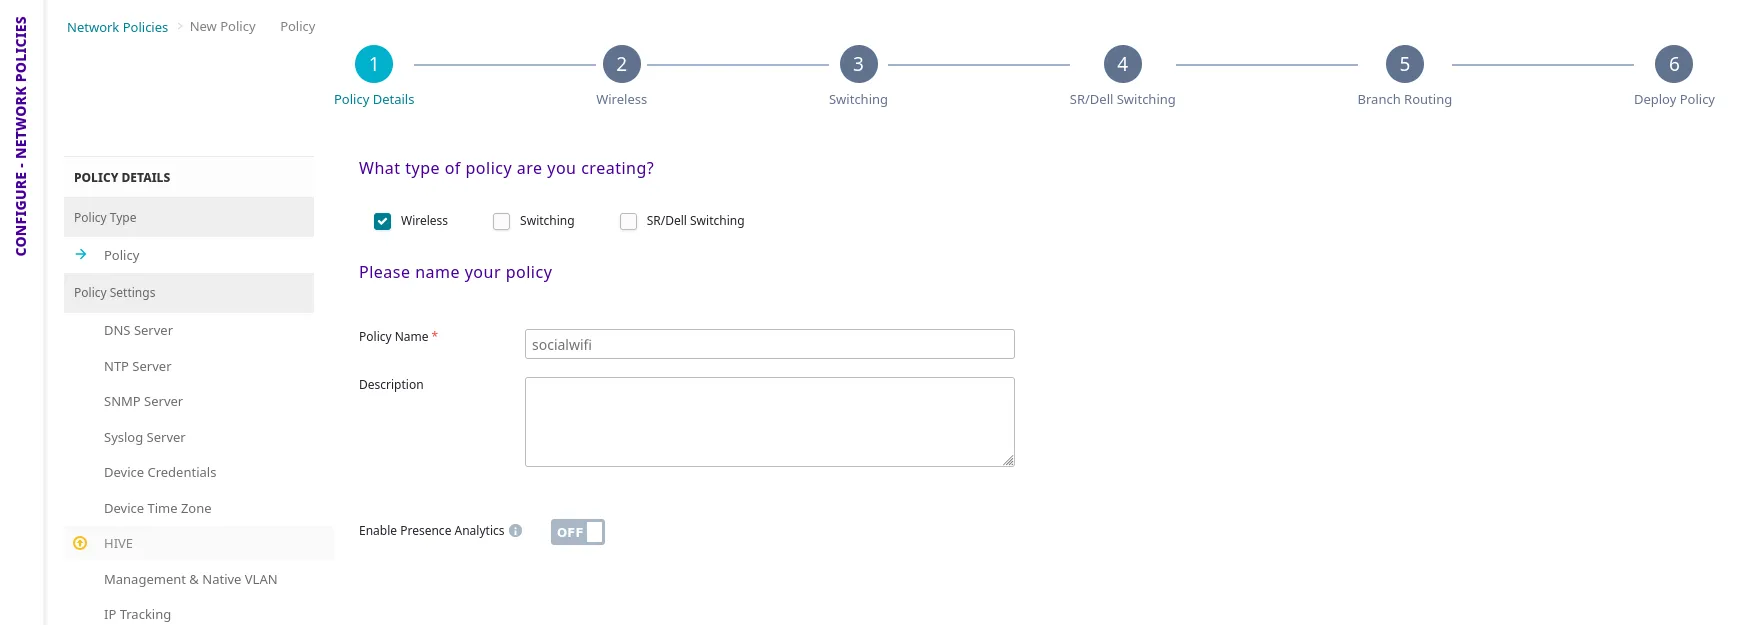
In the “Policy Details” section select Wireless as the policy type, add the name of the Policy and press SAVE on the right lower corner.
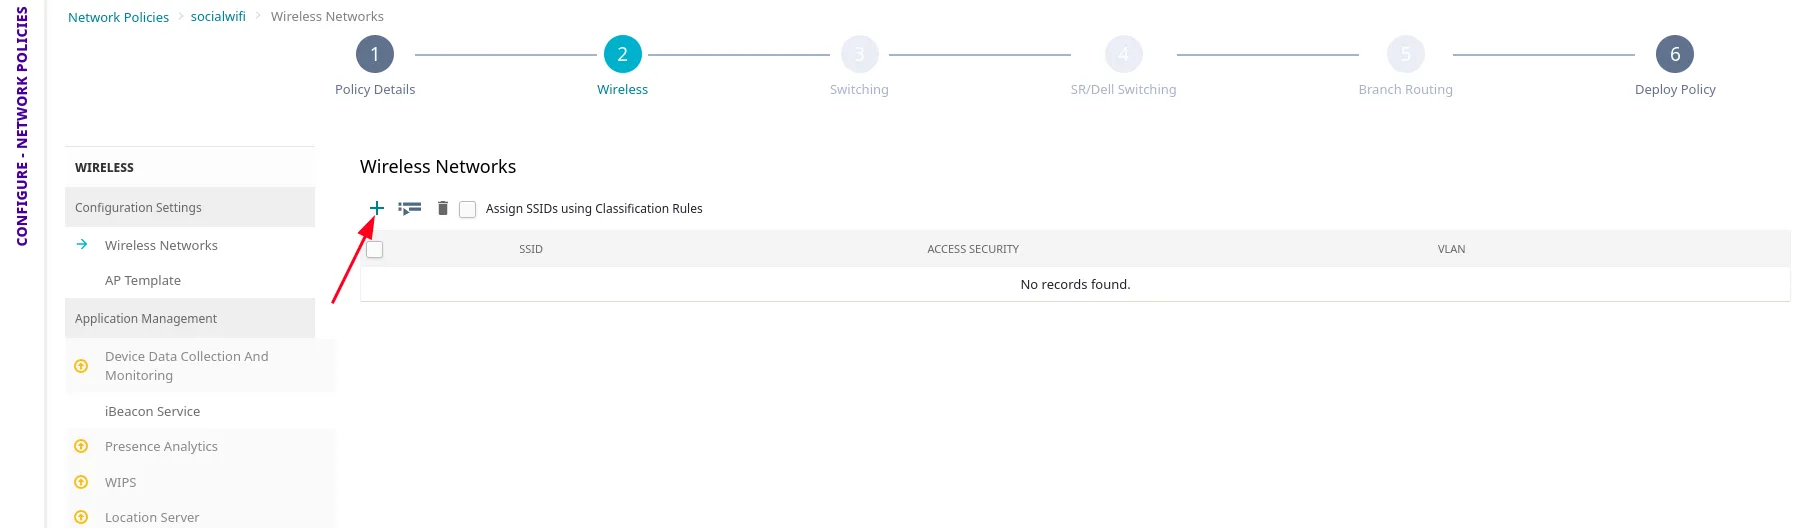
Then, go to the “Wireless” section and press ”+” to add a Wireless network.
Configure as follows:
| Name (SSID) | Your SSID name |
|---|---|
| Broadcast Name | Your SSID name |
| Broadcast SSID Using | WiFi0 Radio (2.4GHz or 5GHz only) |
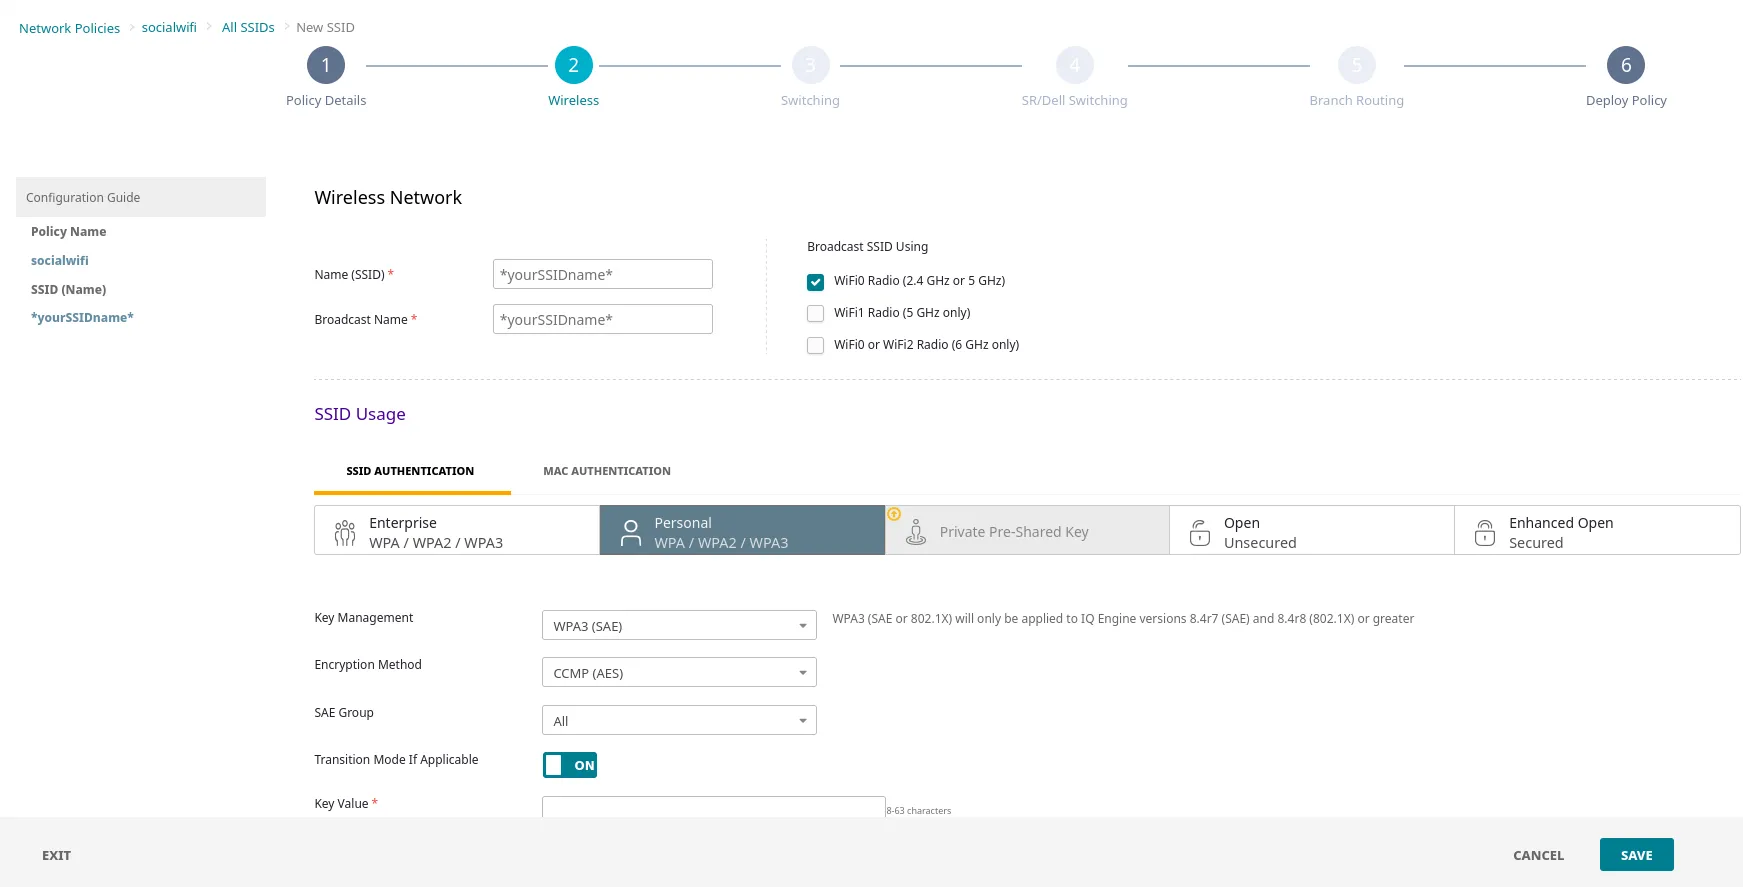
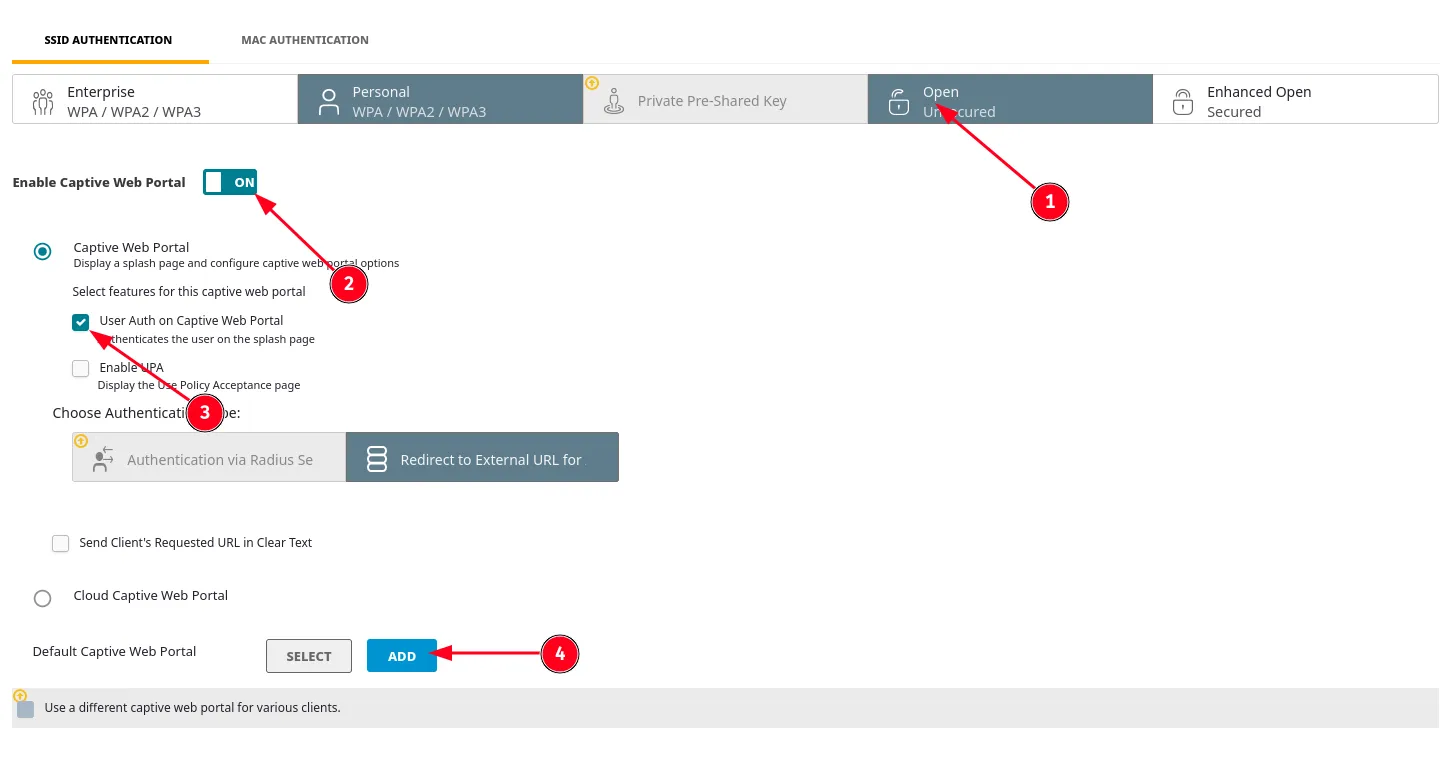
| SSID Authentication | Open |
|---|---|
| Enable Captive Web Portal | On |
| Captive Web Portal | User Auth on Captive Web Portal |
| Default Captive Web Portal | ADD |
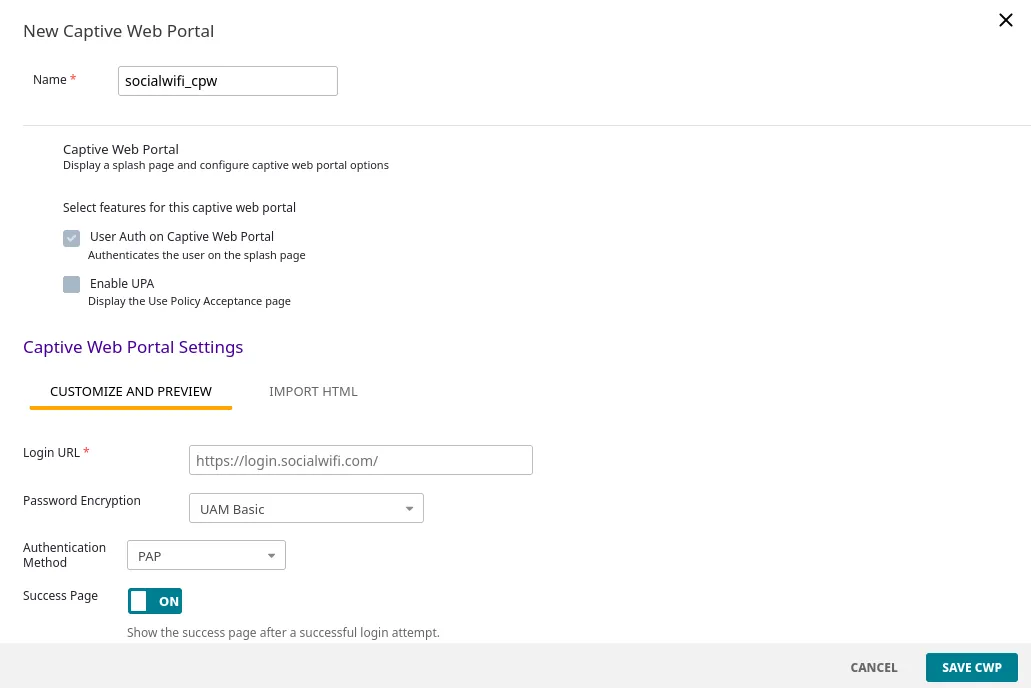
| Name | socialwifi_cpw |
|---|---|
| Login URL | https://login.socialwifi.com/ |
| Password Encryption | UAM Basic |
| Authentication Method | PAP |
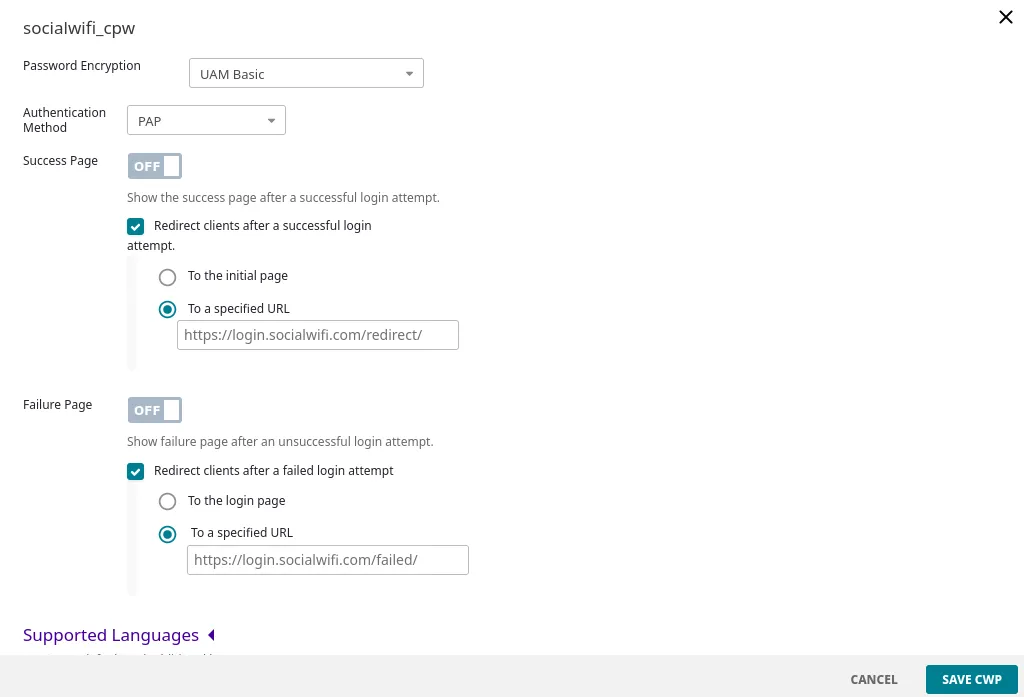
| Success Page | OFF |
| Redirect clients after a successful login attempt. | Checked |
| To the specified URL | https://login.socialwifi.com/redirect/ |
| Failure page | OFF |
| Redirect clients after a successful login attempt. | Checked |
| To the specified URL | https://login.socialwifi.com/failed/ |
Walled garden
As you scroll down, you will see a “Walled Garden” section. Add all of the domains below one by one and press SAVE CWP.
*.socialwifi.comsw-login.comfacebook.com*.facebook.com*.fbcdn.netlinkedin.com*.linkedin.com*.licdn.comtwitter.comapi.twitter.comx.comapi.x.com*.twimg.comwhatsapp.com*.whatsapp.net*.whatsapp.comconnect.facebook.netwww.facebook.comwww.googletagmanager.comwww.googleadservices.comgoogleads.g.doubleclick.net*.youtube.com*.ytimg.com*.googlevideo.comyt3.ggpht.com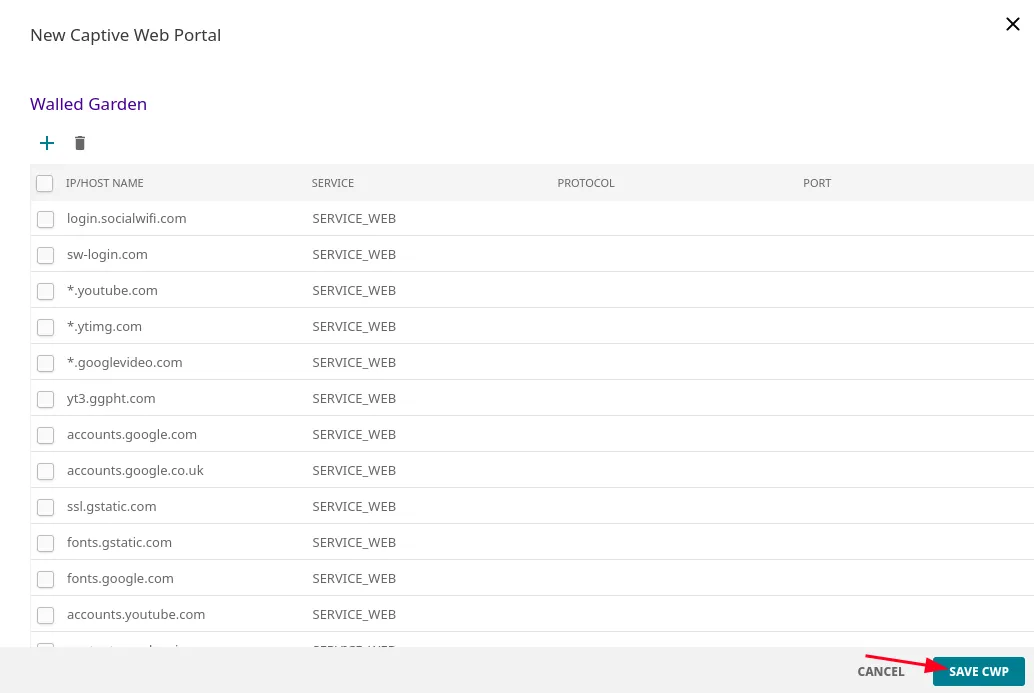
RADIUS server
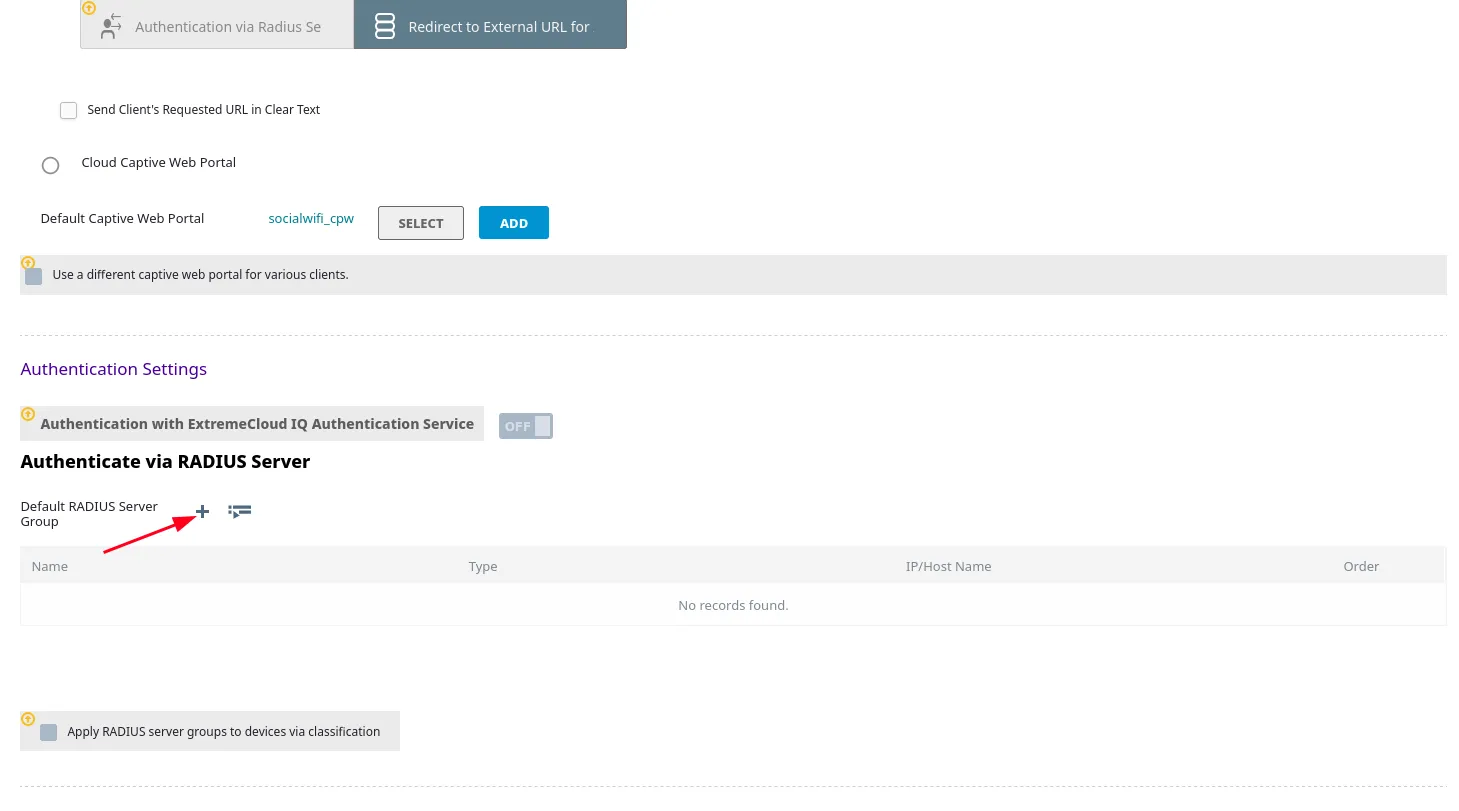
Now, scroll down to the “Authentication Settings” section and add the Default RADIUS Server Group by pressing on ”+”.
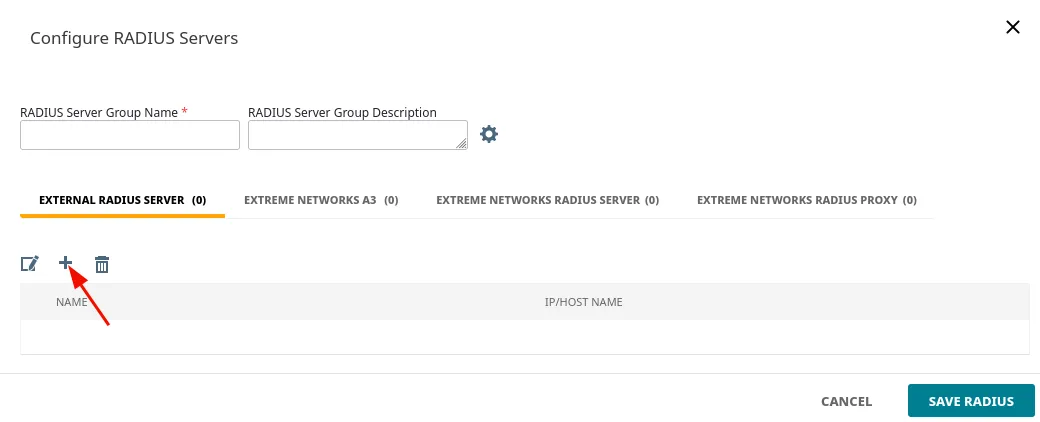
Configure as follows:
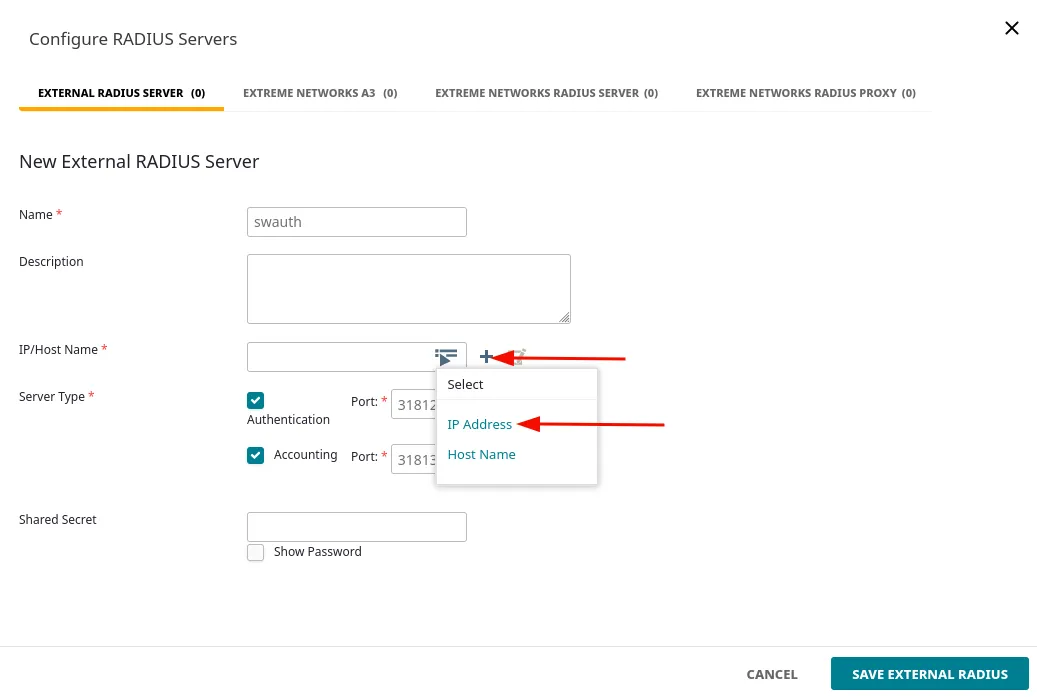
| Name | swauth |
|---|---|
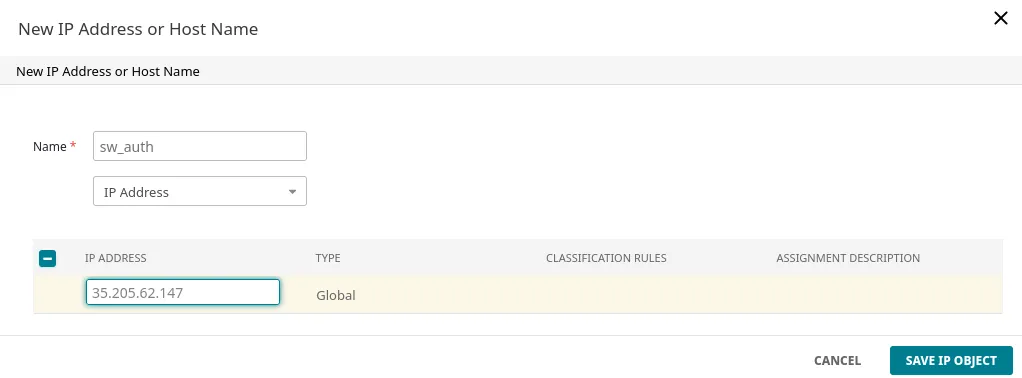
| IP/Host Name | sw_auth (instruction on how to add below) |
| Authentication Port | Checked, 31812 |
| Accounting Port | Checked, 31813 |
| Shared Secret | RADIUS Secret is available in Access Points tab of the Social WiFi Panel |
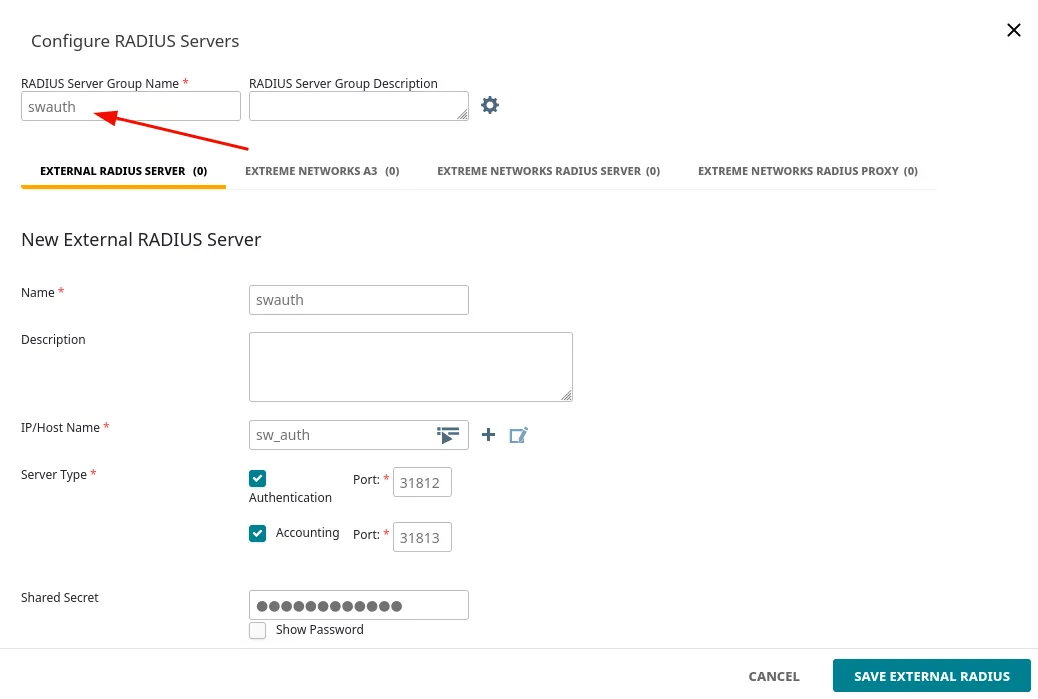
After you add the RADIUS Server, make sure to press SAVE EXTERNAL RADIUS. Then, press SAVE on the bottom right and go to the “Deploy Policy” section.
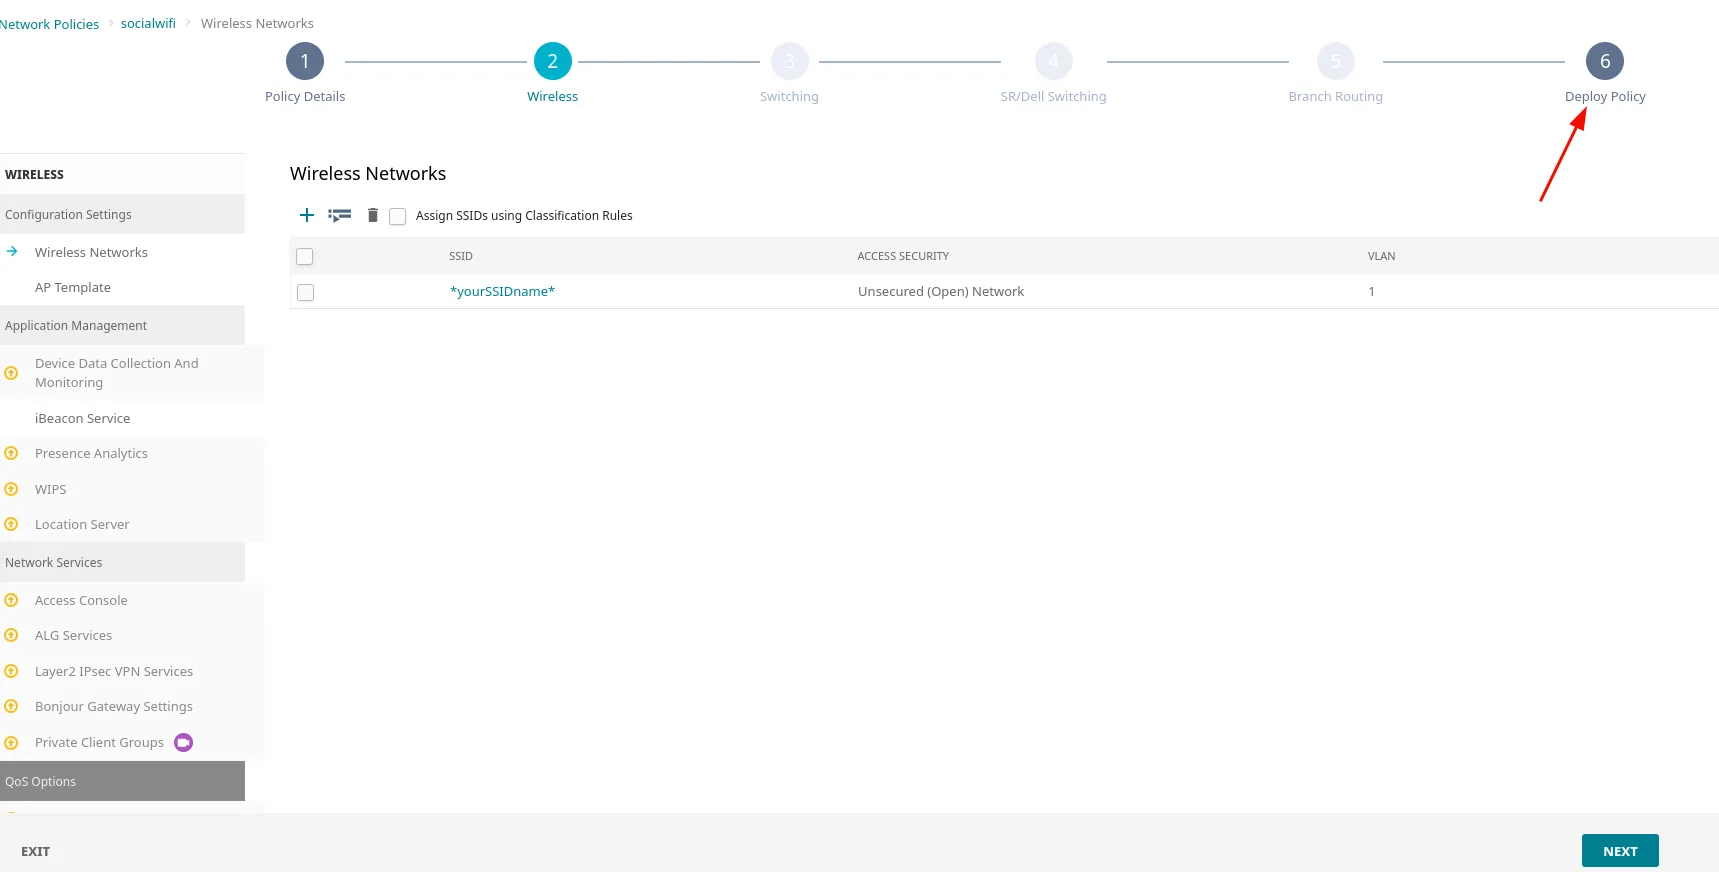
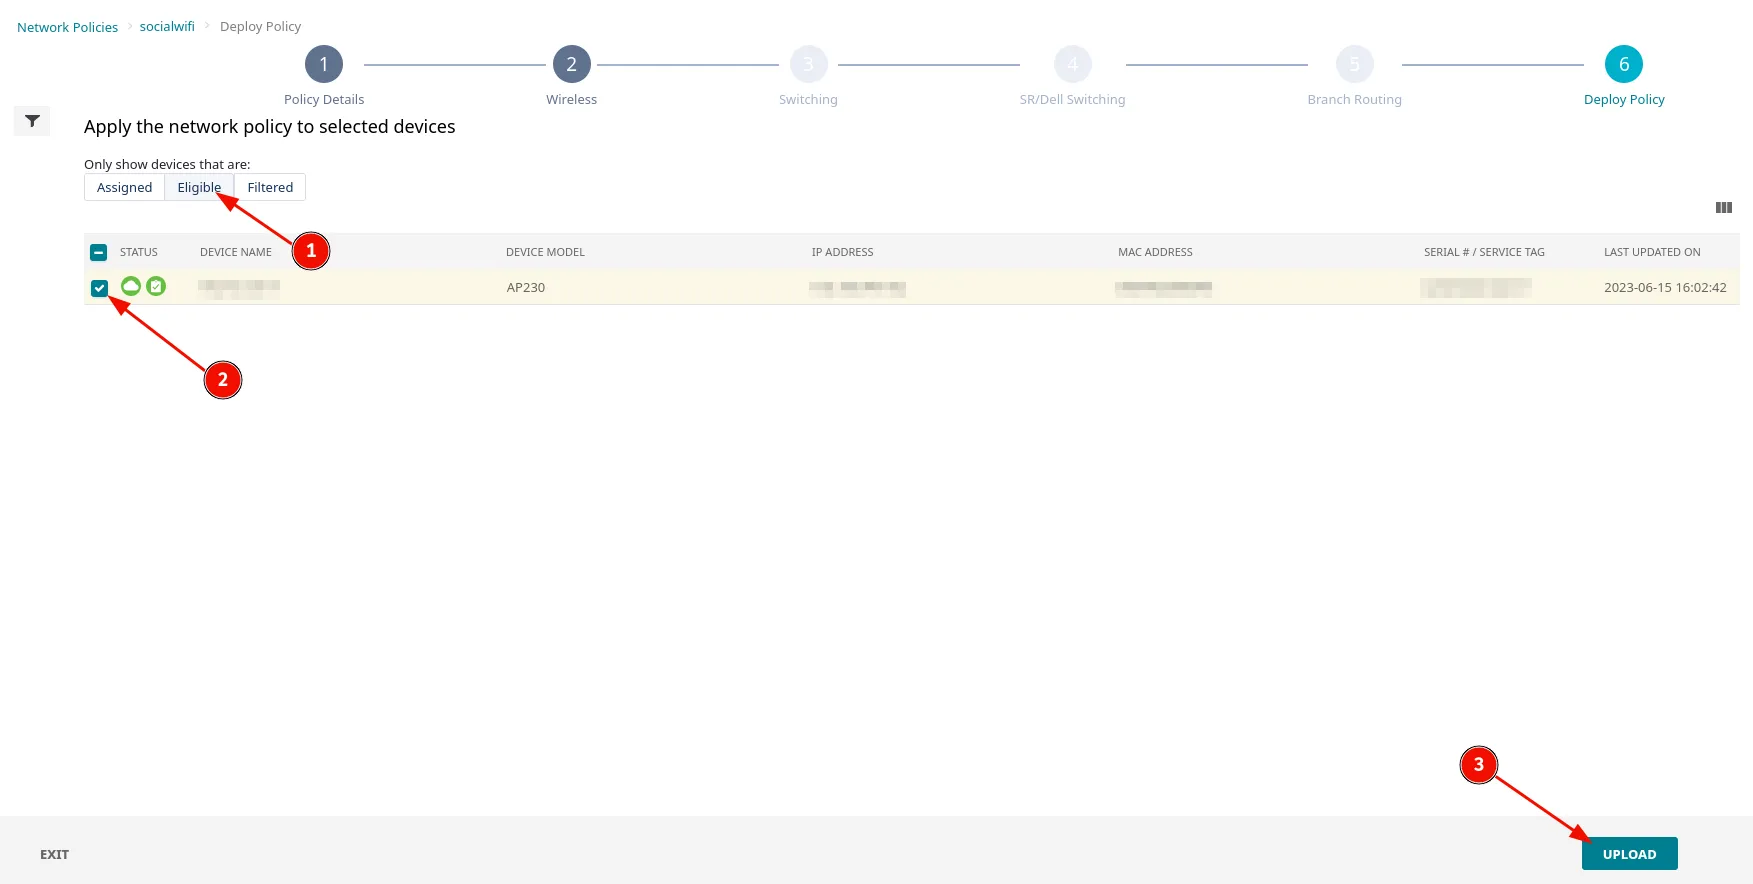
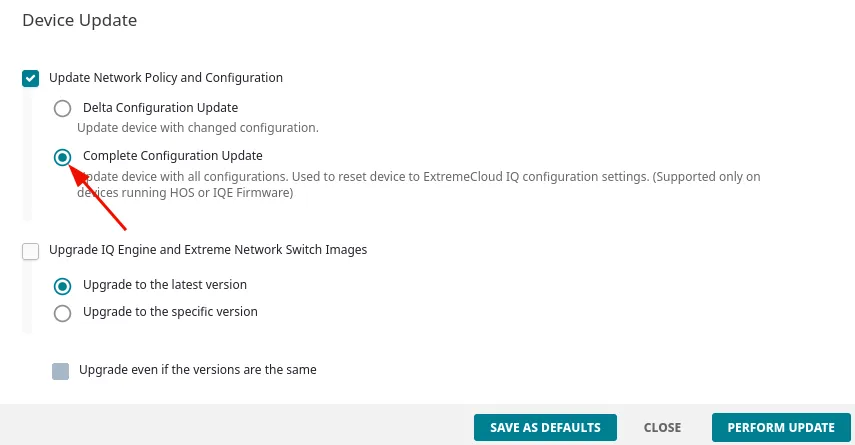
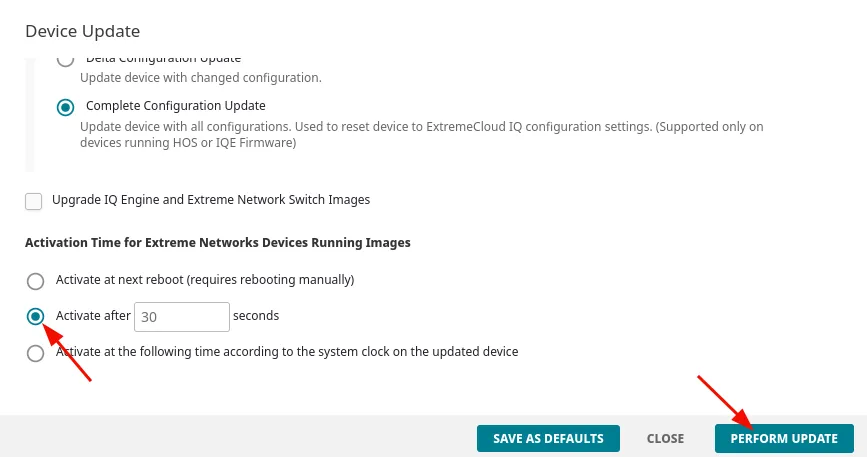
To deploy the created policy, find the Eligible devices and press UPLOAD. Configure as follows:
| Update Network Policy and Configuration | Complete Configuration Update |
|---|---|
| Activate after.. | 30 seconds |
And press PERFORM UPDATE.
Add the access points to Social WiFi panel
The last step is to add all access points to the Social WiFi platform.
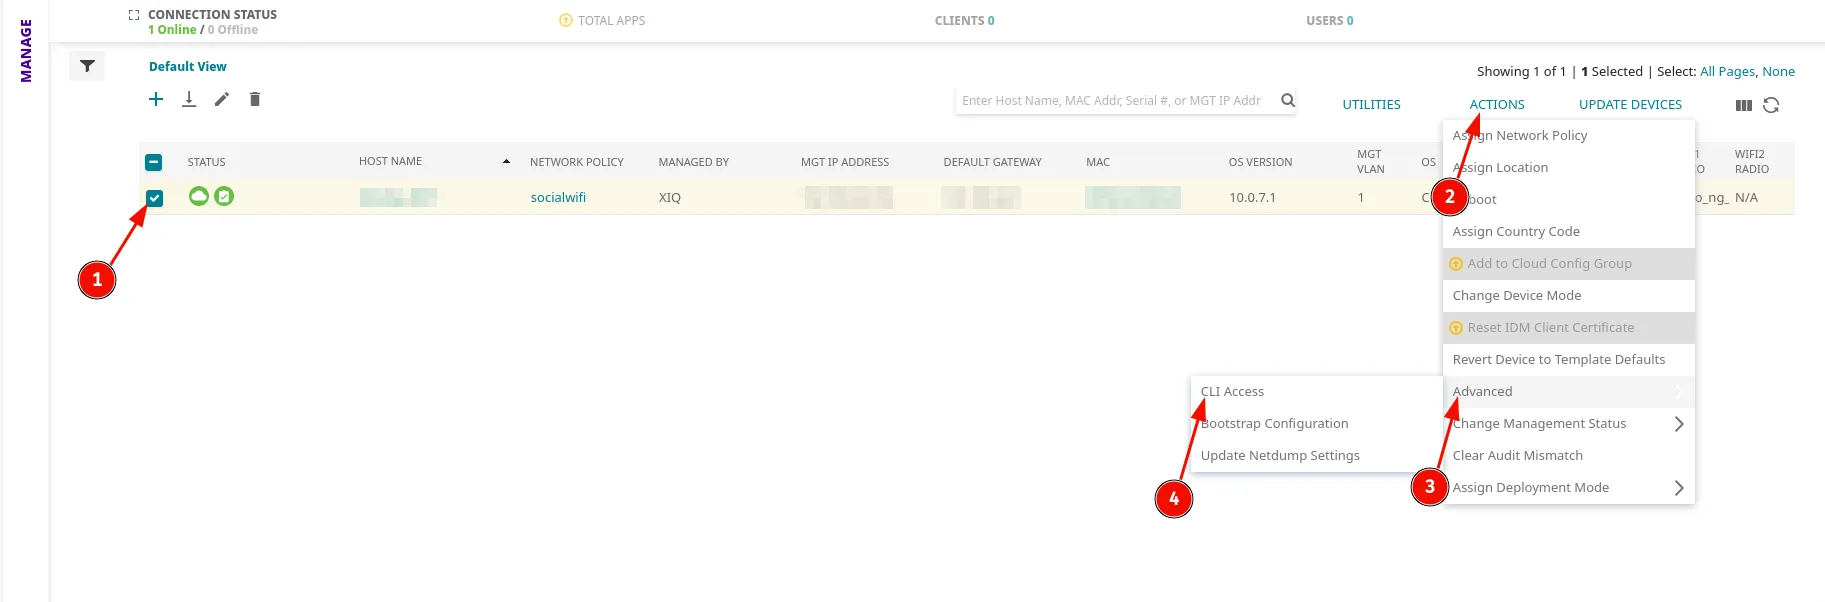
Go to Manage->Devices in the menu on the left. We need to display the MAC address for each device. In order to do that:
- Select the device
- Go to ACTIONS
- Go to Advanced
- Open the CLI Access
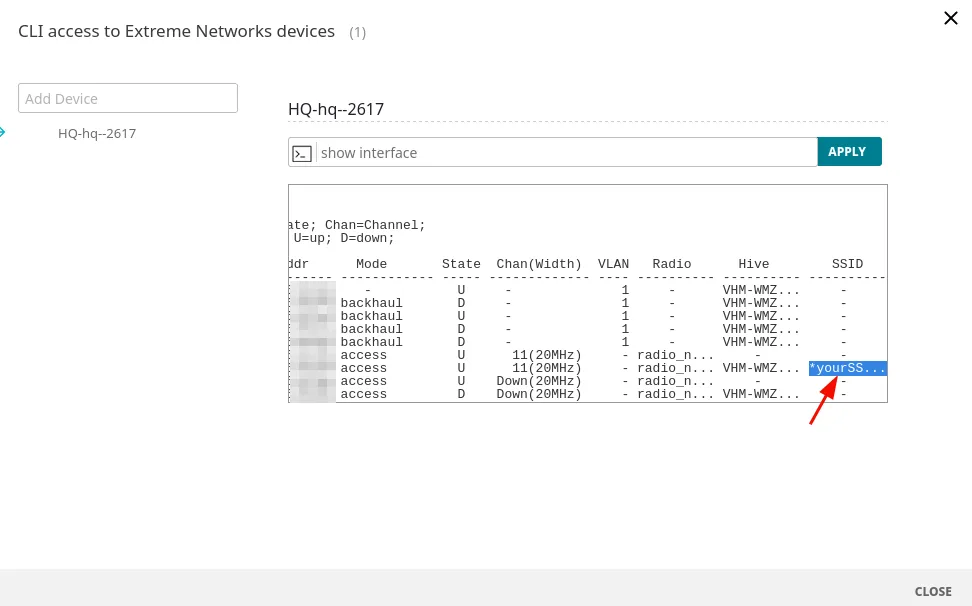
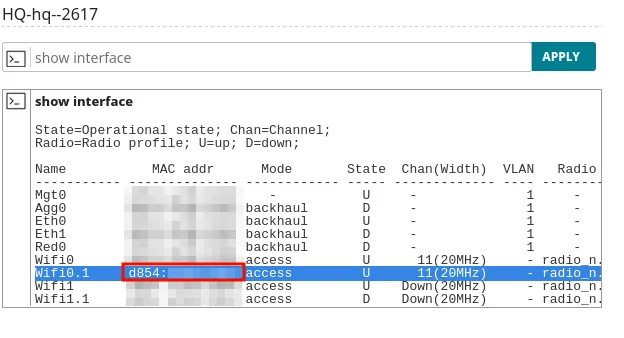
Now, type in the “show interface” command and press APPLY. Scroll down and find your SSID name, then copy the MAC address associated with it and add it to the Social WiFi Panel.
Test the solution
Connect with the WiFi network. You should see a login page. Go through the login process and, once finished, you should have internet access. You should see first connections and authorisations in the Social WiFi Panel’s statistics section.