Cisco Meraki
Compatibility
Social WiFi has been tested and is proven to work on the following configurations:
Cisco MR firmware
- Tested up to MR 29.5.1
An example of a working setup consists of the Cisco Meraki MR42 with a firmware version MR 29.4.1 set up in the Meraki coud controller.
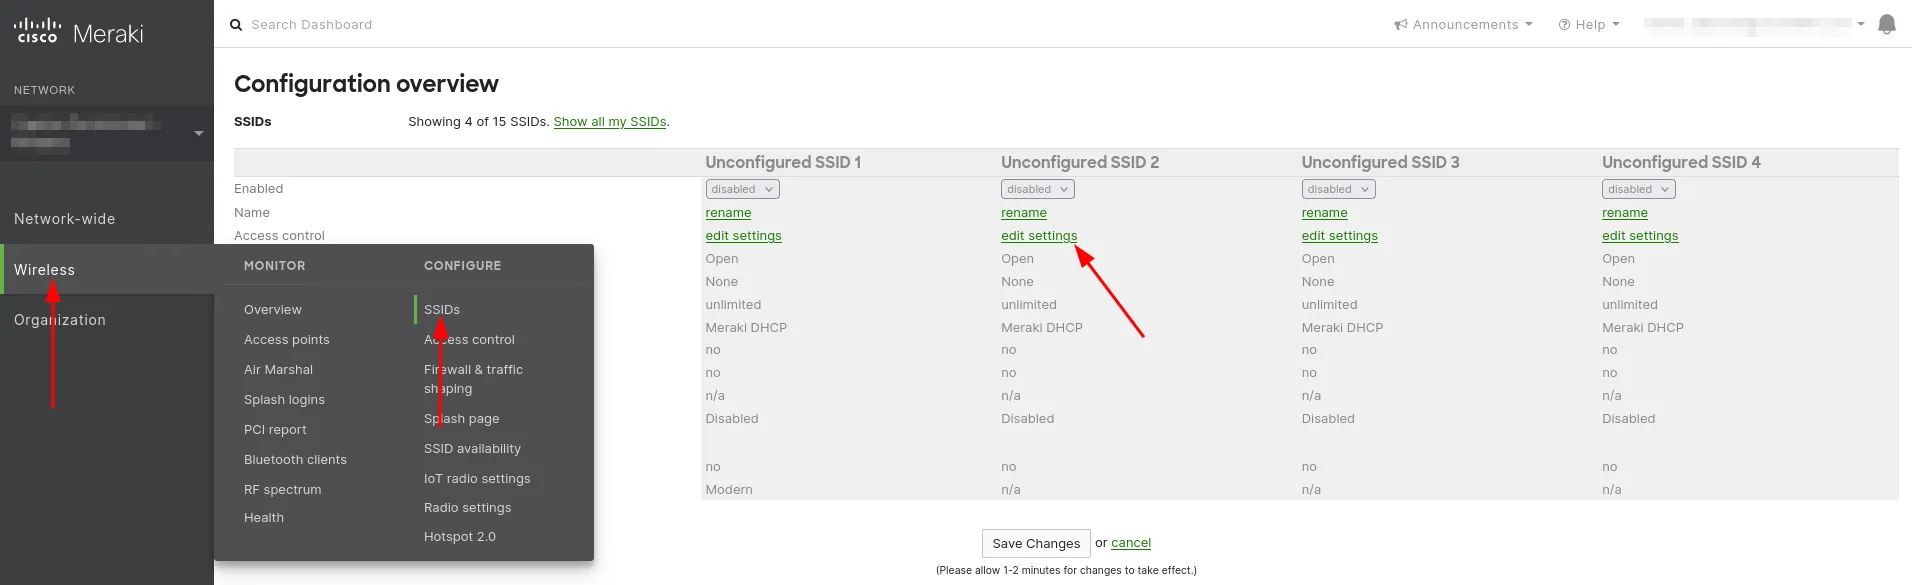
Accessing the device’s administration panel
- Log in to the administration panel with root permissions and go to Network.
- Go to Wireless → Configure SSID → Edit settings.
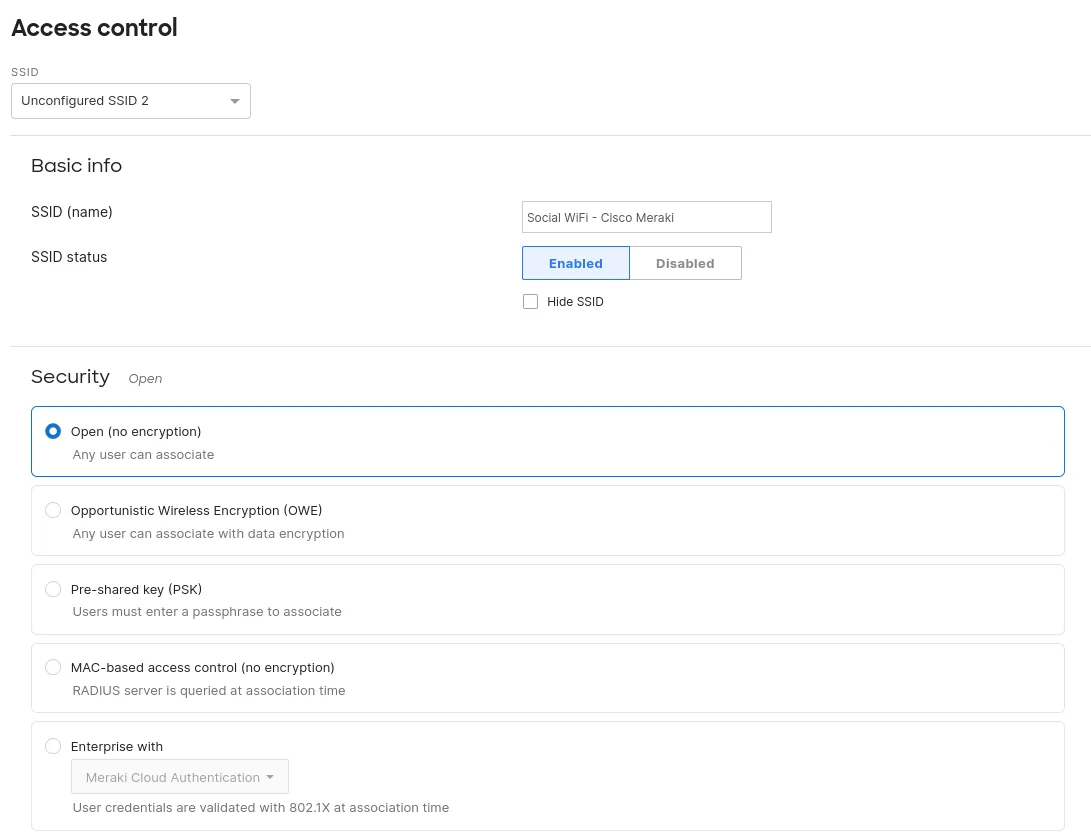
Configuration of Access control
Basic info
| SSID (name) | Your SSID name |
| SSID (status) | Enabled |
| Hide SSID | Leave unchecked |
Security
Leave default - Open (no encryption).
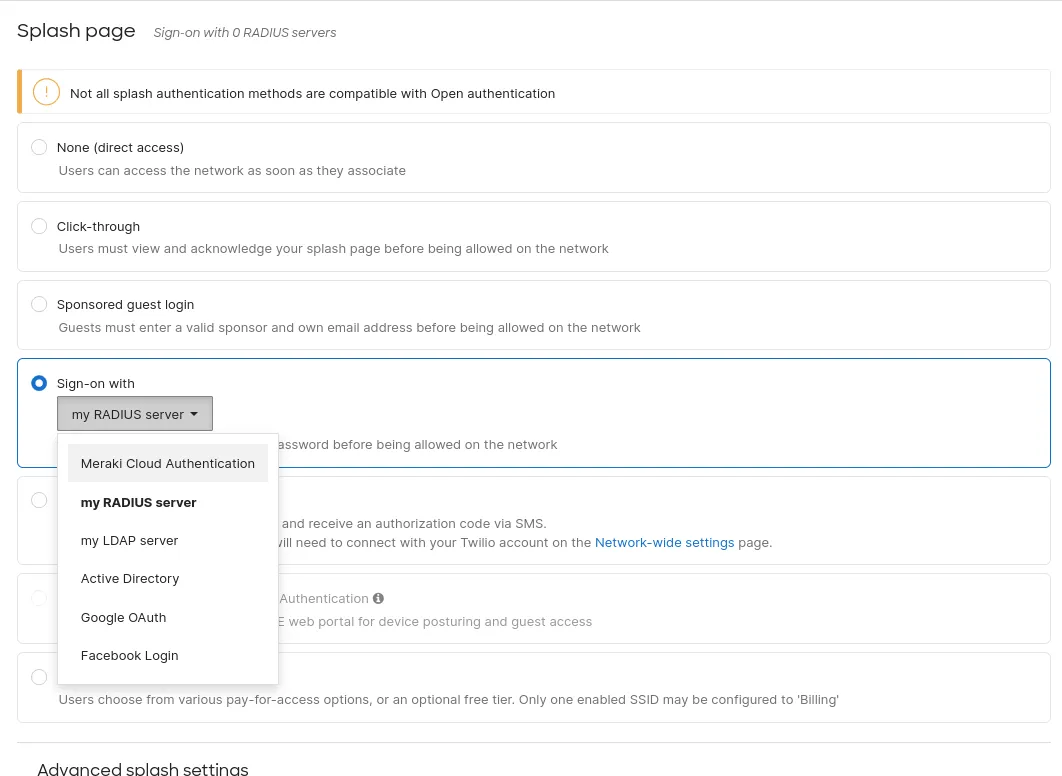
Splash Page
Check the “Sign-on with” option and from the dropdown menu select my RADIUS server.
In the “Advanced splash settings”:
| Captive portal strength | Block all access until sign-on is complete |
|---|---|
| Walled garden | Enabled (Walled garden ranges below) |
| Simultaneous logins | Allow simultaneous devices per user |
| Controller disconnection behavior | Default |
Walled garden ranges
*.socialwifi.comsw-login.comfacebook.com*.facebook.com*.fbcdn.netlinkedin.com*.linkedin.com*.licdn.comtwitter.comapi.twitter.comx.comapi.x.com*.twimg.comwhatsapp.com*.whatsapp.net*.whatsapp.comconnect.facebook.netwww.facebook.comwww.googletagmanager.comwww.googleadservices.comgoogleads.g.doubleclick.net*.youtube.com*.ytimg.com*.googlevideo.comyt3.ggpht.com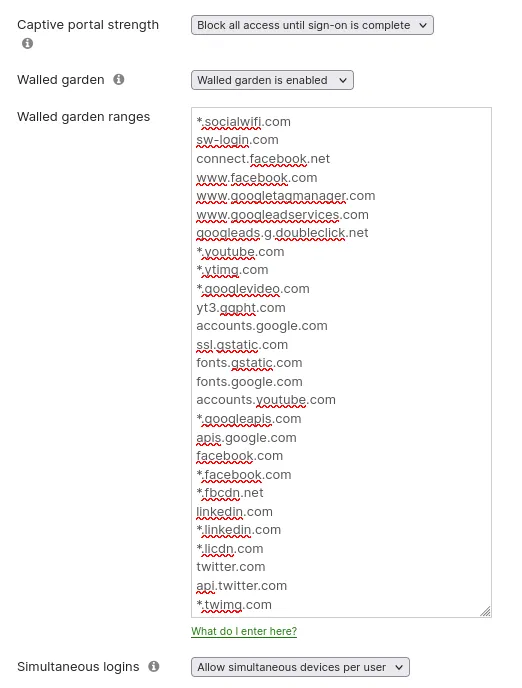
RADIUS
Click on “Add server” and an Authentication server:
| Host IP or FQDN | 35.205.62.147 |
| Port | 31812 |
| Secret | Radius Secret available in Access Points tab of the Social WiFi Panel |
Configuring RADIUS Accounting server:
| Host IP or FQDN | 35.205.62.147 |
| Port | 31813 |
| Secret | Radius Secret available in Access Points tab of the Social WiFi Panel |

Leave rest as of this section as default.
Press Save on the box in the bottom right.
Configuration of Captive Portal
Go to Wireless → Configure Splash page.
- Custom splash URL: Check “Or provide a URL where user will be redirected”: https://login.socialwifi.com/
- Splash behaviour: Where should users go after the splash page? Check “The URL they were trying to fetch”
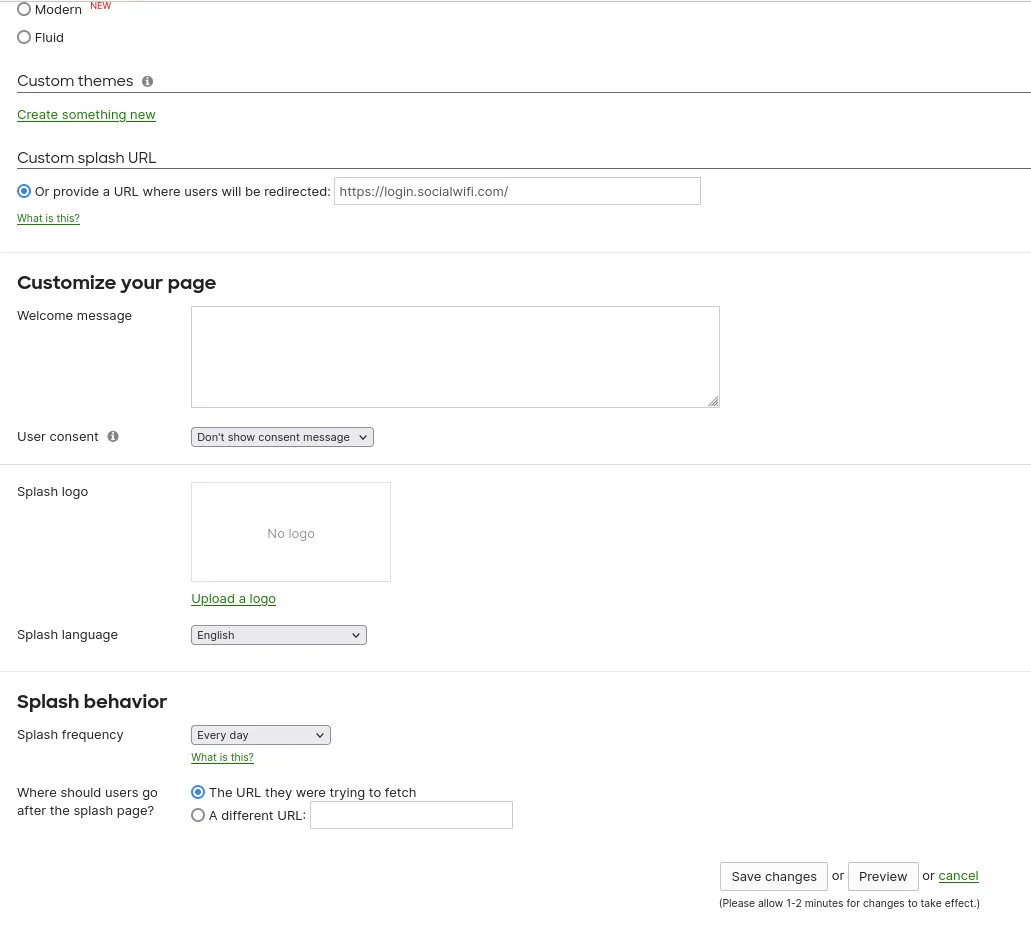
Press Save changes to save the settings.
Adding the device to Social WiFi platform
- Go to Wireless → Monitor → Access Points.
- Copy the MAC addresses of the Access Points you would like to add to Social WiFi platform.
- Go to the Social WiFi Panel.
- Choose the place to which you would like to add the device.
- In the “Access Points” tab, press “Add” (upper right corner), paste the MAC address you copied into the form (adding a name is optional) and click “Create”.