Aruba IAP
Compatibility
Social WiFi has been tested and is proven to work on the following configurations:
Access Point - IAP-325
Firmware - 6.x and higher (tested up to 8.10.0.9_88493 LSR)
Accessing to device’s administration panel
The new version of Aruba’s User Interface uses new default login credentials. To log in first time, your credentials will be:
| Login | admin |
|---|---|
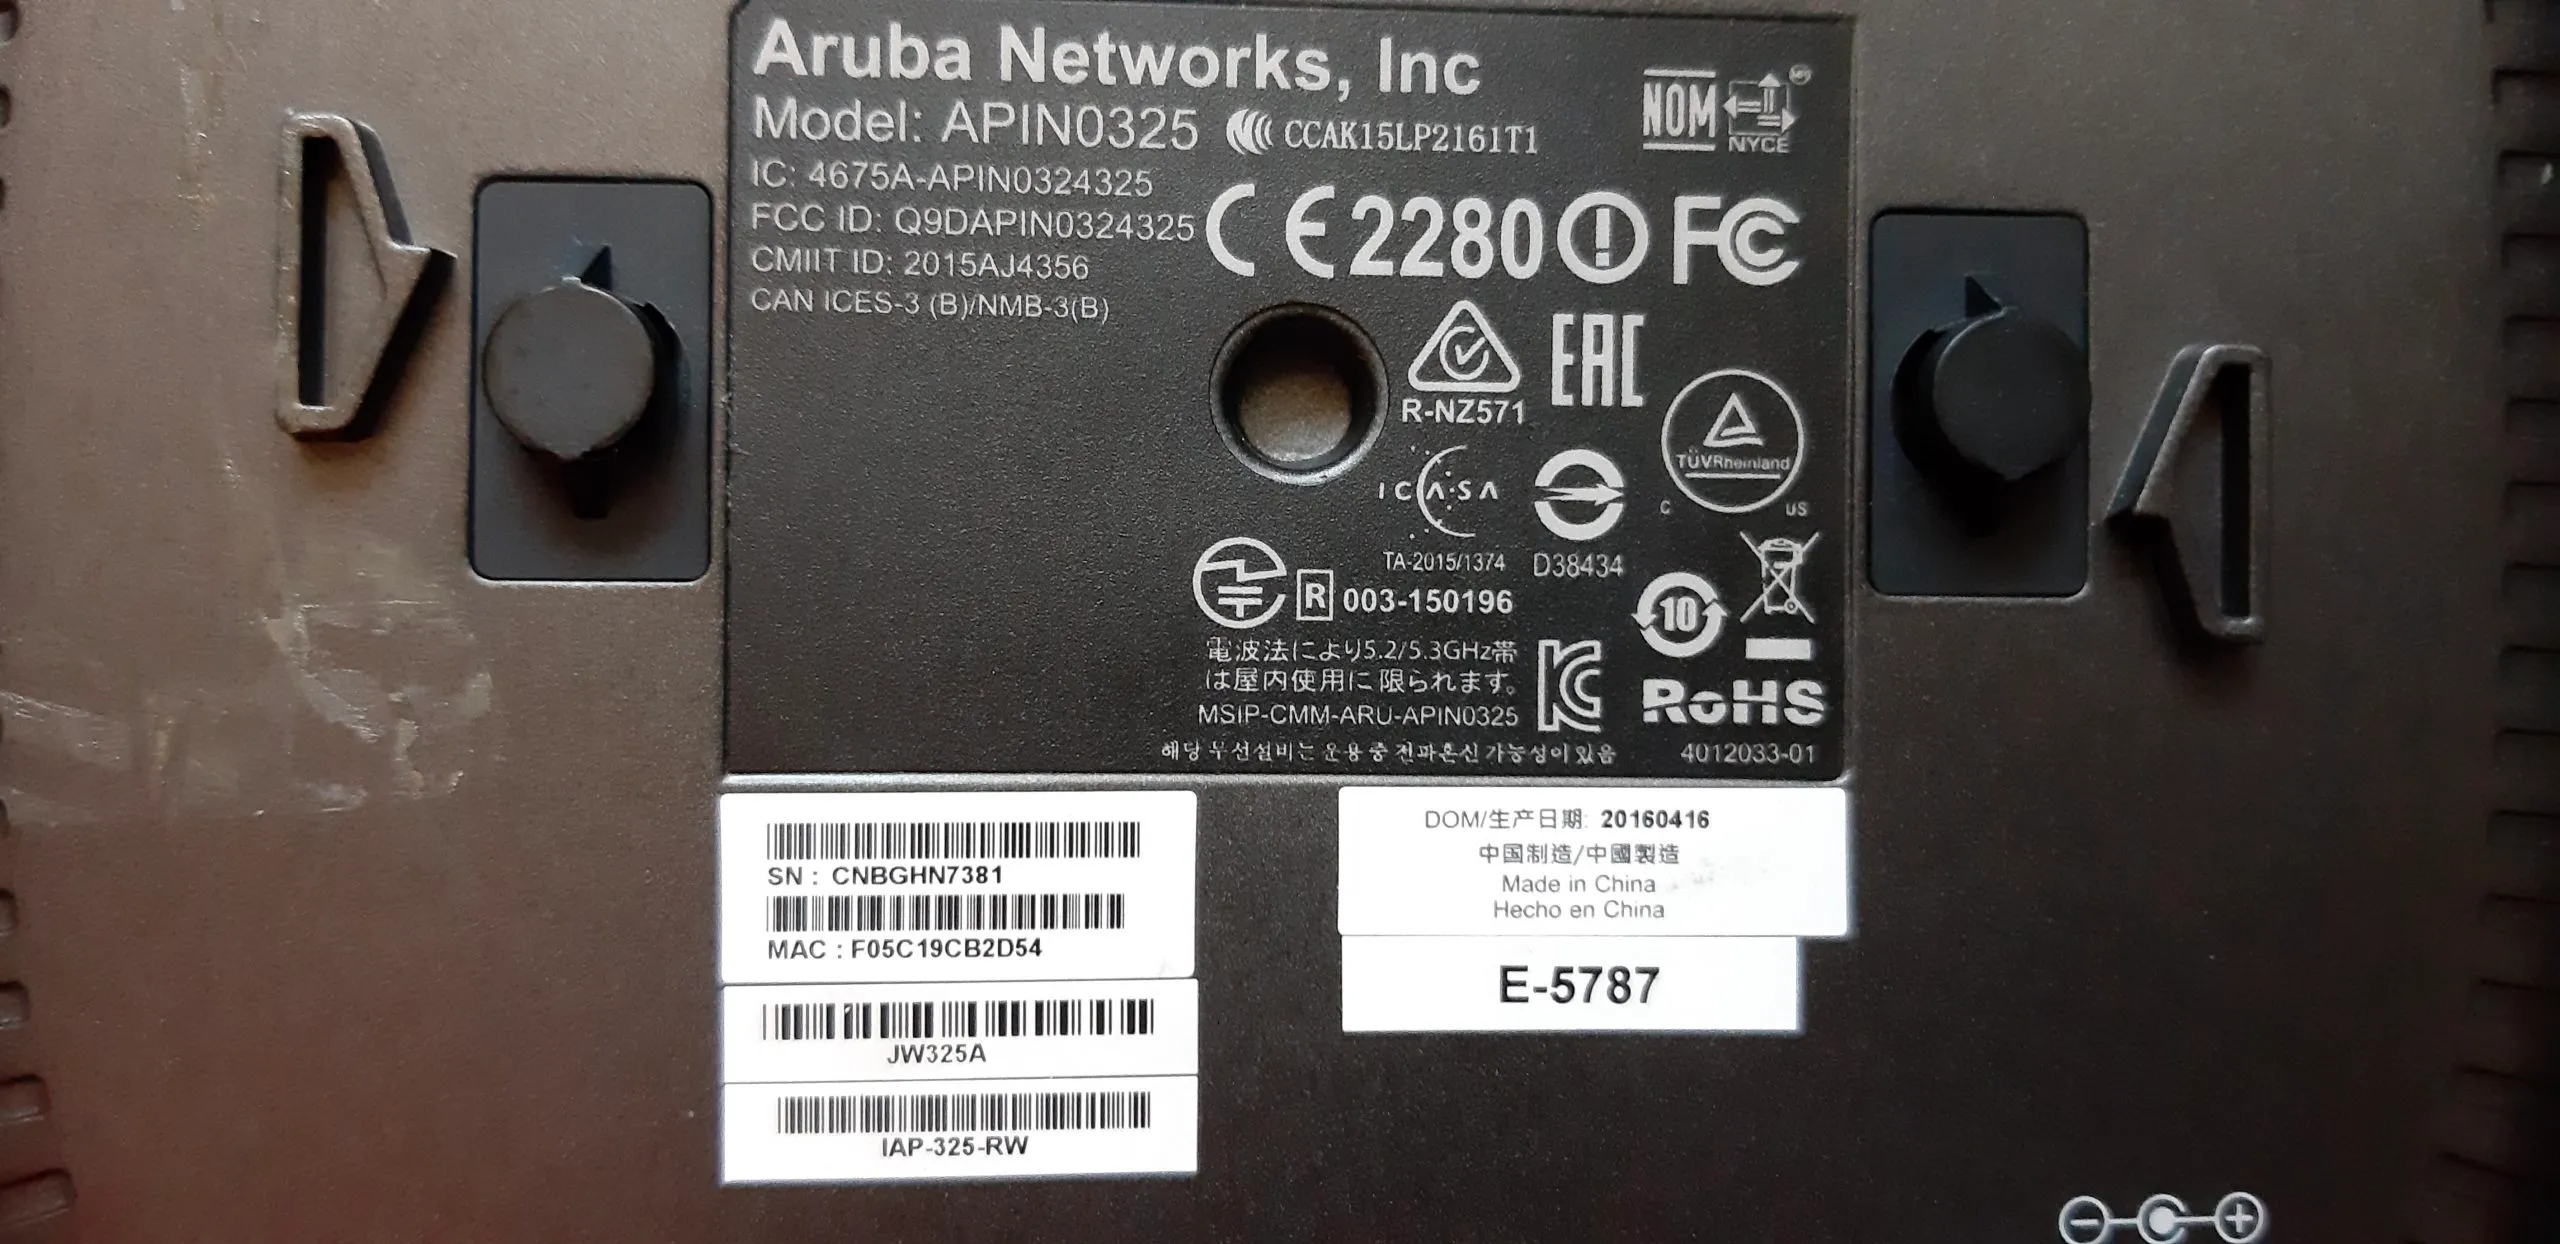
| Password | Your device’s Serial Number (SN) which can be found on the back of your Aruba IAP |
After first login the system will ask you to set your own password.
Configuring Hotspot
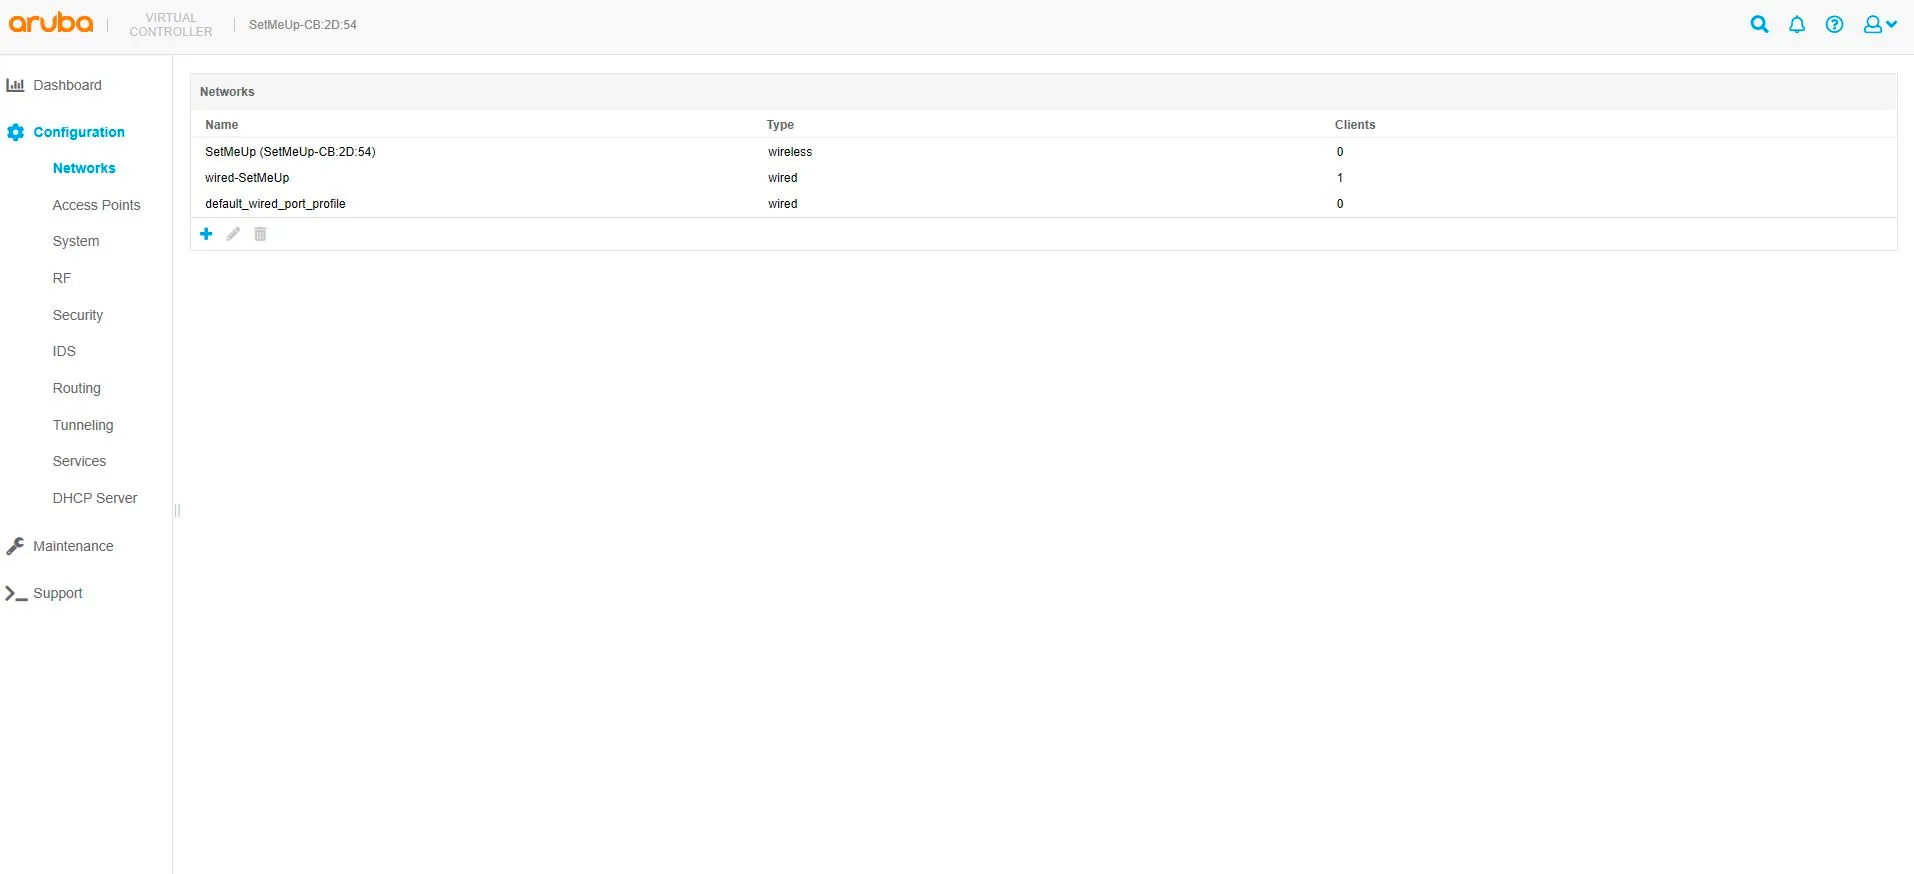
Once you see the Dashboard go to Configuration -> Networks and click the blue “+” sign to add a new wireless network.
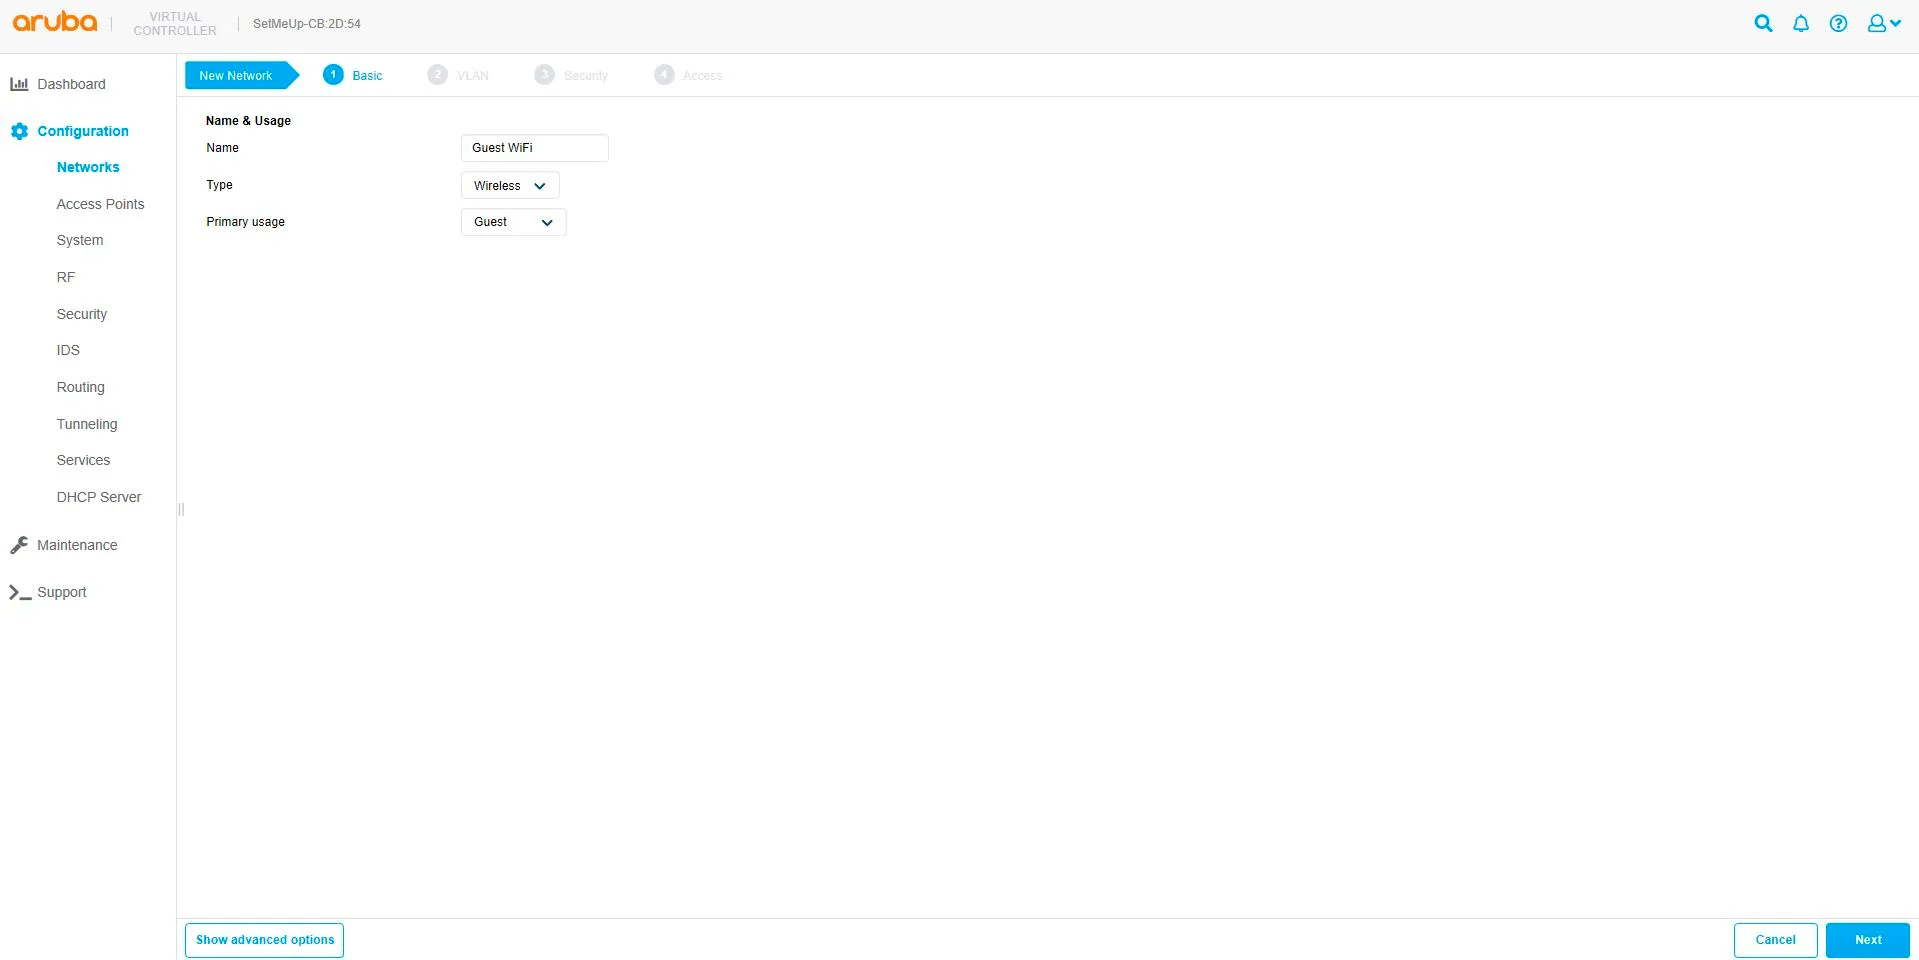
Creating Wireless Network
| Name | Your network name |
|---|---|
| Type | Wireless |
| Primary usage | Guest |
Click Next on the bottom of the screen.
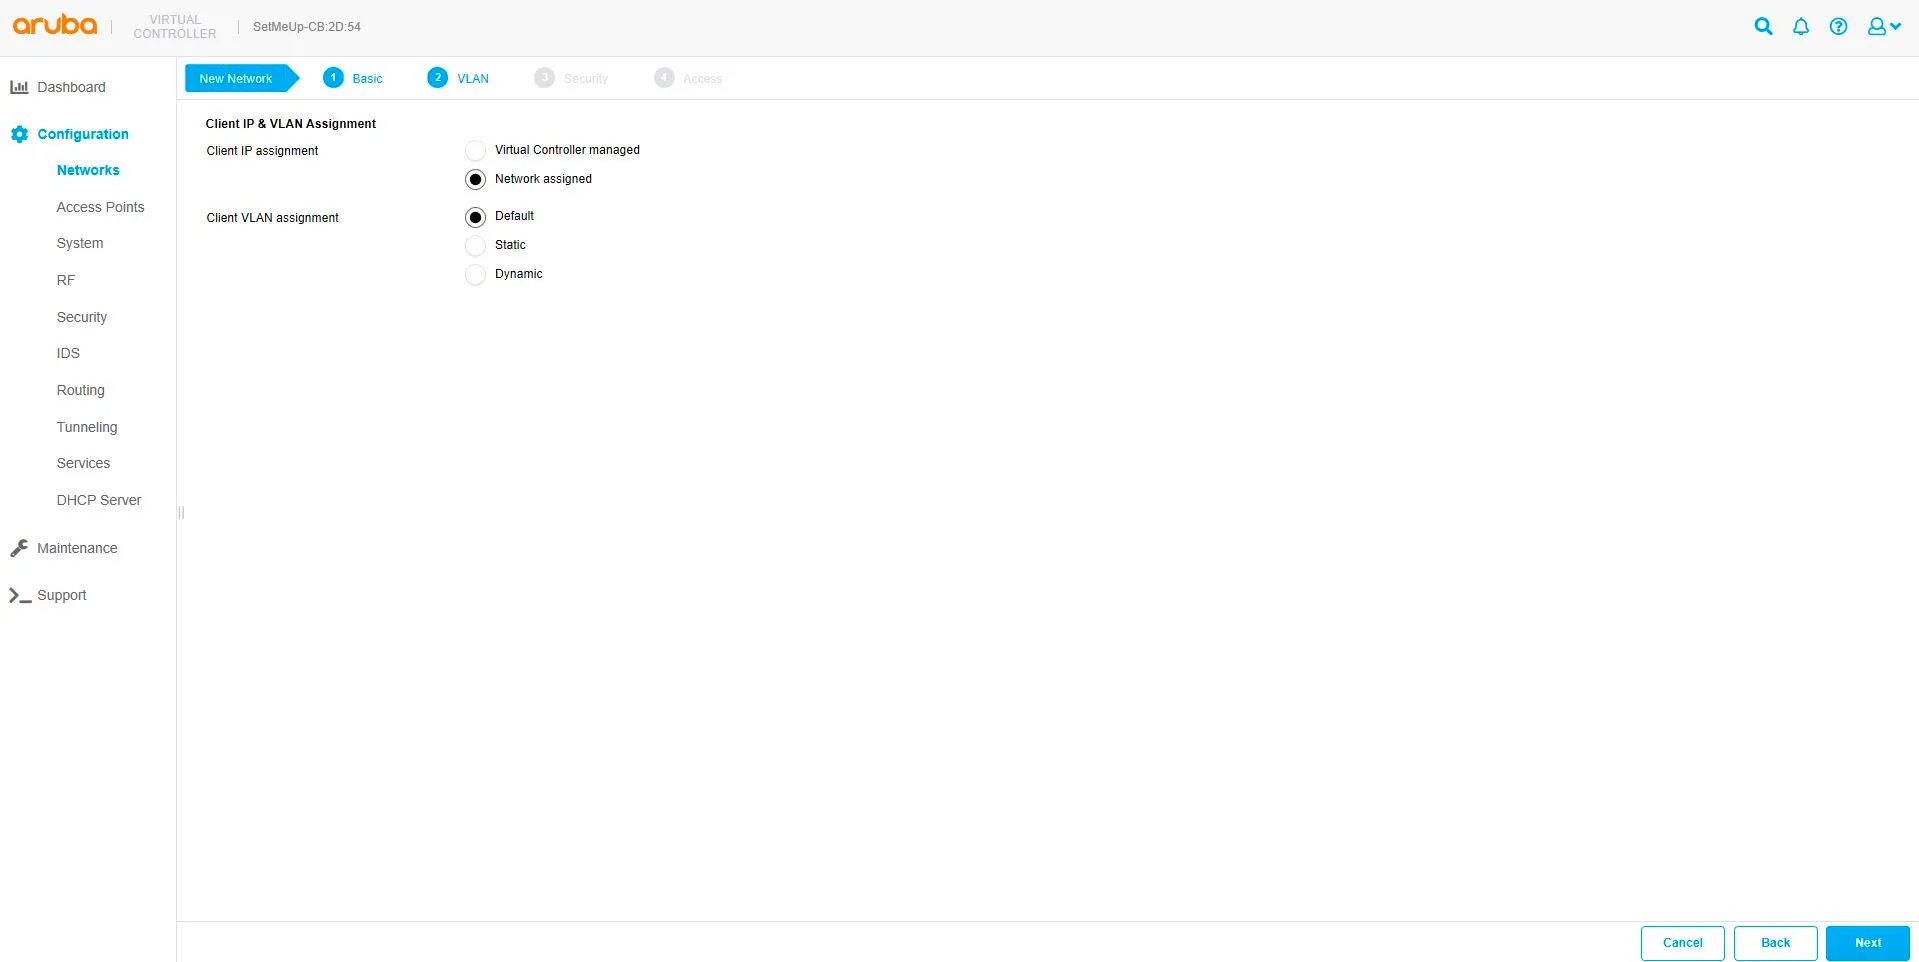
Client IP & VLAN Assignment
| Client IP assignment | Network assigned |
|---|---|
| Client VLAN assignment | Default |
Click Next
Hotspot’s Security Level
| Splash page type | External |
|---|---|
| Captive portal proxy server | [leave blank] |
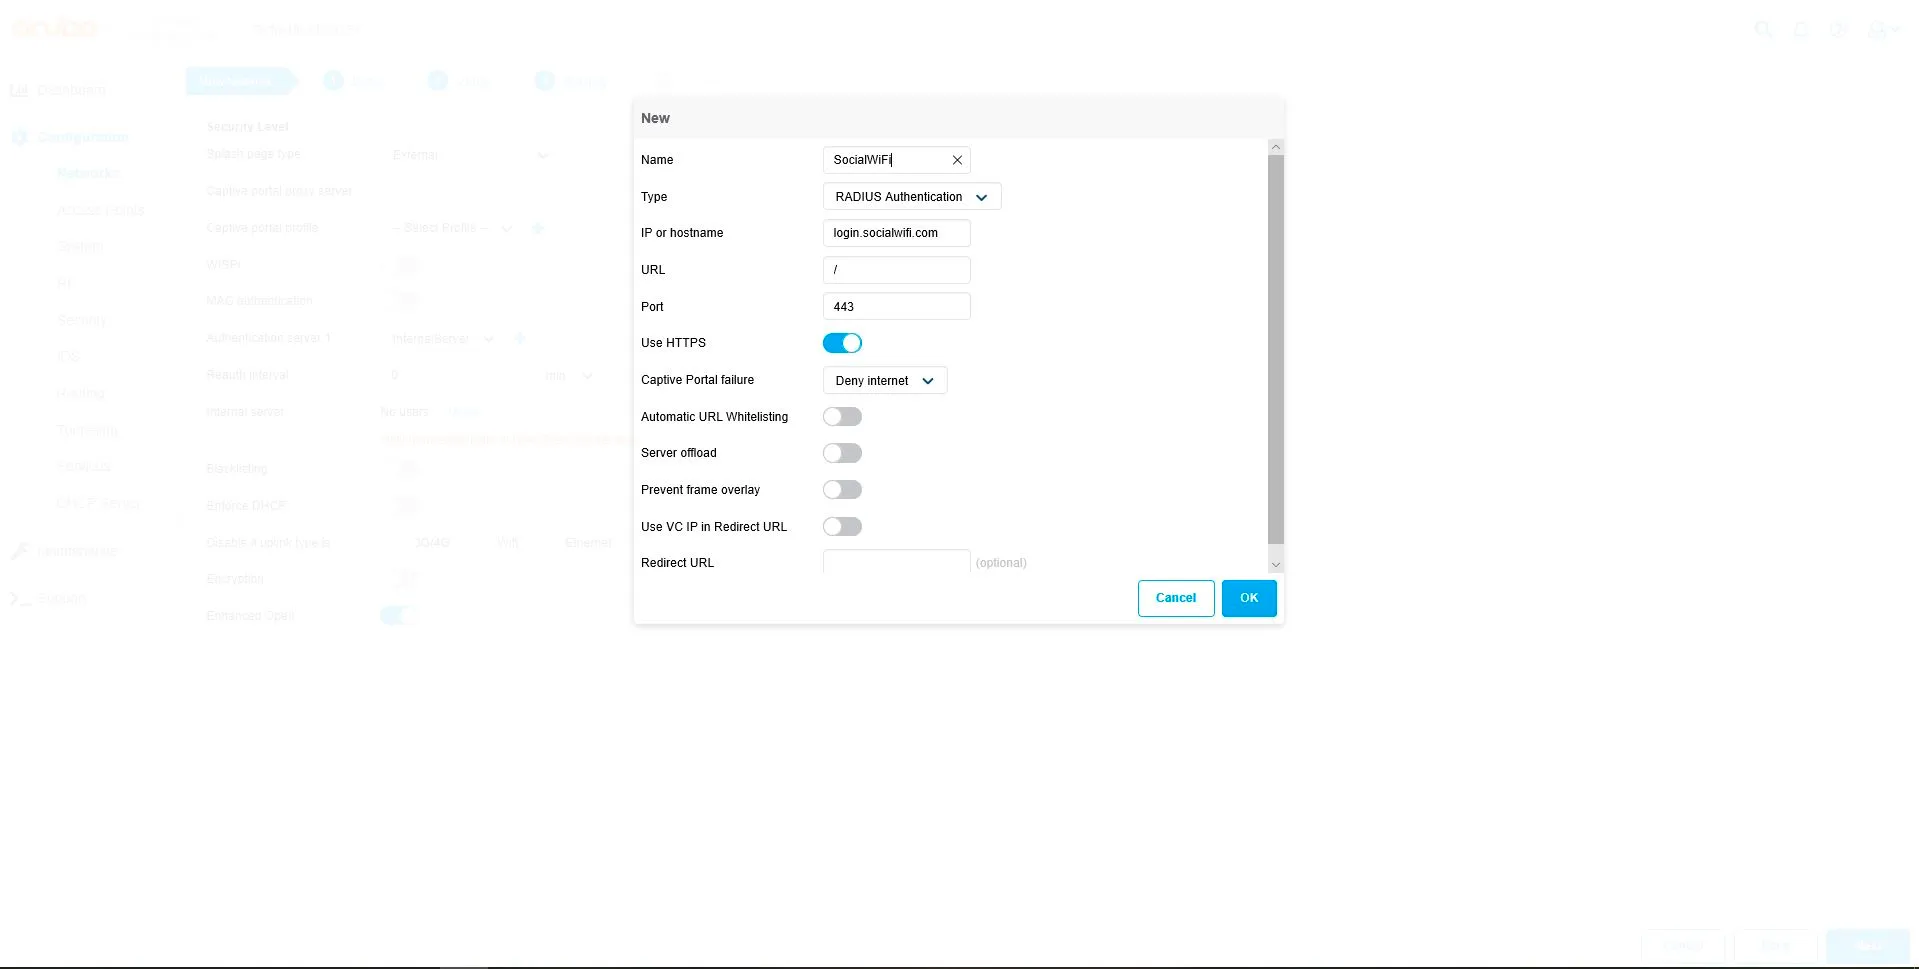
| Captive portal profile | Click the blue “+” sign to add a new profile |

| Name | SocialWiFi |
|---|---|
| Type | RADIUS Authentication |
| IP or hostname | login.socialwifi.com |
| URL | / |
| Port | 443 |
| Use HTTPS | Enabled |
| Captive portal failure | Deny Internet |
| Automatic URL Whitelisting | Disabled |
| Server offload | Disabled |
| Prevent frame overlay | Disabled |
| Use VC IP in Redirect URL | Disabled |
| Redirect URL | Leave empty |
Click OK
Adding RADIUS Server
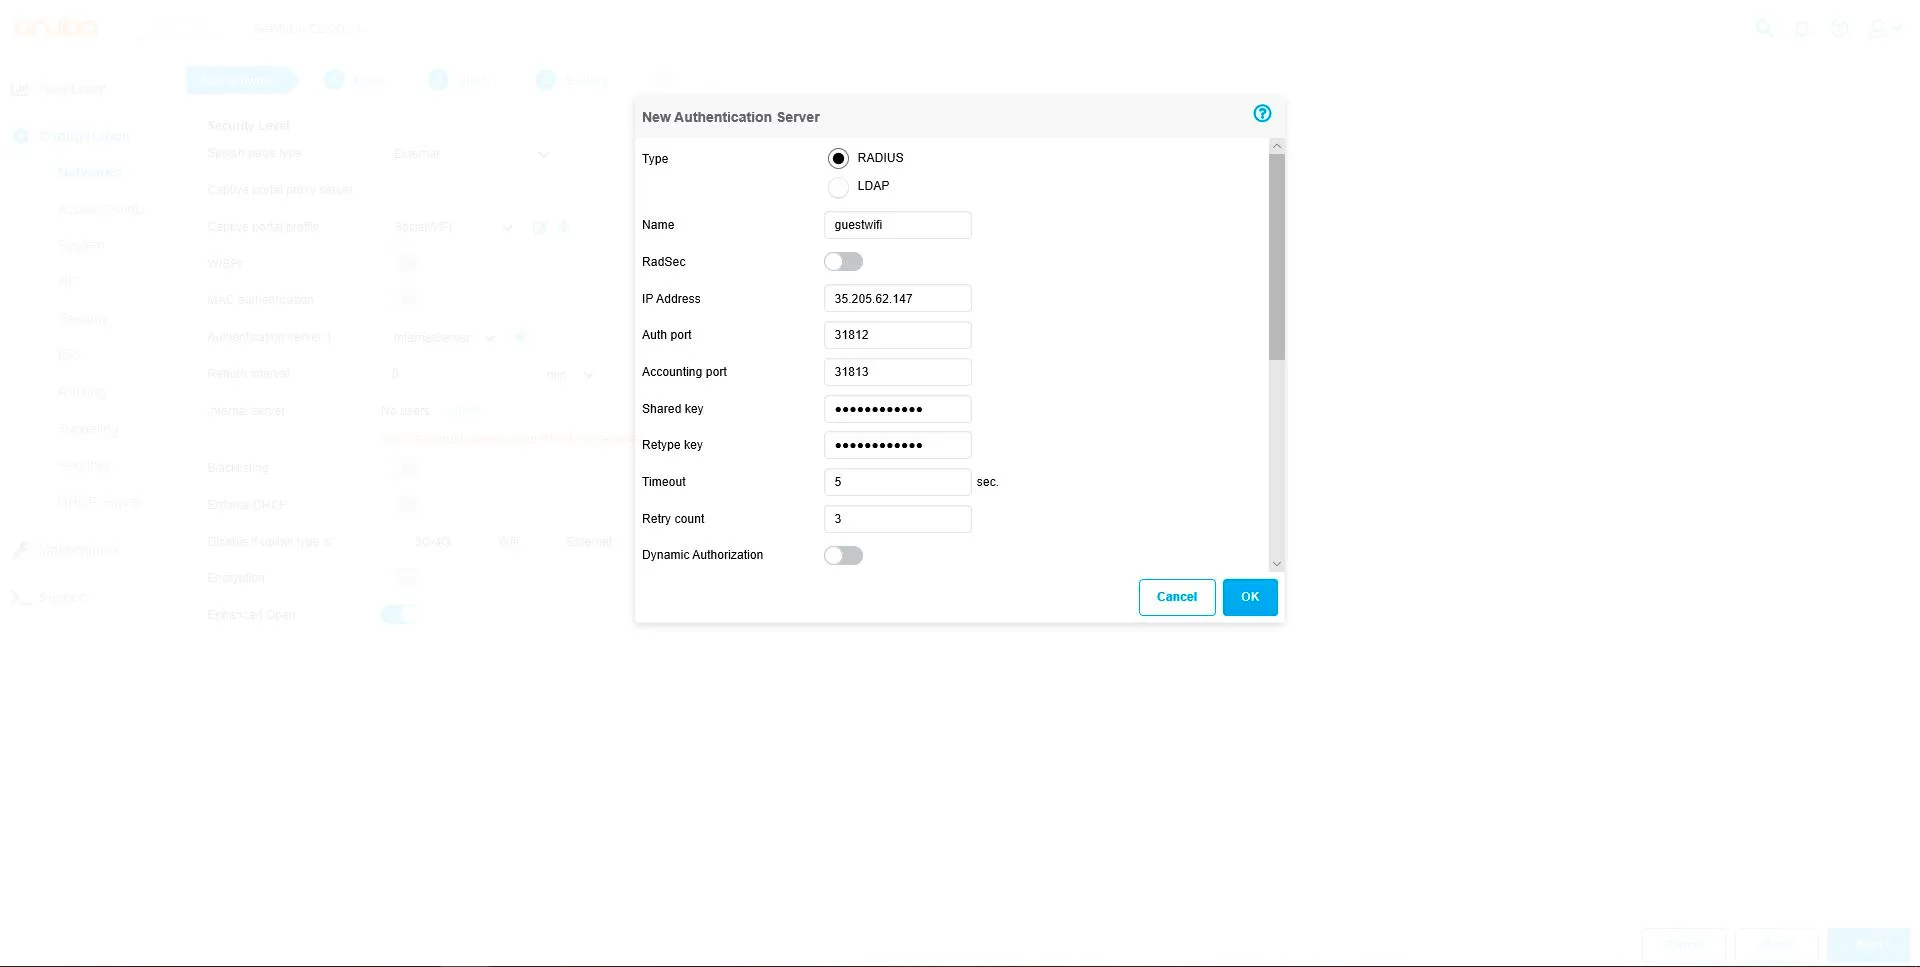
Authentication server 1: Click the blue “+” sign to add a new server

| Type | RADIUS |
|---|---|
| Name | guestwifi |
| RadSec | Disabled |
| IP Address | 35.205.62.147 |
| Auth Port | 31812 |
| Accounting Port | 31813 |
| Shared Key | Radius Secret available in Access Points tab of the Social WiFi Panel |
| Retype Key | Repeat above |
| Timeout | 5 sec |
| Retry Count | 3 |
| Dynamin Authorization | Disabled |
Click OK
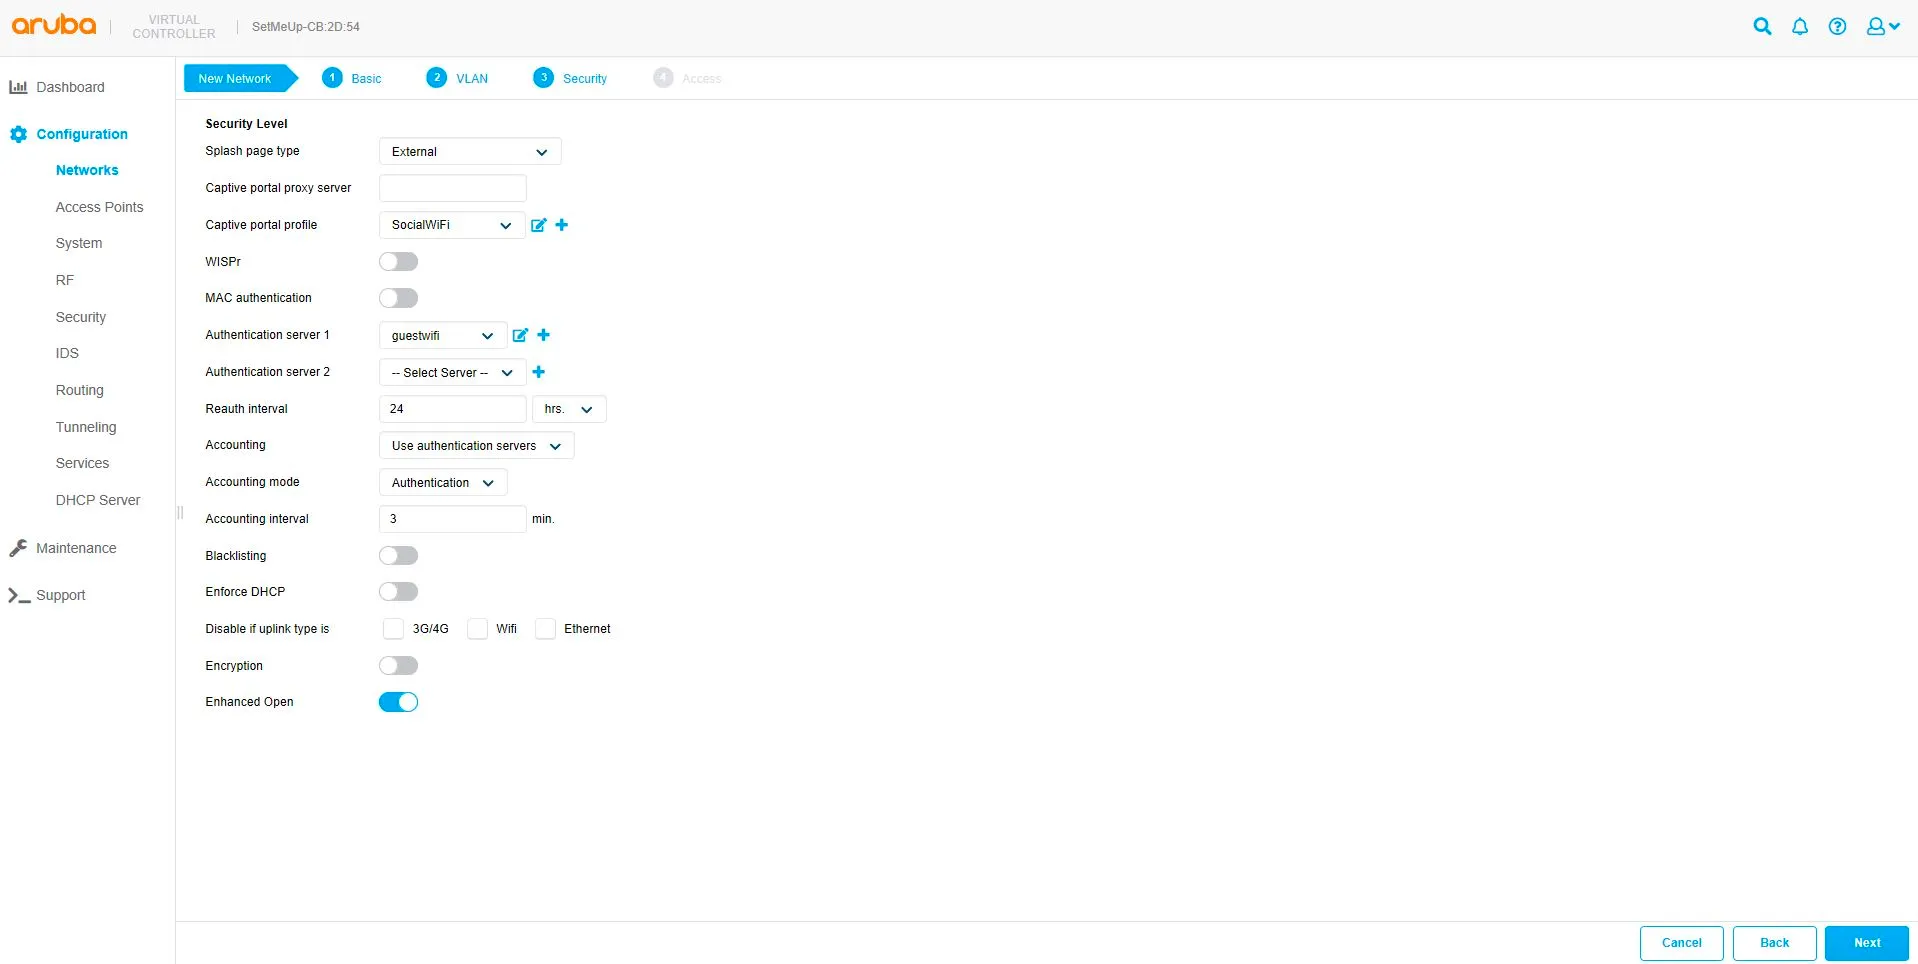
| Reauth Interval | 24 hrs |
|---|---|
| Accounting | Use authentication servers |
| Accounting Mode | Authentication |
| Accounting Interval | 3 min |
| Blacklisting | Disabled |
| Enforce DHCP | Disabled |
| Disable if uplink type is | 3G/4G – Disabled, Wifi – Disabled, Ethernet – Disabled |
| Encryption | Disabled |
| Enhanced Open | Enabled |
Click Next
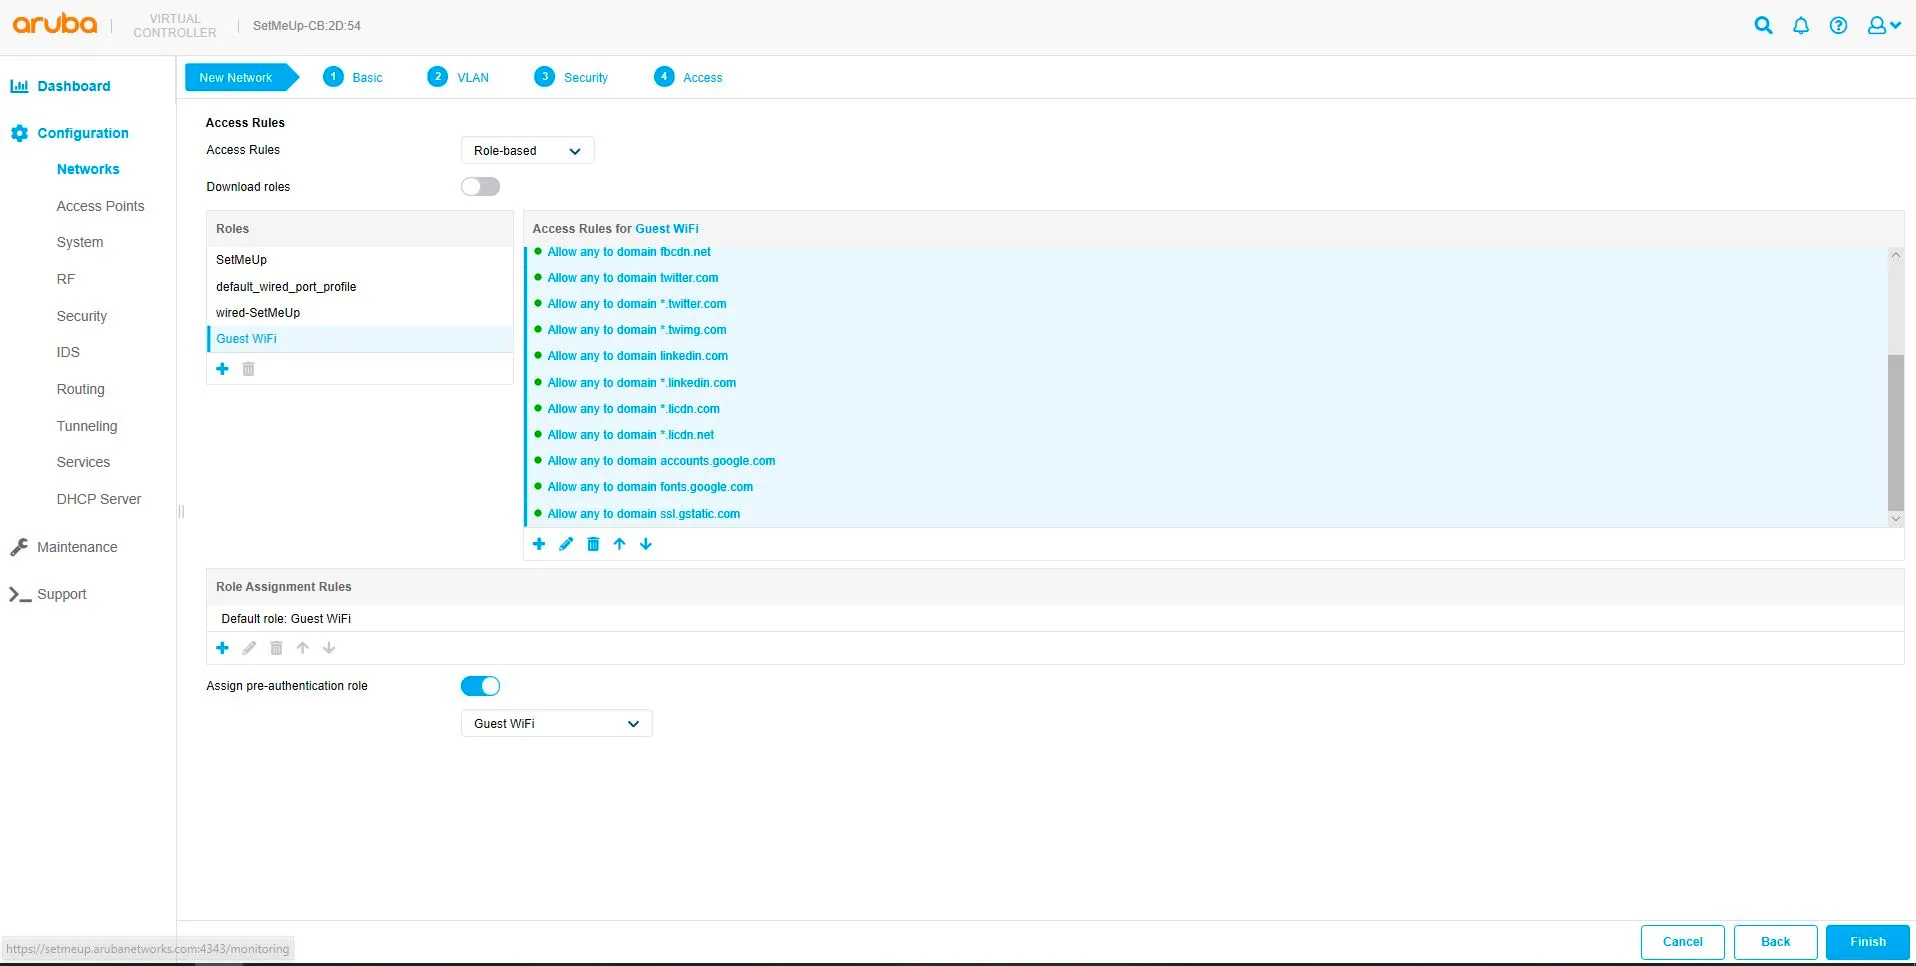
Hotspot Access Rules
| Access Rules | Role-based |
|---|---|
| Download Rules | Disabled |
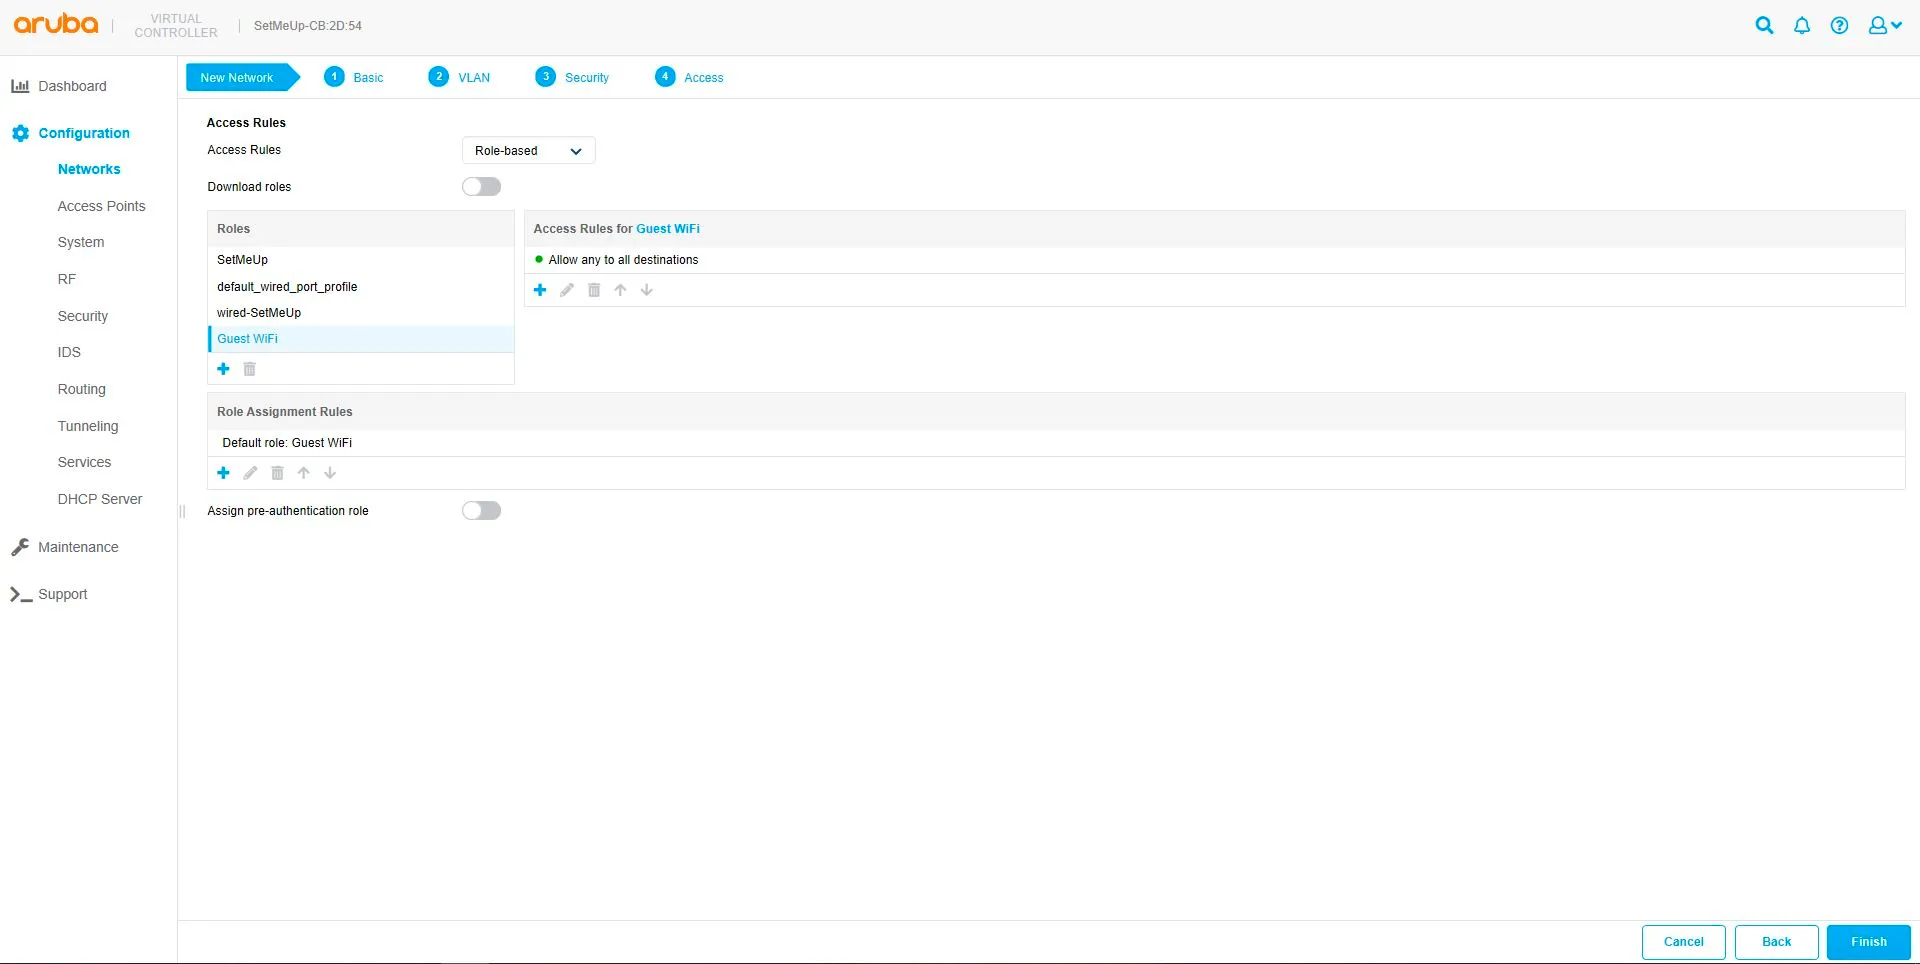
To add a new role, choose your WiFi name and on the right side of the screen click the blue “+” sign.
| Rule type | Access control |
|---|---|
| Service | Network, any |
| Action | Allow |
| Destination | to domain name |
| Domain name | sw-login.com |
Click OK
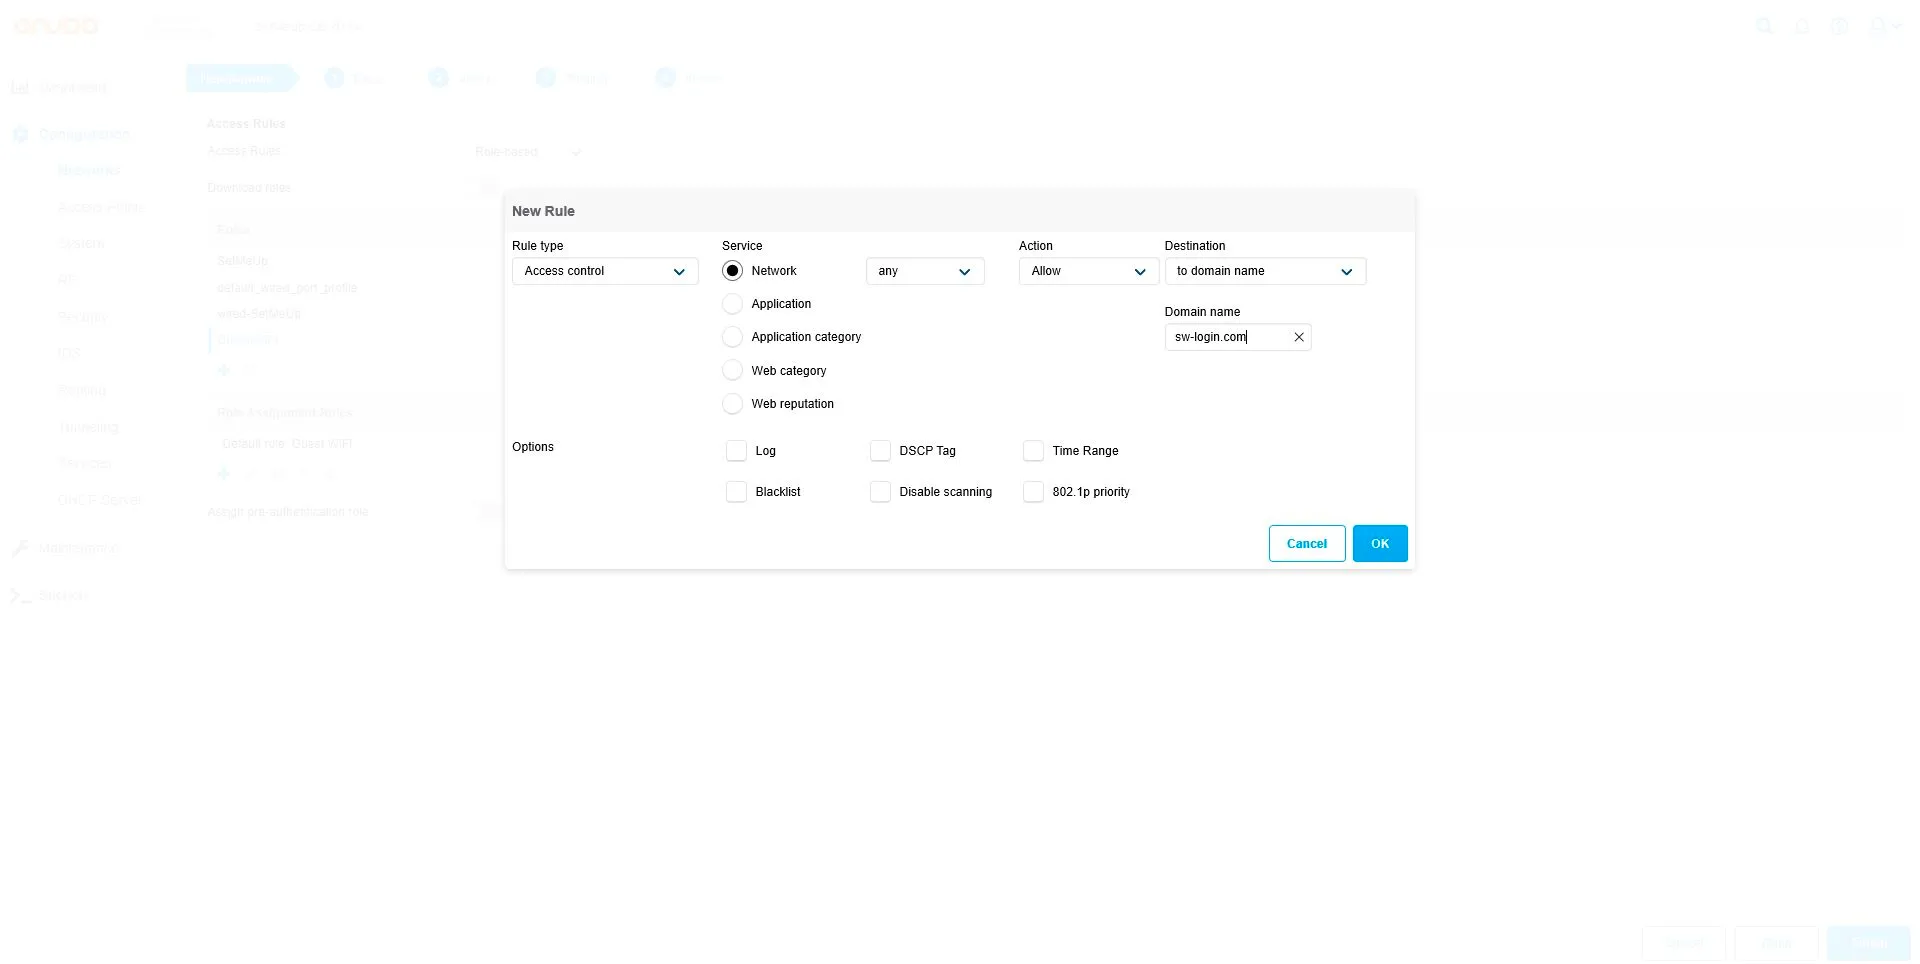
Add all following addresses in the same way as you just added sw-login.com
*.socialwifi.comsw-login.comfacebook.com*.facebook.com*.fbcdn.netlinkedin.com*.linkedin.com*.licdn.comtwitter.comapi.twitter.comx.comapi.x.com*.twimg.comwhatsapp.com*.whatsapp.net*.whatsapp.comconnect.facebook.netwww.facebook.comwww.googletagmanager.comwww.googleadservices.comgoogleads.g.doubleclick.net*.youtube.com*.ytimg.com*.googlevideo.comyt3.ggpht.comAssign pre-authentication role: Enabled, Guest WiFi
Adding AP into Social WiFi Panel
To add your Access Point to Panel, log in to your account, go to Access Points tab and click “Add new”
Your device’s MAC address can be found in Dashboard -> Network on the bottom of screen.
Firewall
If you have an external firewall behind your Aruba devices, make sure that these ports are enabled:
TCP port 2083
Aruba also uses their own port to connect the Access Point with the controller. Make sure to enable port UDP 8211 if you can’t connect your AP with the controller.