Ruckus Virtual SmartZone
Compatibility
Social WiFi has been tested and is proven to work on the following configurations:
Controller versions:
- 5.x
- 6.x
Accessing the device’s administration panel
Configuration through GUI: open any web browser and type the controller’s IP address in the address bar.
- login: login to the account with root permissions
- password: the password to the above account
Device configuration
Configuring Wireless LANs Group:
In the panel go to the following directory: Network->Wireless LANs->Create
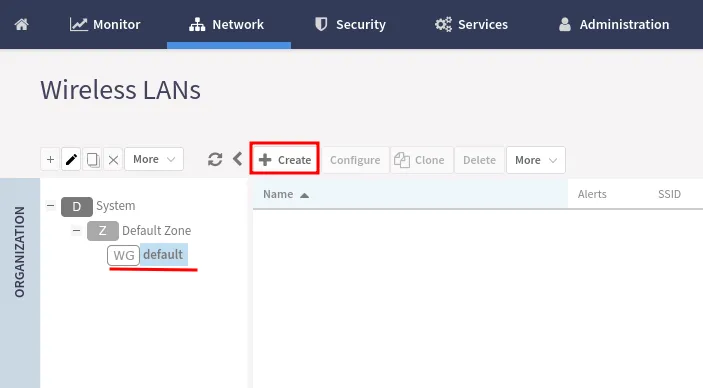
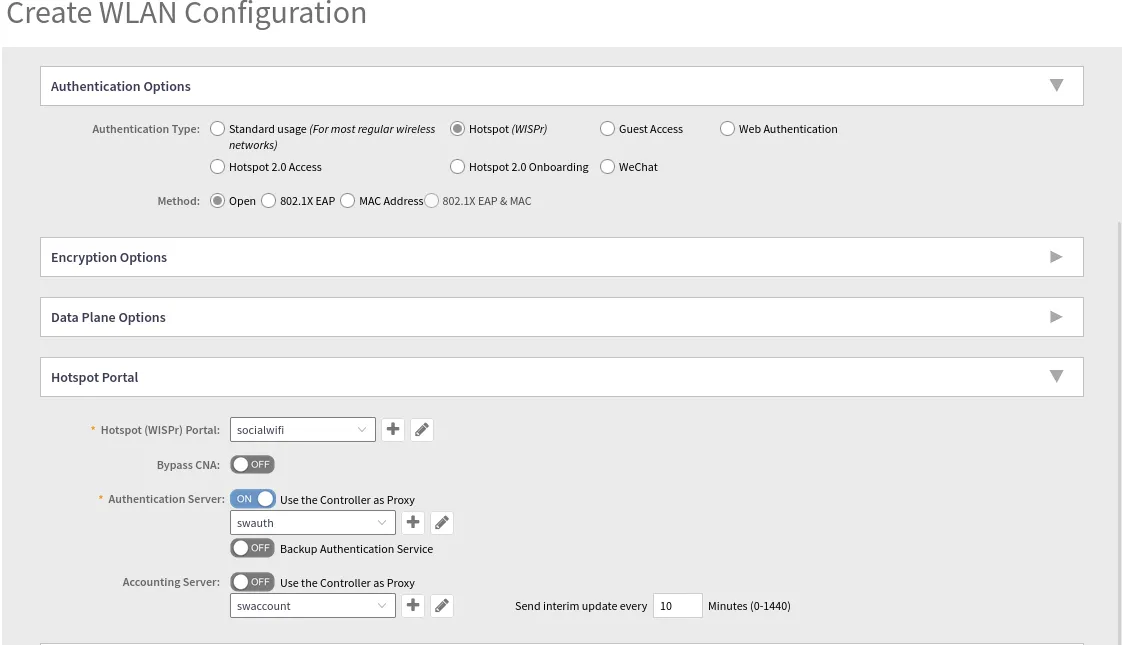
In the pop-up window enter the following:
| Name | Your network name |
|---|---|
| SSID | Your network name |
| WLAN Group | default |
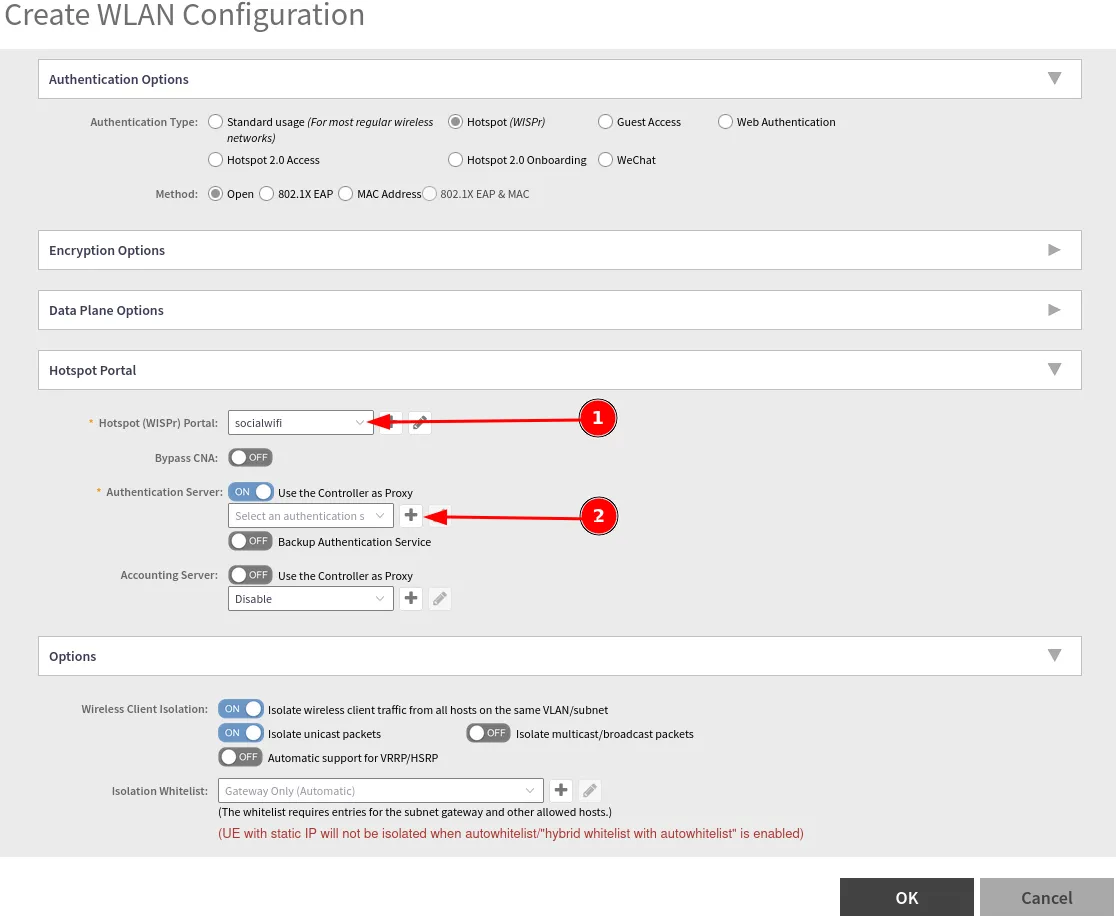
| Authentication Type | Hotspot (WISPr) |
| Authentication Method | Open |
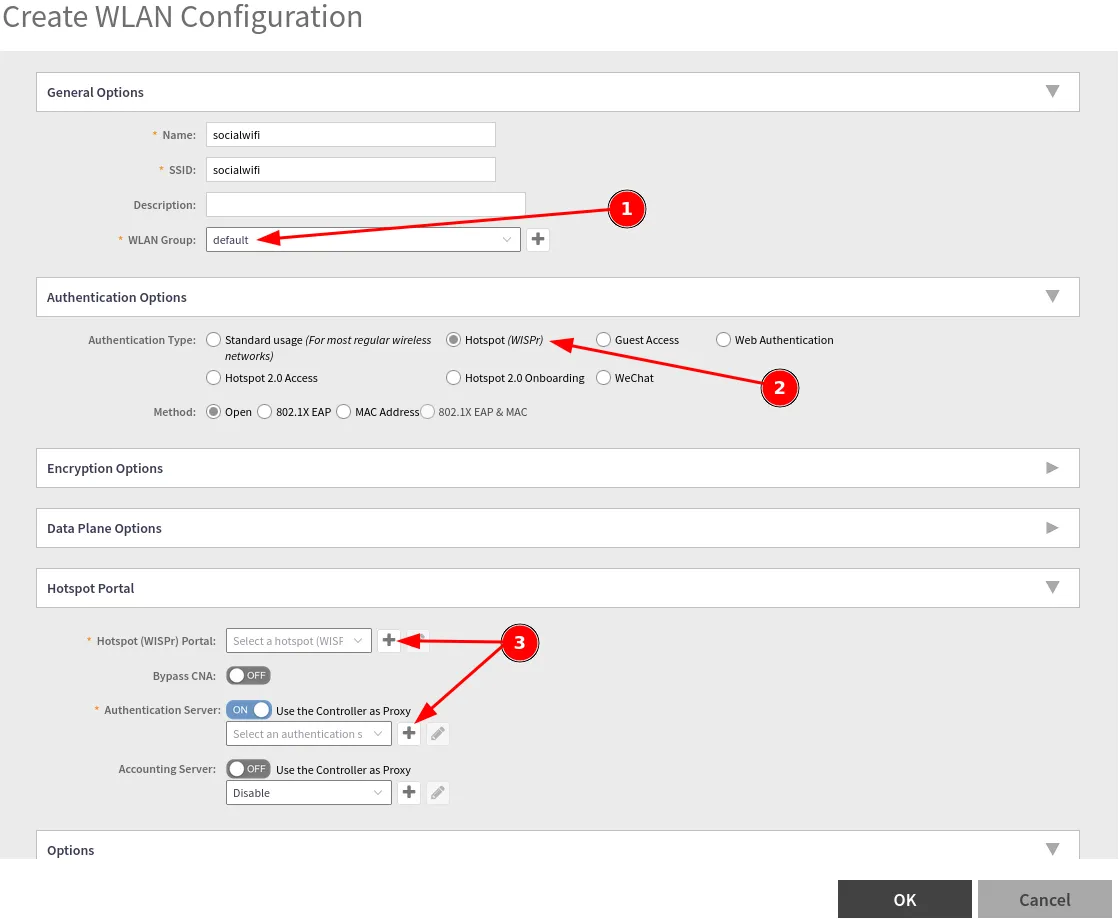
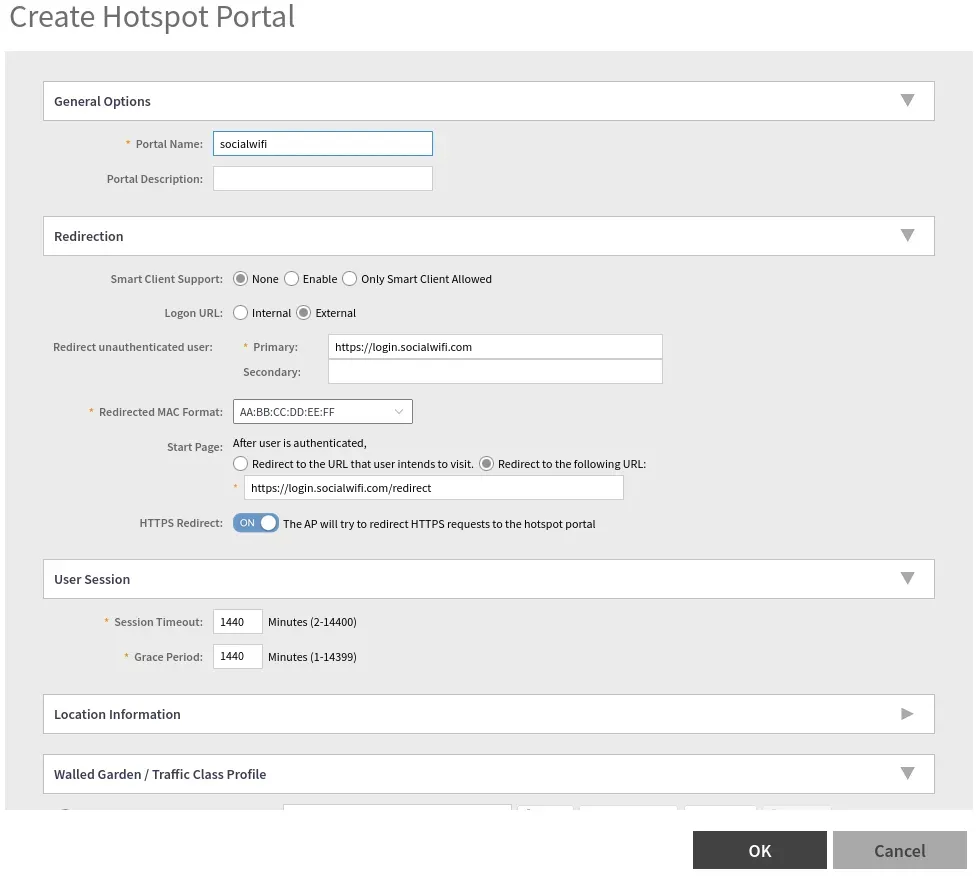
Now, in the “Hotspot (WISPr) Portal” field create a new profile by clicking ”+“
| Portal Name | socialwifi |
|---|---|
| Logon URL | External |
| Redirect unauthenticated user | Primary: https://login.socialwifi.com/, Secondary: empty |
| Redirected MAC Format | AA:BB:CC:DD:EE:FF |
| Start Page | redirect to the following URL:https://login.socialwifi.com/redirect/ |
| Session Timeout | 1440 |
| Grace Period | 1440 |
The, scroll down and add Walled Garden/Traffic Class Profile configuration:
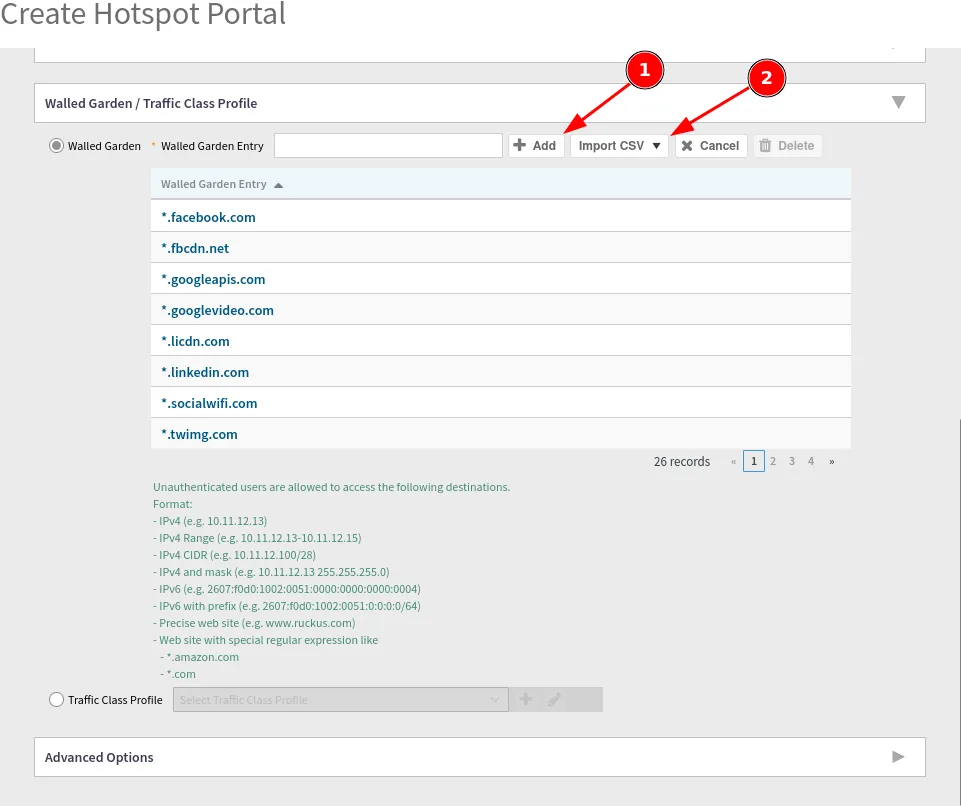
You can either add the domains manually or import the CSV file which is linked below:
Ruckus_vSZ_walled_garden_entries.csv
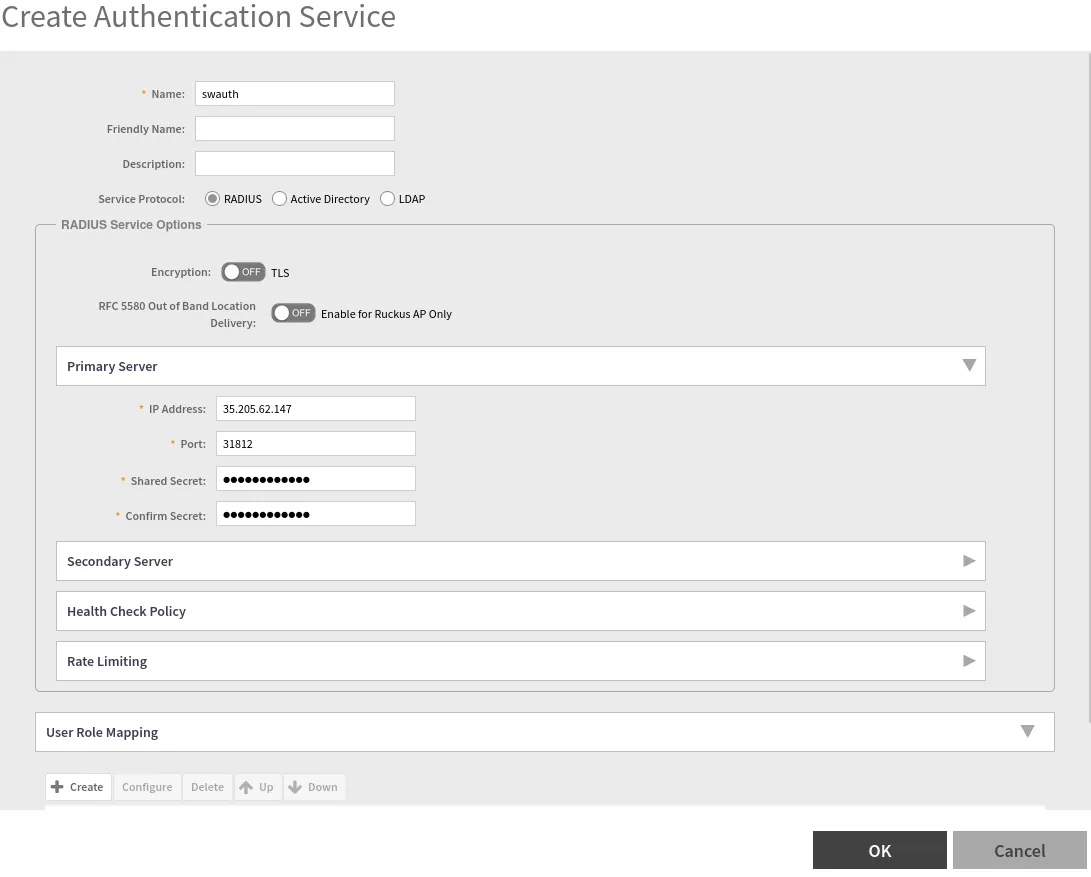
*.socialwifi.comsw-login.comfacebook.com*.facebook.com*.fbcdn.netlinkedin.com*.linkedin.com*.licdn.comtwitter.comapi.twitter.comx.comapi.x.com*.twimg.comwhatsapp.com*.whatsapp.net*.whatsapp.comconnect.facebook.netwww.facebook.comwww.googletagmanager.comwww.googleadservices.comgoogleads.g.doubleclick.net*.youtube.com*.ytimg.com*.googlevideo.comyt3.ggpht.comAfter setting up “socialwifi” hotspot, please click ”+” and add Authentication Server profile: “
In the pop-up window enter the following:
| Name | swauth |
|---|---|
| Type | RADIUS |
| IP Address | 35.205.62.147 |
| Port | 31812 |
| Share Secret | Radius Secret available in Access Points tab of the Social WiFi Panel |
| Confirm Secret | Copy above |
When finished, press OK.
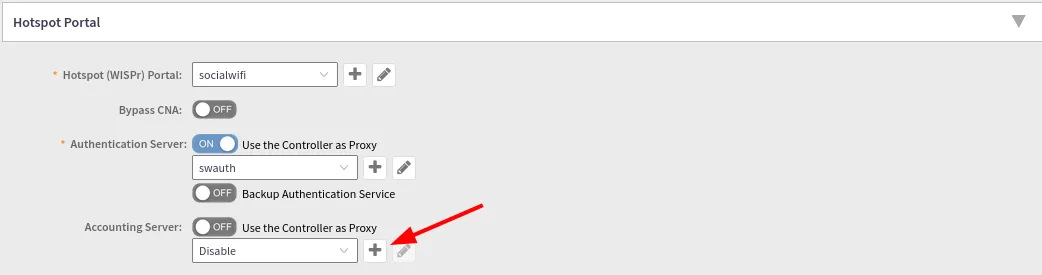
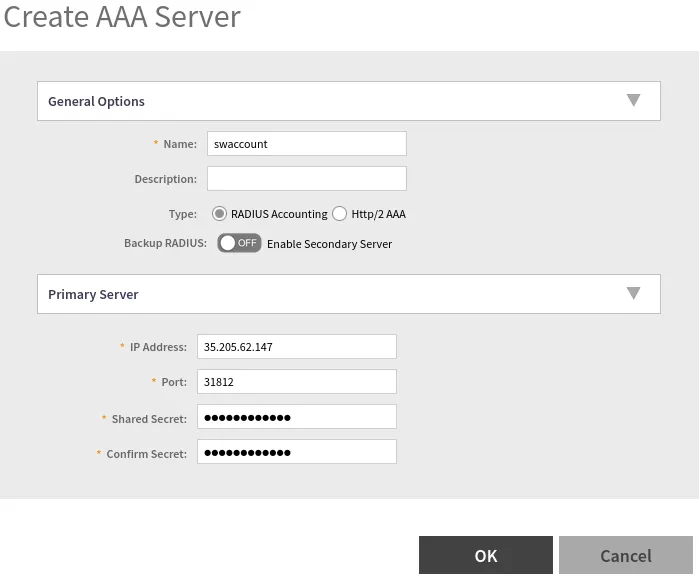
Then, add an “Accounting Server” by clicking ”+”
In the pop-up window enter the following:
| Name | swaccount |
|---|---|
| Type | RADIUS Accounting |
| IP Address | 35.205.62.147 |
| Port | 31813 |
| Shared Secret | Radius Secret available in Access Points tab of the Social WiFi Panel |
| Confirm Secret | Copy above |
When finished, press OK.
After completing the configuration, your “Hotspot Portal” should look like this:
Now, save the changes and go to: Network->Access Points
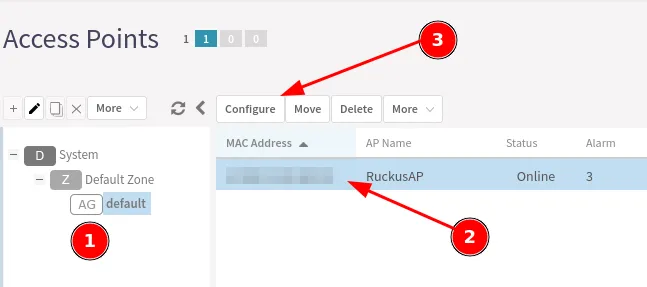
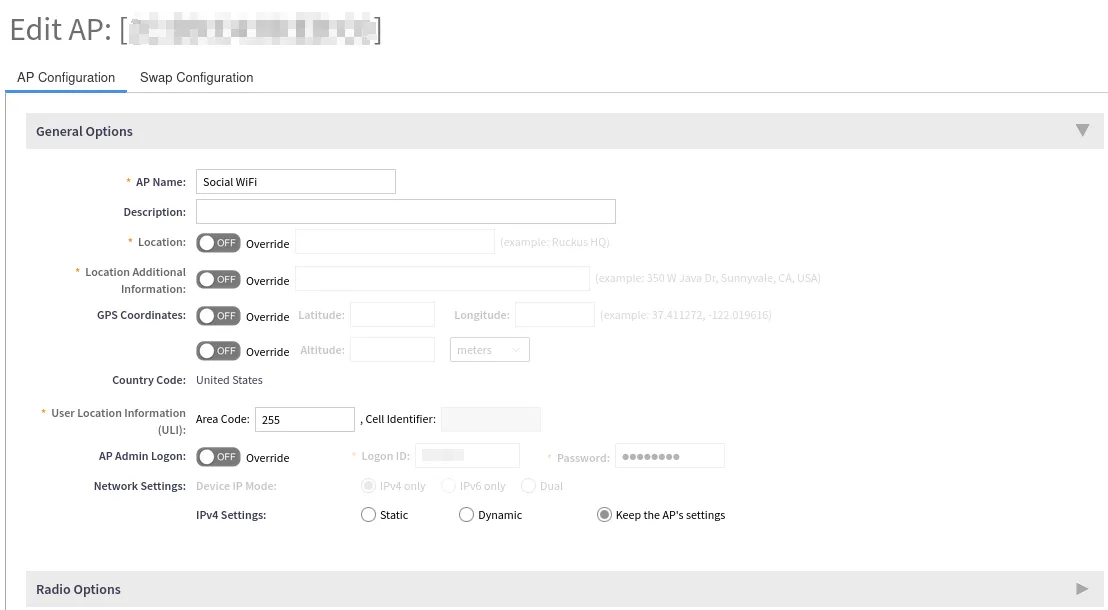
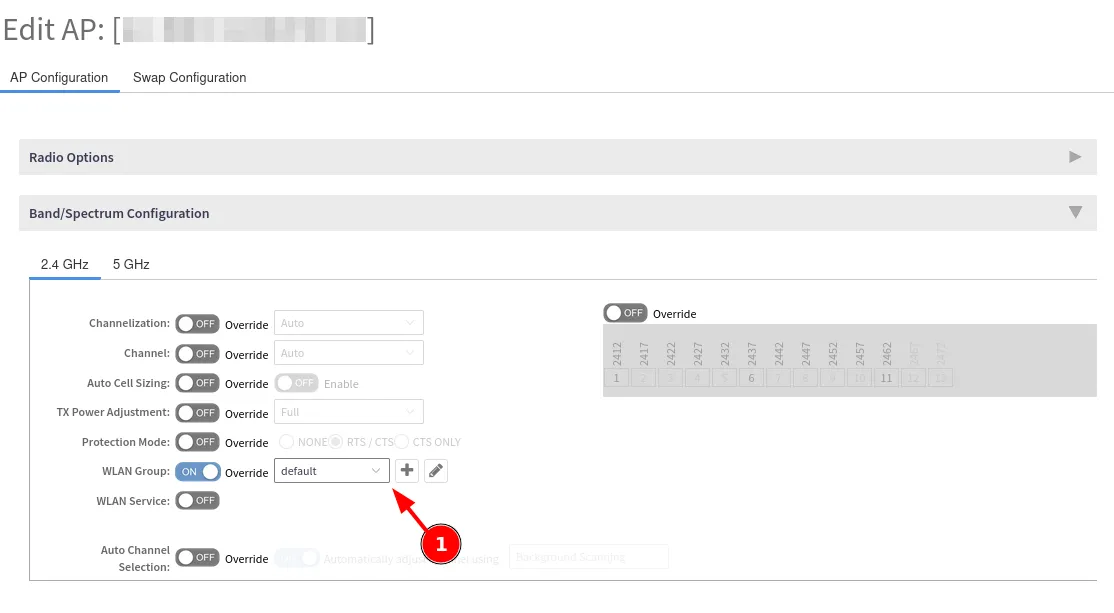
Enter the Access Point configuration panel following the marks. Set up your AP Name and go to the: Band/Spectrum Configuration. Then turn the “WLAN Group” on and choose the “default” profile.
Disabling MAC address encryption
By default, MAC address encryption is enabled on Ruckus SZ devices and will cause Social WiFi to malfunction. In order to disable it, you will need to access your controller CLI via SSH, enable privileged commands, enter config mode, then execute the command “no encrypt-mac-ip”:\
Example:
ruckus> enableruckus# configruckus(config)# no encrypt-mac-ip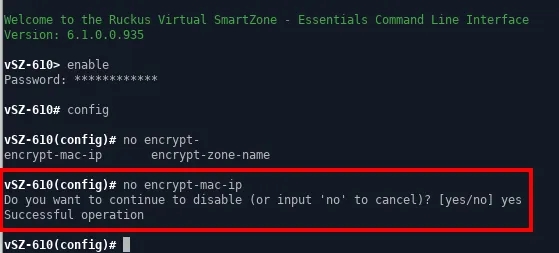
Adding the device to Social WiFi platform
In order to add the device to Social WiFi platform:
- In the Network → Access Points menu, click the AP that you want to add to Social WiFi platform, copy their MAC addresses from AP MAC address field and BSSID column.
- Go to the Social WiFi Panel.
- Choose the place to which you would like to add the device.
- In the “Access Points” tab, press “Add” (upper right corner), paste the MAC address you copied into the form (adding a name is optional) and click “Create”.
Troubleshooting
Symptom: after connecting to the WiFi network, there’s no popup with the login page and internet does not work.
Solution: it might be the case that you have a firewall that blocks traffic between the WiFi device and the controller. You might either have explicit blocking rules on the firewall, or simply have separate VLANs for the guests and the controller and the traffic between them might be blocked as well. In this case you have to unlock specific ports. For example:
- 8090 TCP
- 8099 TCP
- 9997 TCP
- 9998 TCP
More details on firewall configuration are available under this link: https://support.ruckuswireless.com/documents/1335-smartzone-firewall-ports-configuration-guide/download