OpenMesh
Accessing the device’s cloud management tool
Log in to the CloudTrax portal at https://ct4.cloudtrax.com
Configuring the network
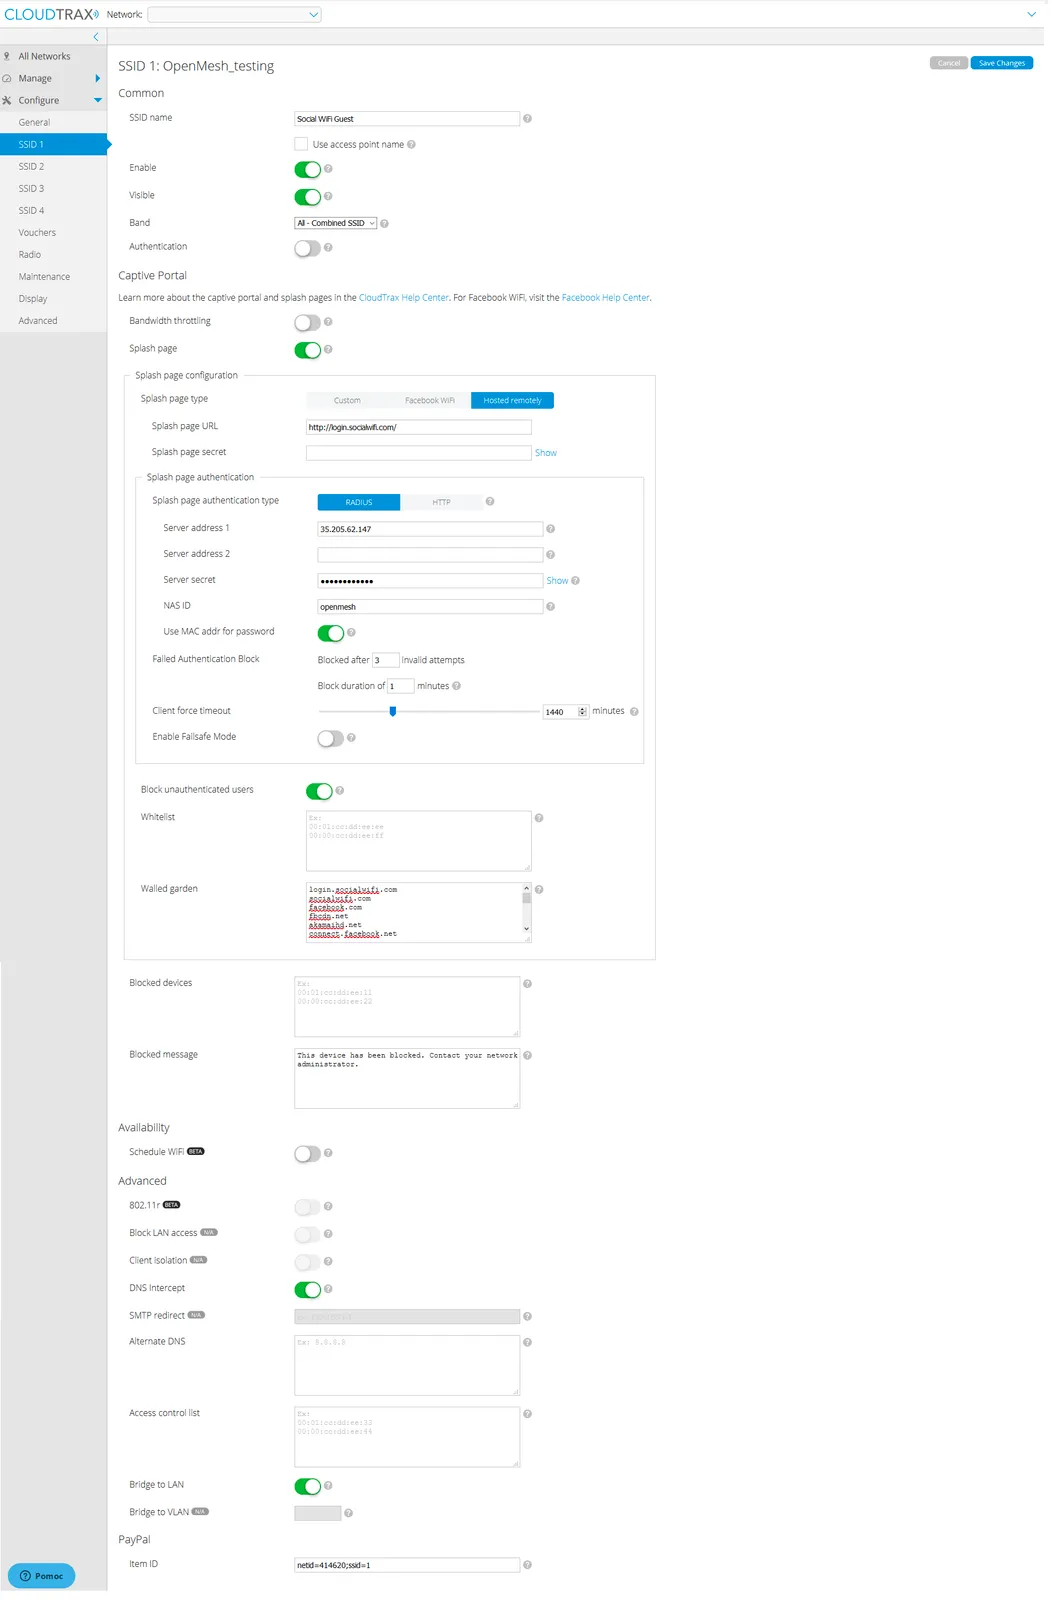
On the left, click on Configure and click the SSID which you wish to configure for guest access and configure with the following settings:
| SSID name | The network name you would like guests to see |
| Enable | Enabled |
| Visible | Enabled |
| Authentication | Unticked |
| Splash page | Enabled |
| Splash page type | Hosted remotely |
| Splash page URL | http://login.socialwifi.com/ |
| Splash page authentication type | RADIUS |
| Server address 1 | 35.205.62.147 |
| Server secret | Radius Secret available in Access Points tab of the Social WiFi Panel |
| NAS ID | openmesh |
| Use MAC addr for password | Enabled |
| Block unauthenticated users | Enabled |
| DNS Intercept | Enabled |
Under Walled Garden, enter the following domains (one per line):
| login.socialwifi.com |
|---|
| socialwifi.com |
| sw-login.com |
- facebook.com
- fbcdn.net
- akamaihd.net
- connect.facebook.net
X (Twitter)
- twitter.com
- x.com
- twimg.com
- linkedin.com
- licdn.net
- licdn.com
Click Save Changes at the top right to finish.
Configuring AP’s iptables procedure
On the left, click on Configure and click Advanced and click Root password: Show. Copy the root password.
Run SSH client (i.e.Putty) and connect to the first AP’s IP address (you can find it in Manage > Access Point tab).
Login to the AP with user: root and password: [root password] (copied in previous step)
After login, paste in the terminal window the following commands:
sed -i '/^exit 0/i iptables -t nat -A OUTPUT -d 35.205.62.147 -p udp -m udp --dport 1812 -j DNAT --to-destination 35.205.62.147:31812' /etc/rc.local
sed -i '/^exit 0/i iptables -t nat -A OUTPUT -d 35.205.62.147 -p udp -m udp --dport 1813 -j DNAT --to-destination 35.205.62.147:31813' /etc/rc.local
reboot
After pasting the commands, press Enter and the AP will be rebooted.
Adding AP to the Social WiFi dashboard
- Log in to the CloudTrax portal at https://ct4.cloudtrax.com
- On the left, click on Manage and click Access Points
- Copy the MAC address of the AP (xx:xx:xx:xx:xx:xx)
- Login to the Social WiFi panel at panel.socialwifi.com and choose the revelant venue
- On the left, click Access Points and then the + Add icon on the top right corner of the screen
- Paste the copied MAC address of your AP in the MAC address field (you can also include a description in the Name field below)
- Click Create
Repeat this step for all the Access Points that you have in your network.