DCN
Prerequisites
This guide will only show you how to turn on Social WiFi on a specified Wireless network. We assume, that you already have your Access Points managed by the AC.
Supported devices
AC models
- DCWS-6028-C, DCWS-6028-R2, version: V705R501C009
AP models
- WL8200-X1R2, version: V306R001C018
- WL8200-X10, WL8200-X4, WL8200-X2, WL8200-X2R2, WL8200-XW2, WL8200-XW4, version: V304R003C018
- WL8200-XT2, WL8200-XIT2, version: V304R002C018
Setup description
This guide is created on a setup consisting of:
- Access Controller model DCWS-6028-C
- Access point model WL8200-X2(R2)
AC Configuration
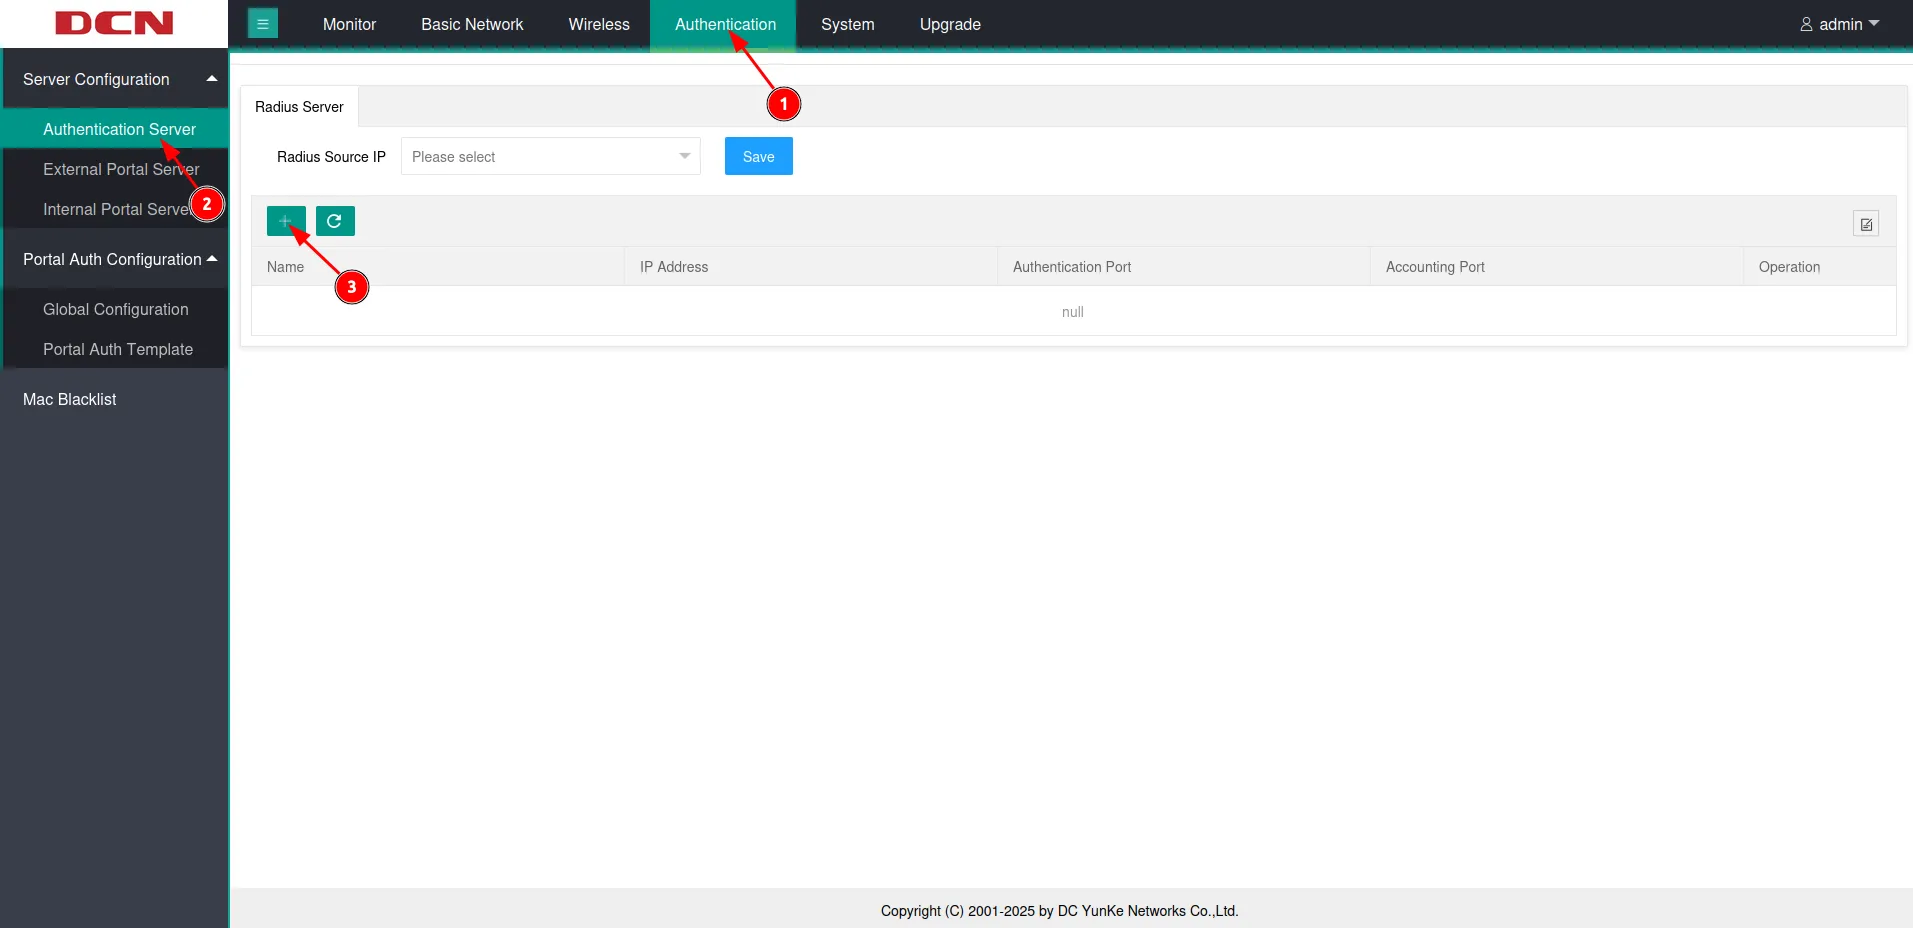
After accessing the Web interface of your AC, go to Authentication (1) -> Authentication Server (2) menu. Then, click on ”+” (3) to add the server.
You should see a window pop up. Configure as follows:
| Name | Social WiFi |
|---|---|
| IP Address | 35.205.62.147 |
| Authentication Port | 31812 |
| Accounting Port | 31813 |
| Shared Key | Radius Secret available in Access Points tab of the Social WiFi Panel. |
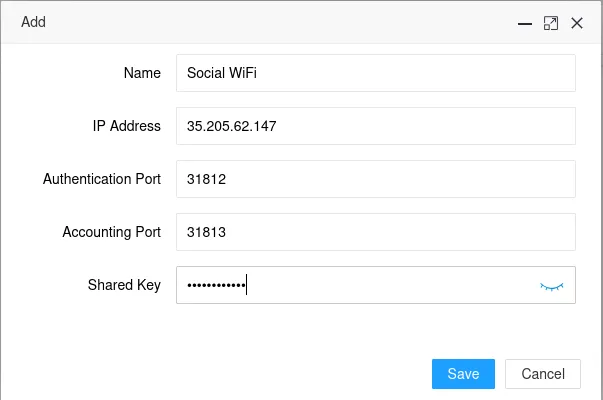
Click Save.
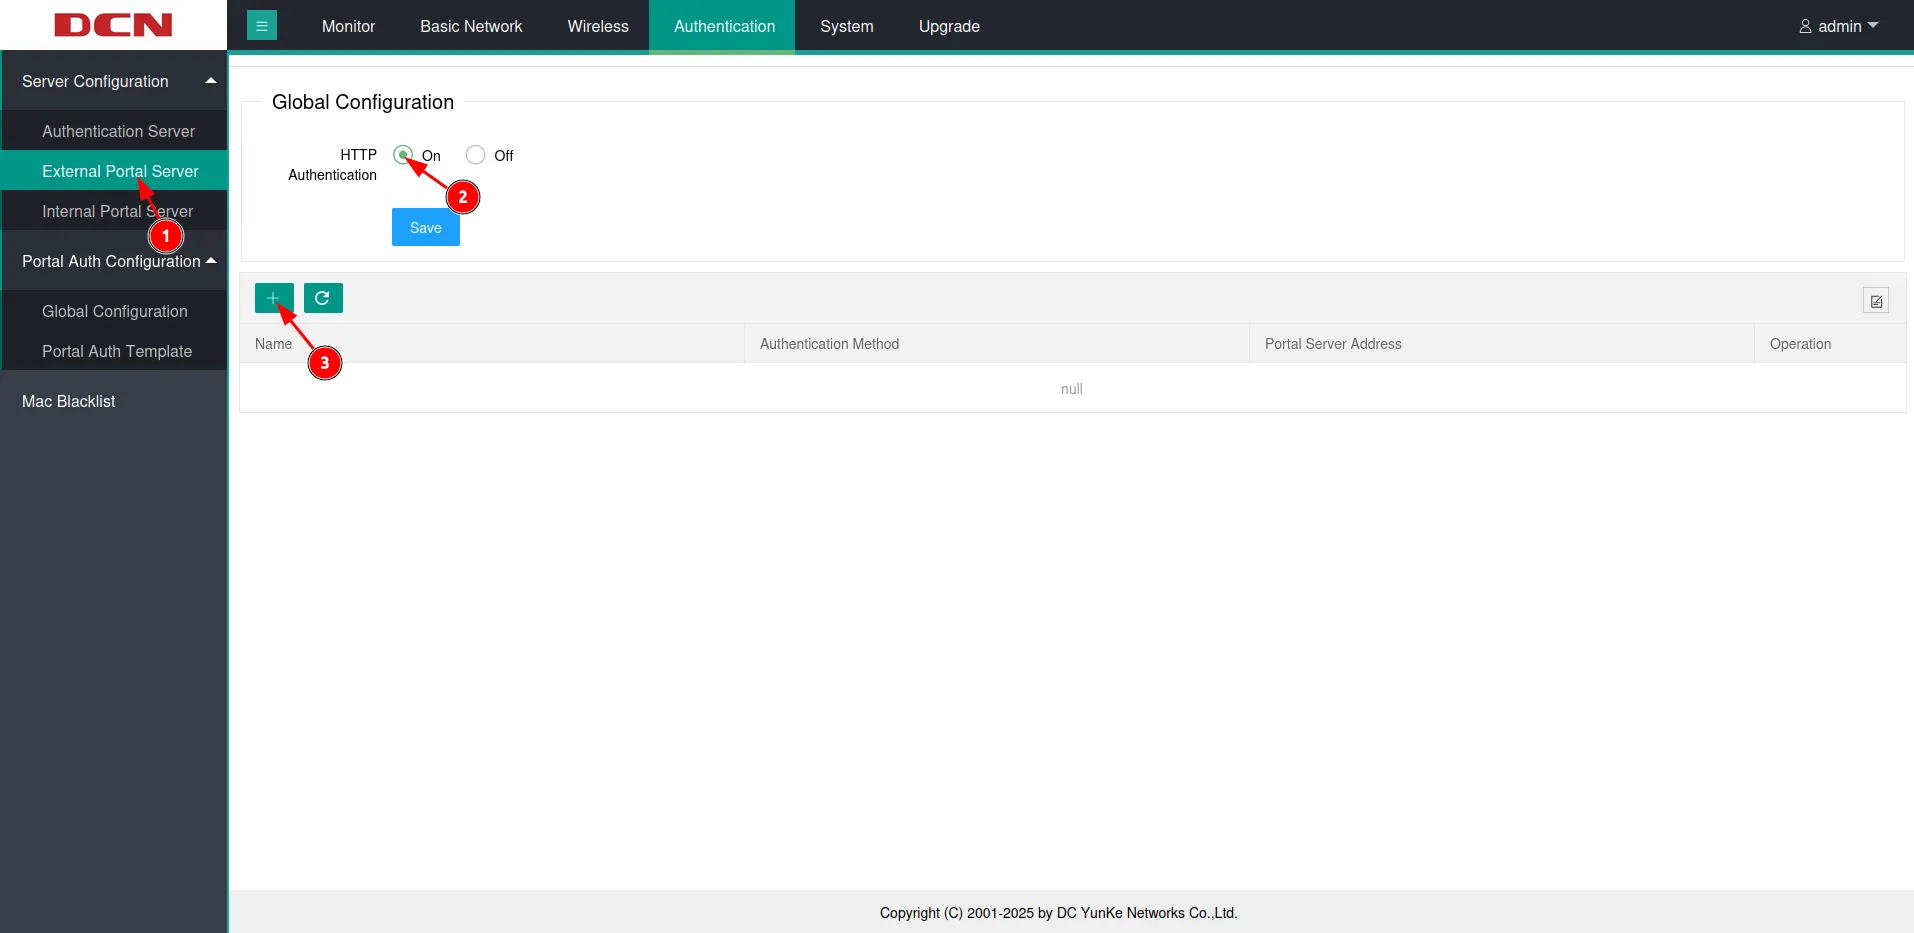
Next, go to the External Portal Server (1). Click “On” in the HTTP Authentication field and save (2). Now click on ”+” (3) to add the portal server.
You should see a window pop up. Configure as follows:
| Name | SocialWiFi |
|---|---|
| Authentication | Http |
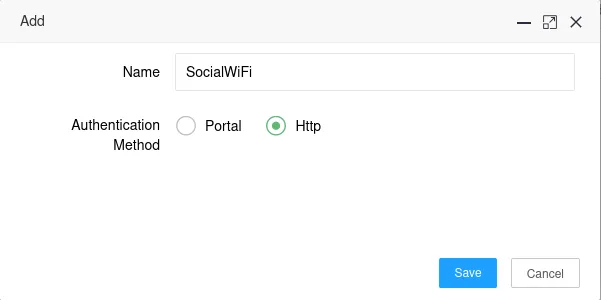
Click Save.
Go to the Global Configuration (1) -> Url Filter (2). Click ”+” (3).
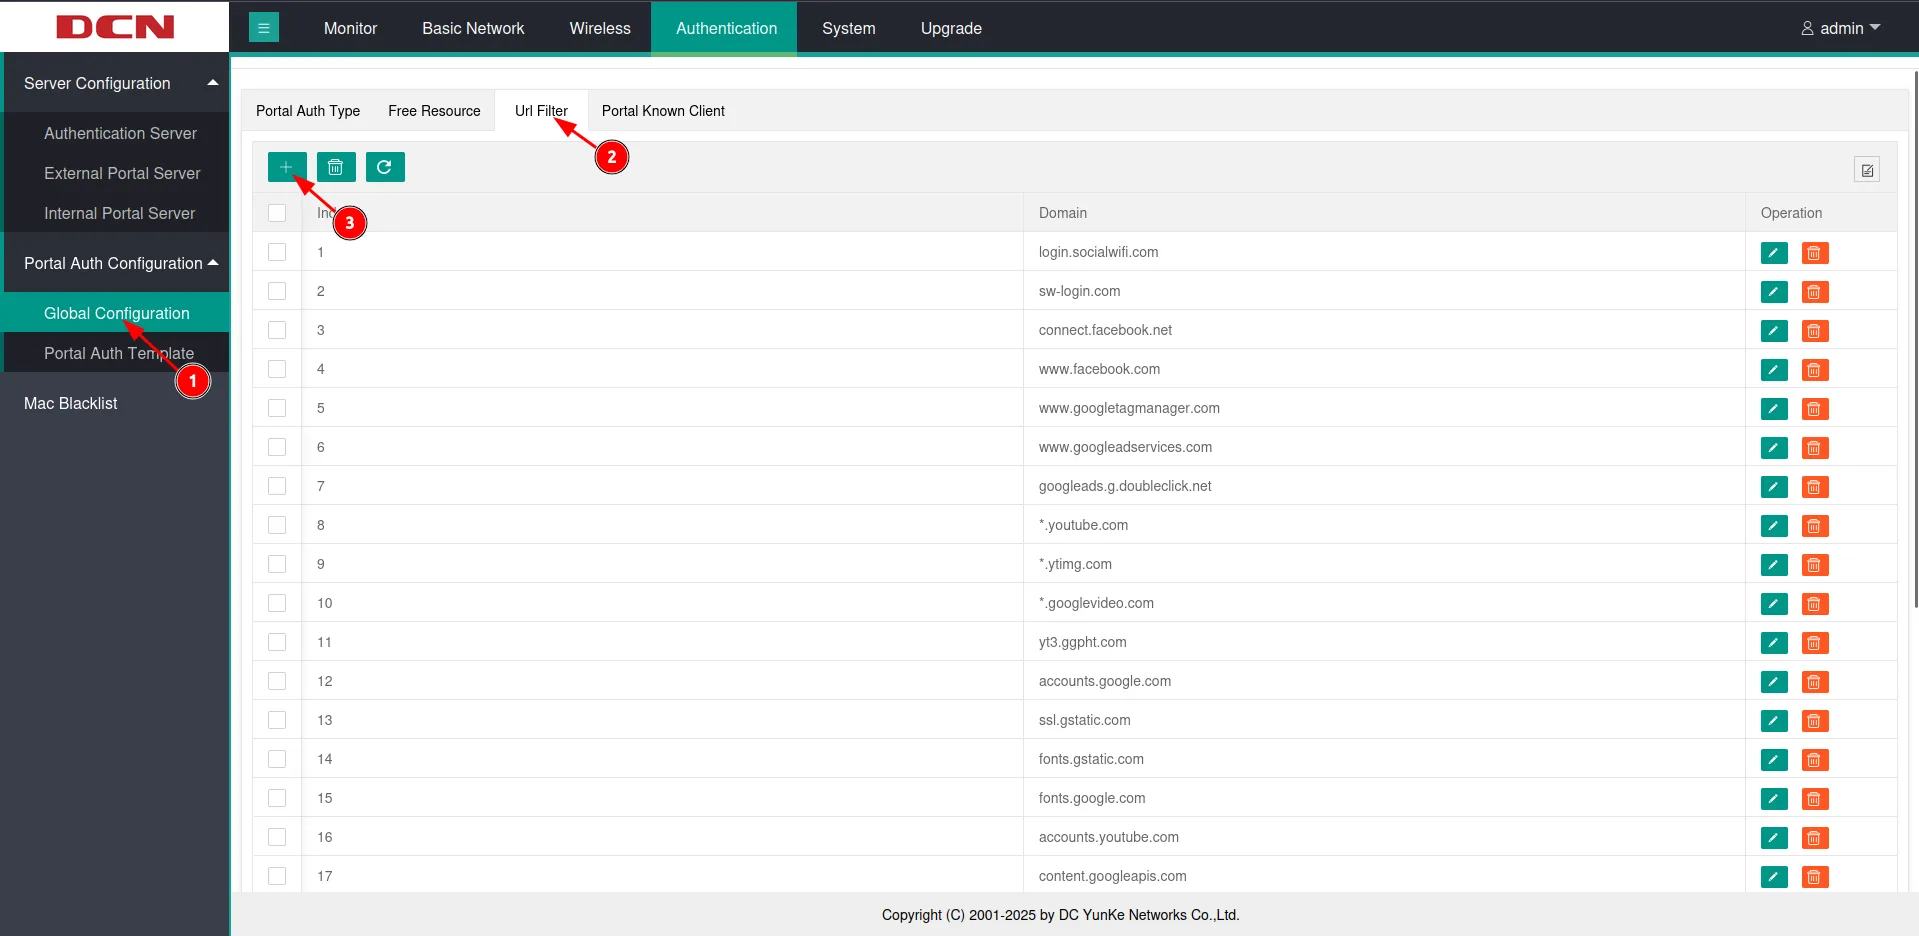
You should see a window pop up. Add all of the domains below one at the time and set the Domain name ID respectively starting from 1.

Click Save.
*.socialwifi.comsw-login.comfacebook.com*.facebook.com*.fbcdn.netlinkedin.com*.linkedin.com*.licdn.comtwitter.comapi.twitter.comx.comapi.x.com*.twimg.comwhatsapp.com*.whatsapp.net*.whatsapp.comconnect.facebook.netwww.facebook.comwww.googletagmanager.comwww.googleadservices.comgoogleads.g.doubleclick.net*.youtube.com*.ytimg.com*.googlevideo.comyt3.ggpht.comNext, switch to the Free Resource (1) section. Click on ”+” (2).
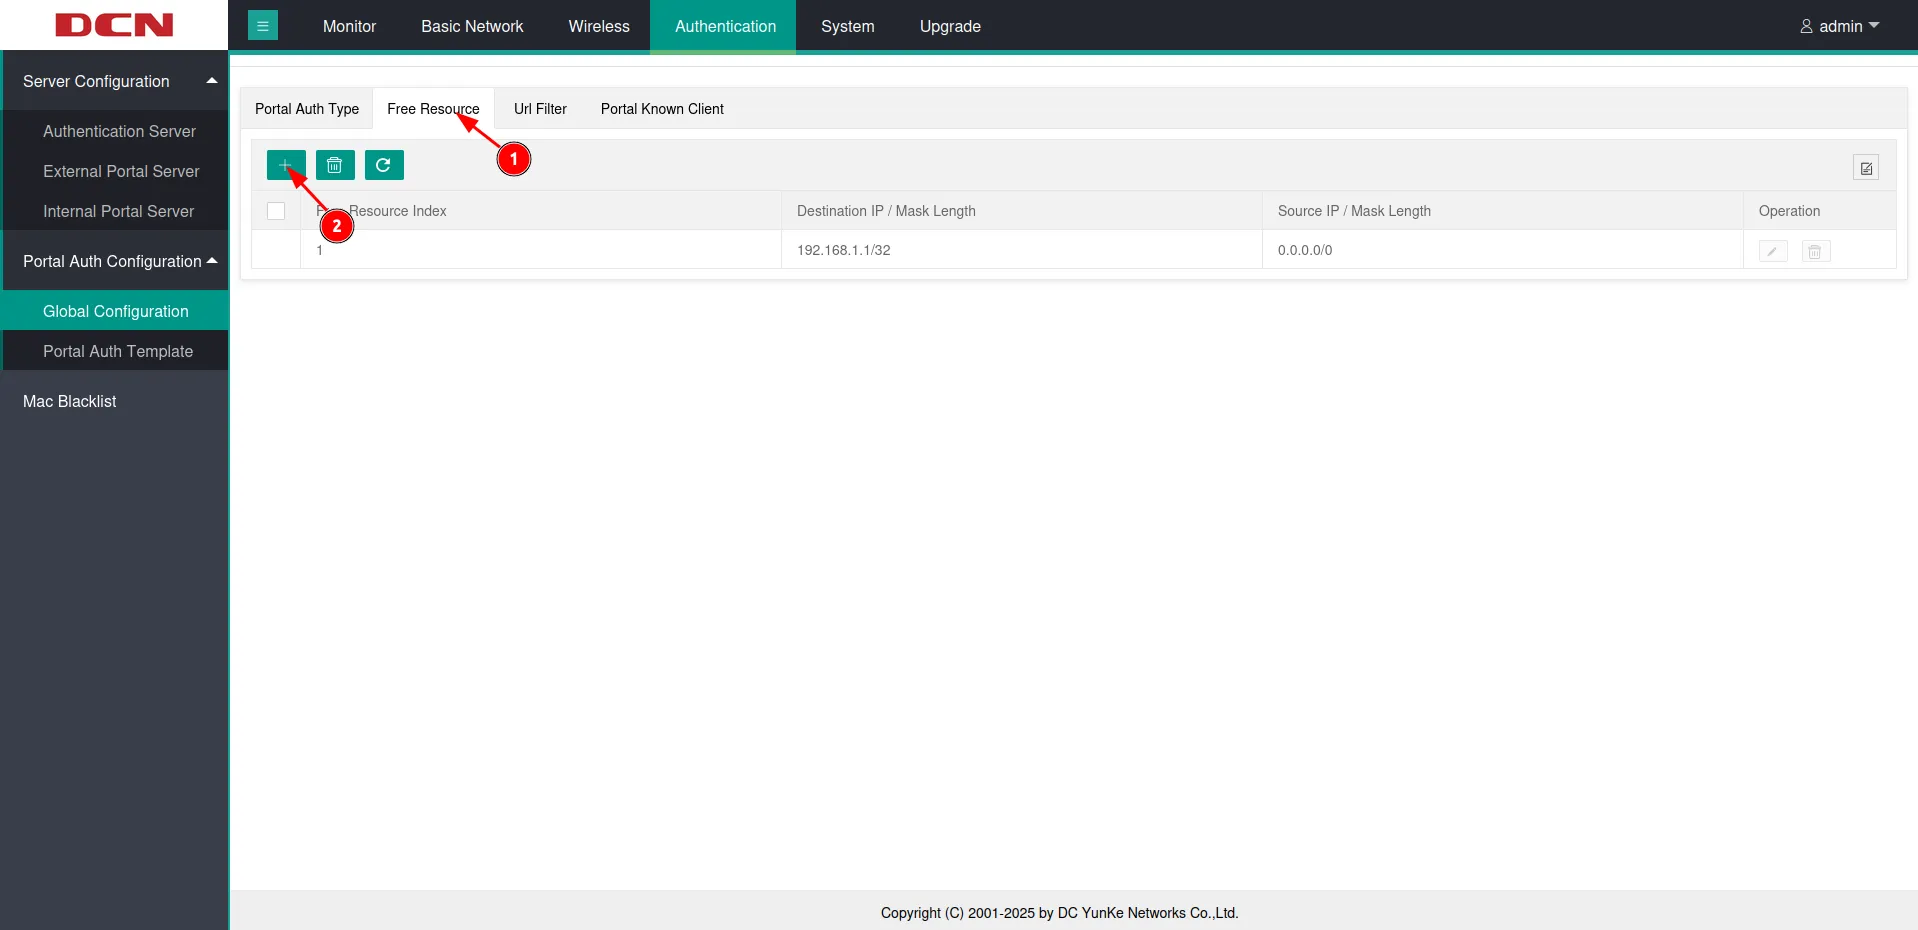
In the pop up window, configure as follows:
| Free Resource Index | 2 |
|---|---|
| Destination IP / Mask Length | Your AC IP address |
| Source IP / Mask Length | 0.0.0.0/0 |
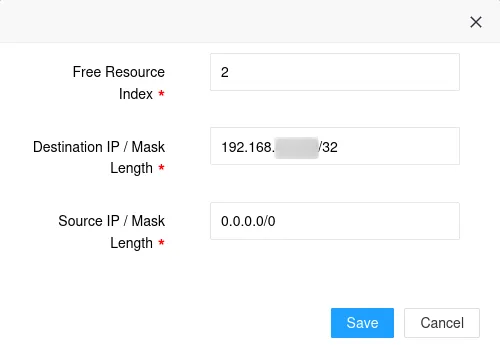
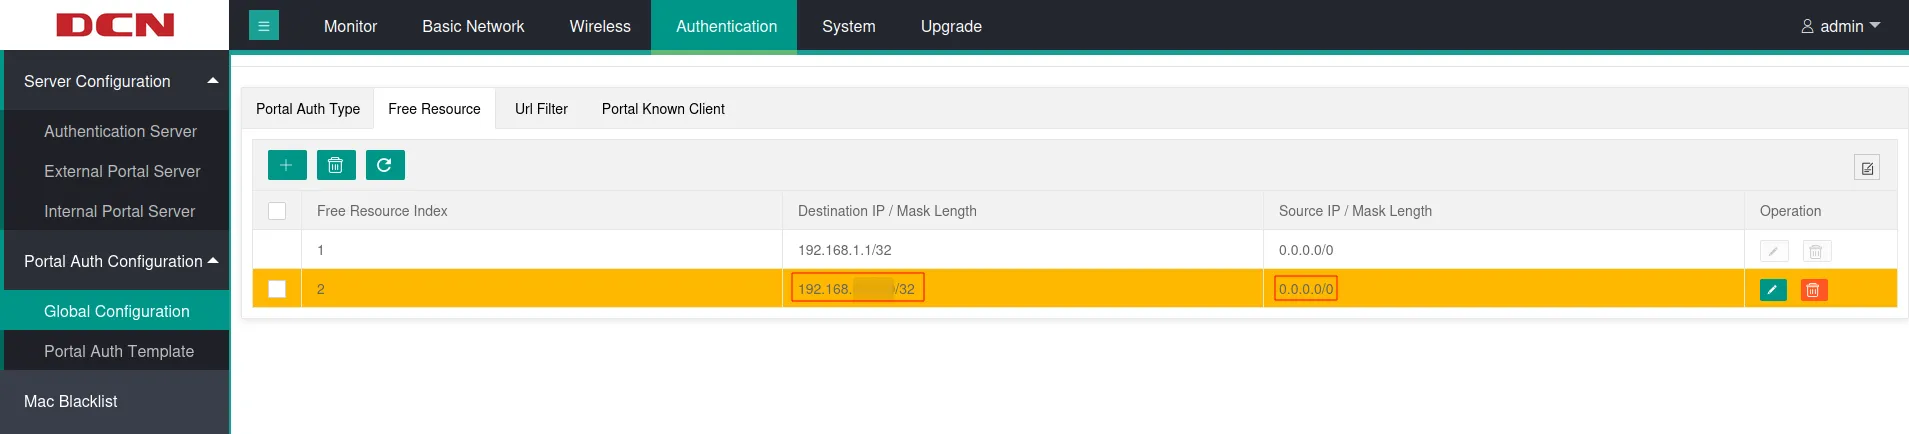
Click Save.
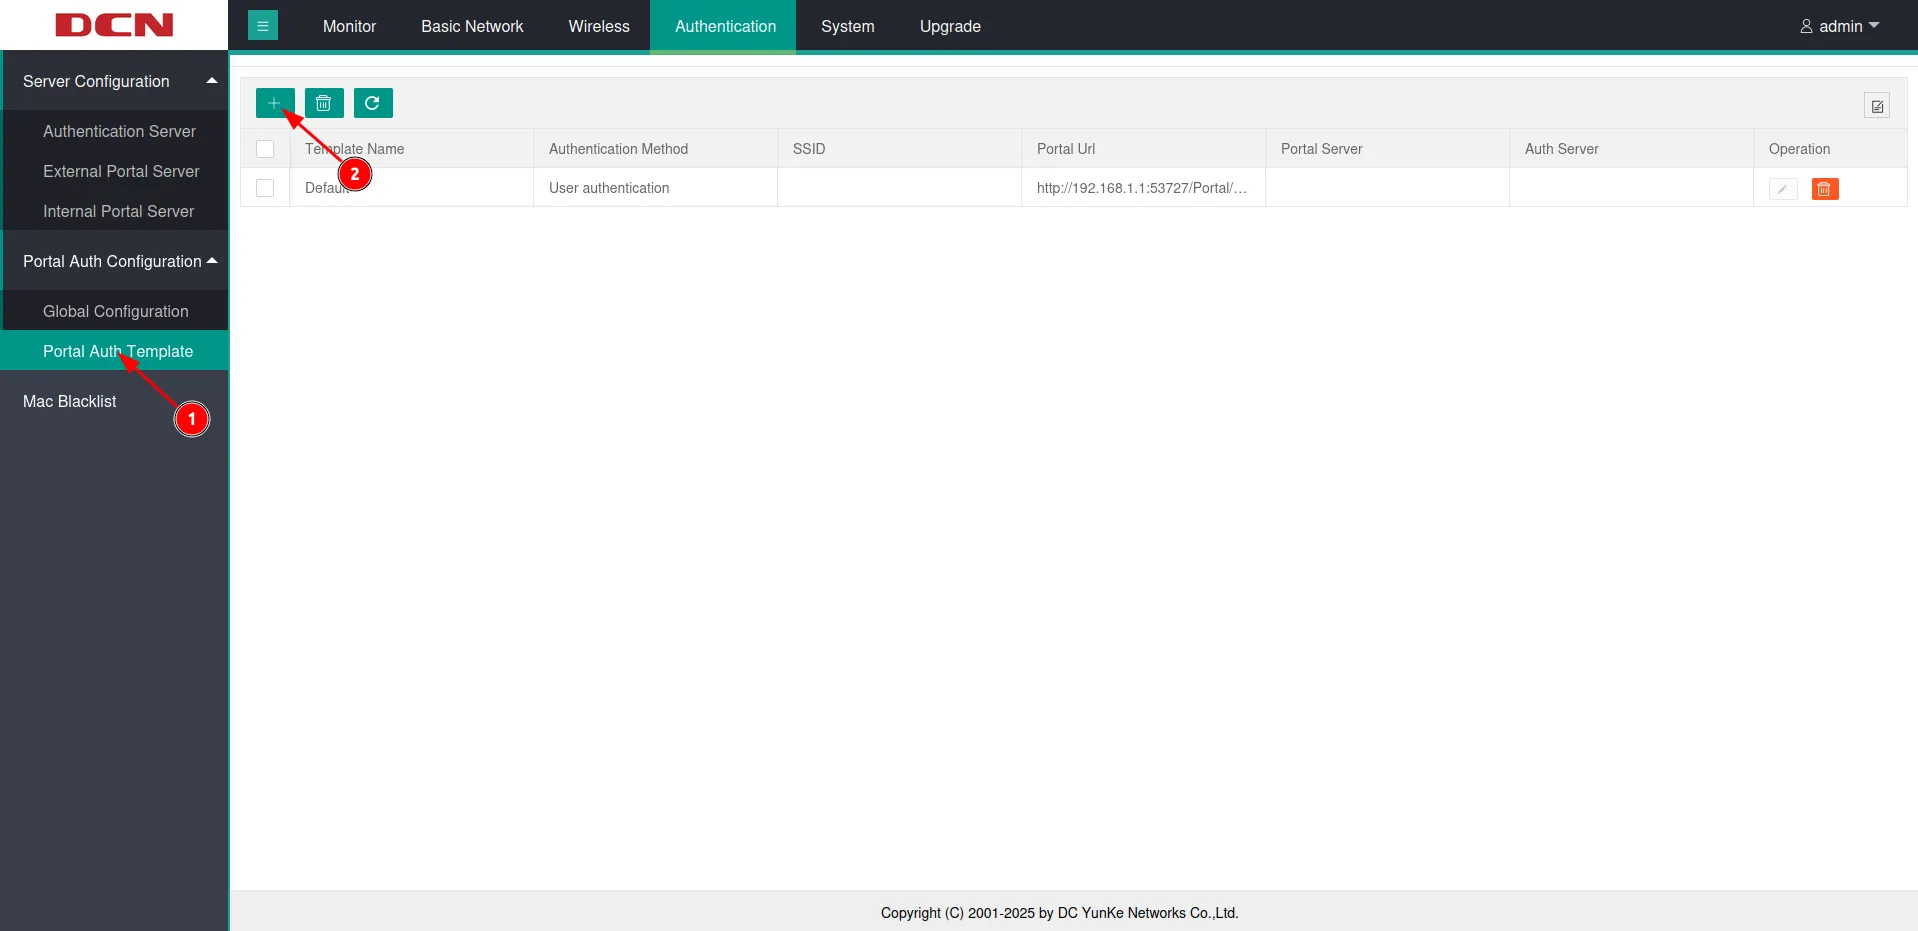
Switch to the Portal Auth Template (1) and click on ”+” (2).
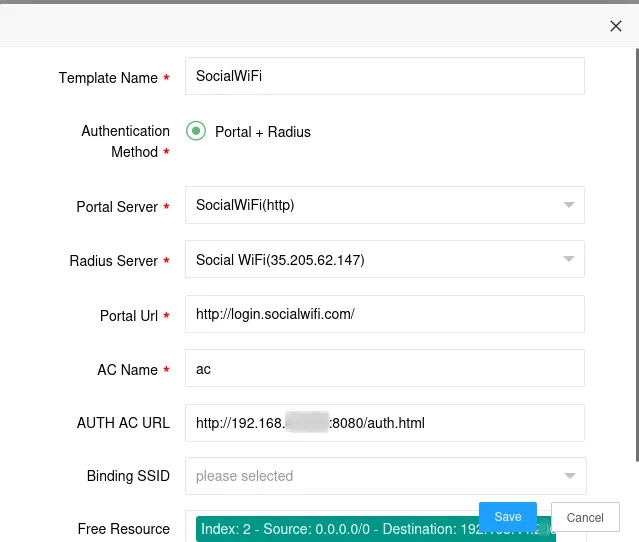
Configure in the pop up window as follows:
| Template Name | SocialWiFi |
| Authentication Method | Portal+Radius |
| Portal Server | SocialWiFi(http) |
| Radius Server | Social WiFi(35.205.62.147) |
| Portal Url | http://login.socialwifi.com/ |
| AC Name | ac |
| AUTH AC URL | http://AC IP Address:8080/auth.html |
| Binding SSID | Here, you can pick the guest SSID if you have one already created. If you don’t have the SSID created yet, leave this as empty and proceed with the guide. |
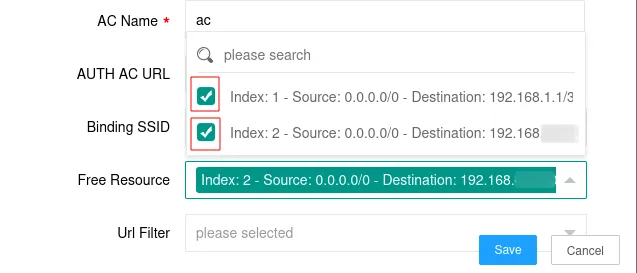
Scroll down.
In the Free Resource section, please select the entry configured below, as well as the entry that was added by default.
In the Url Filter tab, select all of the domains added in the previous step.
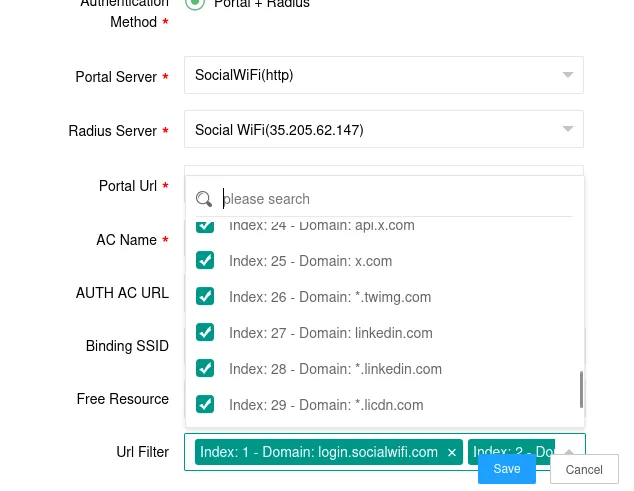
Click Save.
Create an SSID
After Social WiFi configuration, if you don’t yet have a Guest SSID please follow this guide to create one with Social WiFi policy attached to it.
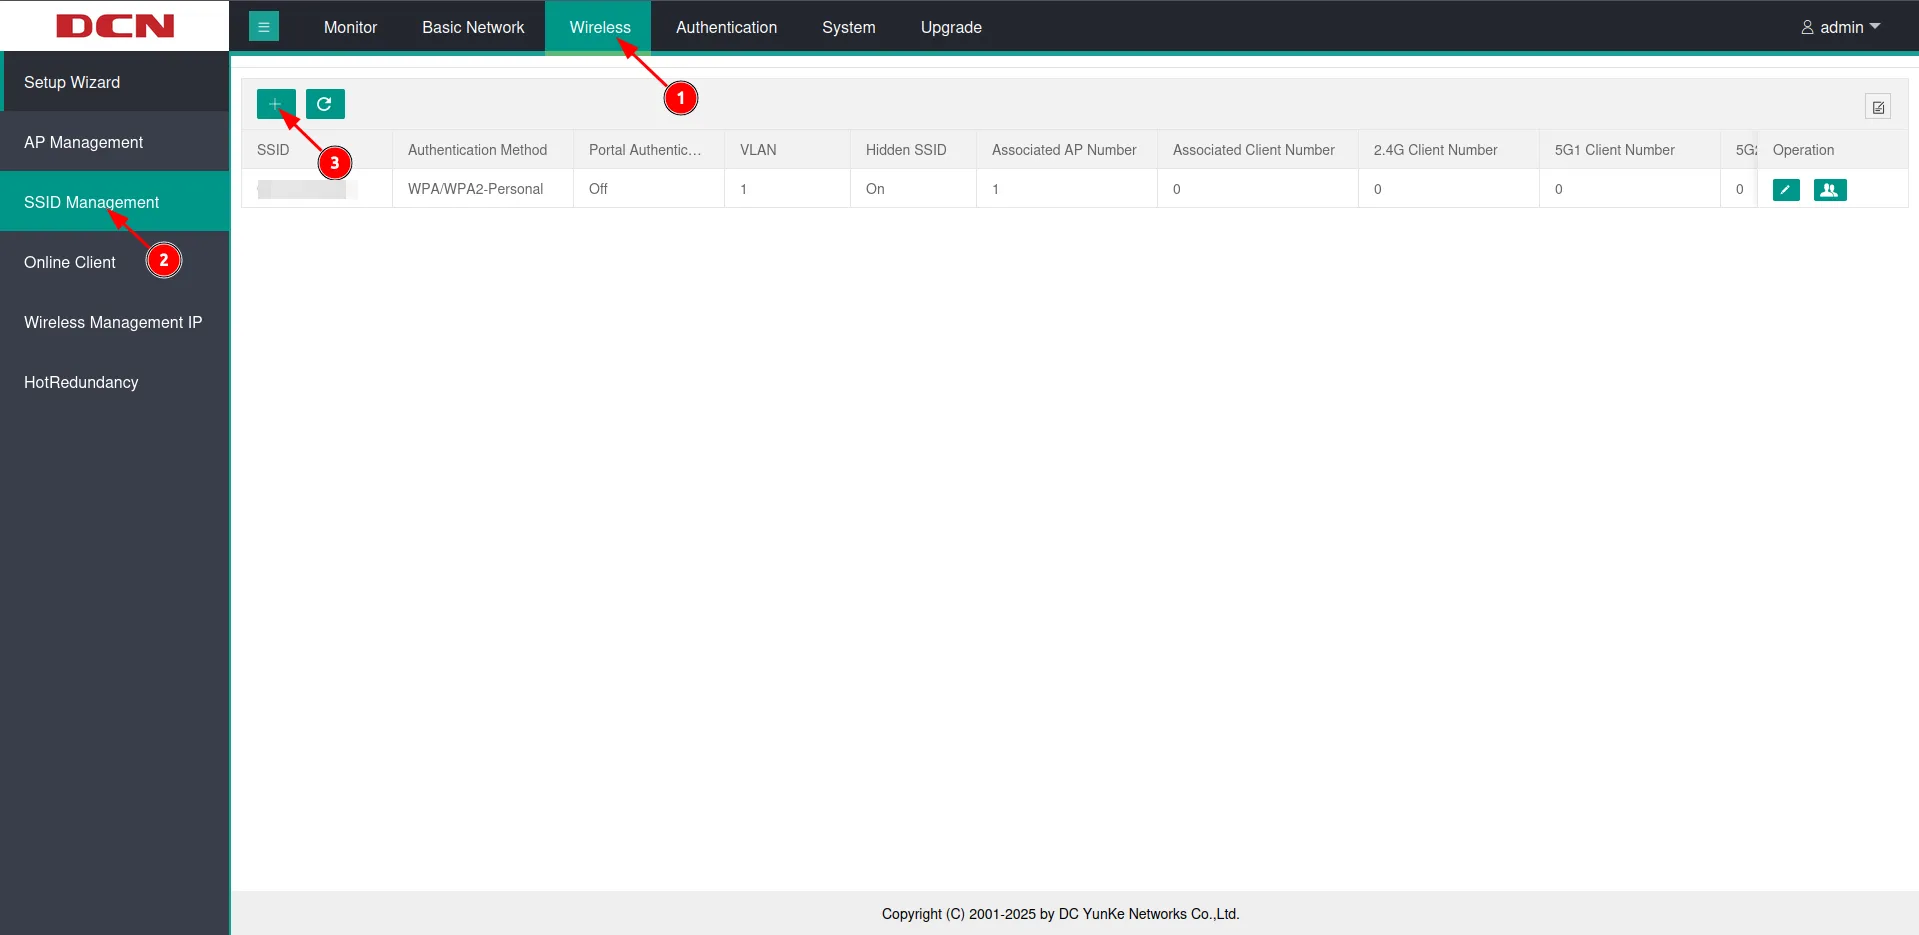
Go to Wireless (1) -> SSID Management (2) and click on ”+”.
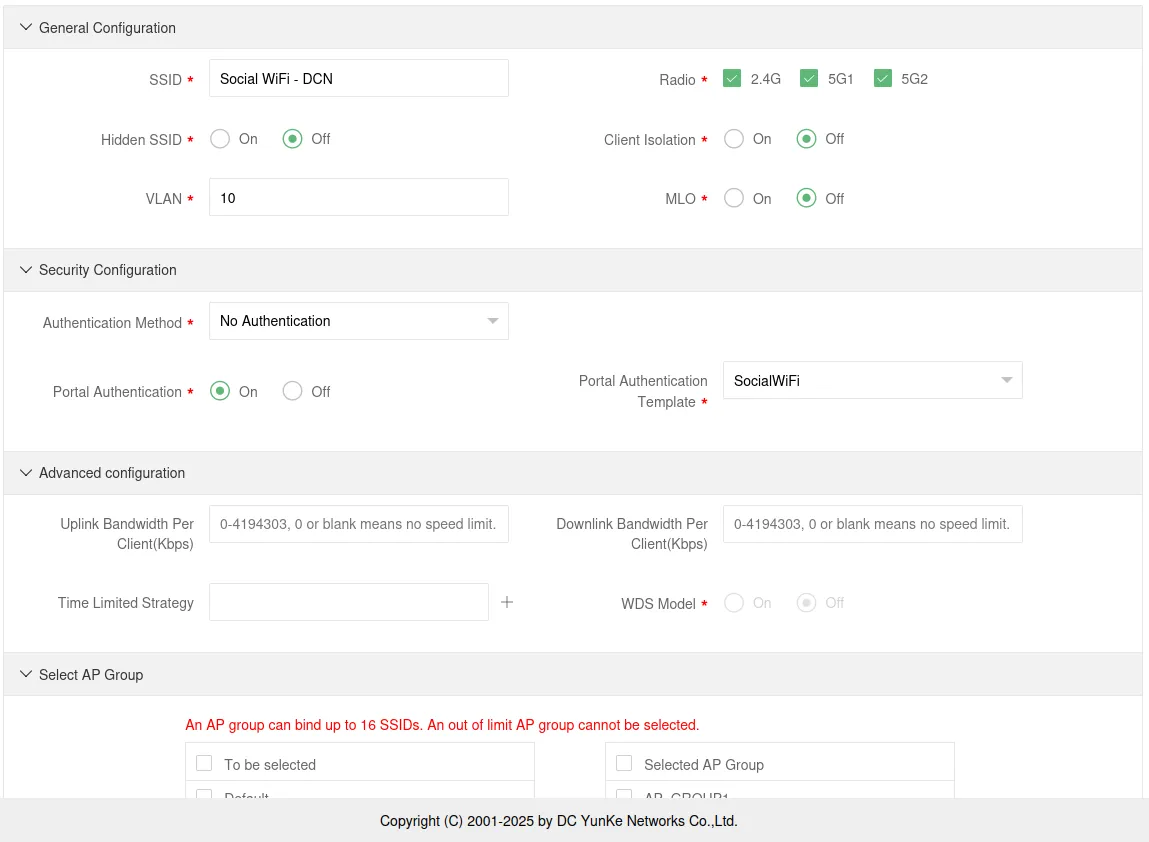
Configure as follows:
| SSID | *your SSID name* |
|---|---|
| Hidden SSID | Off |
| VLAN | 1 * |
| Authentication Method | No Authentication |
| Portal Authentication | On |
| Portal Authentication Template | SocialWiFi |
In the Select AP Group section, make sure to select the AP Group that includes the Access Points you want to broadcast the SSID.
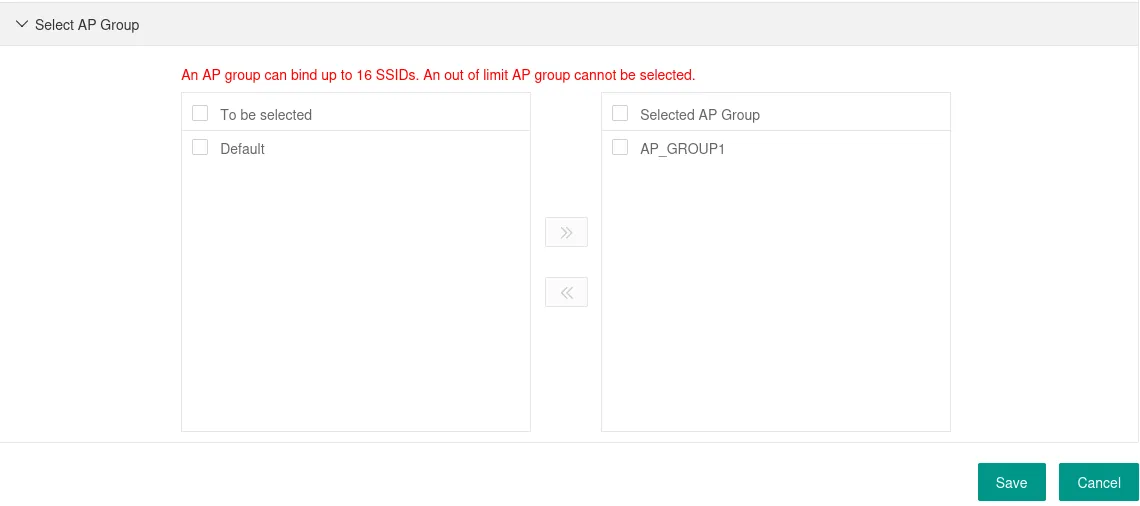
Click Save.
Adding the Access Points in the Panel
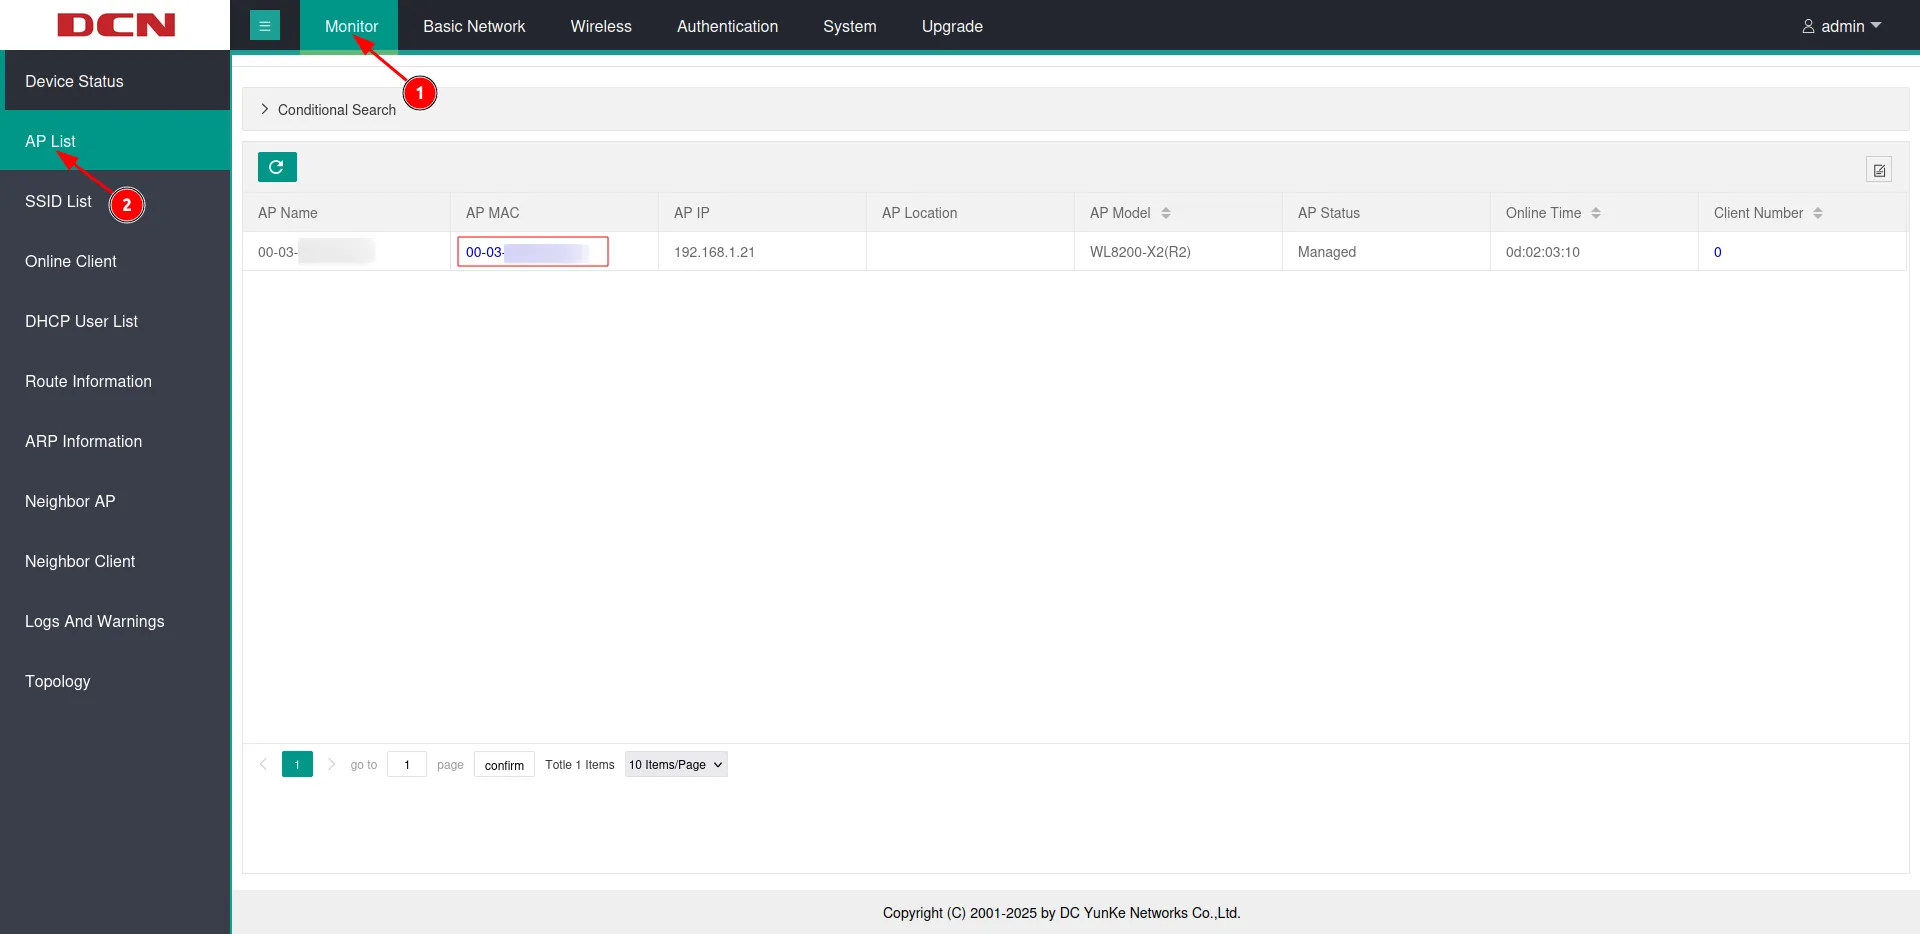
In the AC Web interface, go to Monitor (1) -> AP List (2). Copy the AP MAC value.
Next, switch to Social WiFi Panel, go to Access Points tab, click the Add button and paste the MAC address you’ve copied. Do so for each MAC address. Click Create.
Test the solution
Connect with the WiFi network. You should see a login page. Go through the login process and, once finished, you should have internet access. You should see first connections and authorizations in the Social WiFi Panel’s statistics section.