Cisco WLC
Compatibility
The below instruction pertains to Cisco WLCs of 2504 and 5520 series with IOS 8.2.166.0
Social WiFi has been tested and is proven to work on the following configurations:
Cisco 2500 Series Wireless Controller
- versions up to 8.5.131.0
Cisco AIR-CAP3702I-E-K9
- versions compatibile with the Controller
Accessing the device’s administrative panel
Log in to the administrative panel with root permissions and press Advanced.
Device configuration
RADIUS configuration
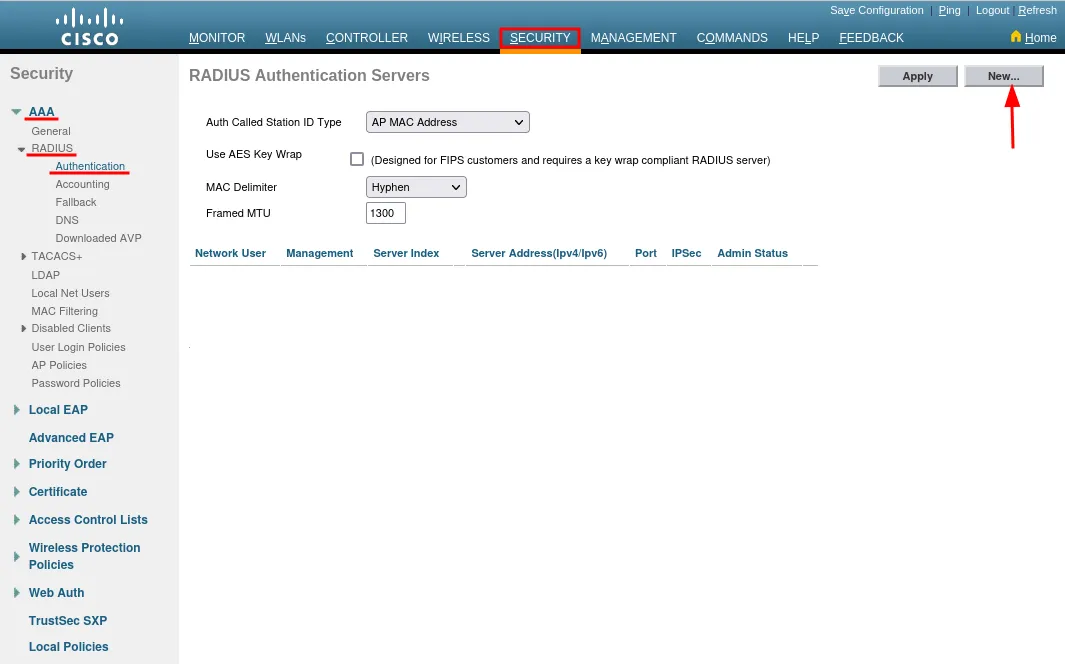
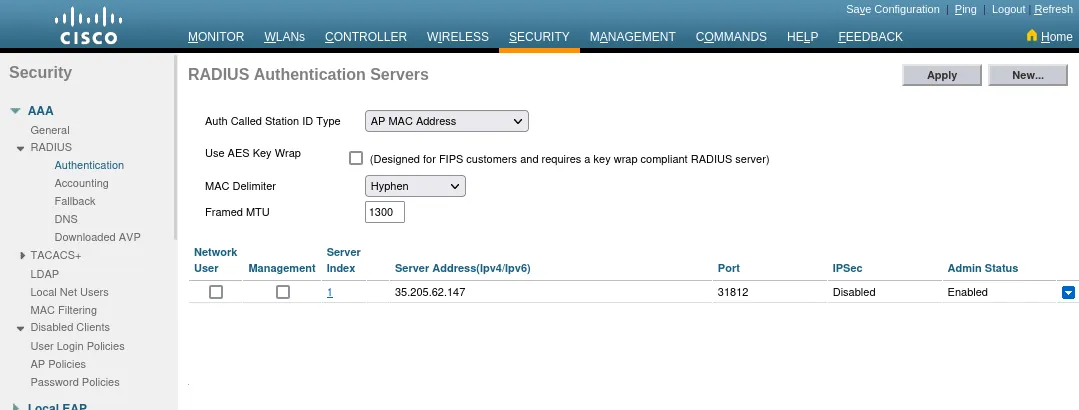
Security → AAA → Radius → Authentication
Security → AAA → Radius → Authentication → New
| Server Index (Priority) | Leave default (1) |
| Server IP Address | 35.205.62.147 |
| Shared Secret Format | ASCII |
| Shared Secret | Radius Secret available in Access Points tab of the Social WiFi Panel |
| Confirm Shared Secret | Radius Secret available in Access Points tab of the Social WiFi Panel |
| Key Wrap | Leave unchecked |
| Port Number | 31812 |
| Server Status | Enabled |
| Support for CoA | Disabled |
| Server Timeout | 5 seconds |
| Network User | Unchecked |
| Management | Unchecked |
| Management Retransmit Timeout | Leave default (2) |
| IPSec | Leave unchecked |
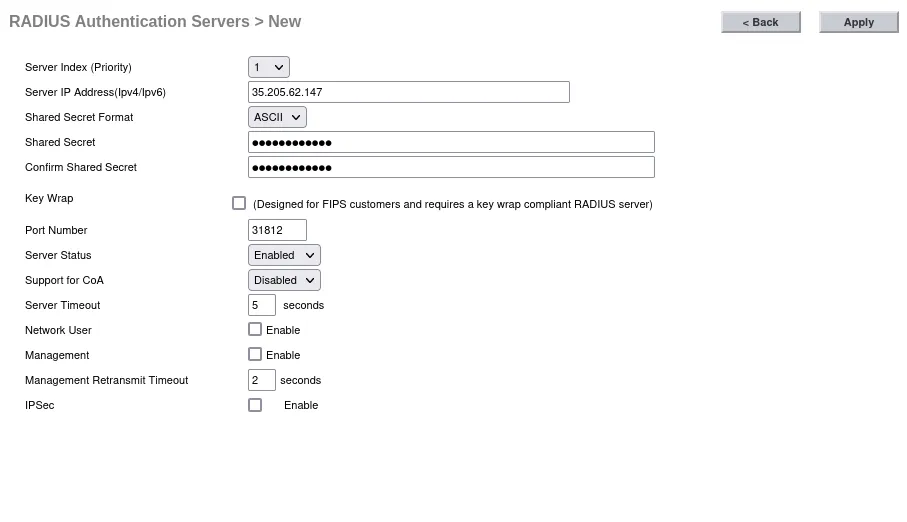
Press Apply.
Now, configure as follows:
| Auth Called Station ID Type | AP MAC Address |
|---|---|
| Use AES Key Wrap | Leave unchecked |
| MAC Delimiter | Hyphen |
| Framed MTU | 1300 |
Press Apply.
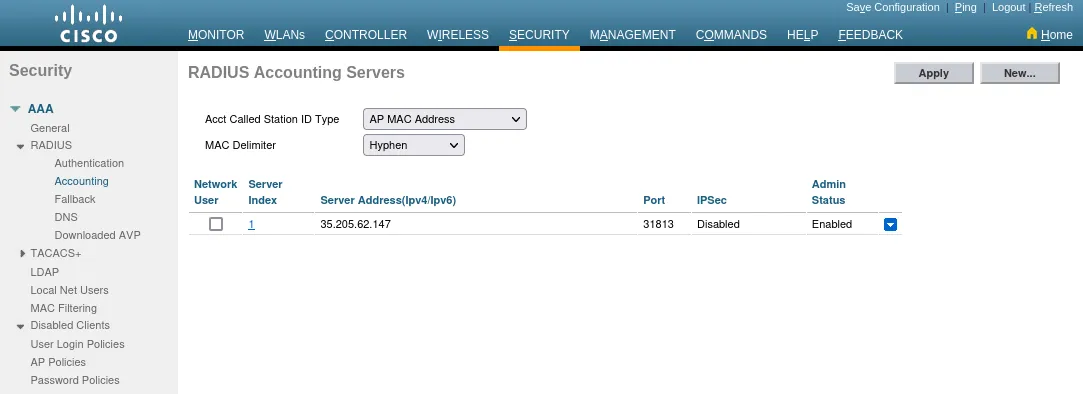
Now, in the menu on the left go to the AAA → Radius → Accounting tab and add new accounting server.
| Server Index (Priority) | Leave default (1) |
| Server IP Address | 35.205.62.147 |
| Shared Secret Format | ASCII |
| Shared Secret | Radius Secret available in Access Points tab of the Social WiFi Panel |
| Confirm Shared Secret | Radius Secret available in Access Points tab of the Social WiFi Panel |
| Port Number | 31813 |
| Server Status | Enabled |
| Server Timeout | 5 seconds |
| Network User | Leave unchecked |
| IPSec | Leave unchecked |
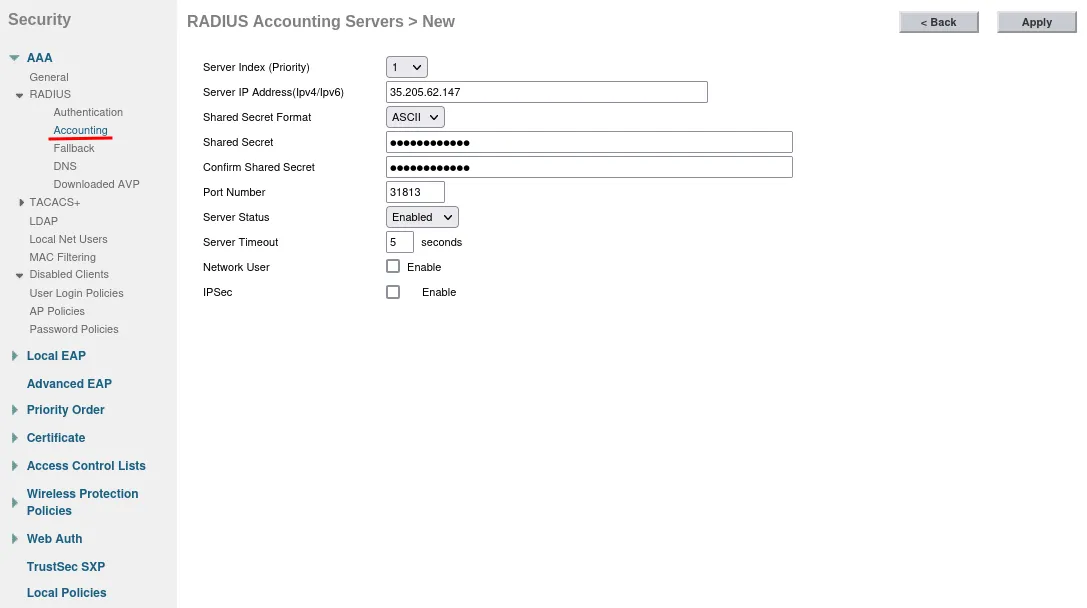
Press Apply.
DNS Walled Garden Configuration
Now, go to the Access Control Lists → Access Control Lists in the same tab and press New… to add a new list.
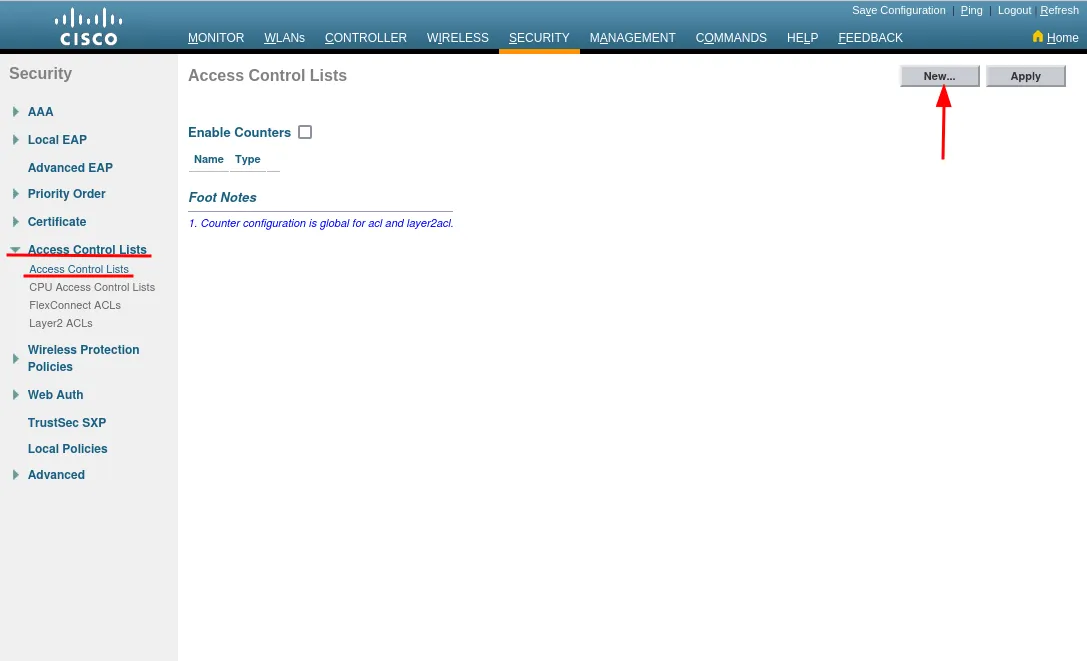
| Access Control List Name | sw_walledgarden |
| ACL Type | IPv4 |

Press Apply.
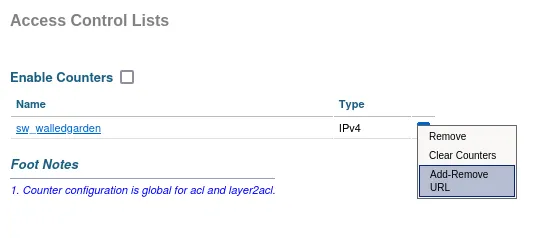
Hover the coursor over the blue icon on the right side of sw_walledgarden text and press “Add/Remove URL”.
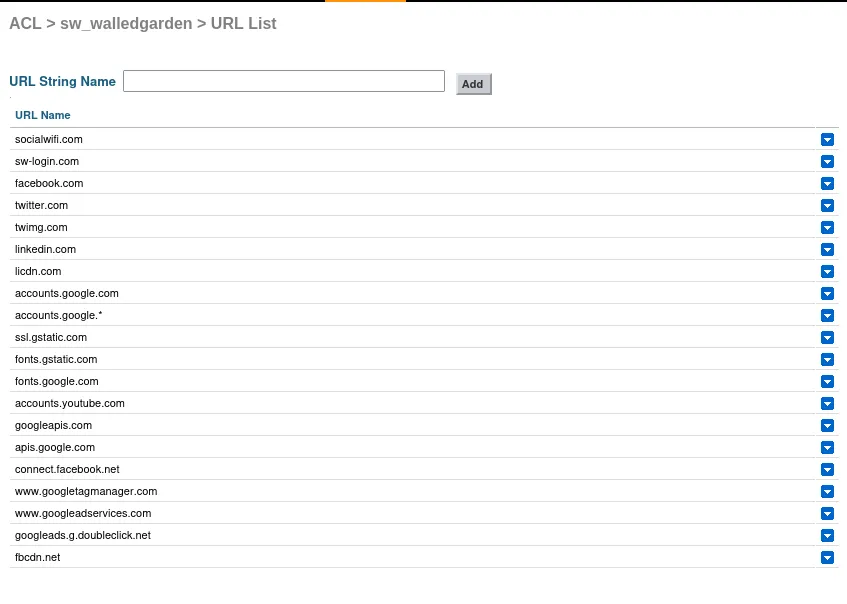
Add these entries one by one:
socialwifi.com sw-login.com facebook.com fbcdn.net twitter.com x.com twimg.com linkedin.com licdn.com connect.facebook.net googleads.g.doubleclick.net |
|---|
Captive Portal/Hotspot configuration
Now, go to the Security -> Web Auth → Web Login Page and configure as follows:
| Web Authentication Type | External (Redirect to external server) |
| Redirect URL after login | [leave empty] |
| External Webauth URL | https://login.socialwifi.com/ |
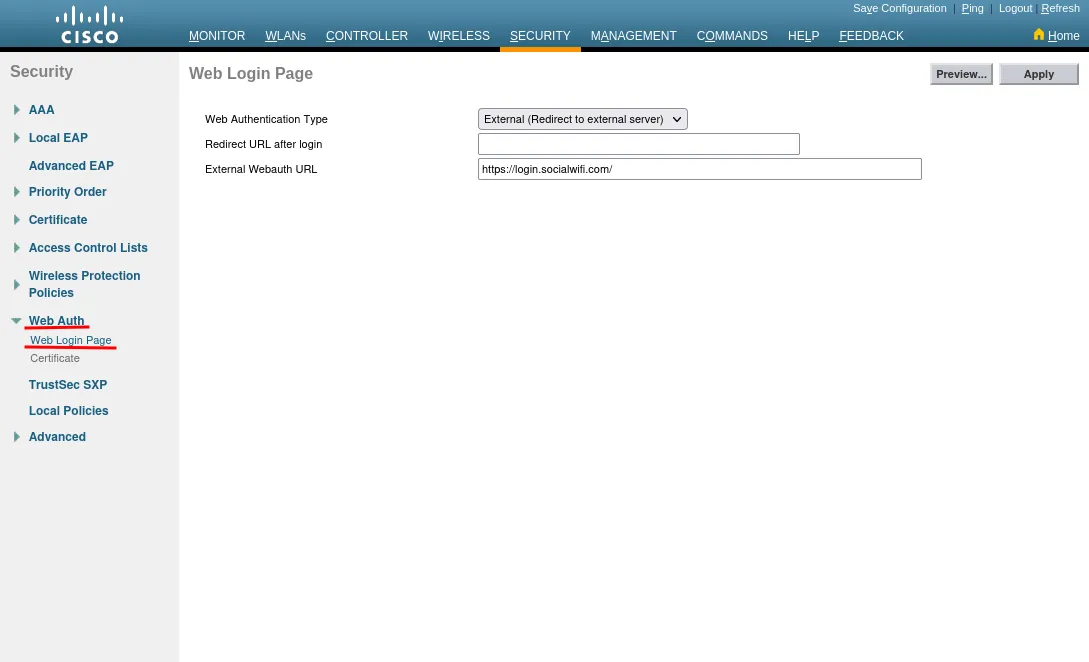
Press Apply.
Go to Management → HTTP-HTTPS and disable WebAuth SecureWeb and HTTPS Redirection:
| WebAuth SecureWeb | Disabled |
|---|---|
| HTTPS Redirection | Disabled |
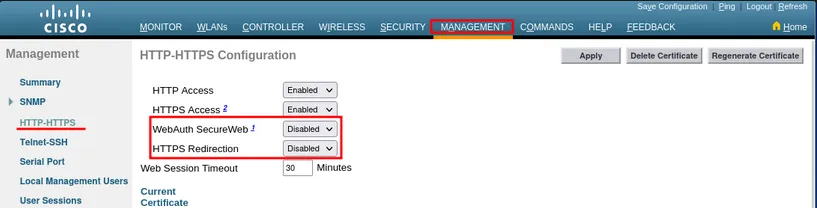
Press Apply.
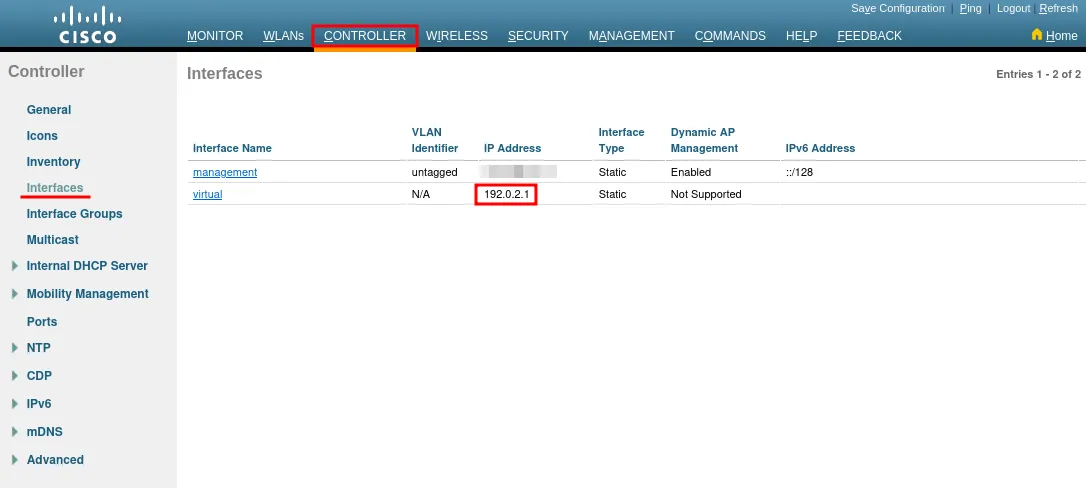
In the Controller → Interfaces section, make sure that the “virtual” interface’s address is not set to 1.1.1.1 (it used to be the default value). If it is, change it to 192.0.2.1.
Network settings configuration
Now, go to the WLANs → WLANs and create the WLAN network or edit if you already have one.
On the upper right press the Go button next to “Create New”.
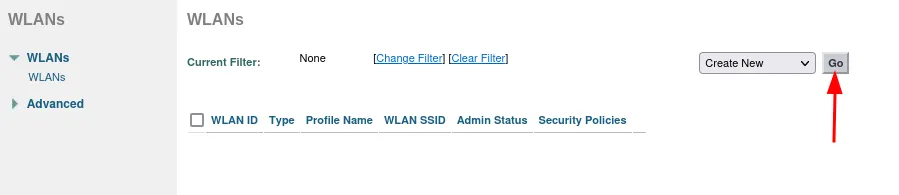
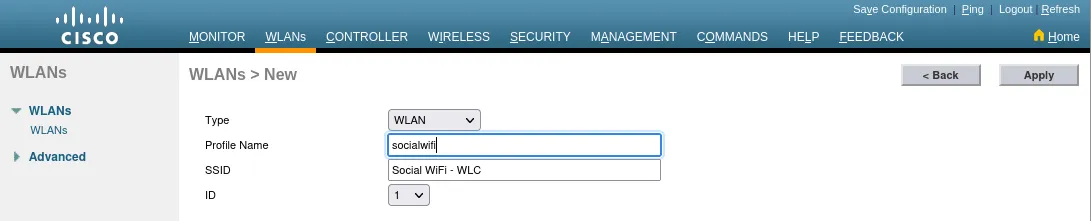
Press Apply.
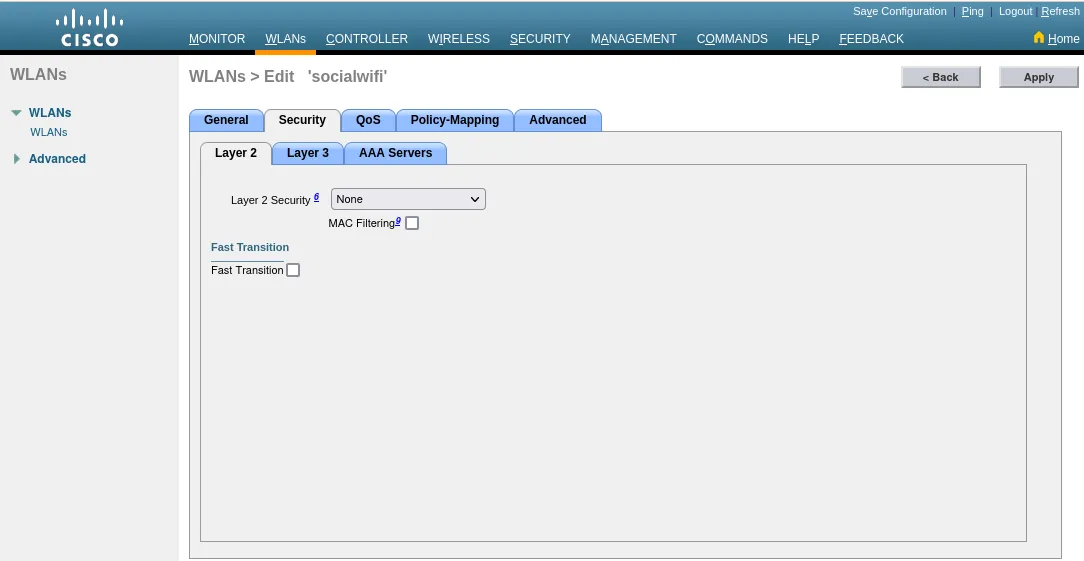
Edit your WLAN and go to security Layer 2 tab. Set “Layer 2 Security” as None.
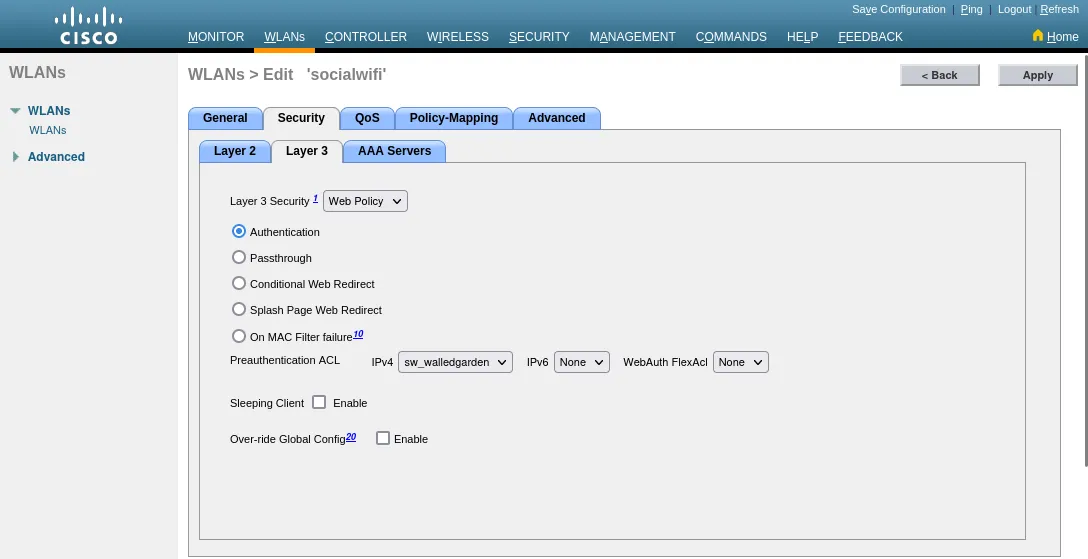
Next, go to the Layer 3 tab and configure as follows:
| Layer 3 Security | Web Policy |
| Check the box | Authentication |
| Preauthentication ACL | IPv4 sw_walledgarden |
| IPv6 | None |
| WebAuth FlexAcl | None |
| Sleeping Client | Leave unchecked |
| Over-ride Global Config | Leave unchecked |
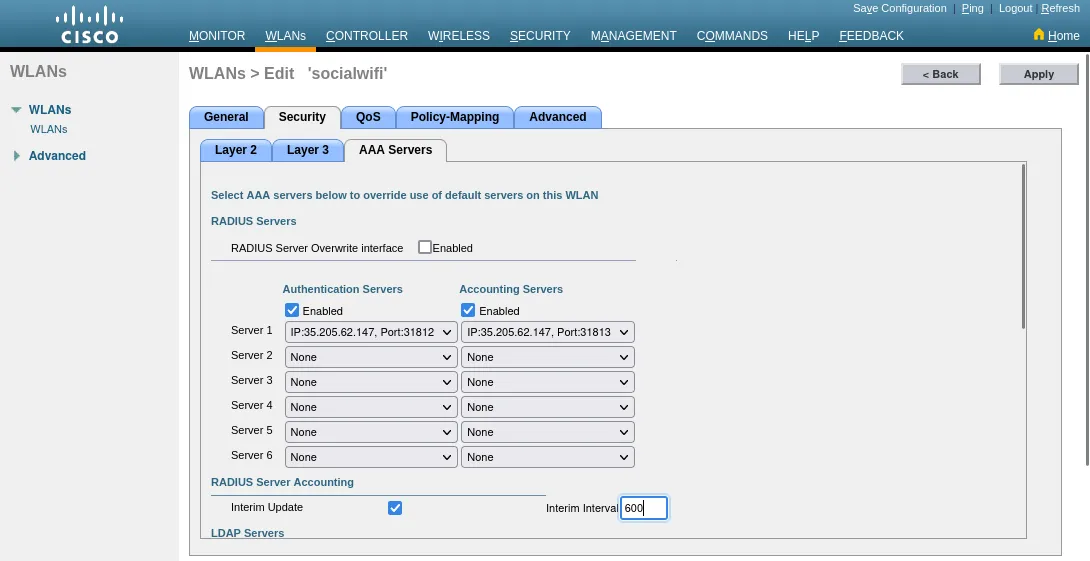
Go to AAA Servers tab and configure as follows:
| Authentication Servers Enabled | Yes |
| Server 1 | IP:35.205.62.147, Port:31812 |
| Accounting Servers Enabled | Yes |
| Server 1 | IP:35.205.62.147, Port:31813 |
| Radius Server Accounting Interim Update | Yes |
| Radius Server Accounting Interim Interval | 600 |
Press Apply.
Adding the device to Social WiFi platform
Monitor → Access Points → Radios → 802.11a/n/ac or 802.11b/g/n
- Copy the MAC addresses of the Access Points you would like to add to Social WiFi platform.
- Go to the Social WiFi Panel.
- Choose the place to which you would like to add the device.
- In the “Access Points” tab, press “Add” (upper right corner), paste the MAC address you copied into the form (adding a name is optional) and click “Create”.