GWN Cloud
Compatibility
Social WiFi has been tested and is proven to work on the following configurations:
Access point firmware
- 1.0.25.3 and newer
Access device administration panel
This guide assumes that the device is already added to your GWN Cloud.
Captive Portal Policy
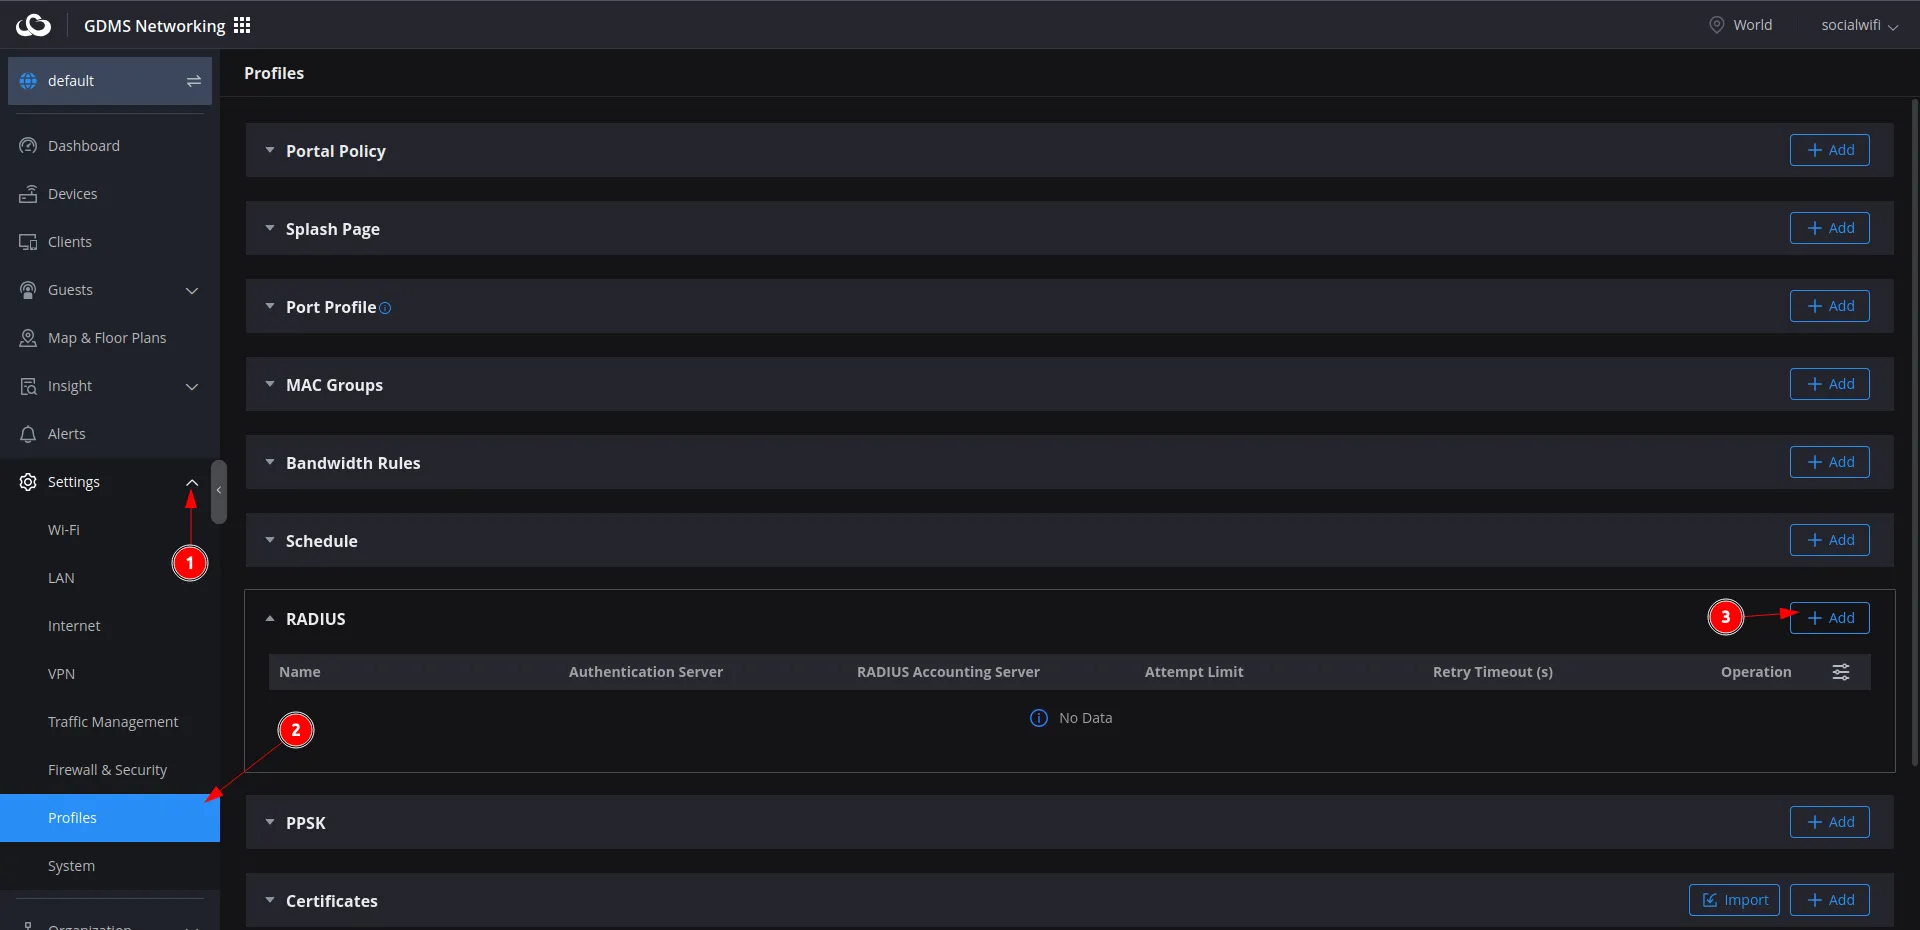
Go to Settings -> Profiles -> RADIUS and press ”+ Add”.
Now, configure as follows:
| Name | sw_radius |
|---|---|
| Server Address | 35.205.62.147 |
| Port | 31812 |
| Secret | RADIUS Secret is available in Access Points tab of the Social WiFi Panel |
For the “Radius Accounting Servers” and below:
| Server Address | 35.205.62.147 |
|---|---|
| Port | 31813 |
| Secret | RADIUS Secret is available in Access Points tab of the Social WiFi Panel |
| RADIUS NAS ID | (leave empty) |
| Attempt Limit | 1 |
| RADIUS retry timeout (s) | 10 |
| Accounting Update Interval (sec) | 600 |
| Dynamic VLAN | Leave unchecked |
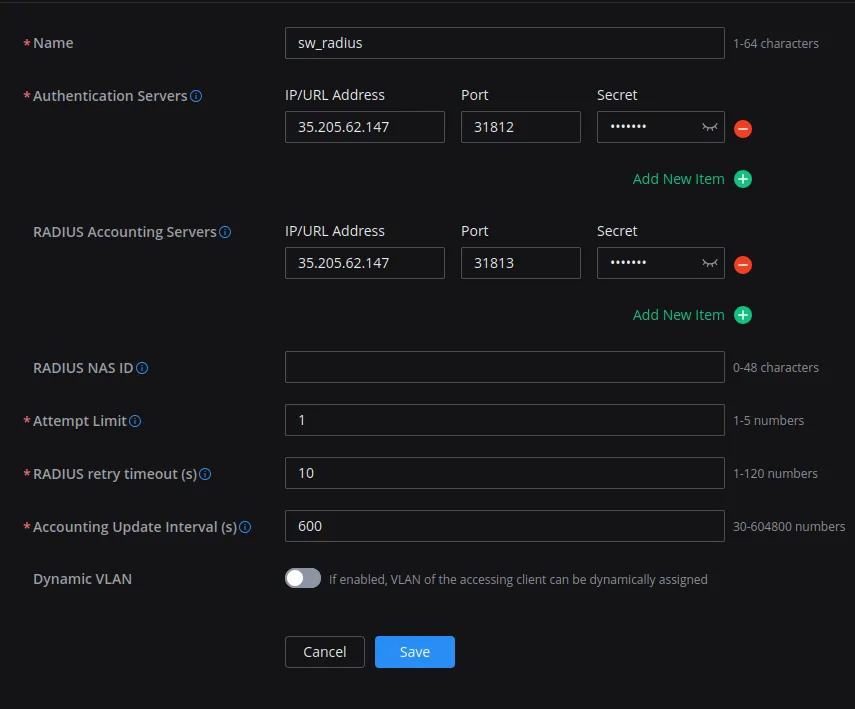
Click Save.
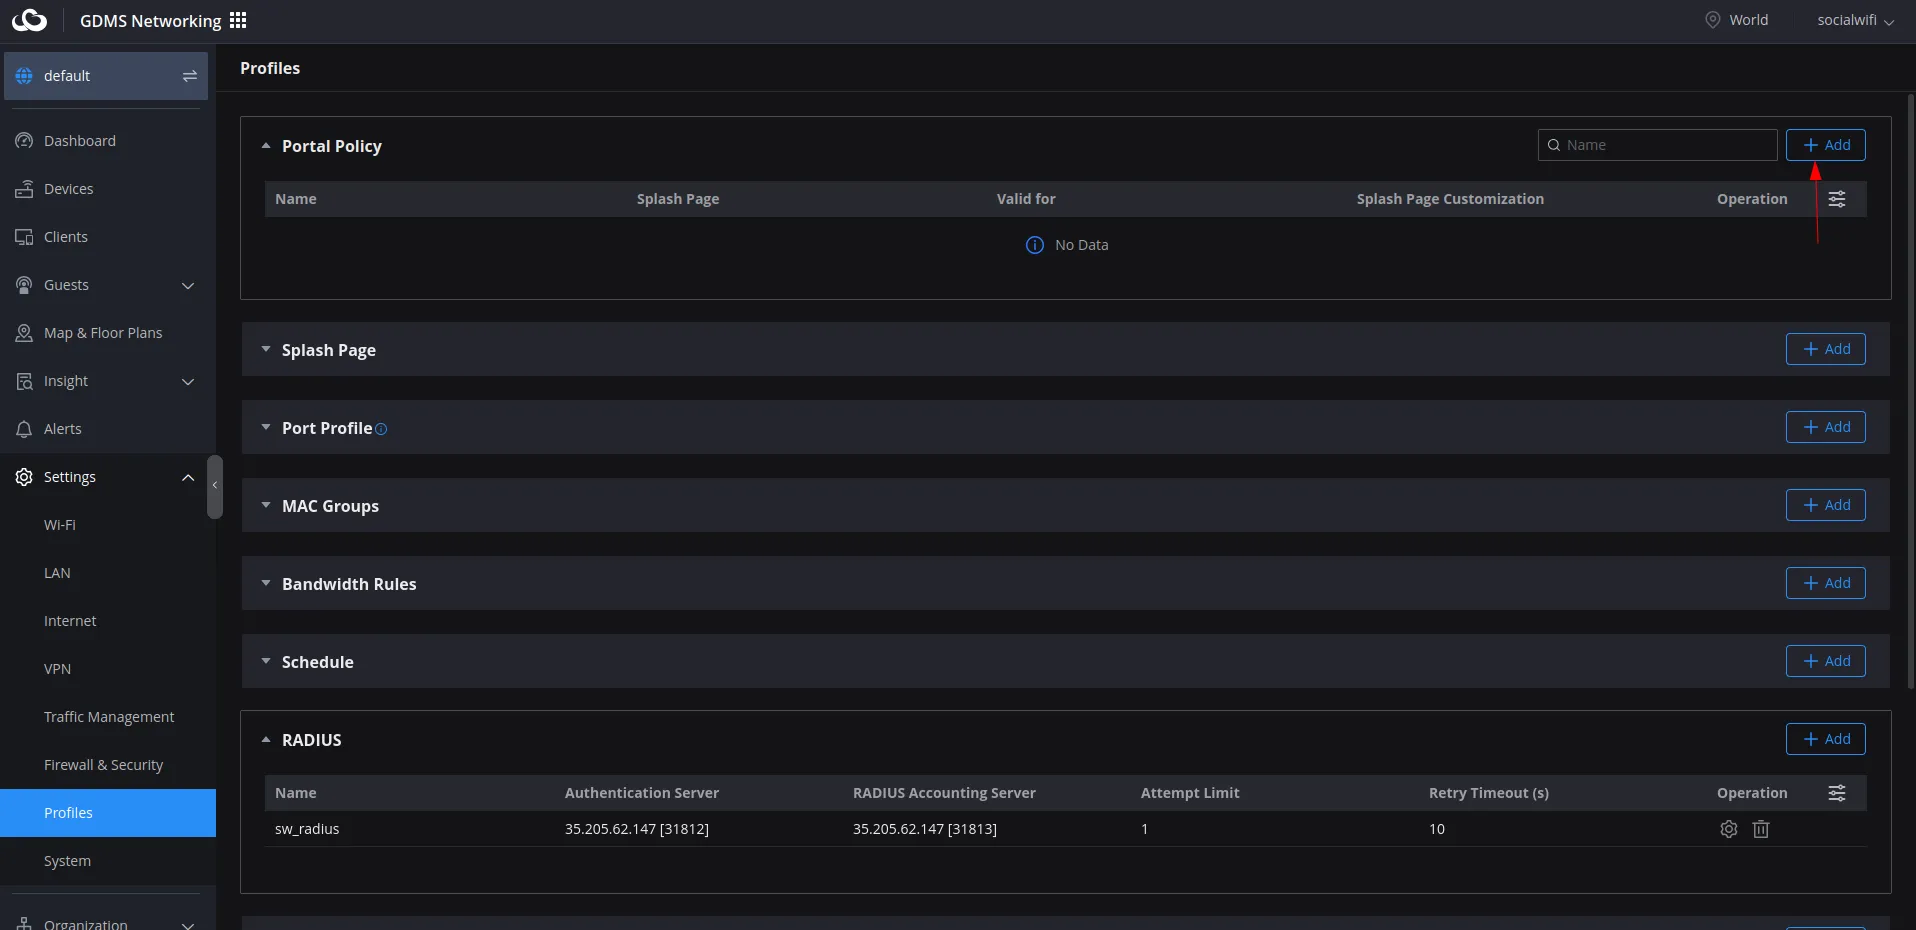
Now, go back to Profiles and go to Portal Policy. Press “+Add”.
Configure as follows:
| Name | Social WiFi |
|---|---|
| Splash Page | External |
| Platform | Universal Platform |
| External Splash Server Address | http://login.socialwifi.com |
| RADIUS Authentication | sw_radius |
| Timeout Duration of Unauthenticated Clients (minutes) | 1 |
| Redirect URL | https://login.socialwifi.com/redirect/ |
| Enable HTTPS Redirection | Leave unchecked |
| Enable Secure Portal | Leave unchecked |
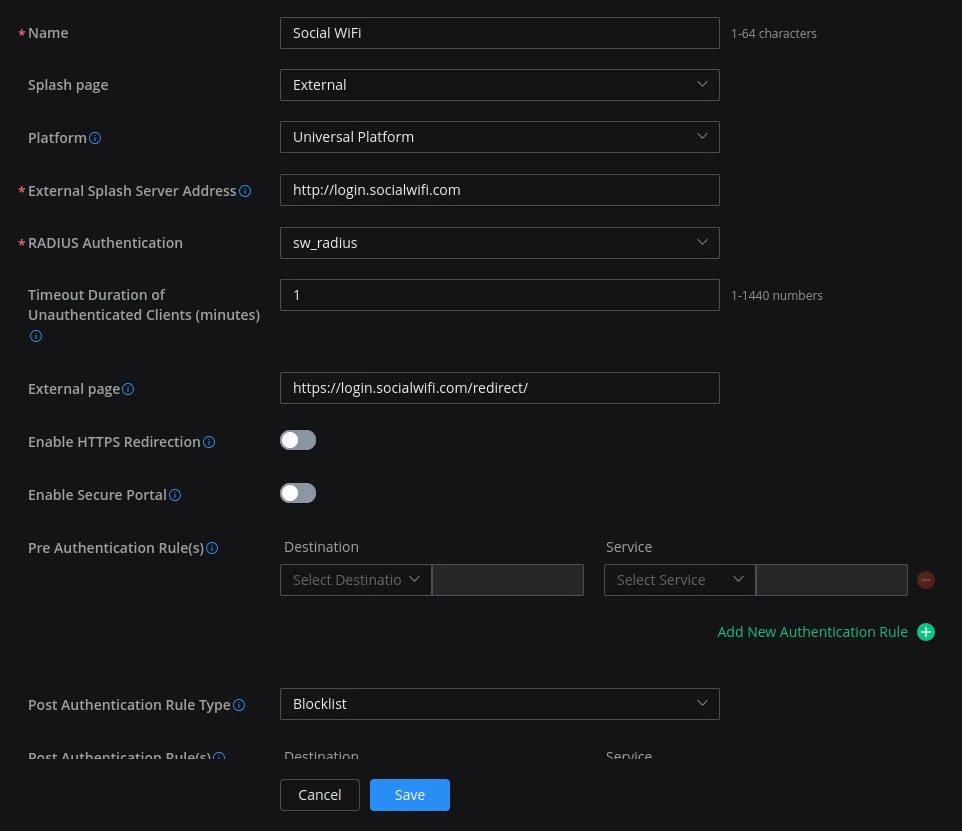
When finished, scroll down. Now you’ll need to add the following domains in the Pre Authentication Rule(s) section.
Each domain needs to be added separately. For each one, click the Select Destination dropdown and select Hostname. Use the domain as the value for the field next to the dropdown. Click the Select Service dropdown and select Web.
You can add more entries by clicking the Add New Authentication Rule button.
socialwifi.comsw-login.comfacebook.comfbcdn.netlinkedin.comlicdn.comtwitter.comx.comtwimg.comwhatsapp.netwhatsapp.comconnect.facebook.netwww.facebook.comwww.googletagmanager.comwww.googleadservices.comgoogleads.g.doubleclick.netyoutube.comytimg.comgooglevideo.comyt3.ggpht.com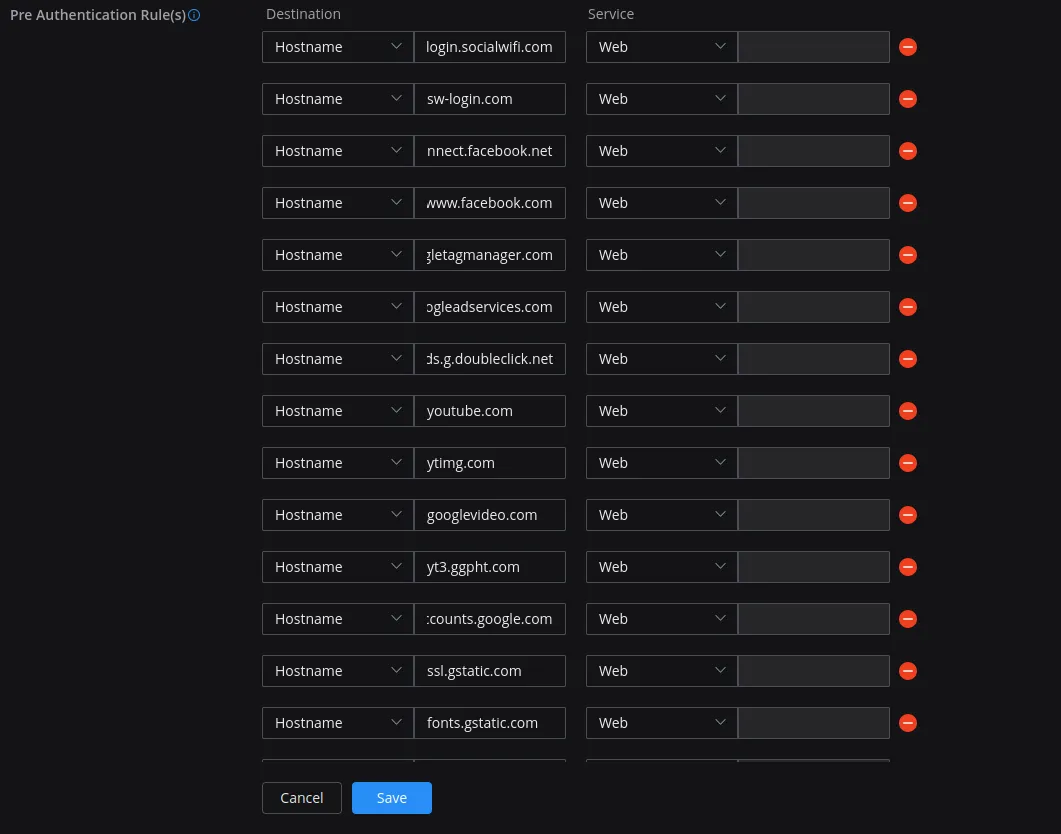
When finished, click Save at the bottom.
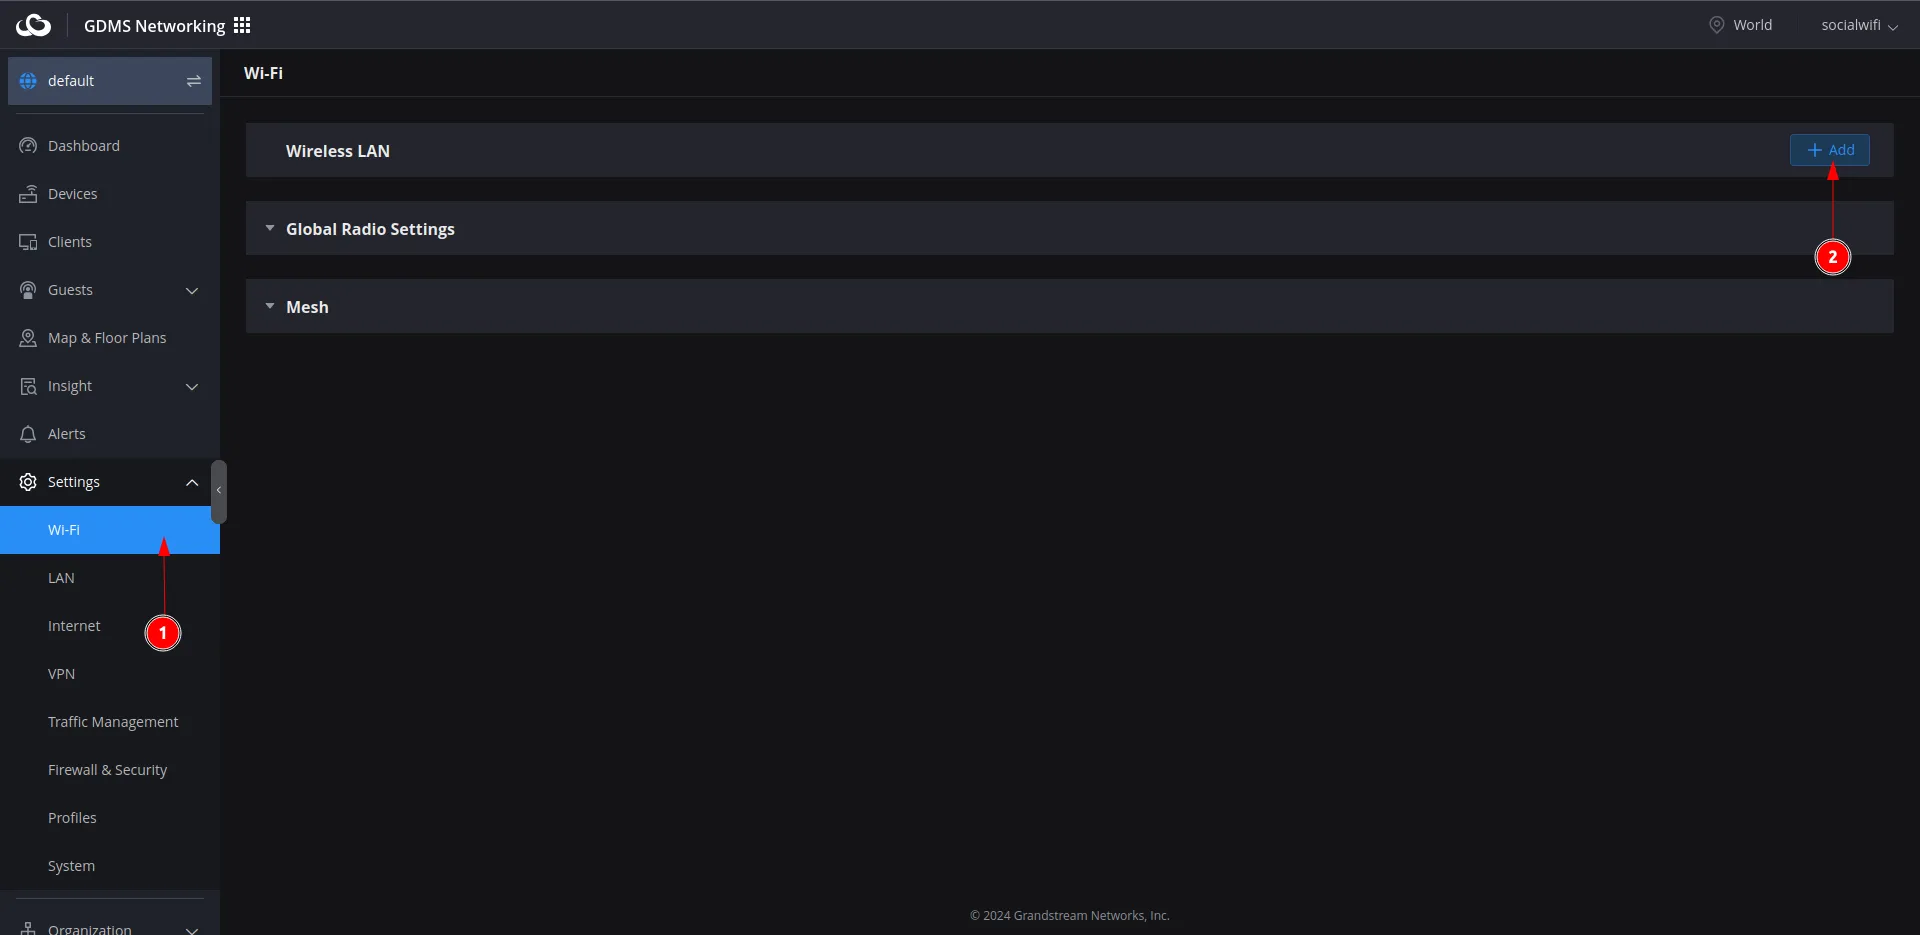
Enable Captive Portal on Wi-Fi
Go to Settings -> Wi-Fi in the menu on the left. Click the Edit icon (if you already have a working WiFi network) or the +Add button (if you need to create a new WiFi network).
In the Basic section, configure as follows:
| WiFi | Enabled |
|---|---|
| SSID | *Your SSID name* |
| Client IP Assignment | Leave default |
| Associated VLAN | Leave unchecked |
| Enable Captive Portal | Checked |
| Captive Portal Policy | Social WiFi |
| SSID band | Leave default |
In the Access Security section use the following settings:
| Security Type | Open |
|---|
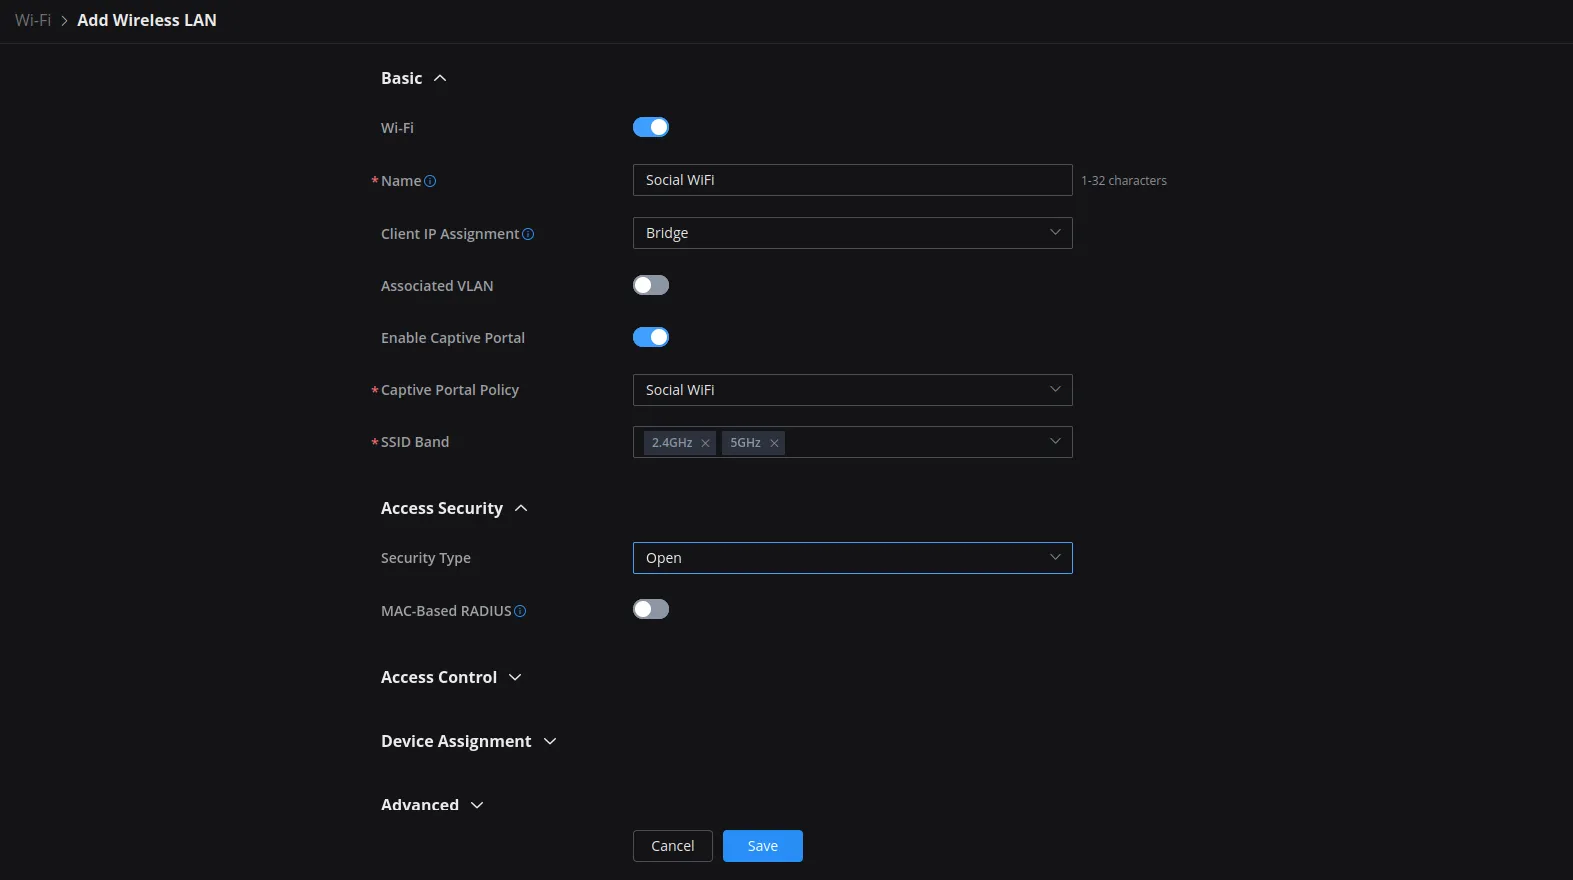
Click Save.
Add the access points to Social WiFi panel
The setup of the controller is now finished. The last step is to add all access points to the Social WiFi platform.
Go to Devices in the menu on the left. You’ll find the list of all connected access points. One of the columns should be “MAC”. You’ll need to copy the MAC address and paste it into Social WiFi panel.
To do that, switch to Social WiFi Panel, go to Access Points tab, click the Add button and paste the MAC address of the access point.
Click Create. Repeat this step for each access point.
Test the solution
Connect with the WiFi network. You should see a login page. Go through the login process and, once finished, you should have internet access. You should see first connections and authorisations in the Social WiFi Panel’s statistics section.