cnPilot
Compatibility
Social WiFi has been tested and is proven to work on the following configurations:
Access point firmware
- 3.11.3-r7 and newer (tested up to 4.2.3.1-r7)
Configure WLAN
Go to Configure -> WLAN and click on Add WLAN. If you have a WLAN network already created, you can edit the existing one.
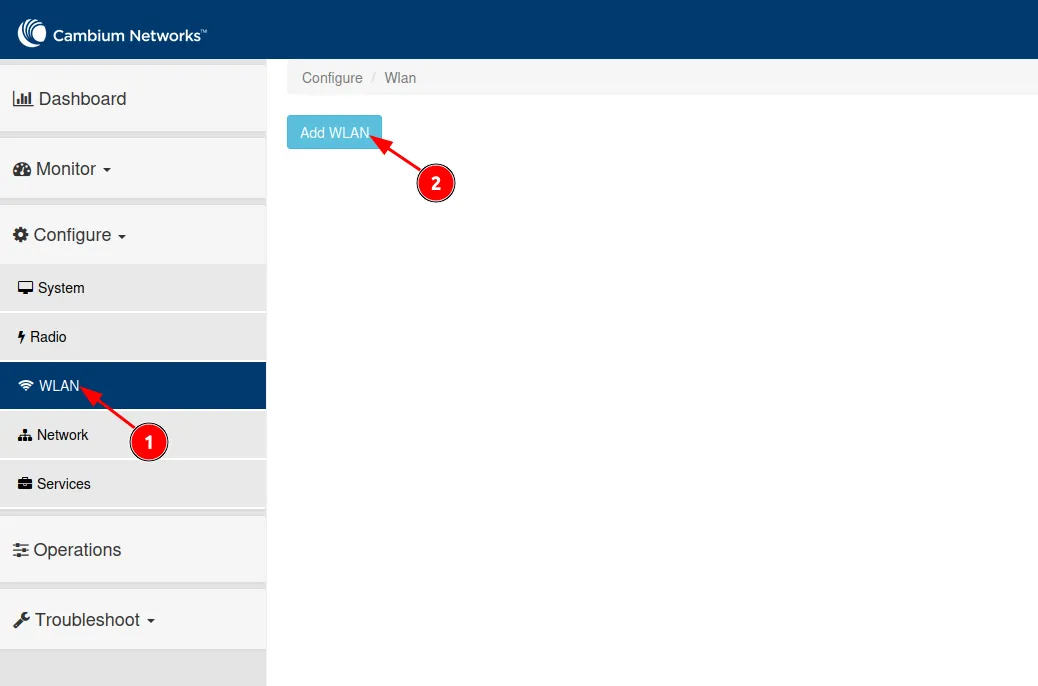
If you decide to create a new one, assign it any WLAN ID you’d like.
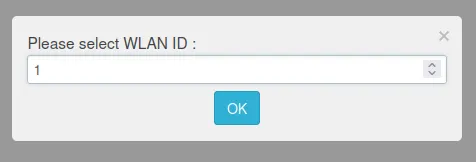
Click OK.
Now, you should see the dashboard where you can edit the SSID. Make sure that the “Enabled” box is checked and change the SSID name. Leave the rest as default.

Scroll down to the bottom of the page and press Save.
Configure RADIUS
Now, go to the “Radius Server” tab and configure as follows.
Authentication Server 1
| Host | Secret | Port | Realm |
|---|---|---|---|
| 35.205.62.147 | RADIUS Secret is available in Access Points tab of the Social WiFi Panel | 31812 | Leave empty |
Accounting Server 1
| Host | Secret | Port | Realm |
|---|---|---|---|
| 35.205.62.147 | RADIUS Secret is available in Access Points tab of the Social WiFi Panel | 31813 | Leave empty |
| Accounting Mode | Start-Interim-Stop |
|---|---|
| Interim Update Interval | 600 |
Leave the rest as default.
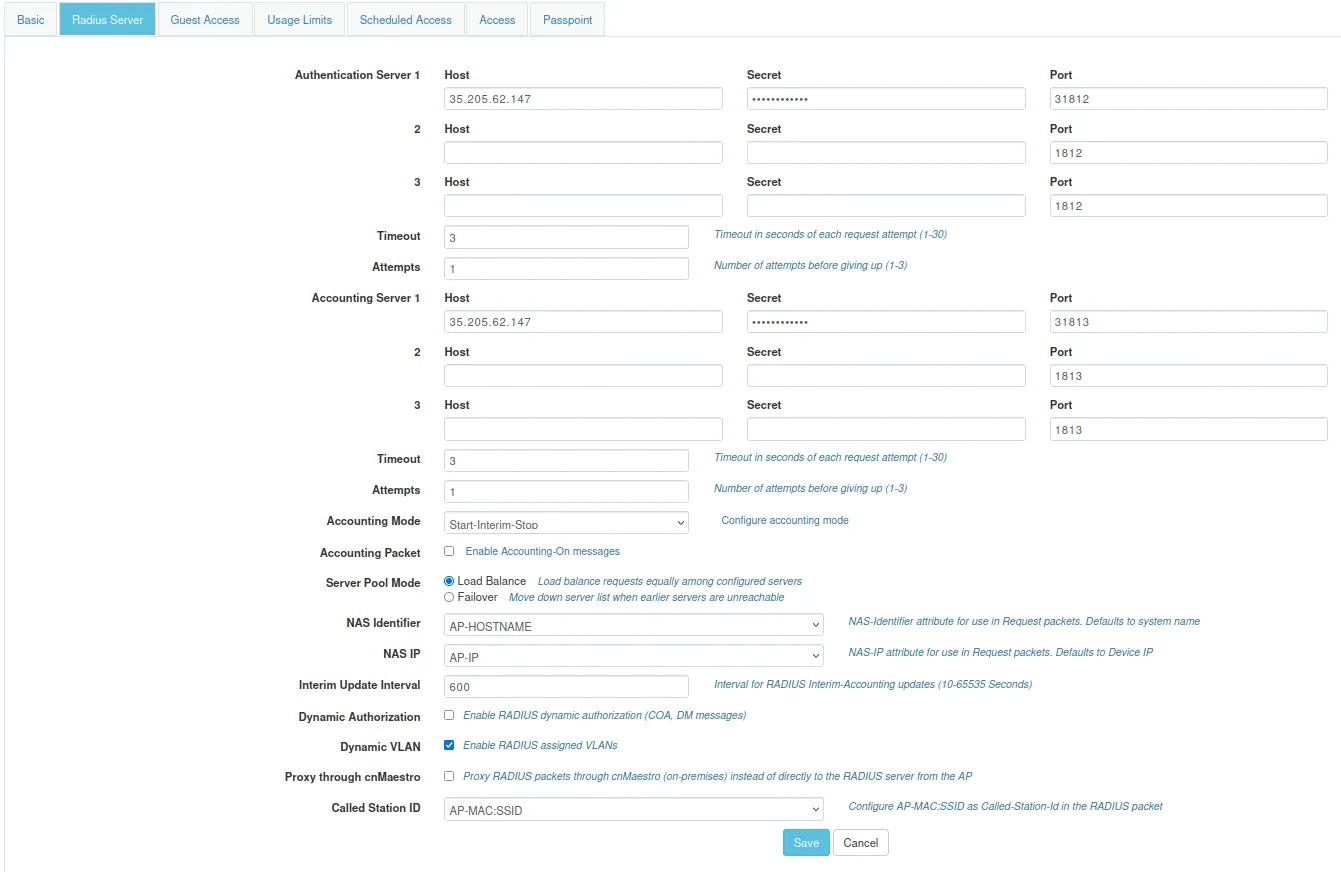
Scroll down to the bottom of the page and press Save.
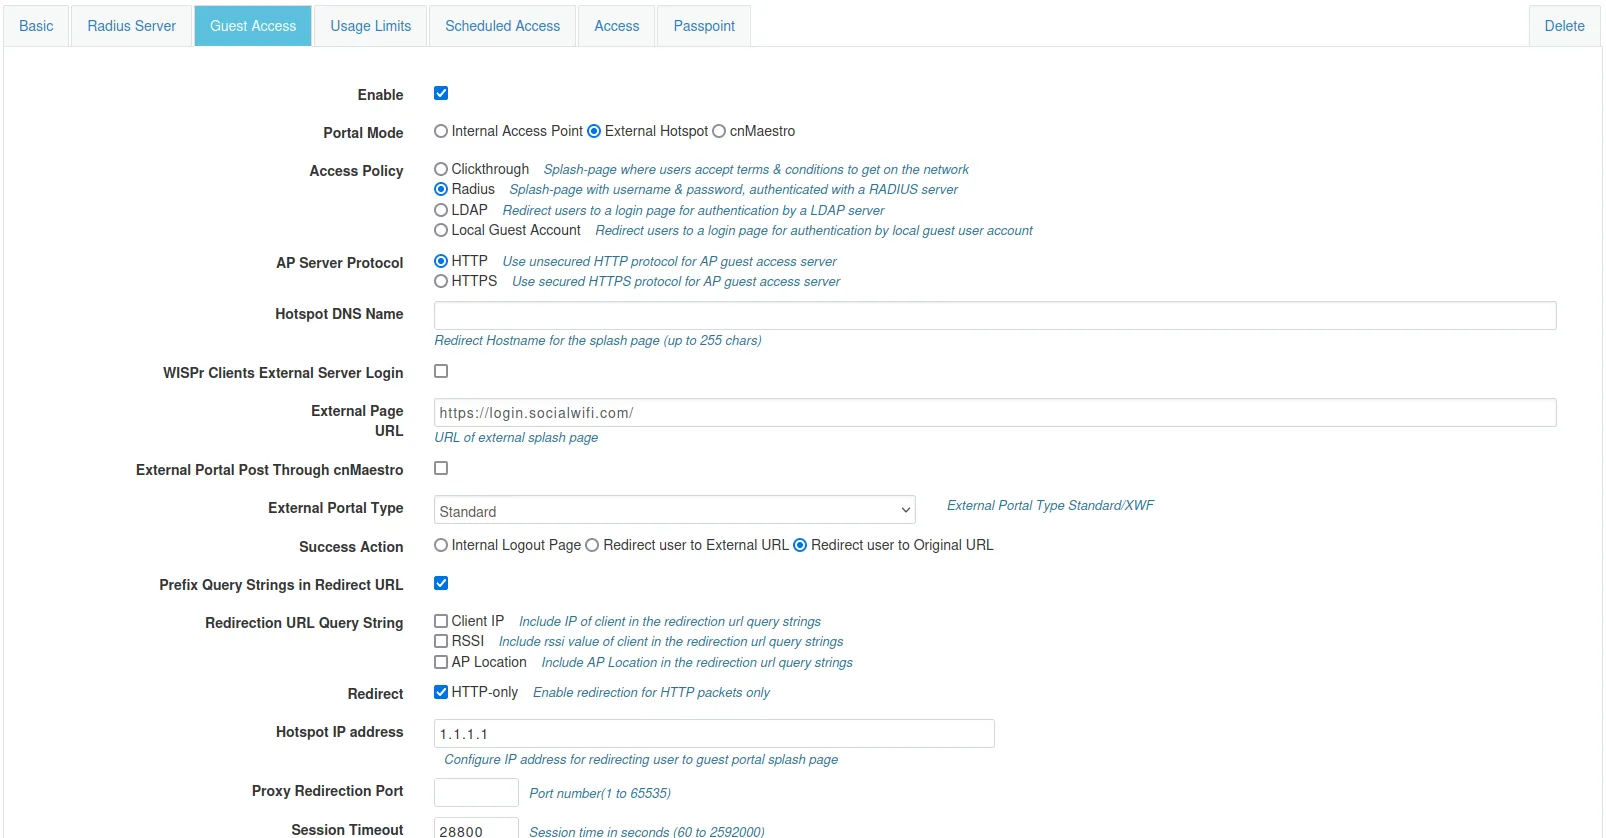
Now, go to the “Guest Access” and configure as follows.
| Enable | Checked |
|---|---|
| Portal Mode | External Hotspot |
| Access Policy | Radius |
| AP Server Protocol | HTTP |
| Hotspot DNS Name | Leave empty |
| WISPr Clients External Server Login | Leave unchecked |
| External Page URL | http://login.socialwifi.com |
| External Portal Post Through cnMaestro | Leave unchecked |
| External Portal Type | Standard |
| Success Action | Redirect user to Original URL |
| Prefux Query Strings in Redirect URL | Checked |
| Redirection URL Query String | Leave unchecked |
| Redirect | HTTP-only |
| Hotspot IP address | 1.1.1.1 |
| Proxy Redirection Port | Leave empty |
| Session timeout | Enter desired value or leave default |
| Inactivity Timeout | Enter desired value or leave default |
| MAC Authentication Fallback | Leave unchecked |
| Extend Interface | Leave empty |
Click Save.
Walled Garden
Now, scroll down in the Guest Access tab and copy and paste each Walled Garden entry. Make sure to press Save after each entry.
login.socialwifi.comsw-login.comwww.facebook.comfacebook.comstatic.xx.fbcdn.netexternal-frt3-2.xx.fbcdn.netwww.linkedin.comstatic-exp1.licdn.commedia-exp1.licdn.comstatic.licdn.comtwitter.comapi.twitter.comx.comapi.x.compbs.twimg.comabs-0.twimg.comabs.twimg.comwhatsapp.netwhatsapp.commmx-ds.cdn.whatsapp.netchat.cdn.whatsapp.netscontent.whatsapp.netconnect.facebook.netwww.facebook.comwww.googletagmanager.comwww.googleadservices.comgoogleads.g.doubleclick.net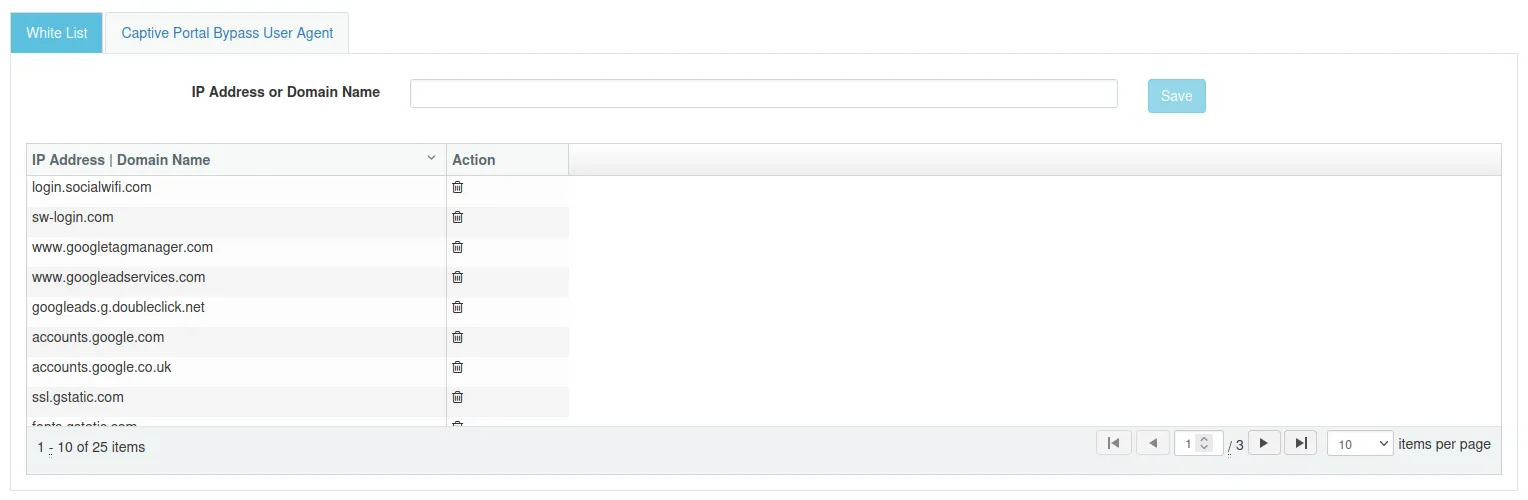
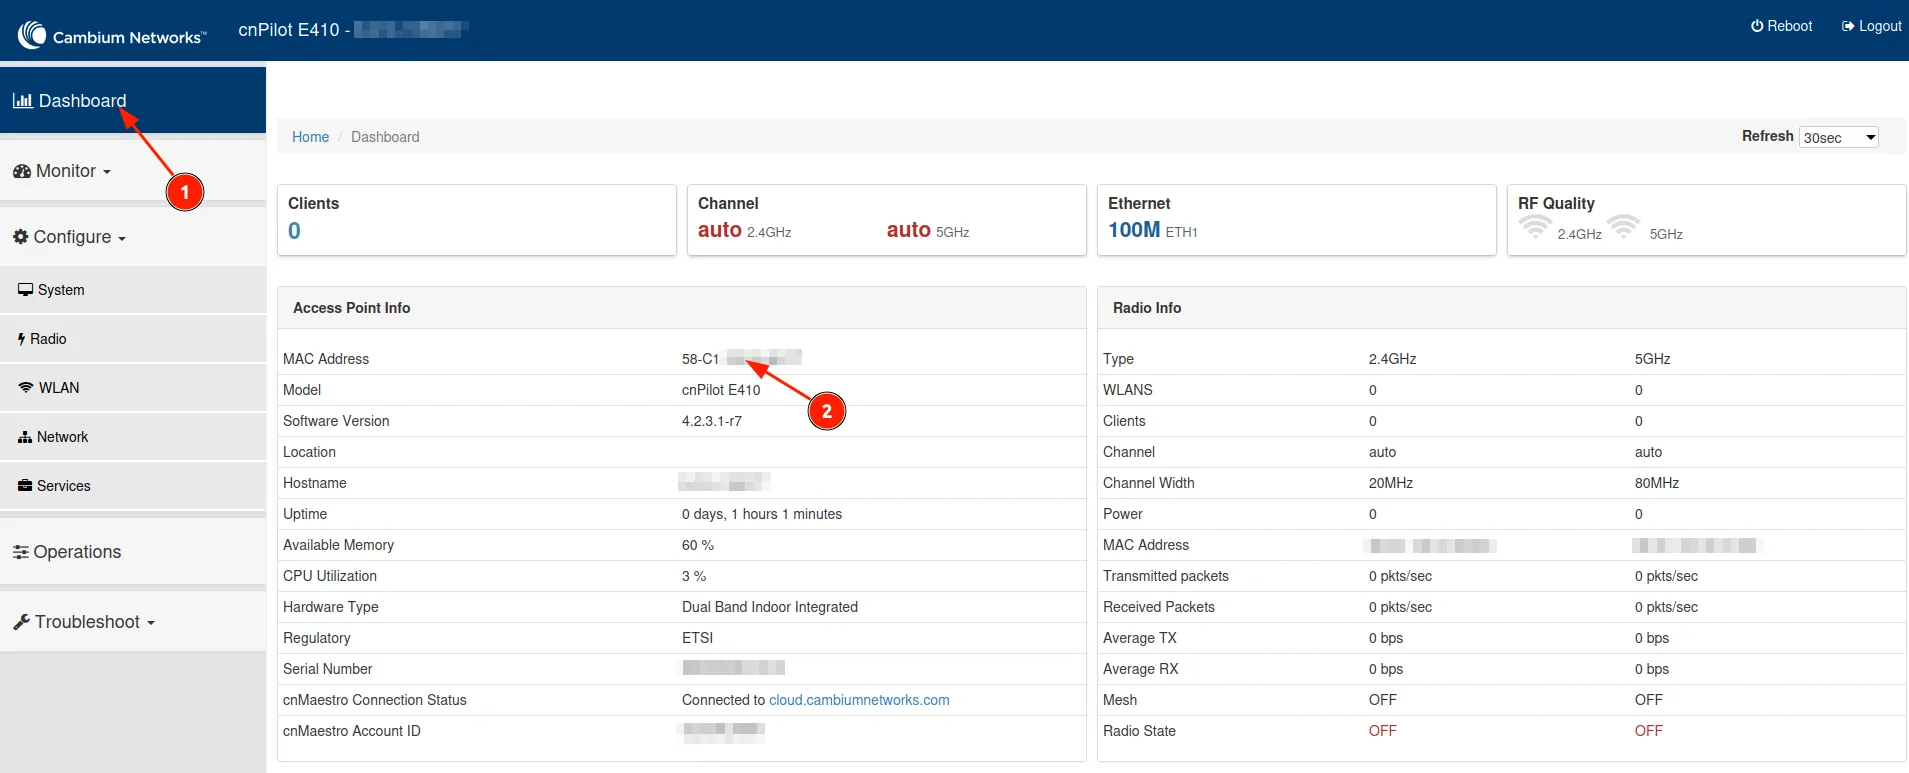
Add the access points to Social WiFi panel
The setup of the controller is now finished. The last step is to add all access points to the Social WiFi platform.
Go to Dashboard(1) in the menu on the left. Copy the MAC Address from the “MAC Address’ column.
Now, switch to Social WiFi Panel, go to Access Points tab, click the Add button and paste the MAC address. Click Create.
Test the solution
Connect with the WiFi network. You should see a login page. Go through the login process and, once finished, you should have internet access. You should see first connections and authorizations in the Social WiFi Panel’s statistics section.