Alcatel-Lucent Express
Accessing the device’s administration panel
Log in to your Access Point by opening your web browser and typing in its IP address.
Device configuration
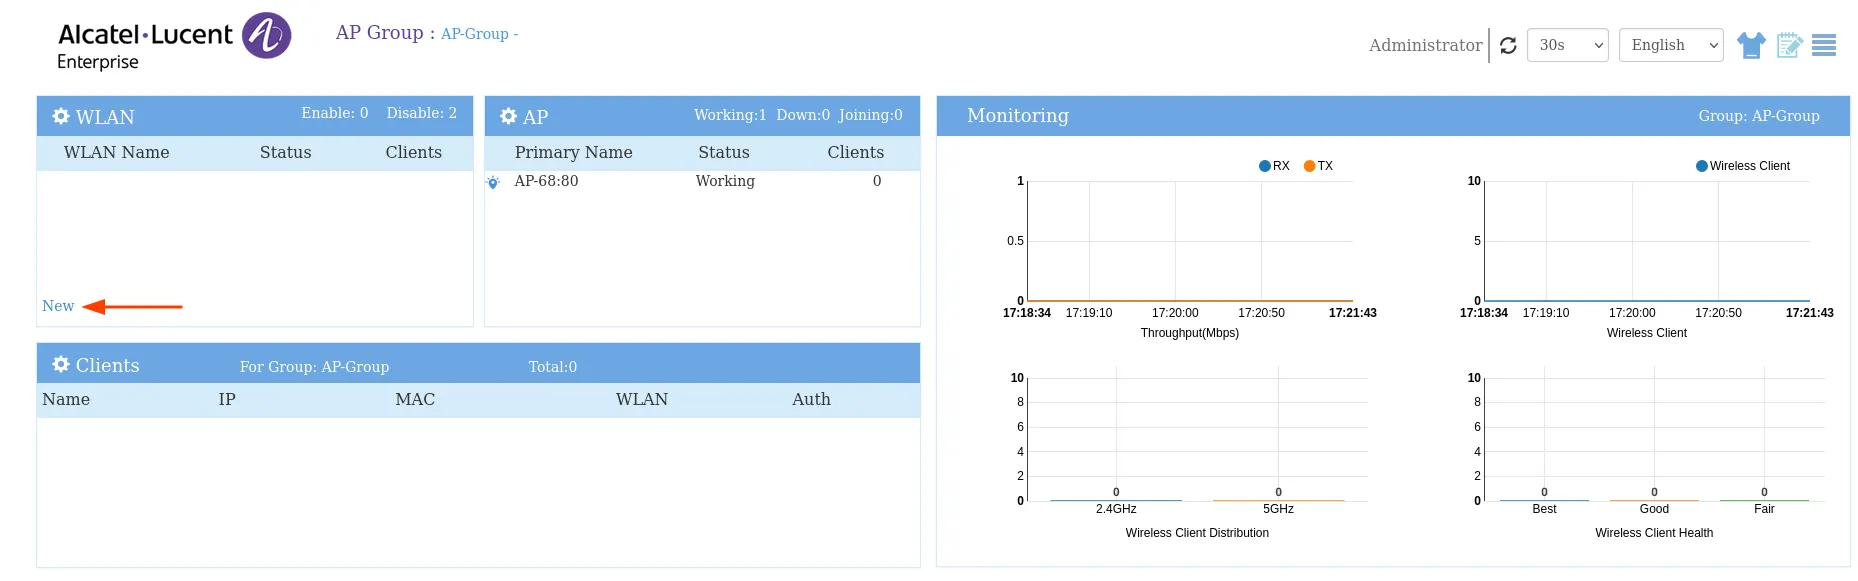
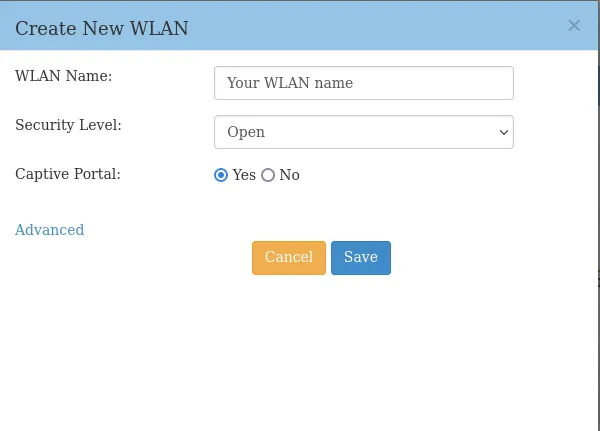
After you login to the Dashboard, on the left upper corner you should see the “WLAN” tab. Press New to create new wireless network as follows:
| WLAN Name | Your chosen network name |
|---|---|
| Security Level | Open |
| Captive Portal | Yes |
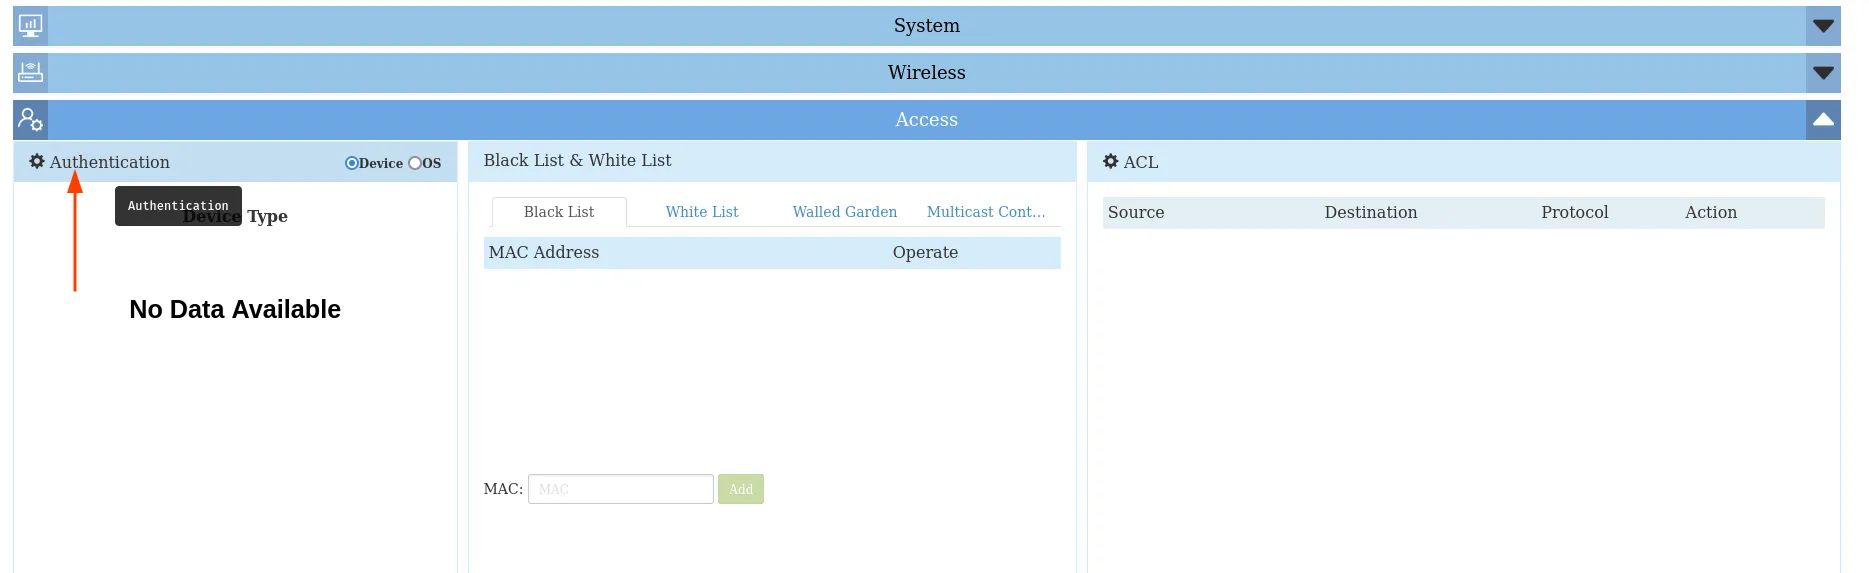
Now, scroll down to the “Access” section and expand. Press on the Authentication on the left lower corner.
You should see the pop up window, configure as follows:
| HTTPS | off |
|---|---|
| Dummy IP | Leave default (1.1.1.1) |
| External Captive Portal | Checked |
| Hostname | login.socialwifi.com |
| Redirect URL | / |
| Redirect URL param | disable |
| Server IP/Hostname | 35.205.62.147 |
| Authentication Server Port | 31812 |
| Secret | Radius Secret available in Access Points tab of the Social WiFi Panel |
| Confirm | Radius Secret available in Access Points tab of the Social WiFi Panel |
| Radius Accounting | Checked |
| Accounting Server Port | 31813 |
| Accounting Interval | 600 |
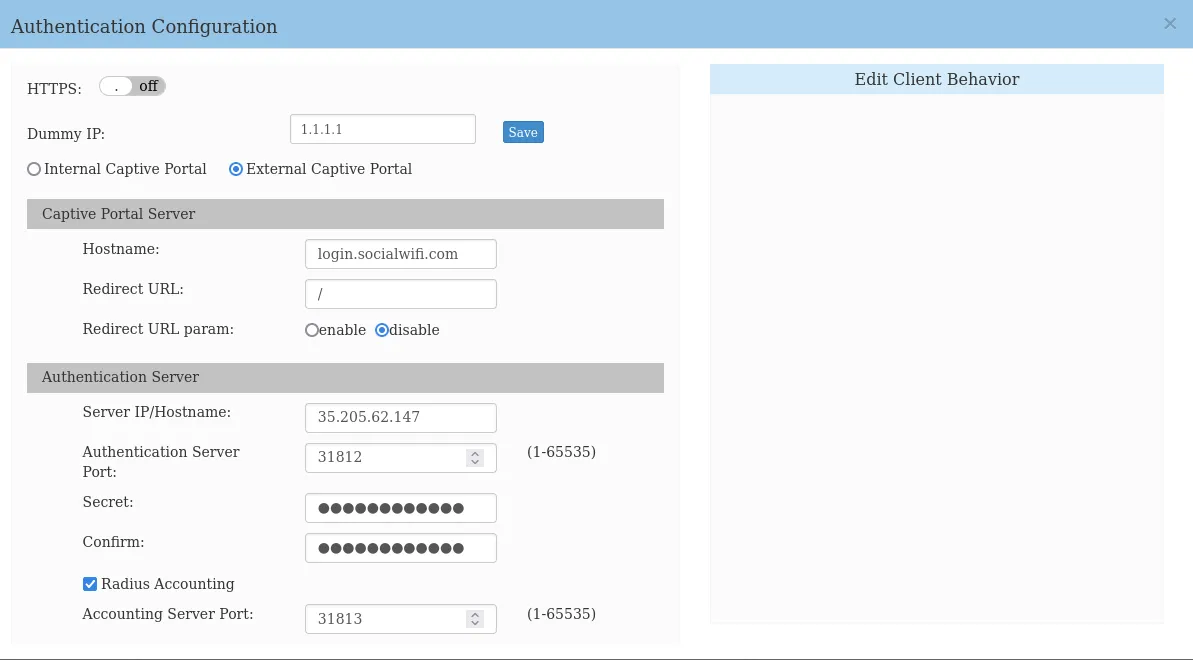
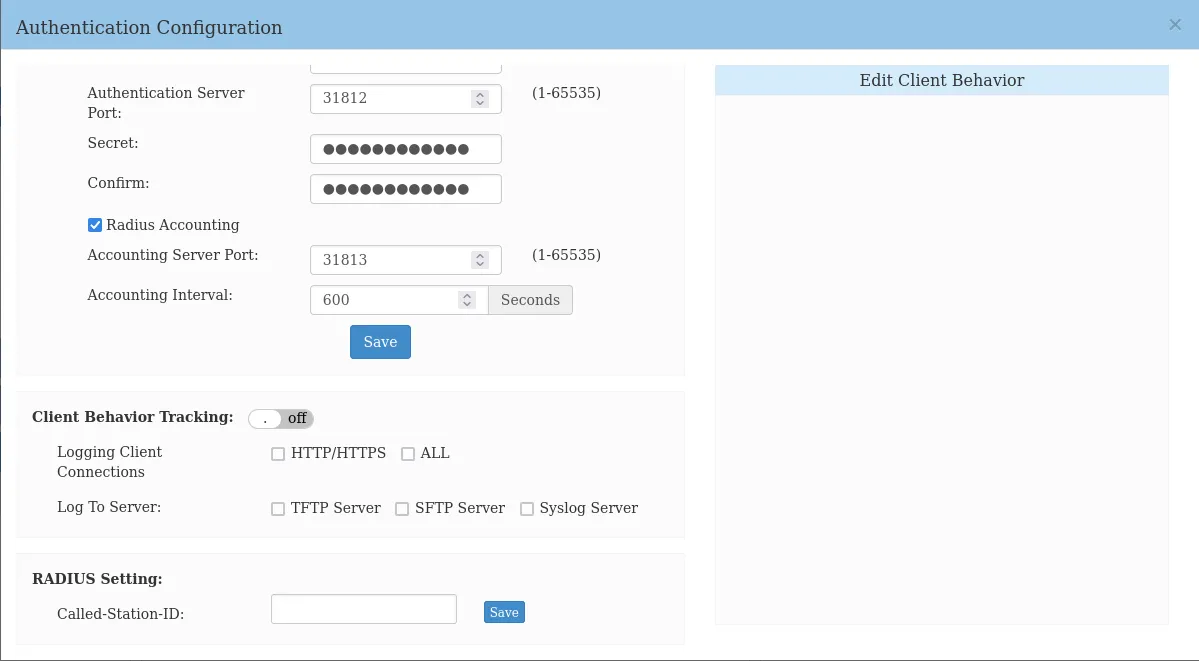
Press Save.
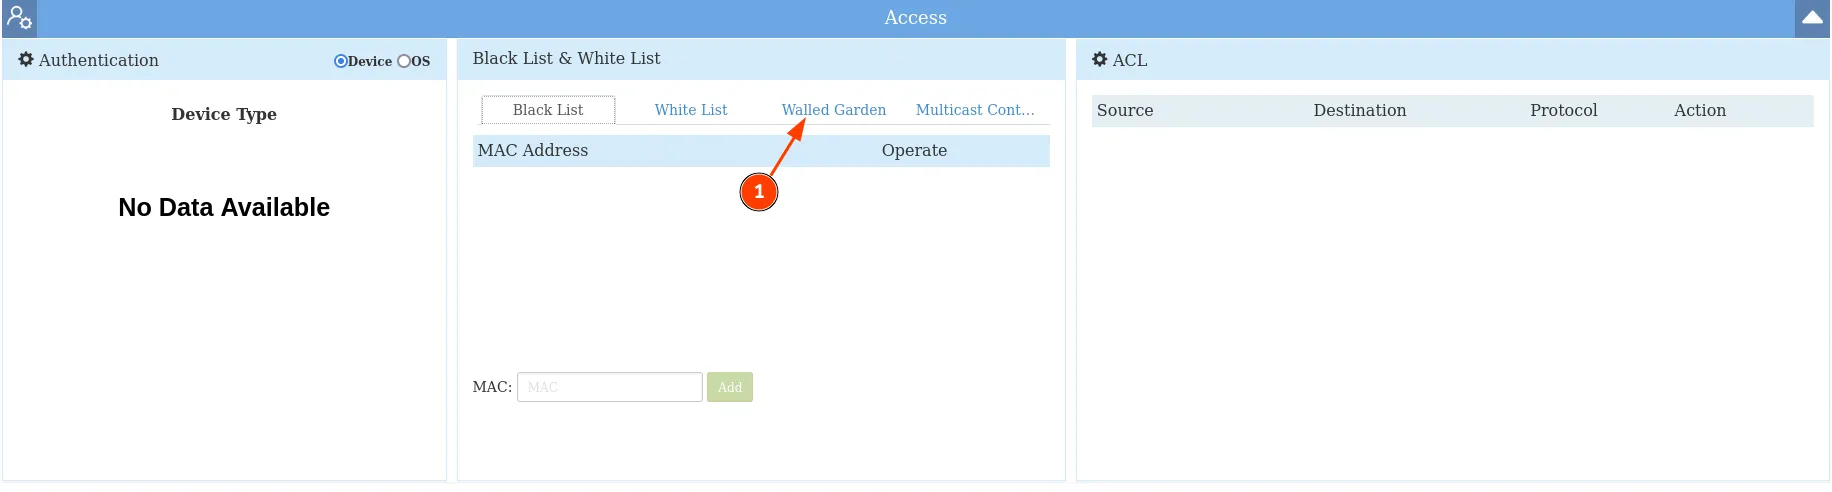
Walled Garden
Now, in the middle of the “Access” tab, there’s a Black List & White list section. Press on the Walled Garden tab and select the “Domain” checkbox.
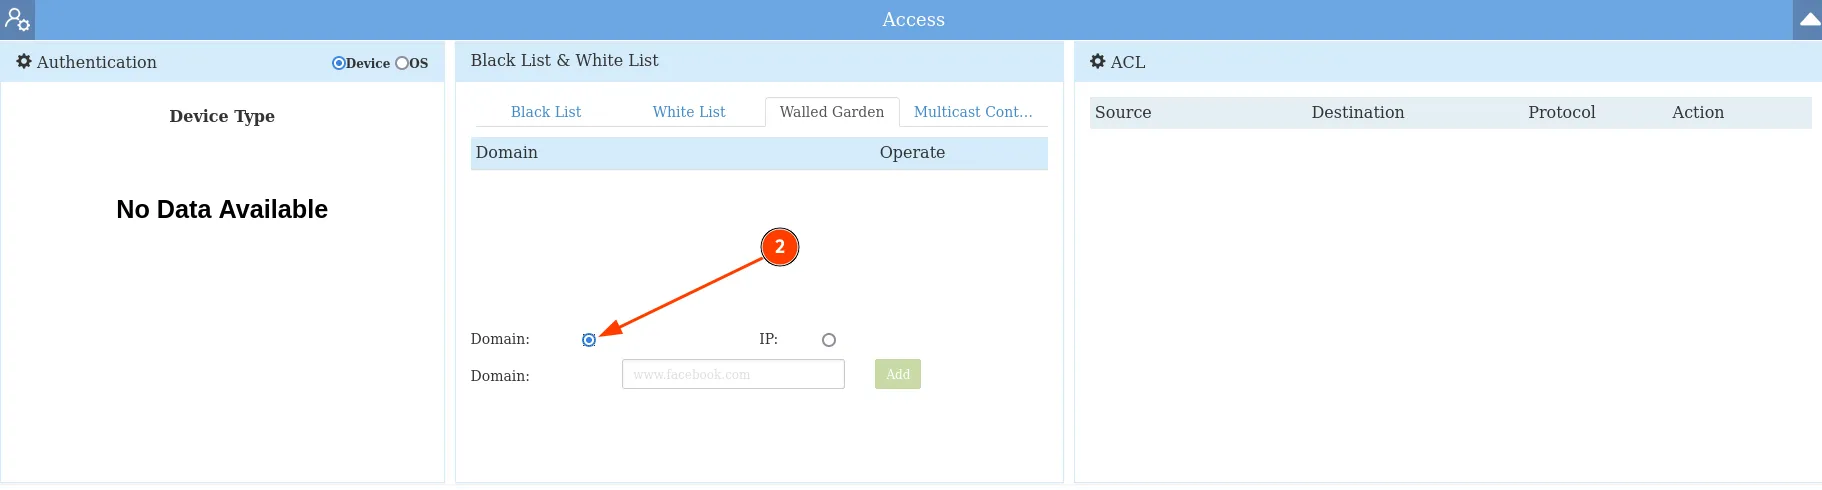
Now, add all the domains:
login.socialwifi.comsw-login.comwww.facebook.comfacebook.comstatic.xx.fbcdn.netexternal-frt3-2.xx.fbcdn.netwww.linkedin.comstatic-exp1.licdn.commedia-exp1.licdn.comstatic.licdn.comtwitter.comapi.twitter.comx.comapi.x.compbs.twimg.comabs-0.twimg.comabs.twimg.comwhatsapp.netwhatsapp.commmx-ds.cdn.whatsapp.netchat.cdn.whatsapp.netscontent.whatsapp.netconnect.facebook.netwww.facebook.comwww.googletagmanager.comwww.googleadservices.comgoogleads.g.doubleclick.net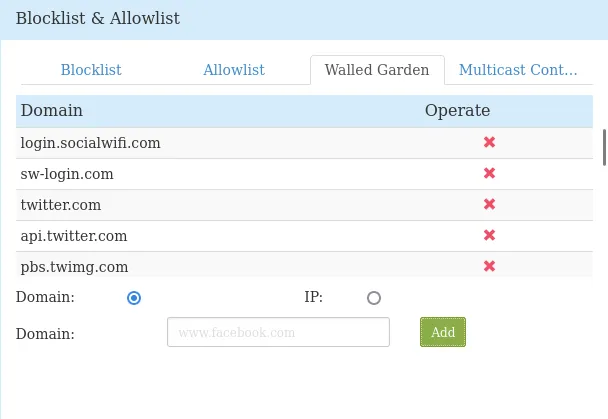
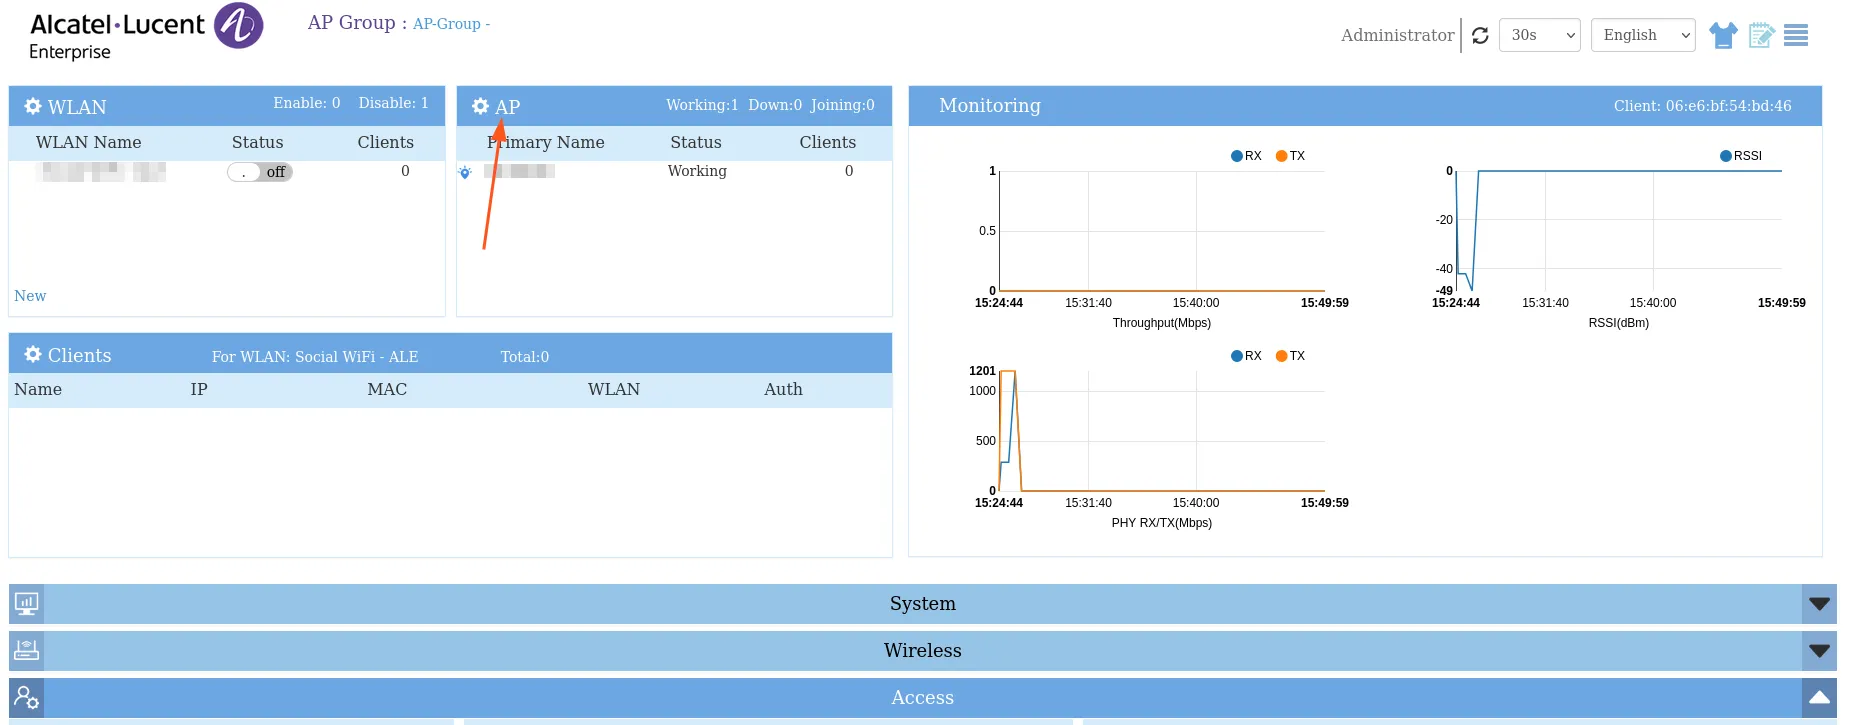
Now, scroll to the top of the page and press on the “AP” bar:
Copy te MAC address of the device.

Now, switch to Social WiFi Panel, go to Access Points tab, click the Add button and paste the MAC addresses of your access point. Click Create.
Test the solution
Connect with the WiFi network. You should see a login page. Go through the login process and, once finished, you should have internet access. You should see first connections and authorizations in the Social WiFi Panel’s statistics section.