Integrate with SALESmanago
Accessing SALESmanago info
To get the data required for the integration, you’re going to need to log into your SALESmanago account.
1) Visit SALESmanago.com
2) Click the “login” button in the top right corner
3) Put in your SALESmanago credentials and click “LOGIN”
4) In the SALESmanago dashboard, go to “Settings” (under the wrench icon)
5) Within the “Settings” menu, select “Integration”
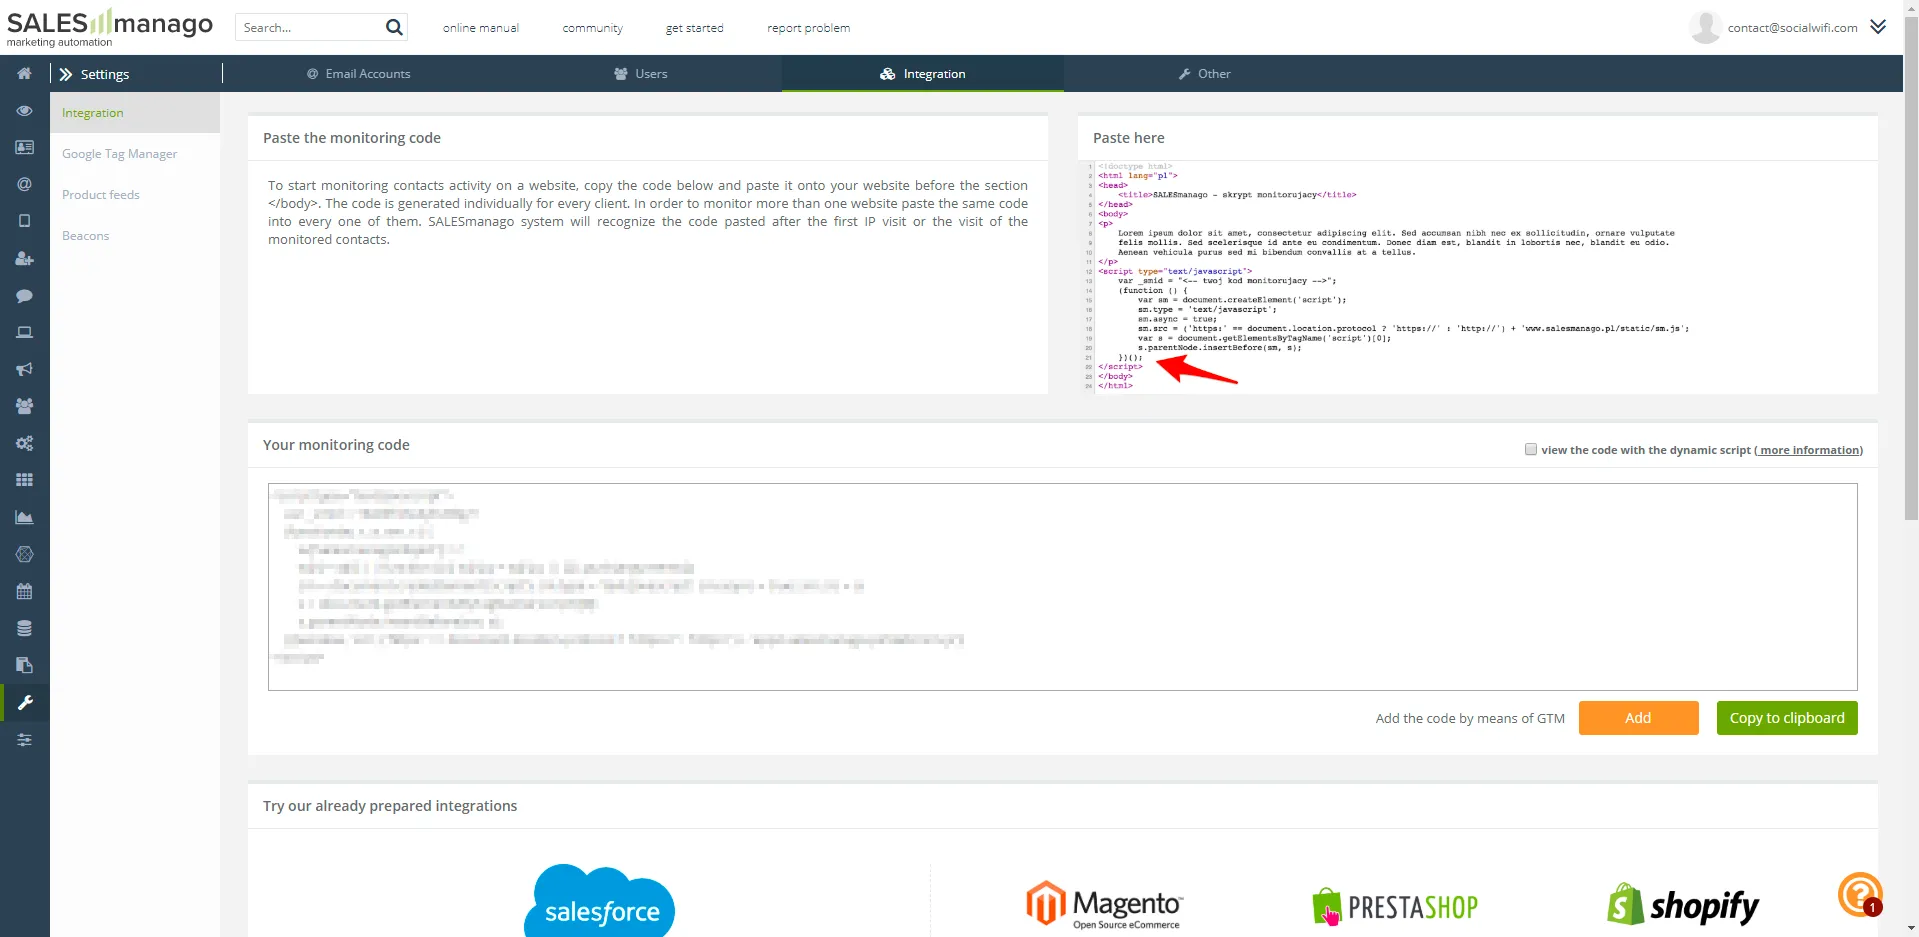
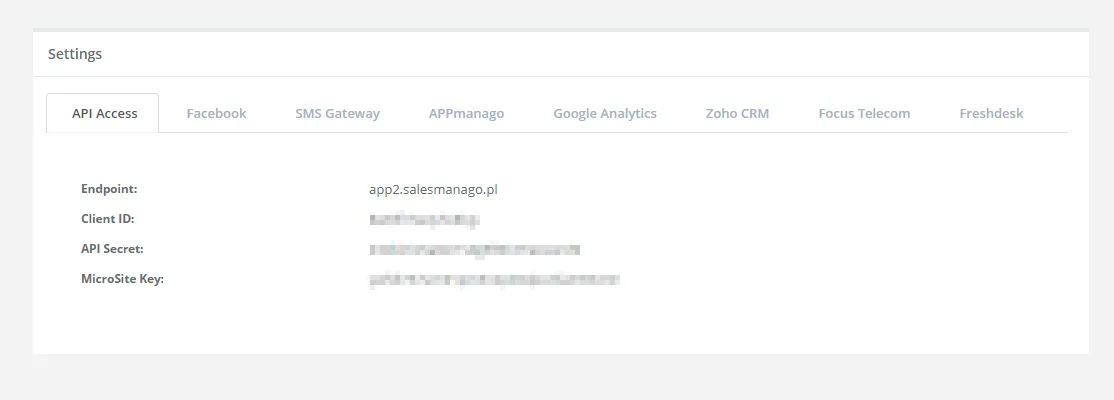
6) Scroll down – here’s your API data!
Enabling the integration
1) Within the Social WiFi panel, go to your venue and select Integrations: SALESmanago
2) Paste in the API data collected in the previous steps; as the account owner’s email, use the one visible in the top right corner of the SALESmanago dashboar
3) Make sure that the field next to “Active” is checked and save
Understanding the mechanics
Every time a user logs in to your WiFi network, the data will be sent to SALESmanago. It will also be updated if the marketing permission is revoked or another visit occurs.
Within the SALESmanago CRM module, you will be able to see additional information about the user, such as the language (e.g. language-en) or any additional info collected from social media (age, gender, etc.). You can use those segments for targeting your marketing content.
Within the Social WiFi panel, you can specify segments that will be added to all users sent to SALESmanago – for example “wifi-user”.