Zyxel Nebula
Compatibility
Social WiFi has been tested and is proven to work on the following configurations:
Zyxel Nebula Control Center
- Access point firmware: V6.10(ABDF.8)
Access the administration panel
This guide assumes that the device is already connected with Zyxel Nebula Control Center.
Wireless network configuration
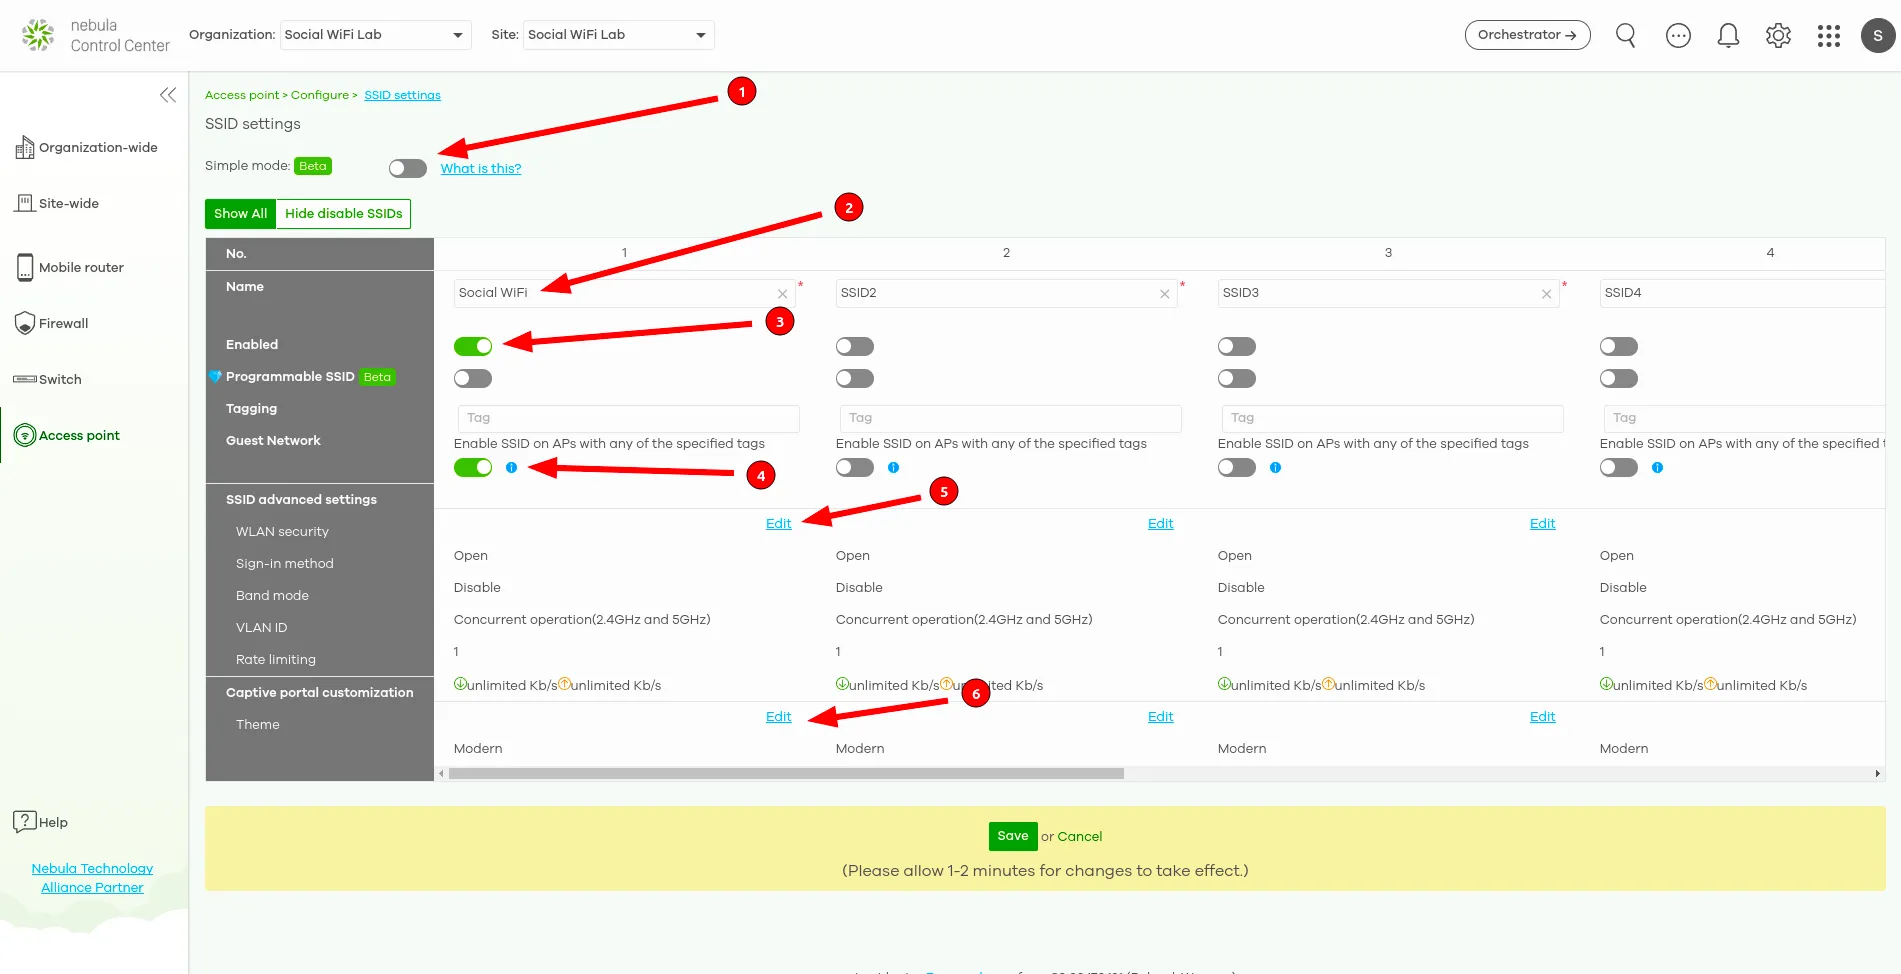
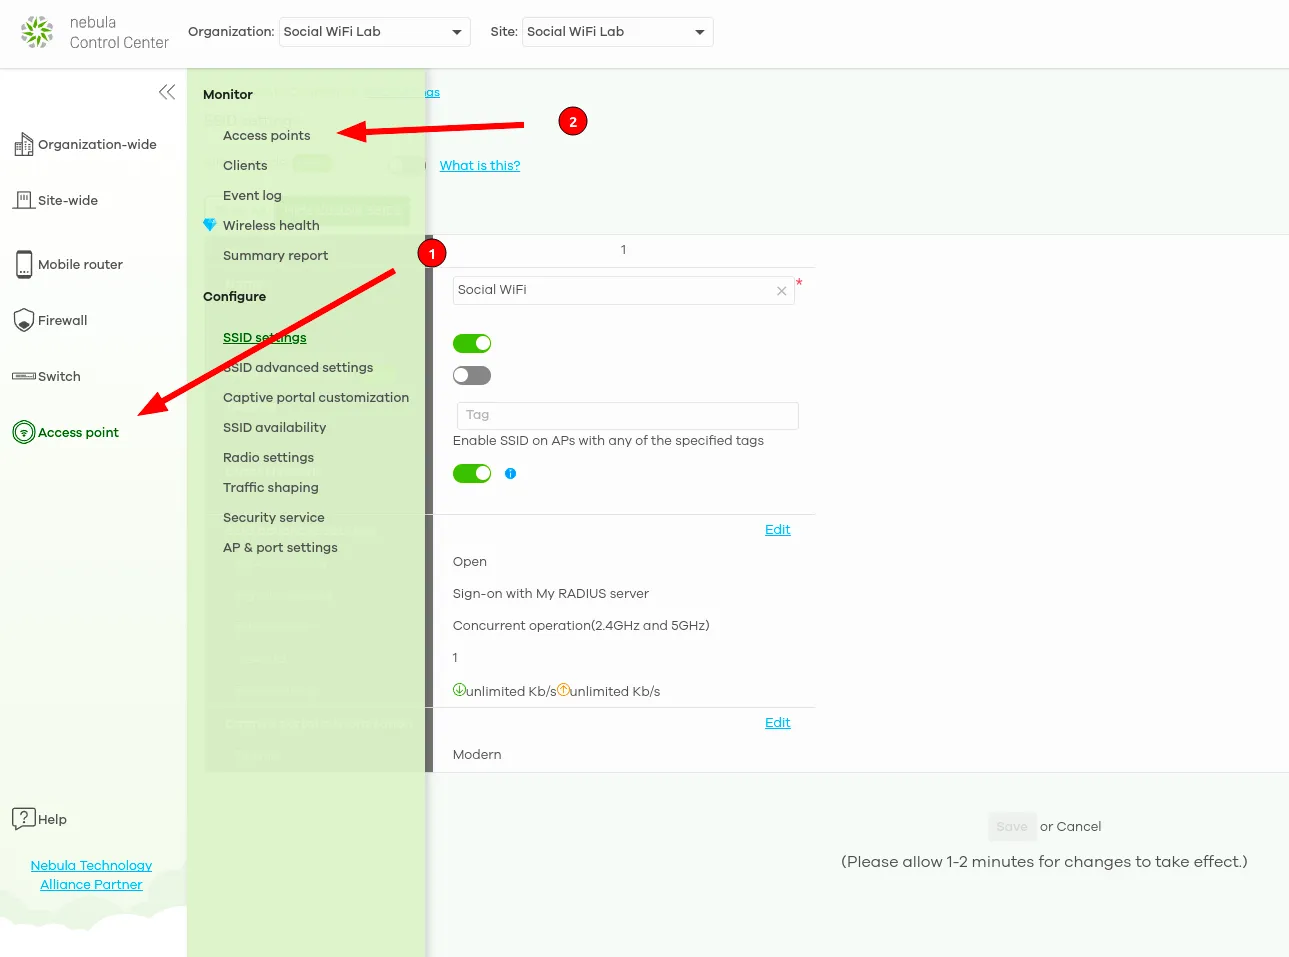
Go to Access point → SSID settings.
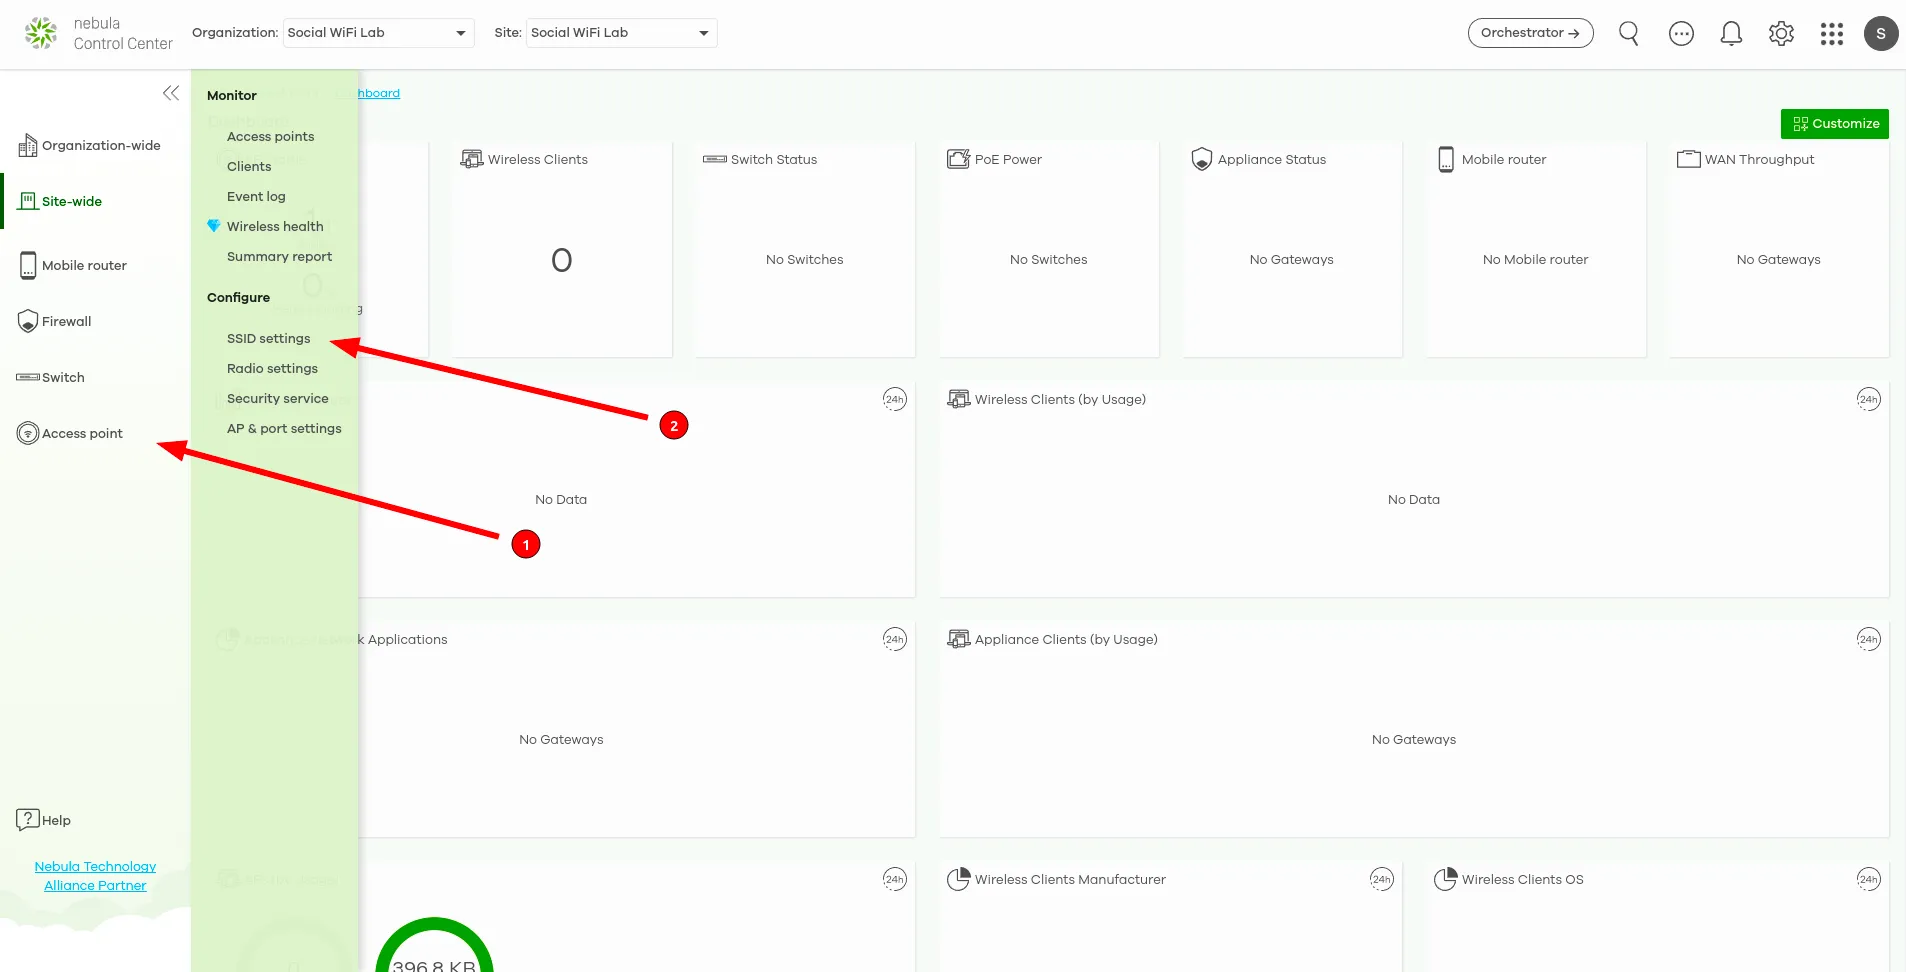
Make sure that Simple mode is disabled. Set the Name for the WiFi network (e.g. “Social WiFi”), make sure that Enabled and Guest Network are switched on.
WLAN security
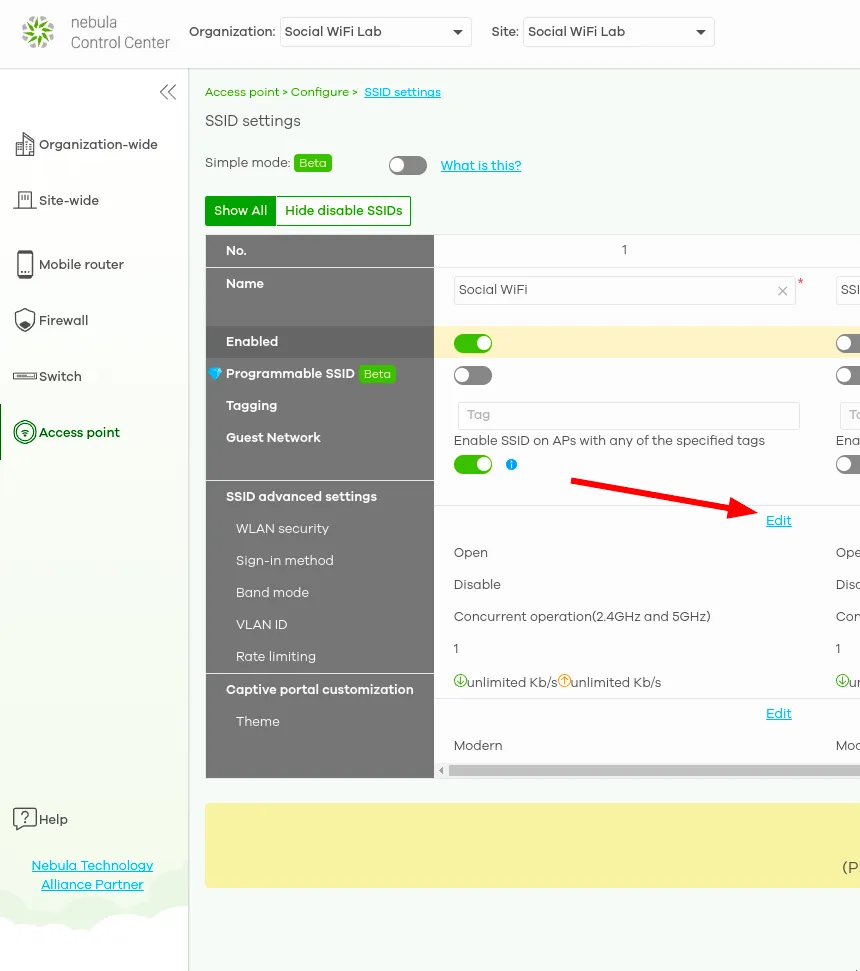
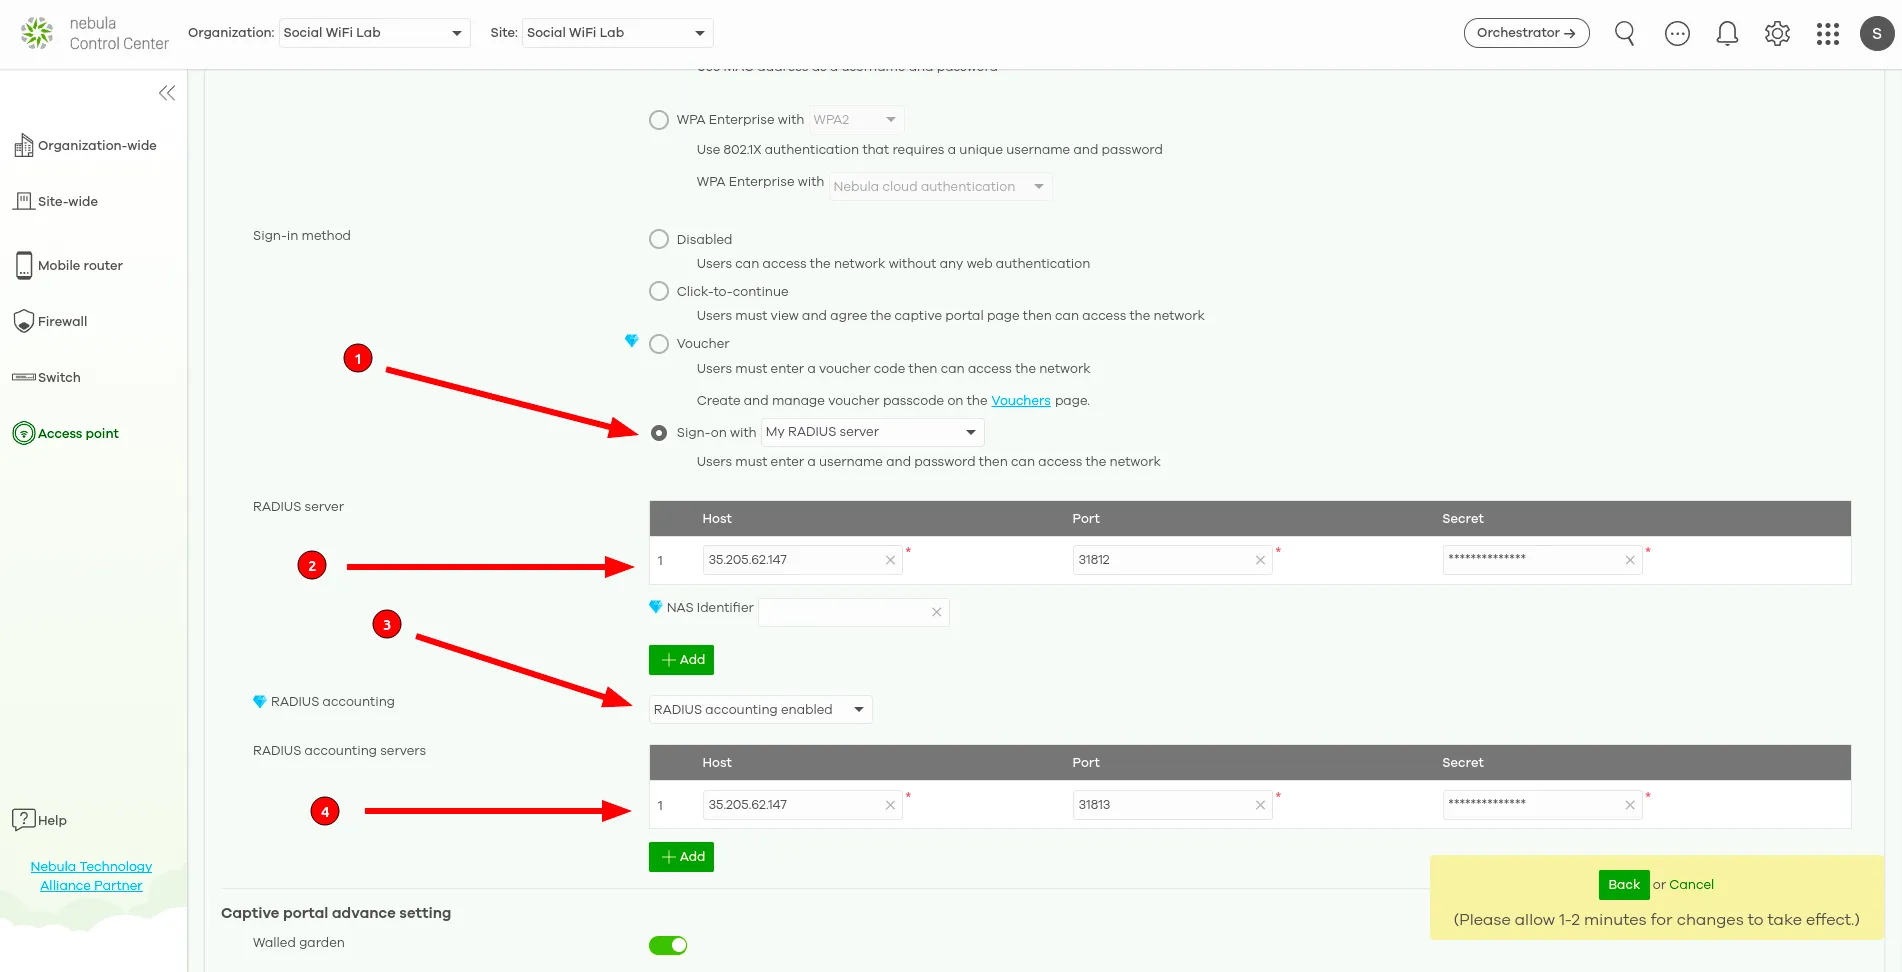
When in the Access point → SSID settings, next to WLAN security, click on Edit.
In the Network access section, use the following settings:
| Security options | Open |
| Sign-in method | Sign-on with: My RADIUS server |
| RADIUS server - Host | 35.205.62.147 |
| RADIUS server – Port | 31812 |
| RADIUS server – Secret | RADIUS Secret is available in Access Points tab of the Social WiFi dashboard |
| RADIUS accounting | RADIUS accounting enabled (optional, but recommended) |
| RADIUS accounting servers – Host | 35.205.62.147 |
| RADIUS accounting servers – Port | 31813 |
| RADIUS accounting servers – Secret | RADIUS Secret is available in Access Points tab of the Social WiFi dashboard |
In the Captive portal advance setting section, use the following settings:
| Walled garden | Switched on |
|---|---|
| Walled garden ranges | *copy below* |
| Simultaneous login limit | Unlimited |
| Strict Policy | Block all access until sign-on |
| Reauth time | Follow site-wide settings (you can set preferred forced guest logout time here) |
*.socialwifi.comsw-login.com*.facebook.com*.fbcdn.net*.twitter.com*.twimg.com*.linkedin.com*.licdn.com*.x.com*.googleapis.comapis.google.comwww.googletagmanager.comwww.googleadservices.comgoogleads.g.doubleclick.net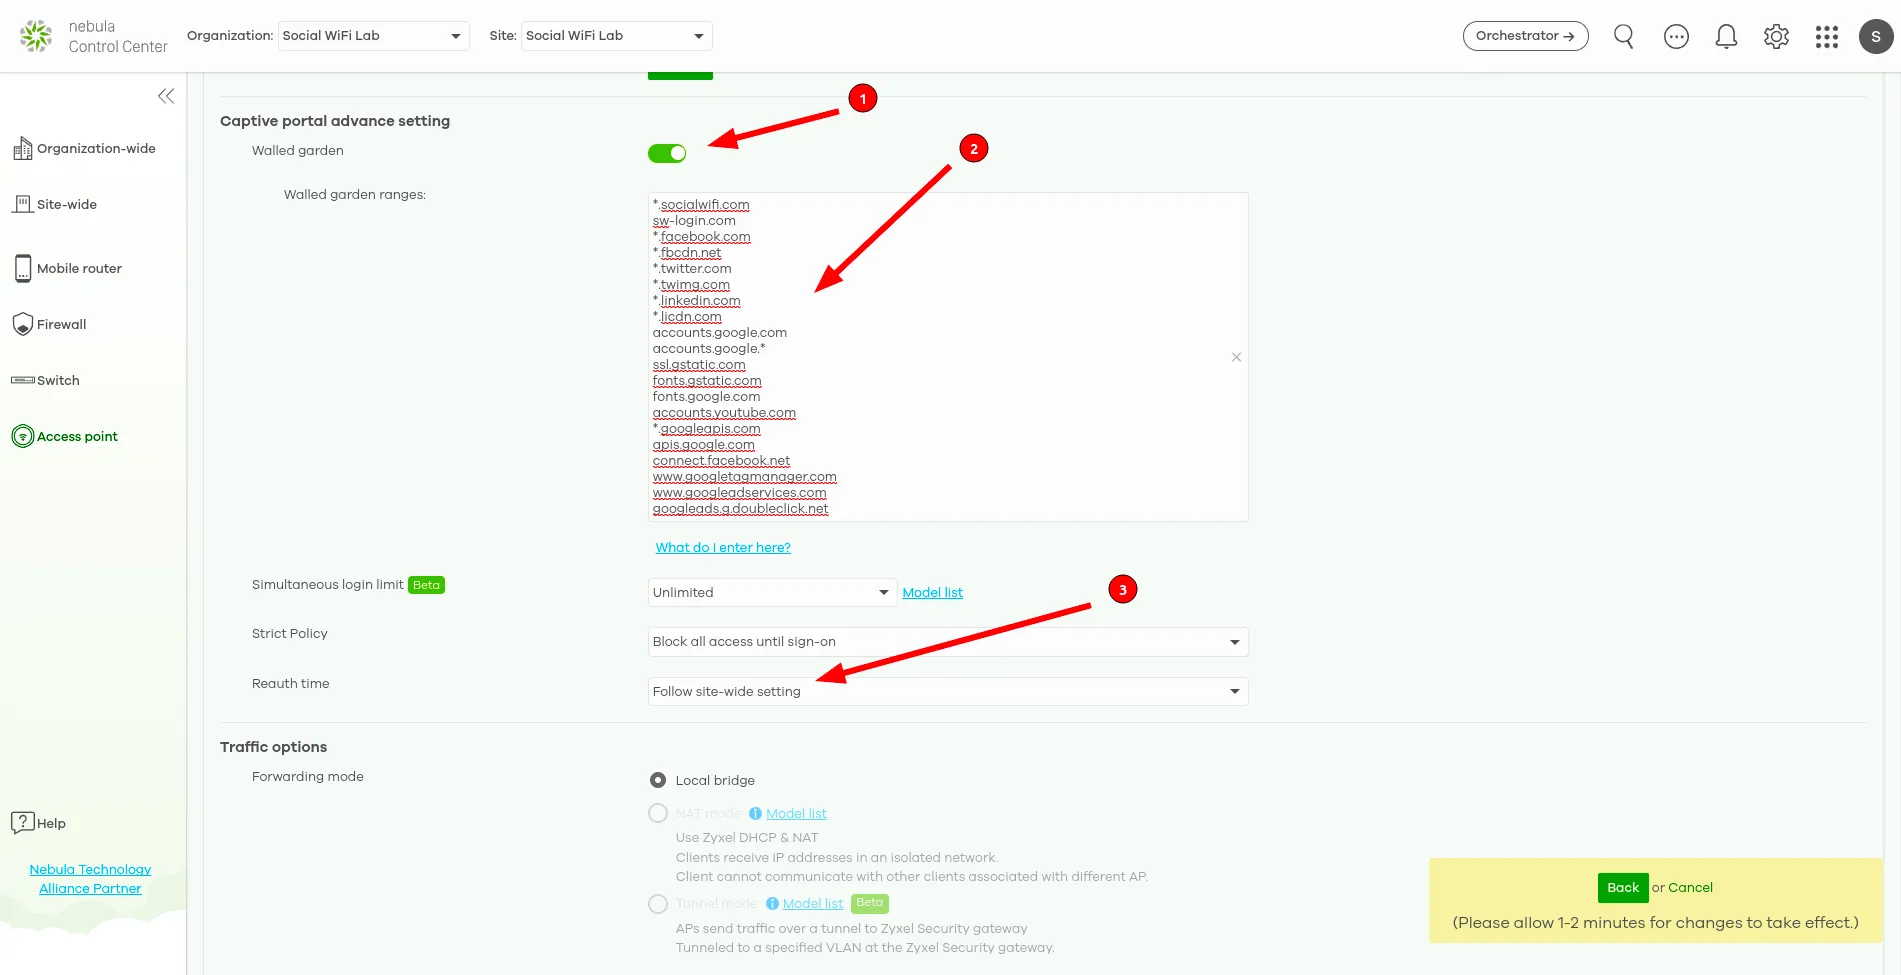
Leave the Traffic options and Advanced settings sections as they are.
Click the green Back button at the bottom of the page to go back to the SSID settings screen.
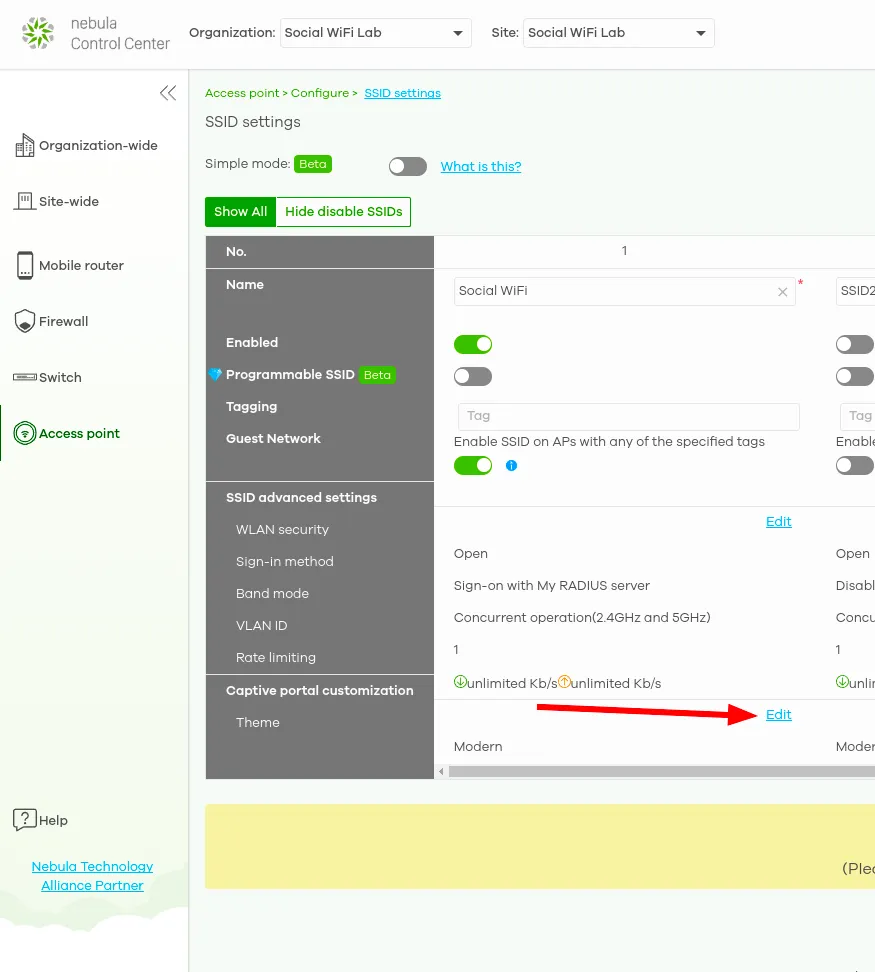
Captive portal customization
When in the Access point → SSID settings, next to Captive portal customization, click on Edit.
In the External captive portal URL section, use the following settings:
| Use URL | https://login.socialwifi.com |
In the Captive portal behavior section, use the following settings:
| After the captive portal page where the user should go? | To promotion URL: https://login.socialwifi.com/redirect/ |
|---|
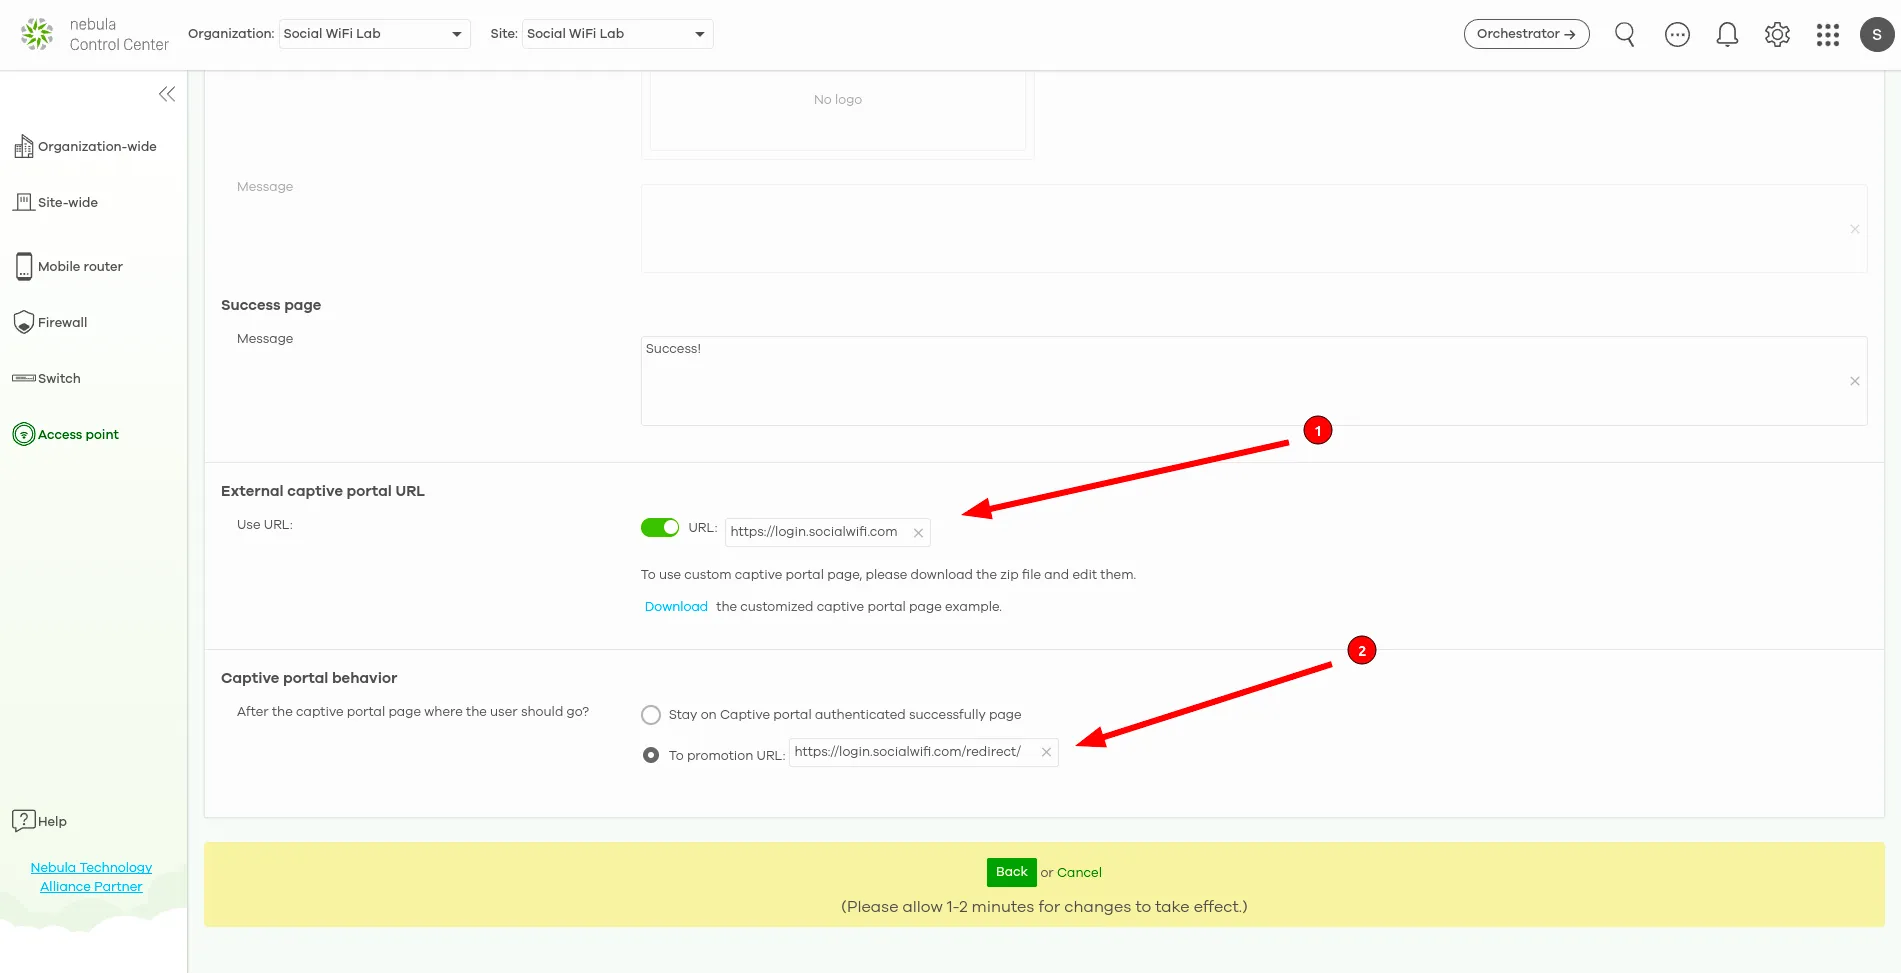
Click the green Back button at the bottom of the page to go back to the SSID settings screen.
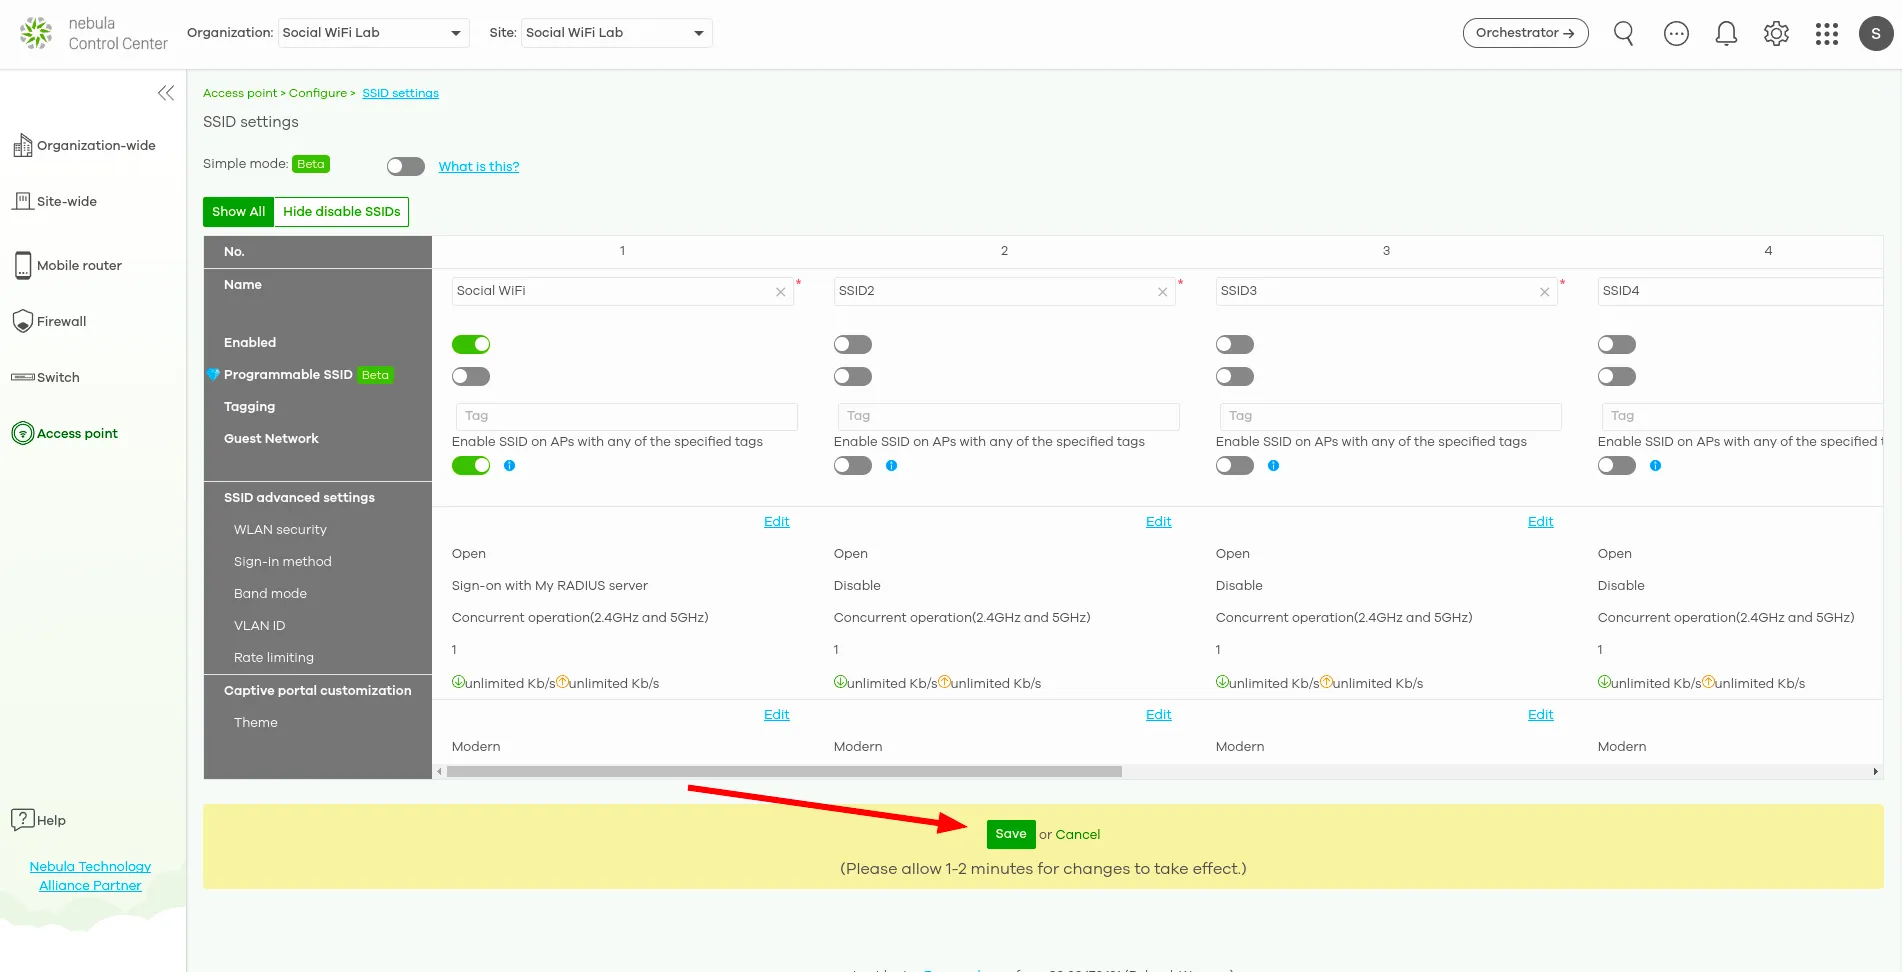
When in the Access point → SSID settings, click the green Save button at the bottom of the page.
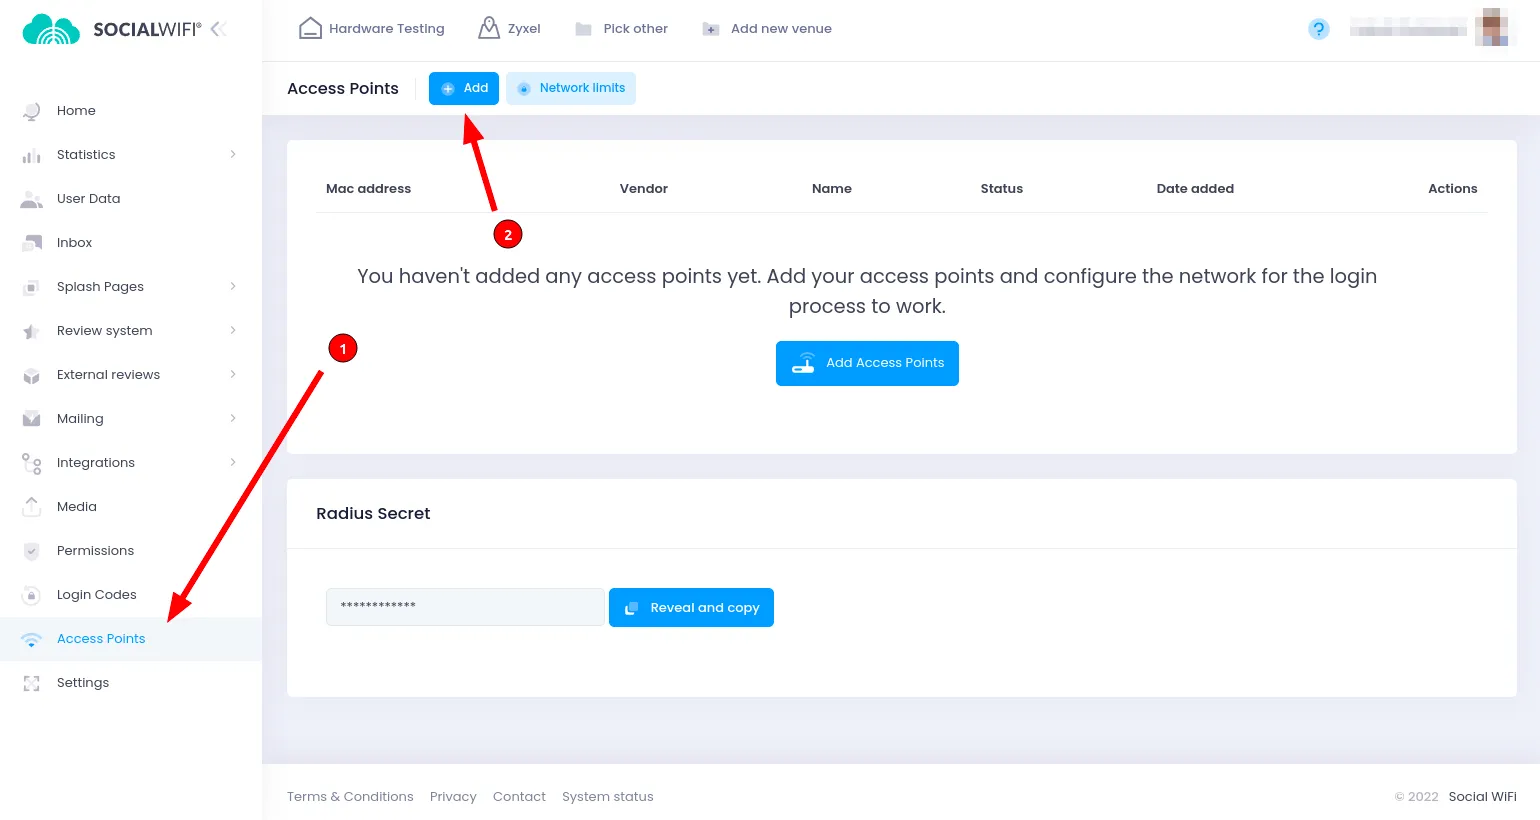
Add the access points to Social WiFi panel
The setup of the controller is now finished. The last step is to add all access points to the Social WiFi platform.
Go to Access point → Access points in the menu on the left. Find the MAC address column. You will need those MAC addresses in the next step.
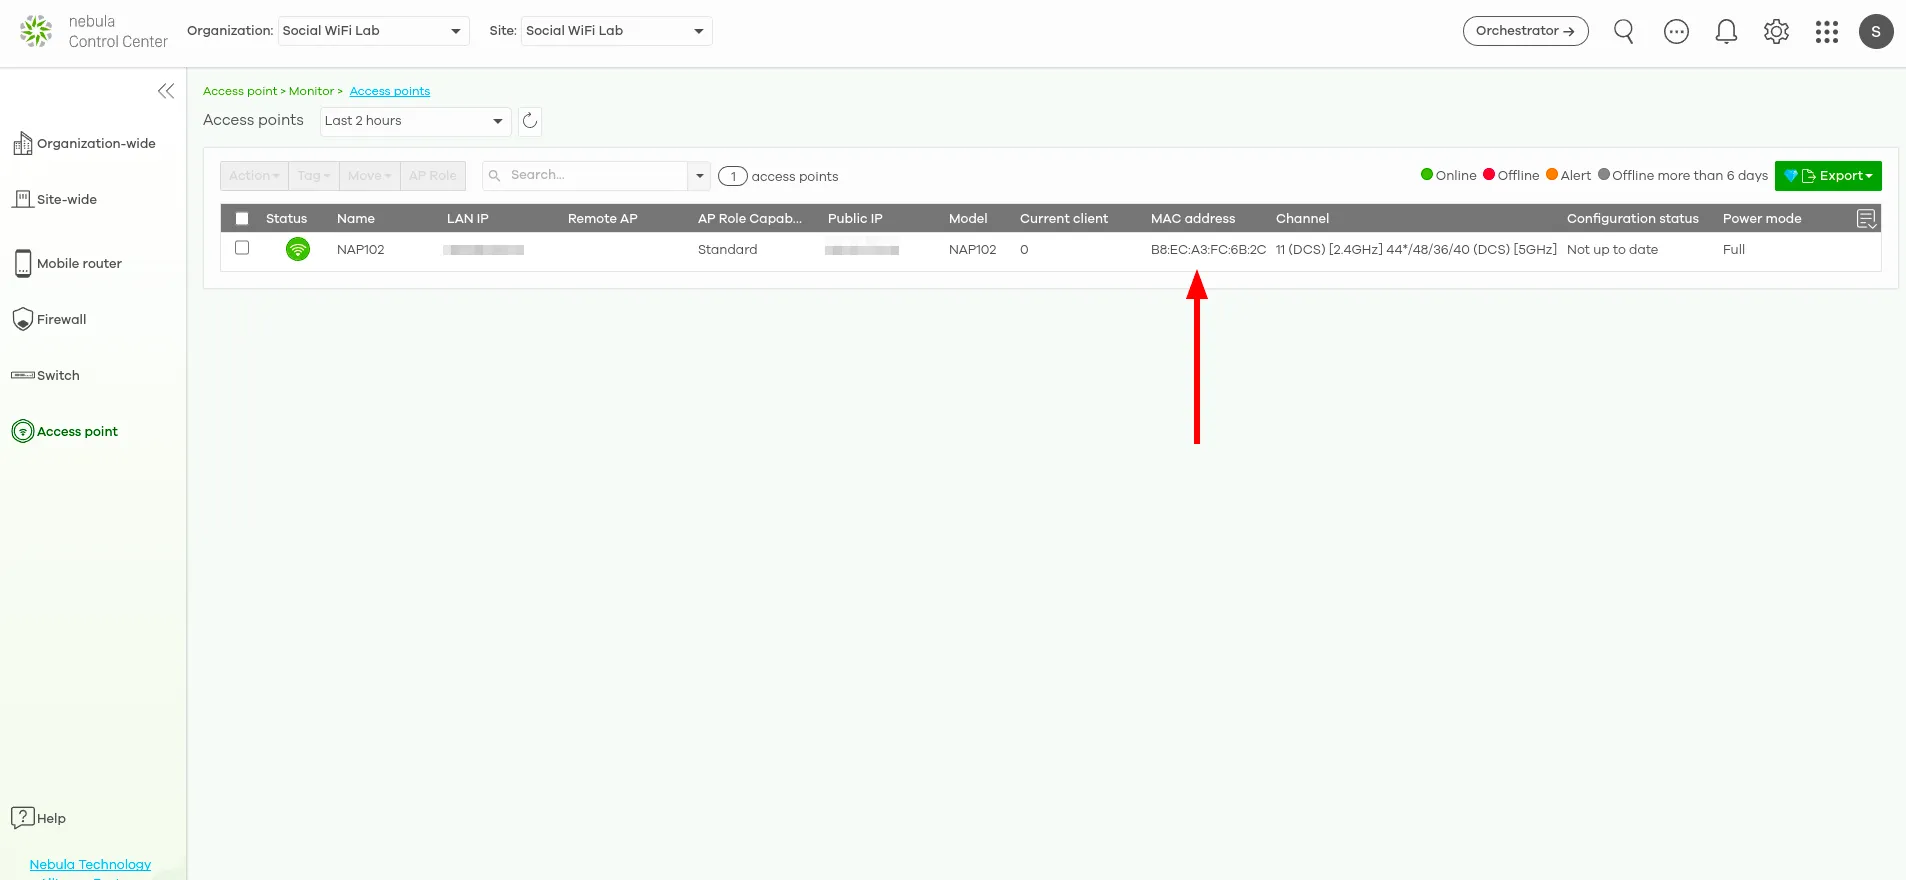
Now, switch to Social WiFi Panel, go to Access Points tab, click the Add button and paste the MAC addresses of all of your access points controlled by the Zyxel Nebula. Click Create.
Test the solution
Connect with the WiFi network. You should see a login page. Go through the login process and, once finished, you should have internet access.
You should see first connections and authorizations in the Social WiFi Panel’s statistics section.
Firewall
If you have any Firewall behind your Zyxel Access Point, make sure that these ports are enabled:
- 443 i 6667 (are used in TCP for Nebula Cloud Management)
- 123 (used in UDP for Network Time Protocol(NTP)