Winbox
Prerequisites
This guide assumes Winbox 4.0 is already downloaded. If not, download it from the manufacturer’s website.
The device must be connected as shown in the connection guide.
Compatibility
Social WiFi is compatible with the following configurations:
RouterOS versions:
- 6.x
- 7.5 and newer, tested up to 7.19.4 (hotspot doesn’t work on RouterOS 7 below version 7.5)
Accessing the router
To access the router:
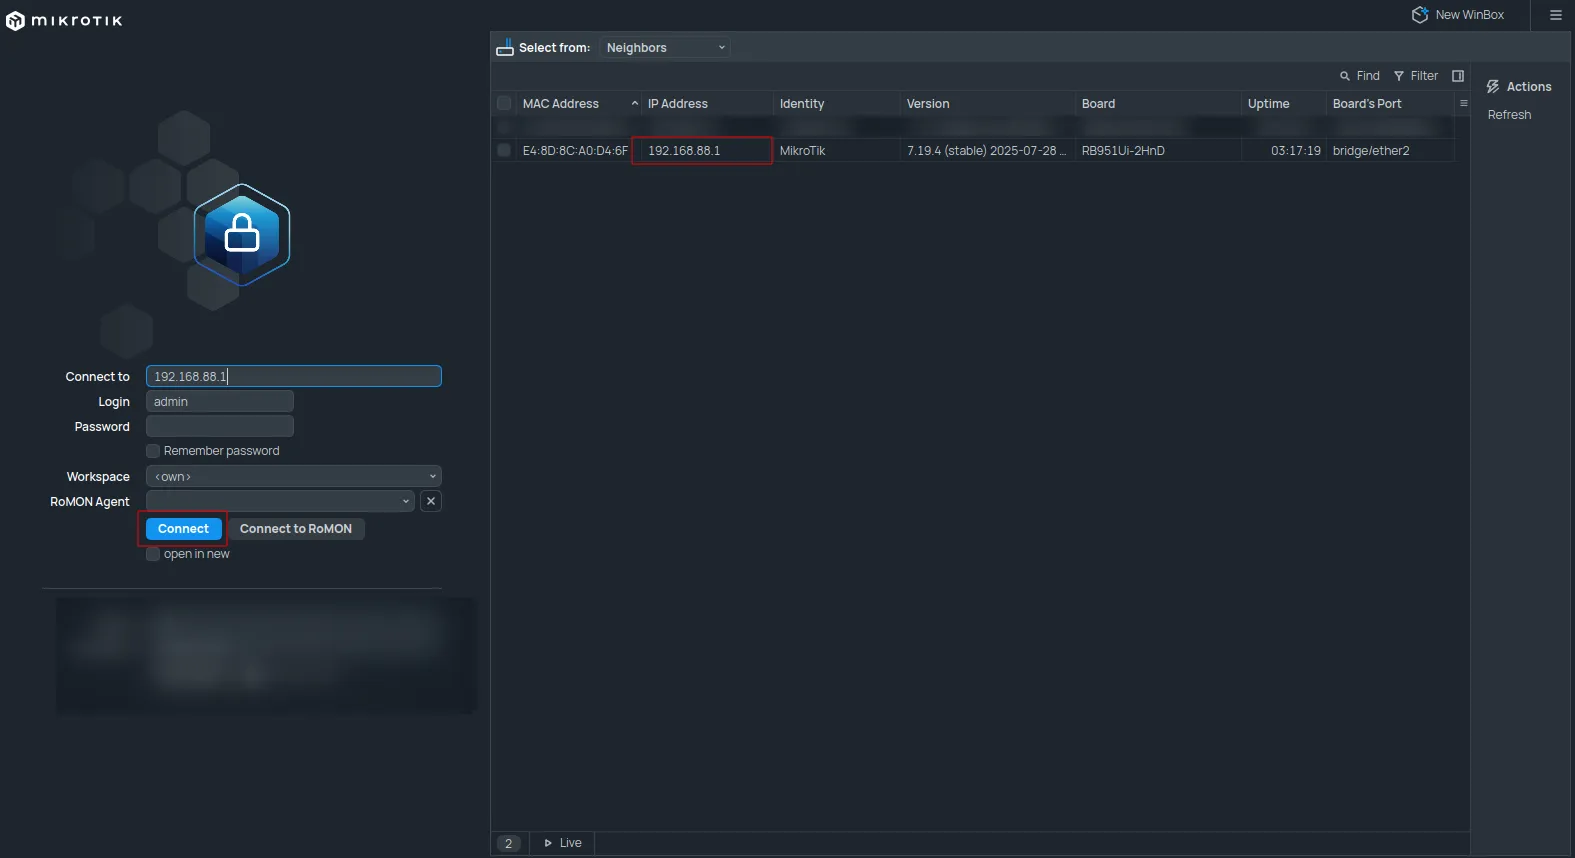
- Start Winbox.
- At the top, set “Connect To” to the router’s MAC address found in the “Neighbors” tab.
- The router should appear on the list; double-click it.
- Click the blue “Connect” button.

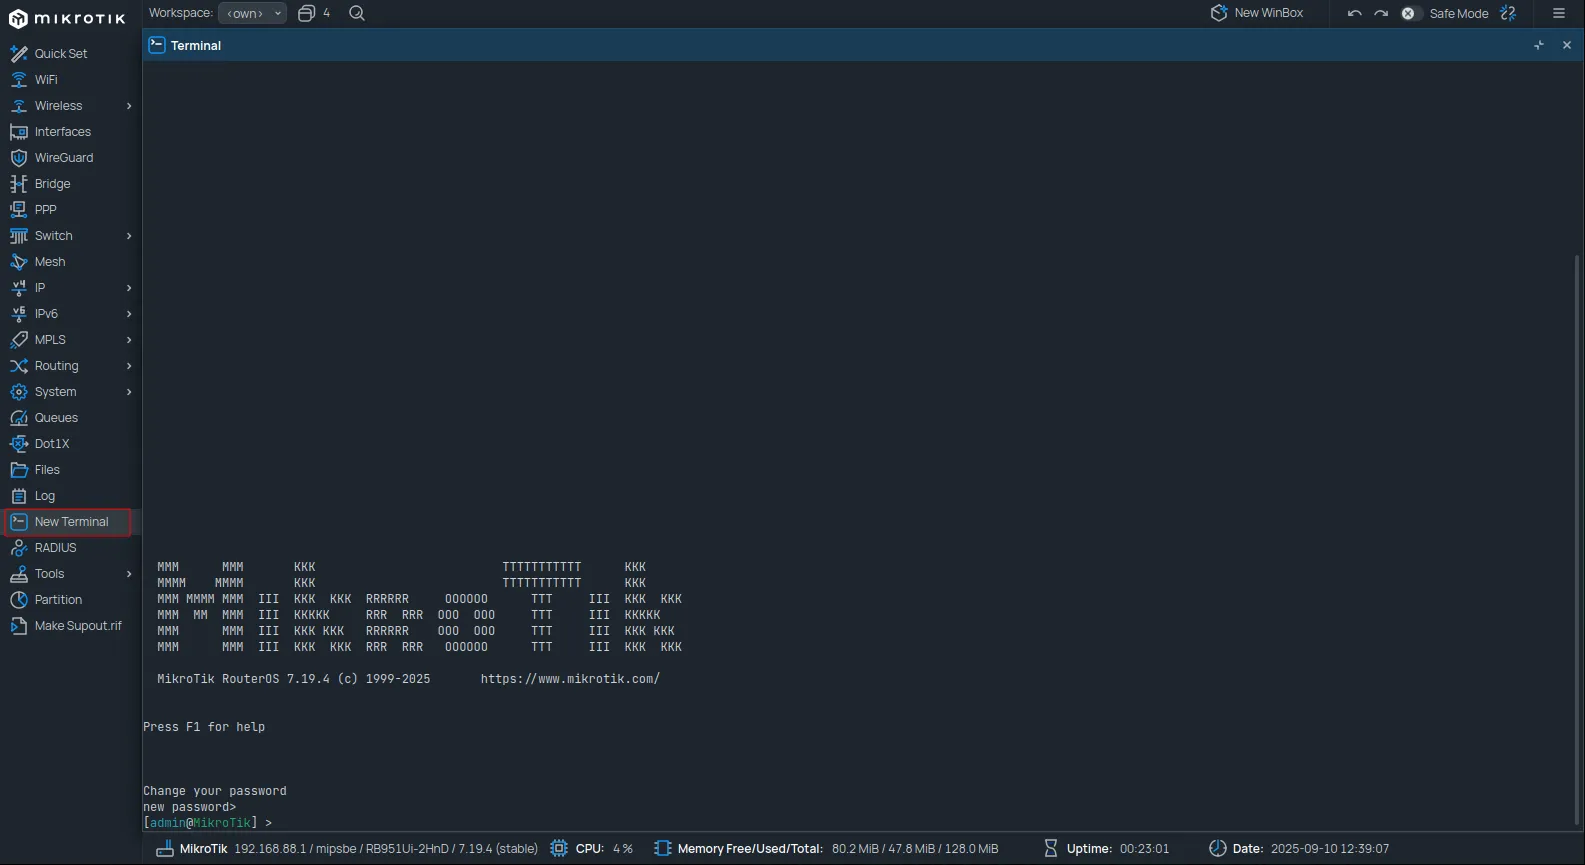
Press CTRL+C to skip changing the password. Leave the terminal window open.
Social WiFi configuration
Hotspot files download
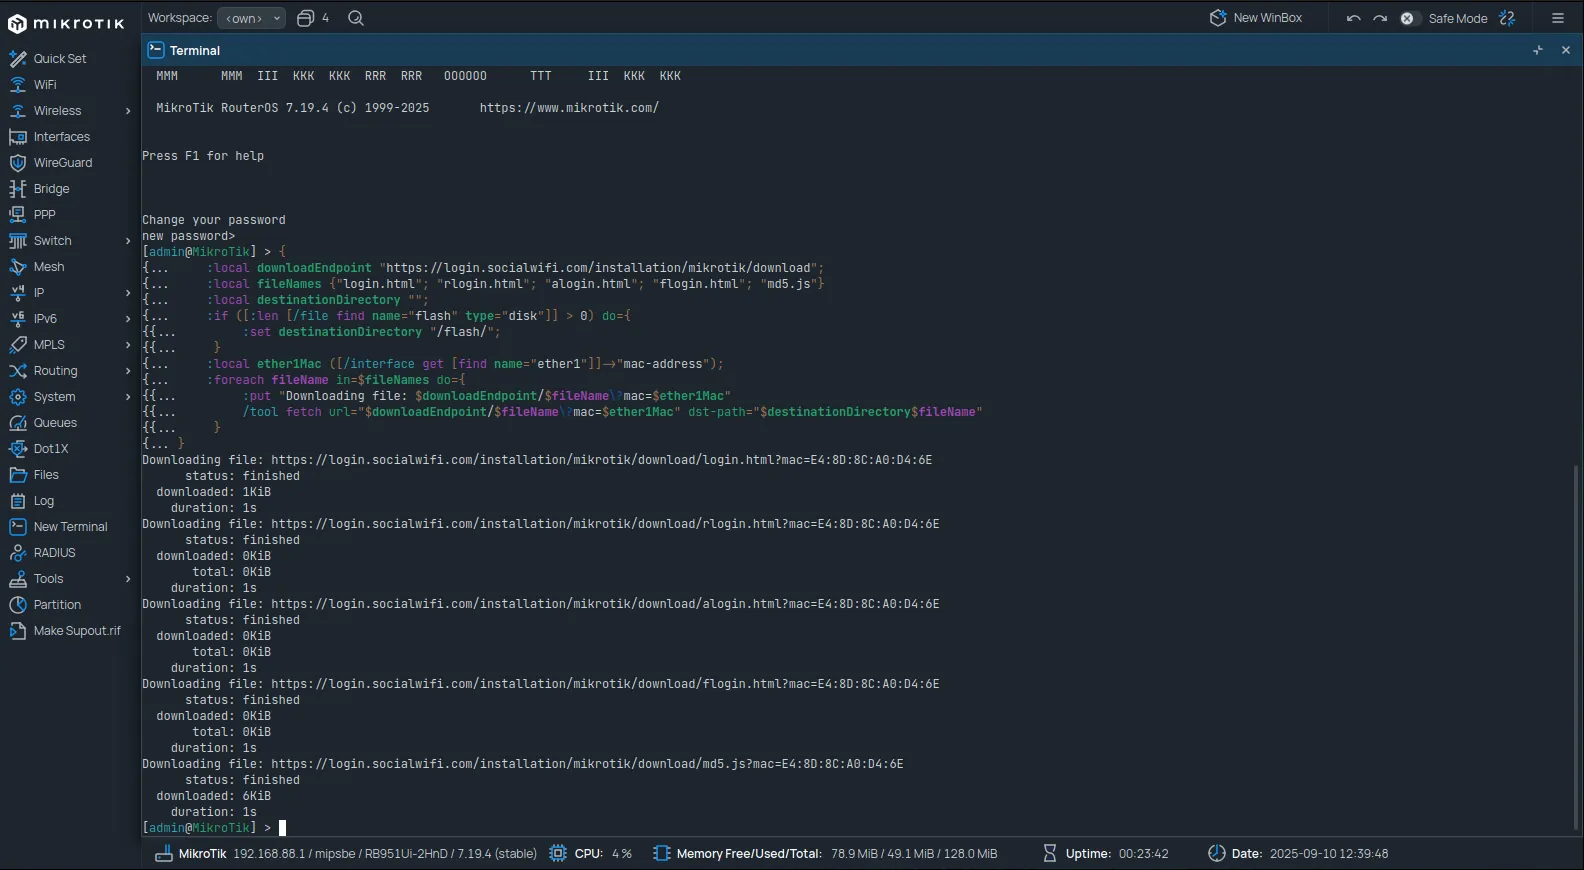
Copy and paste the following script into the terminal:
{ :local downloadEndpoint "https://login.socialwifi.com/installation/mikrotik/download"; :local fileNames {"login.html"; "rlogin.html"; "alogin.html"; "flogin.html"; "md5.js"} :local destinationDirectory ""; :if ([:len [/file find name="flash" type="disk"]] > 0) do={ :set destinationDirectory "/flash/"; } :local ether1Mac ([/interface get [find name="ether1"]]->"mac-address"); :foreach fileName in=$fileNames do={ :put "Downloading file: $downloadEndpoint/$fileName\?mac=$ether1Mac" /tool fetch url="$downloadEndpoint/$fileName\?mac=$ether1Mac" dst-path="$destinationDirectory$fileName" }}The files will download automatically after running the script.
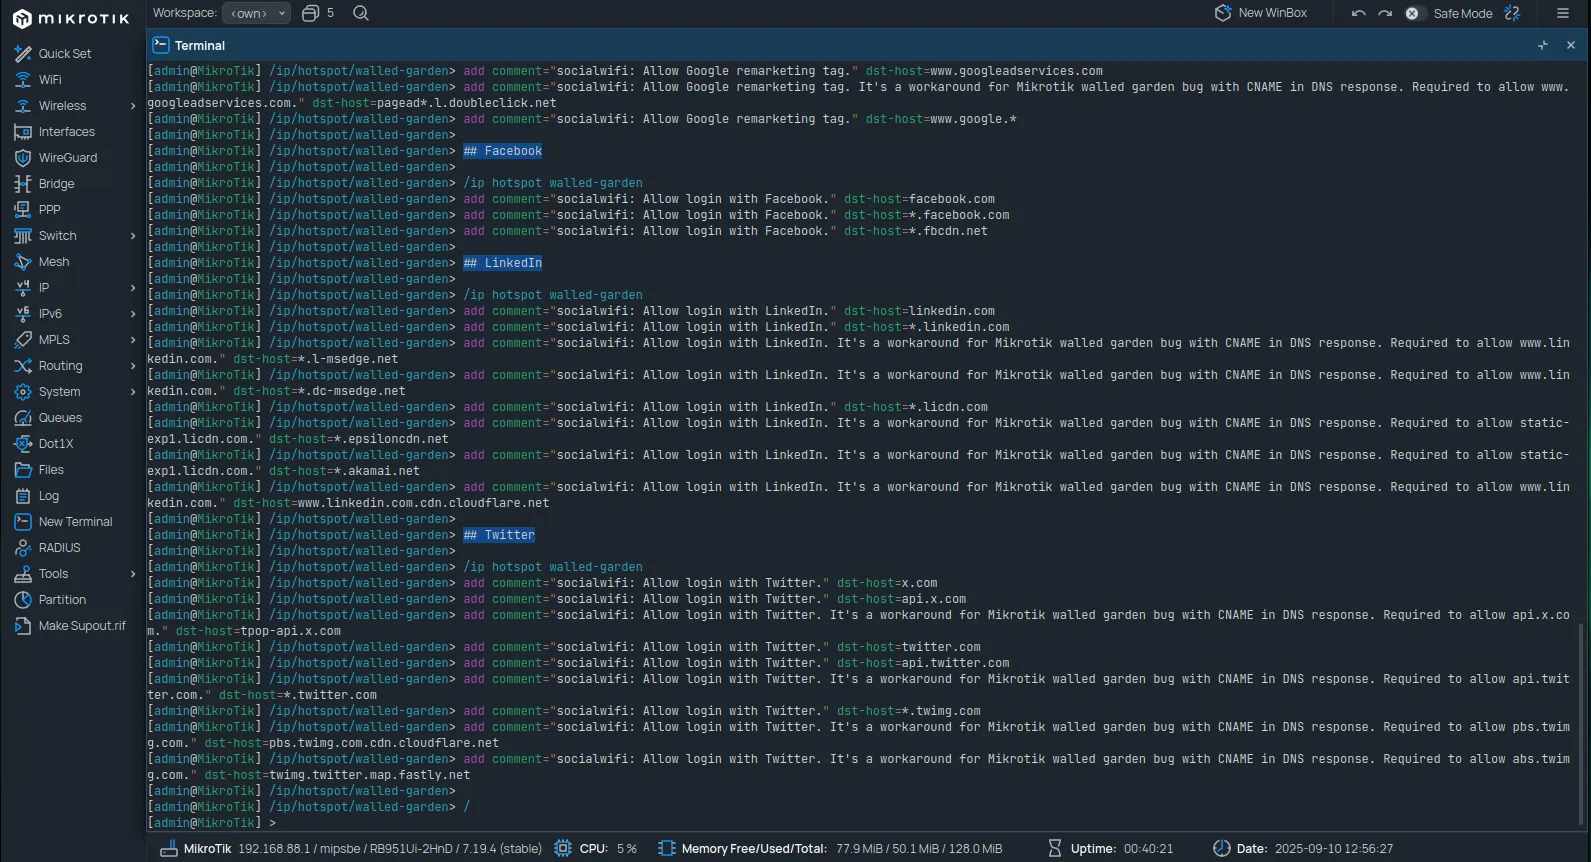
Walled Garden configuration
Copy and paste the following commands into the terminal. All commands can be pasted at once.
## Social WiFi
/ip hotspot walled-gardenadd comment="socialwifi: Allow captive portal main service." dst-host=*.socialwifi.comadd comment="socialwifi: Allow captive portal main service." dst-host=sw-login.com
## YouTube widget
/ip hotspot walled-gardenadd comment="socialwifi: Allow YouTube widget." dst-host=*.youtube.comadd comment="socialwifi: Allow YouTube widget. It's a workaround for Mikrotik walled garden bug with CNAME in DNS response. Required to allow www.youtube.com." dst-host=youtube-ui.l.google.comadd comment="socialwifi: Allow YouTube widget. It's a workaround for Mikrotik walled garden bug with CNAME in DNS response. Required to allow img.youtube.com." dst-host=ytimg.l.google.comadd comment="socialwifi: Allow YouTube widget." dst-host=*.ytimg.comadd comment="socialwifi: Allow YouTube widget." dst-host=*.googlevideo.comadd comment="socialwifi: Allow YouTube widget." dst-host=yt3.ggpht.comadd comment="socialwifi: Allow YouTube widget. It's a workaround for Mikrotik walled garden bug with CNAME in DNS response. Required to allow yt3.ggpht.com." dst-host=*.l.googleusercontent.com
## Facebook remarketing pixel
/ip hotspot walled-gardenadd comment="socialwifi: Allow Facebook remarketing pixel." dst-host=*.facebook.comadd comment="socialwifi: Allow Facebook remarketing pixel." dst-host=connect.facebook.netadd comment="socialwifi: Allow Facebook remarketing pixel. It's a workaround for Mikrotik walled garden bug with CNAME in DNS response. Required to allow connect.facebook.net." dst-host=*.fbcdn.net
## Google remarketing tag
/ip hotspot walled-gardenadd comment="socialwifi: Allow Google remarketing tag." dst-host=www.googletagmanager.comadd comment="socialwifi: Allow Google remarketing tag. It's a workaround for Mikrotik walled garden bug with CNAME in DNS response. Required to allow www.googletagmanager.com." dst-host=www-googletagmanager.l.google.comadd comment="socialwifi: Allow Google remarketing tag." dst-host=www.googleadservices.comadd comment="socialwifi: Allow Google remarketing tag. It's a workaround for Mikrotik walled garden bug with CNAME in DNS response. Required to allow www.googleadservices.com." dst-host=pagead*.l.doubleclick.netadd comment="socialwifi: Allow Google remarketing tag." dst-host=www.google.*
## Facebook
/ip hotspot walled-gardenadd comment="socialwifi: Allow login with Facebook." dst-host=facebook.comadd comment="socialwifi: Allow login with Facebook." dst-host=*.facebook.comadd comment="socialwifi: Allow login with Facebook." dst-host=*.fbcdn.net
## LinkedIn
/ip hotspot walled-gardenadd comment="socialwifi: Allow login with LinkedIn." dst-host=linkedin.comadd comment="socialwifi: Allow login with LinkedIn." dst-host=*.linkedin.comadd comment="socialwifi: Allow login with LinkedIn. It's a workaround for Mikrotik walled garden bug with CNAME in DNS response. Required to allow www.linkedin.com." dst-host=*.l-msedge.netadd comment="socialwifi: Allow login with LinkedIn. It's a workaround for Mikrotik walled garden bug with CNAME in DNS response. Required to allow www.linkedin.com." dst-host=*.dc-msedge.netadd comment="socialwifi: Allow login with LinkedIn." dst-host=*.licdn.comadd comment="socialwifi: Allow login with LinkedIn. It's a workaround for Mikrotik walled garden bug with CNAME in DNS response. Required to allow static-exp1.licdn.com." dst-host=*.epsiloncdn.netadd comment="socialwifi: Allow login with LinkedIn. It's a workaround for Mikrotik walled garden bug with CNAME in DNS response. Required to allow static-exp1.licdn.com." dst-host=*.akamai.netadd comment="socialwifi: Allow login with LinkedIn. It's a workaround for Mikrotik walled garden bug with CNAME in DNS response. Required to allow www.linkedin.com." dst-host=www.linkedin.com.cdn.cloudflare.net
## Twitter
/ip hotspot walled-gardenadd comment="socialwifi: Allow login with Twitter." dst-host=x.comadd comment="socialwifi: Allow login with Twitter." dst-host=api.x.comadd comment="socialwifi: Allow login with Twitter. It's a workaround for Mikrotik walled garden bug with CNAME in DNS response. Required to allow api.x.com." dst-host=api.x.com.cdn.cloudflare.netadd comment="socialwifi: Allow login with Twitter. It's a workaround for Mikrotik walled garden bug with CNAME in DNS response. Required to allow api.x.com." dst-host=tpop-api.x.comadd comment="socialwifi: Allow login with Twitter. It's a workaround for Mikrotik walled garden bug with CNAME in DNS response. Required to allow abs.twimg.com." dst-host=dynamic.x.com.cdn.cloudflare.netadd comment="socialwifi: Allow login with Twitter." dst-host=twitter.comadd comment="socialwifi: Allow login with Twitter." dst-host=api.twitter.comadd comment="socialwifi: Allow login with Twitter. It's a workaround for Mikrotik walled garden bug with CNAME in DNS response. Required to allow api.api.com." dst-host=api.twitter.com.cdn.cloudflare.netadd comment="socialwifi: Allow login with Twitter. It's a workaround for Mikrotik walled garden bug with CNAME in DNS response. Required to allow api.twitter.com." dst-host=*.twitter.comadd comment="socialwifi: Allow login with Twitter." dst-host=*.twimg.comadd comment="socialwifi: Allow login with Twitter. It's a workaround for Mikrotik walled garden bug with CNAME in DNS response. Required to allow pbs.twimg.com." dst-host=pbs.twimg.com.cdn.cloudflare.netadd comment="socialwifi: Allow login with Twitter. It's a workaround for Mikrotik walled garden bug with CNAME in DNS response. Required to allow abs.twimg.com." dst-host=twimg.twitter.map.fastly.net
## WhatsApp
/ip hotspot walled-gardenadd comment="socialwifi: Allow login with WhatsApp." dst-host=whatsapp.comadd comment="socialwifi: Allow login with WhatsApp." dst-host=*.whatsapp.comadd comment="socialwifi: Allow login with WhatsApp." dst-host=*.whatsapp.net
/
Add new bridge
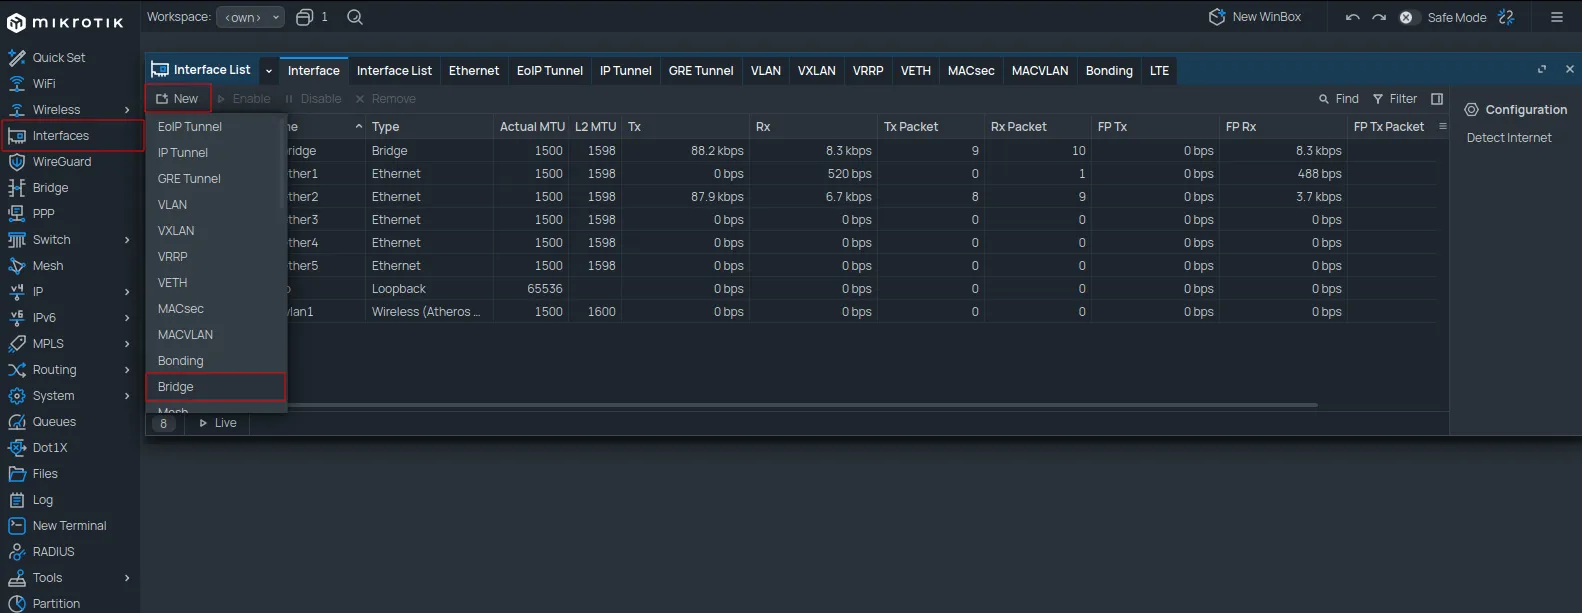
Navigate to Interfaces from the left-hand menu. In the Interface tab, click New and select Bridge.
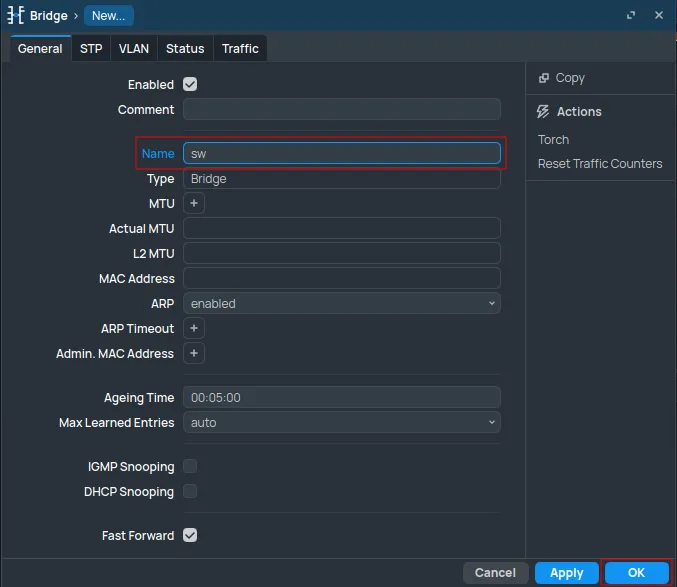
Set the Name field to sw and click OK.
Add new guest network
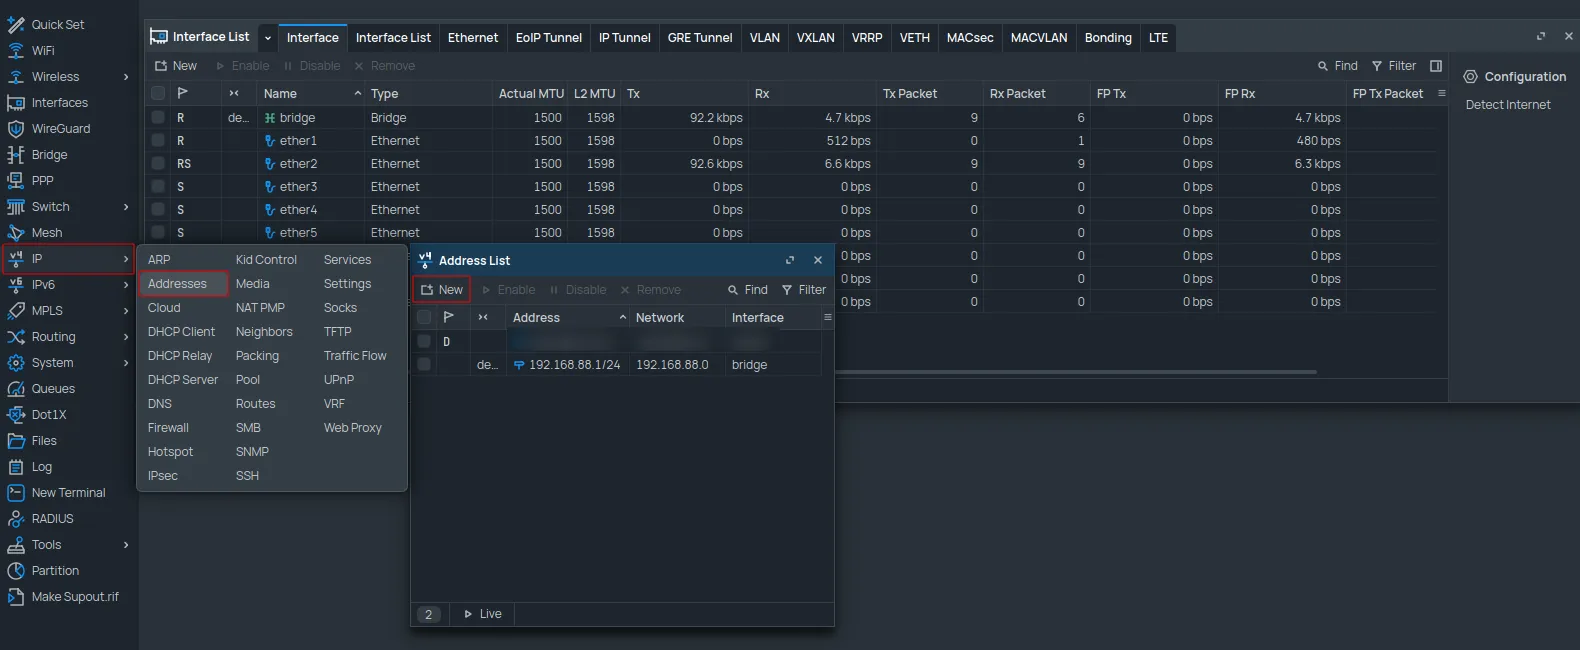
Navigate to IP -> Addresses and click New.
Configure as follows:
| Address | 10.8.0.1/16 |
|---|---|
| Network | 10.8.0.0 |
| Interface | sw |
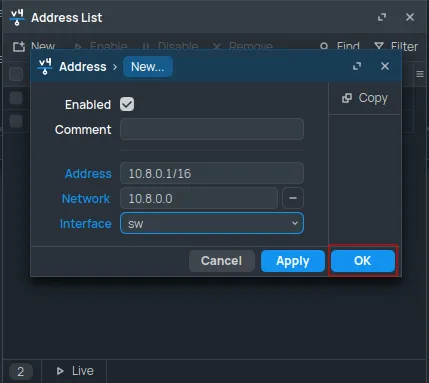
Click OK.
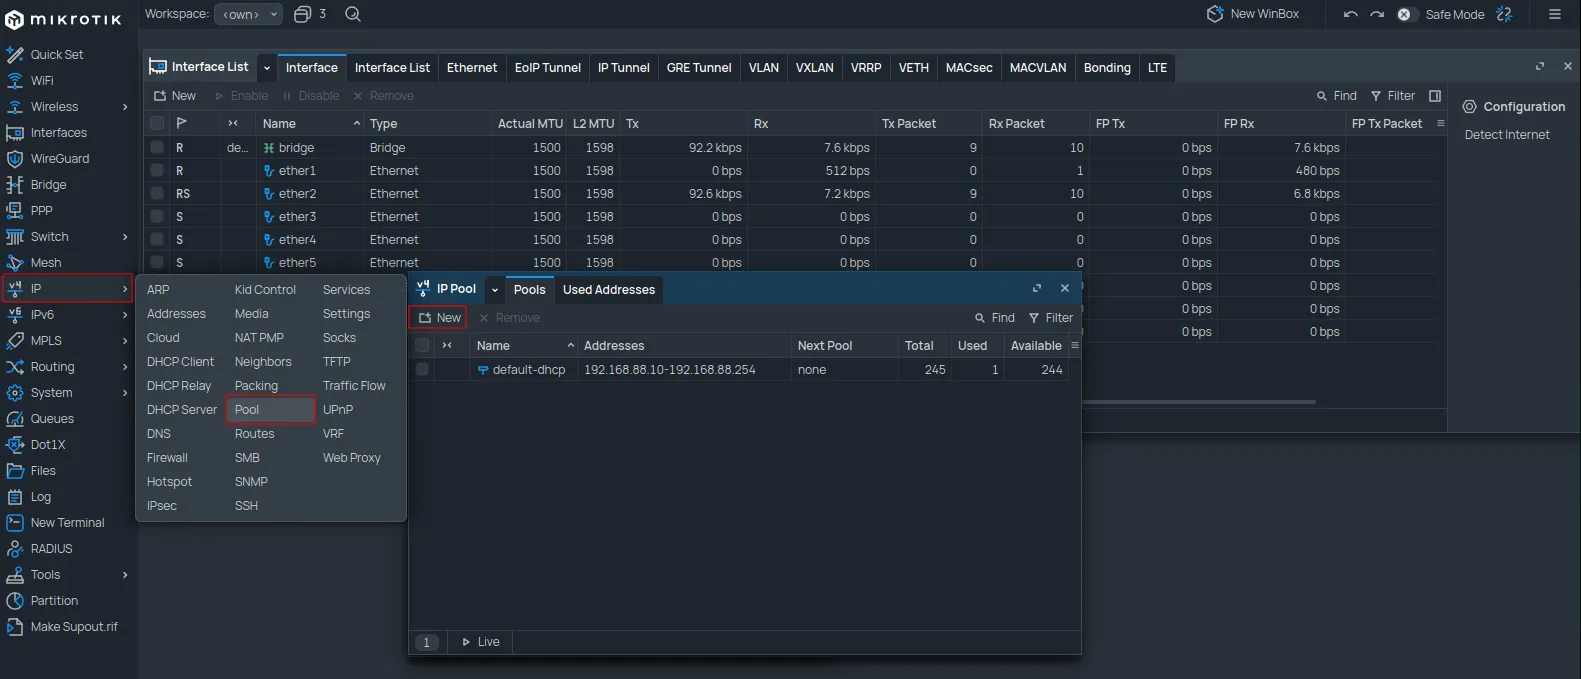
Next, navigate to IP -> Pool and click New.
Configure as follows:
| Name | dhcp_pool_sw |
|---|---|
| Addresses | 10.8.0.2-10.8.255.254 |
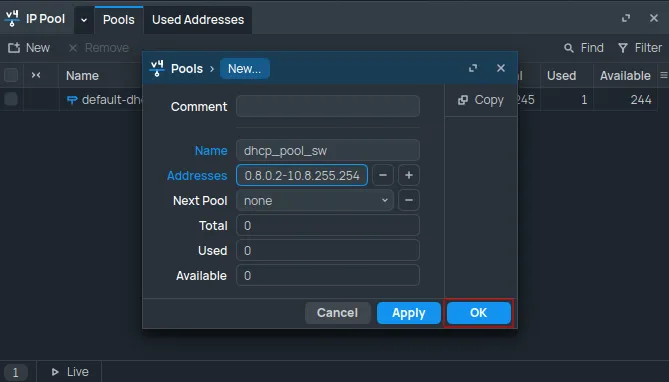
Click OK.
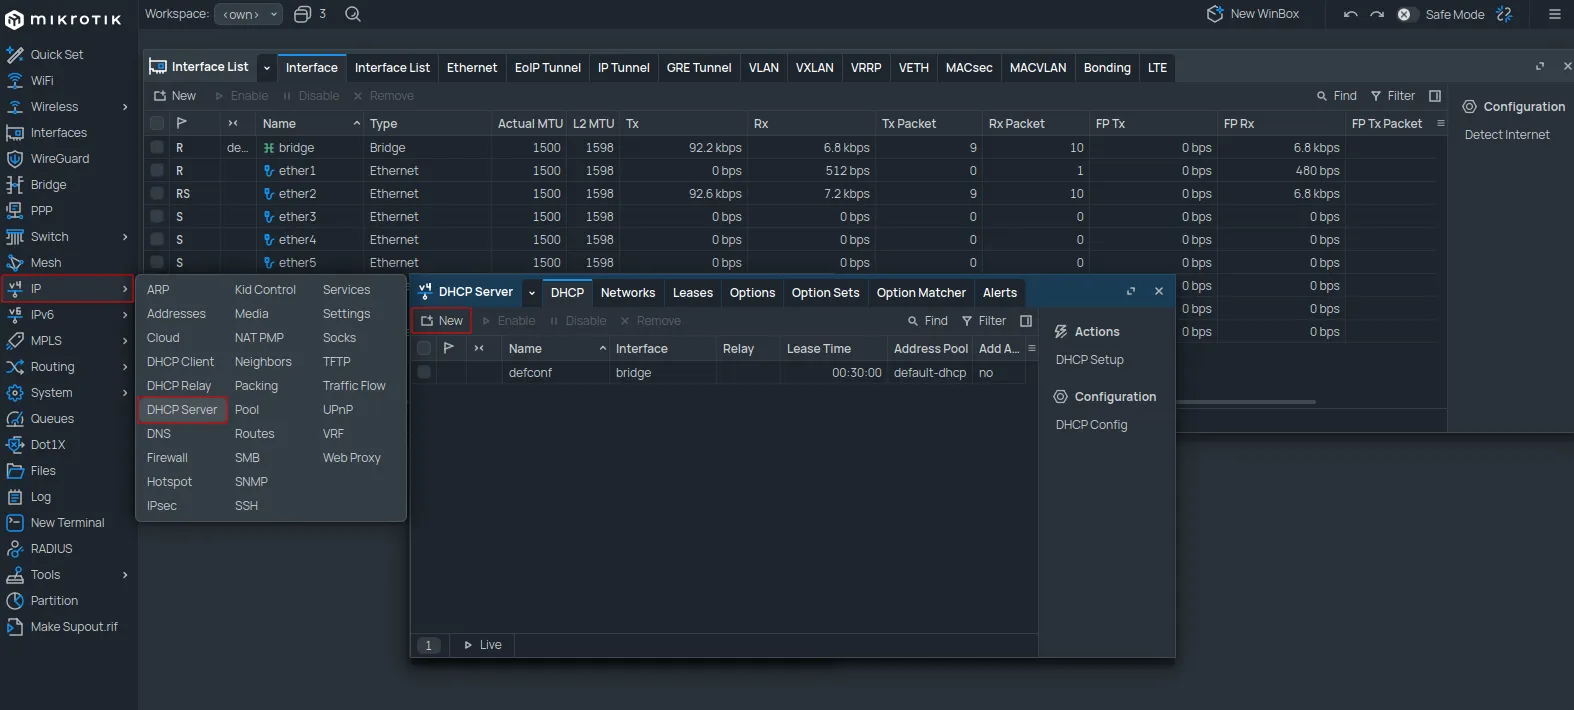
Navigate to IP -> DHCP Server. In the DHCP tab, click New.
Configure as follows:
| Name | dhcp_sw |
|---|---|
| Interface | sw |
| Lease Time | 2d 00:00:00 |
| Address Pool | dhcp_pool_sw |
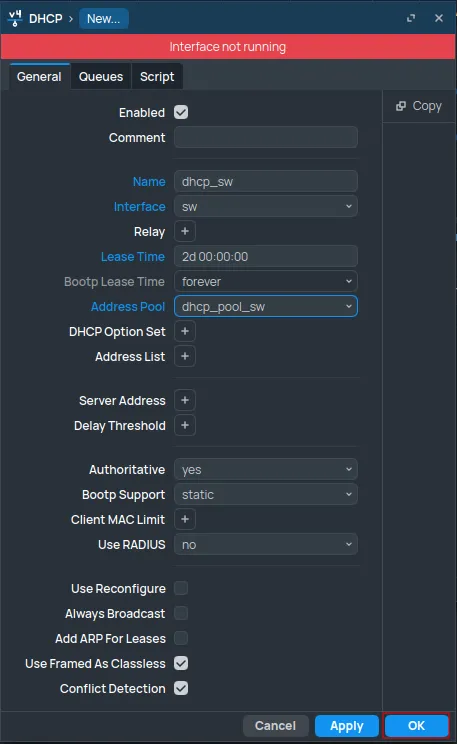
Click OK.
Switch to the Networks tab and click New.

Configure as follows:
| Address | 10.8.0.0/16 |
|---|---|
| Gateway | 10.8.0.1 |
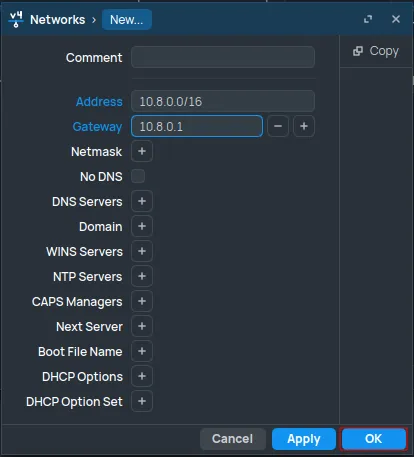
Click OK.
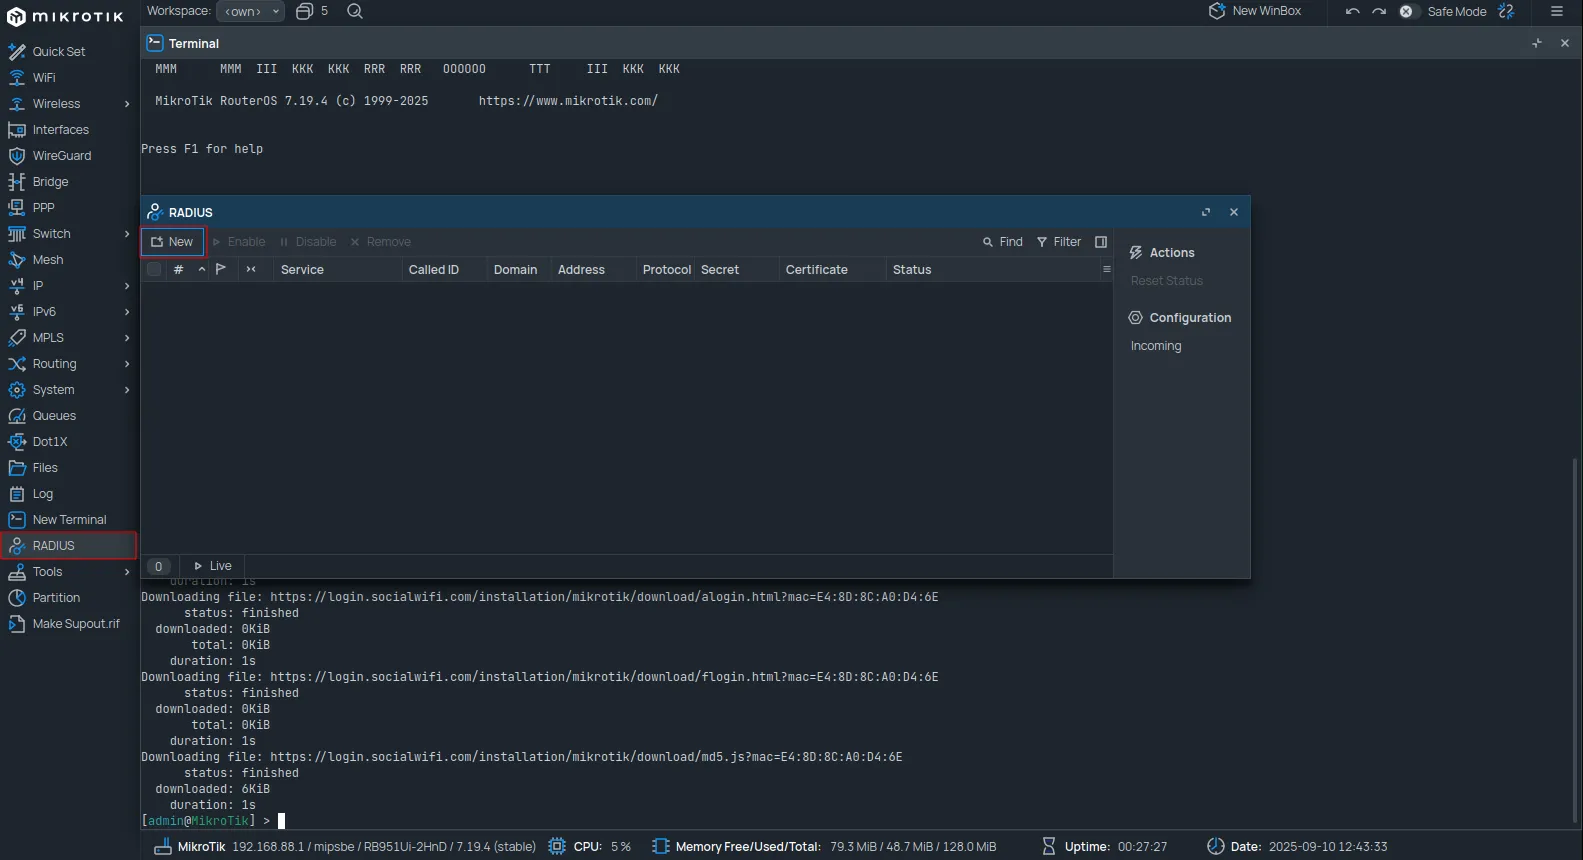
RADIUS configuration
Navigate to the RADIUS section and click New.
Configure as follows:
| Service | hotspot |
|---|---|
| Address | 35.205.62.147 |
| Secret | The RADIUS Secret is available in the Access Points tab of the Social WiFi Panel. |
| Authentication Port | 31812 |
| Accounting Port | 31813 |
| Timeout | 1000 |
| Accounting Backup | Unchecked |
| Require Message Auth | yes for request resp (This field is only available in RouterOS 7.13 and newer.) |
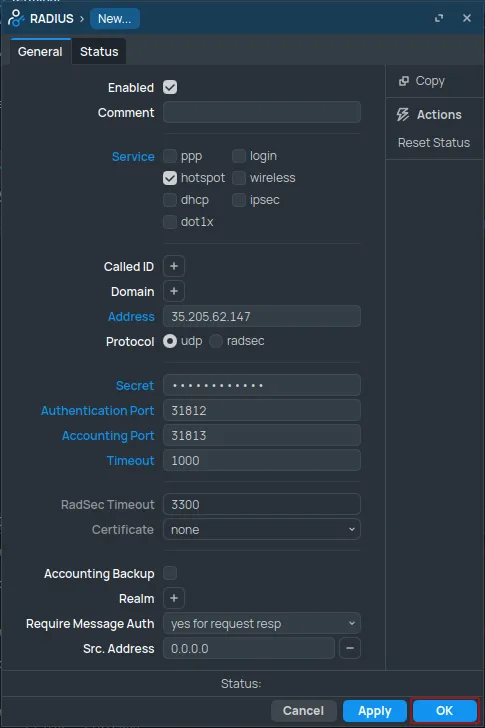
Click OK.
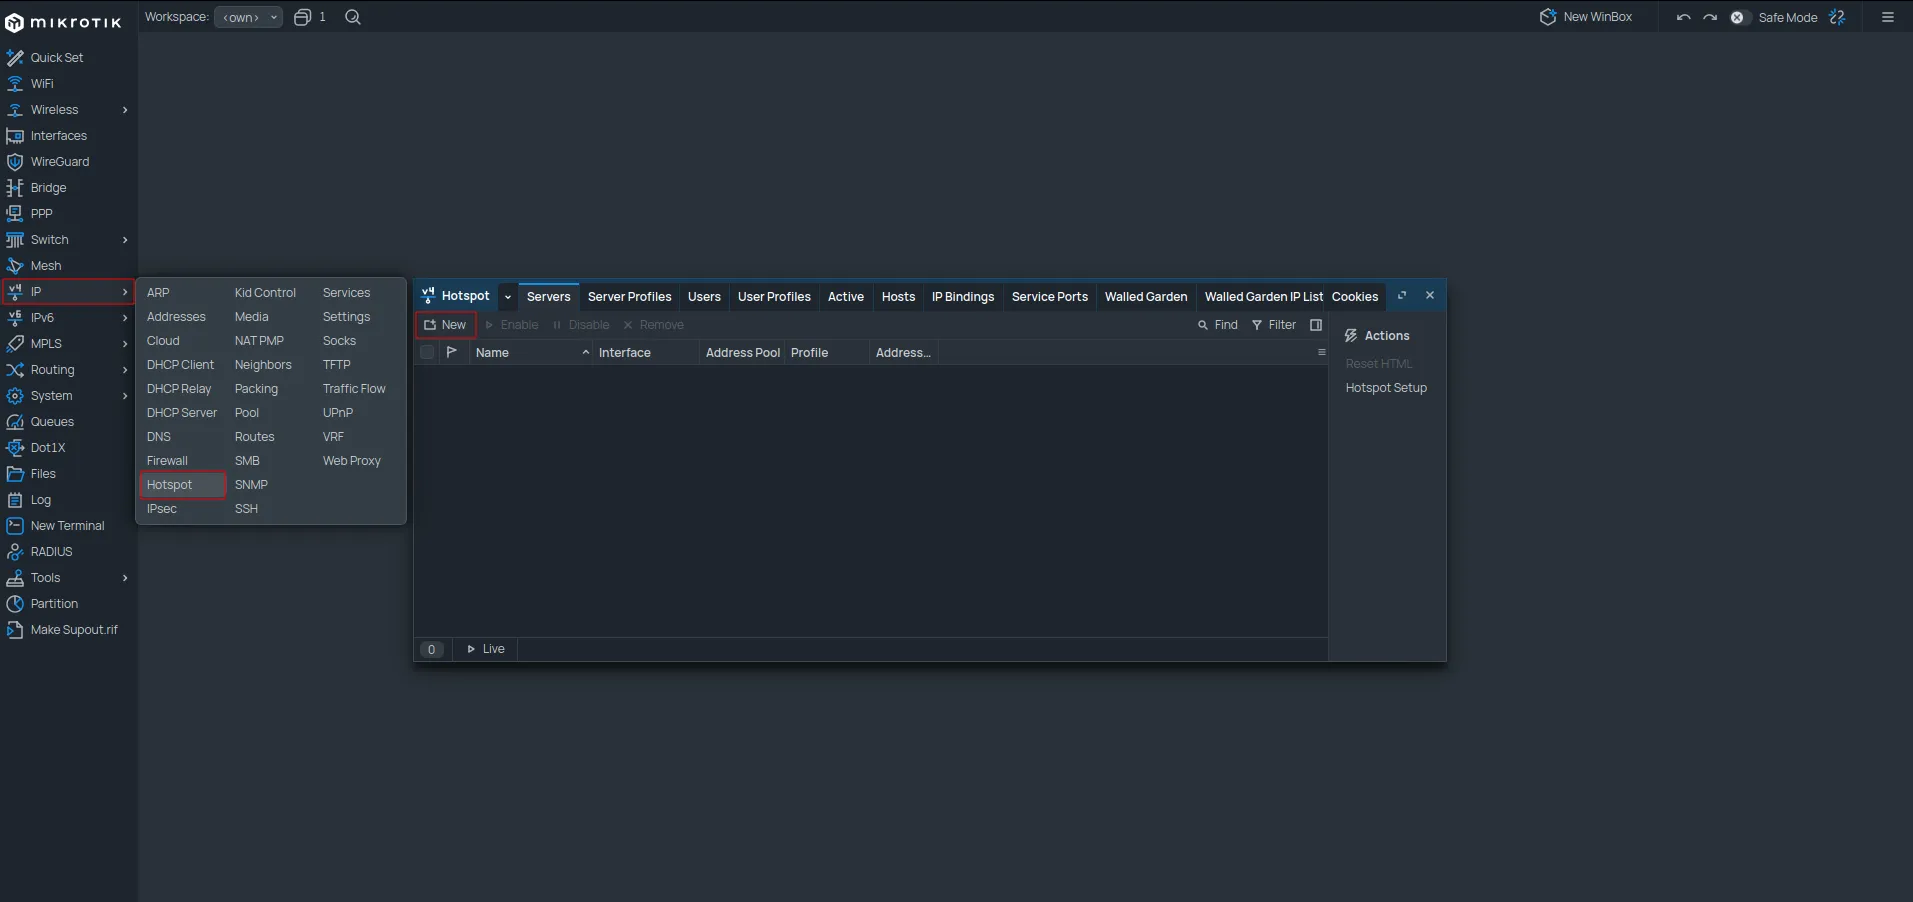
Hotspot configuration
Navigate to IP -> Hotspot. In the Servers tab, click New.
Configure as follows:
| Name | socialwifi |
|---|---|
| Interface | sw |
| Address Pool | none |
| Profile | default |
| Idle Timeout | 00:05:00 |
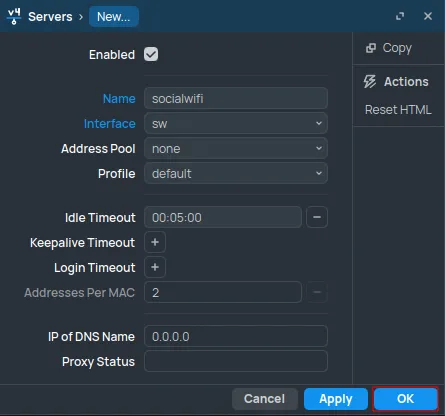
Click OK.
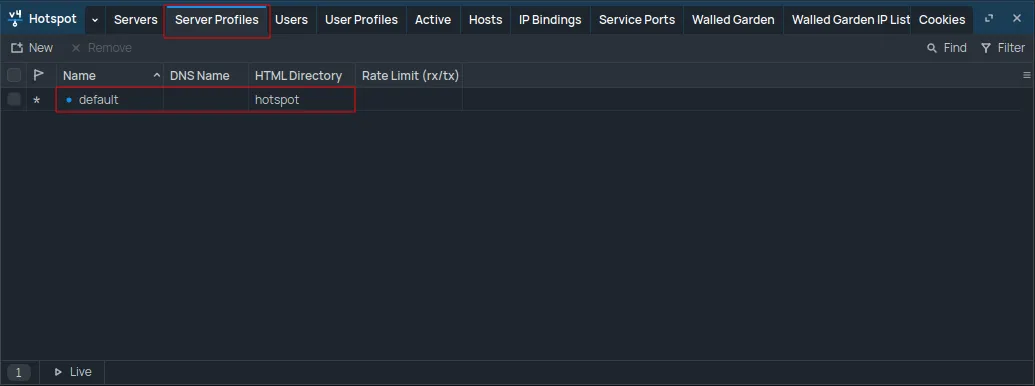
Switch to the Server Profiles tab. Double-click the default profile.
Configure as follows:
-
In the General tab:
DNS Name logging.sw.com HTML Directory Change the name to .(a period). If the Files section contains a “flash” folder, set this field to flash/.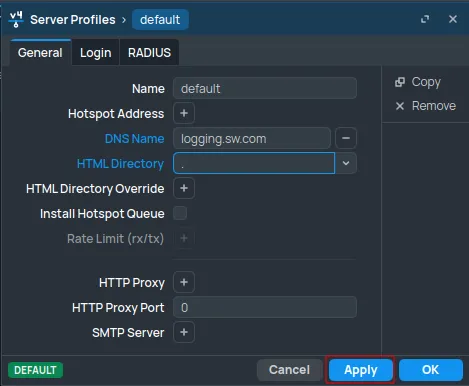
-
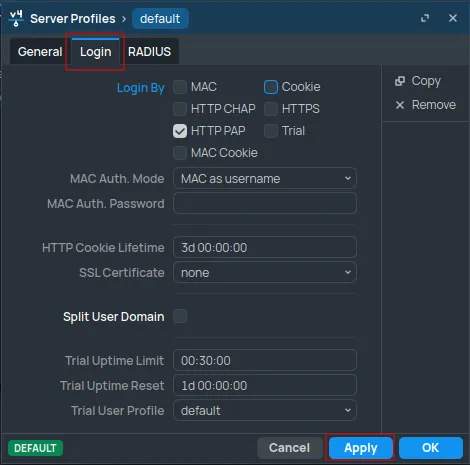
In the Login tab:
Set Login By to HTTP PAP (uncheck all other options).
-
In the RADIUS tab:
Use RADIUS yes Interim Update 00:10:00 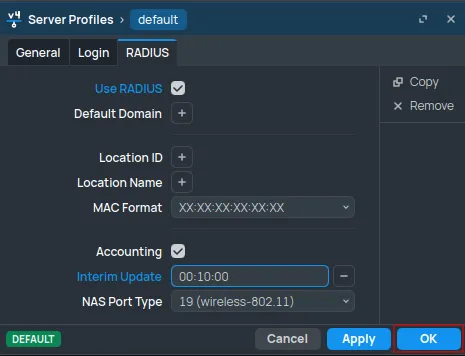
Click OK.
Switch to User Profiles. Double-click the default profile.
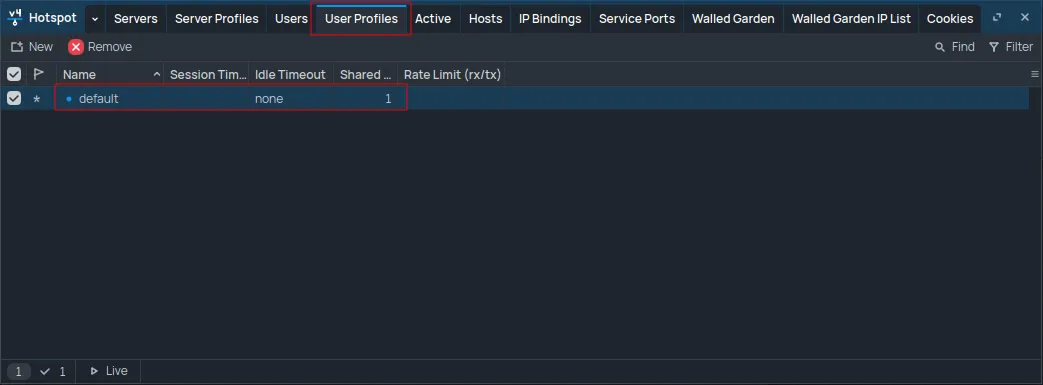
Set the Keepalive Timeout value to 2d 00:00:00.
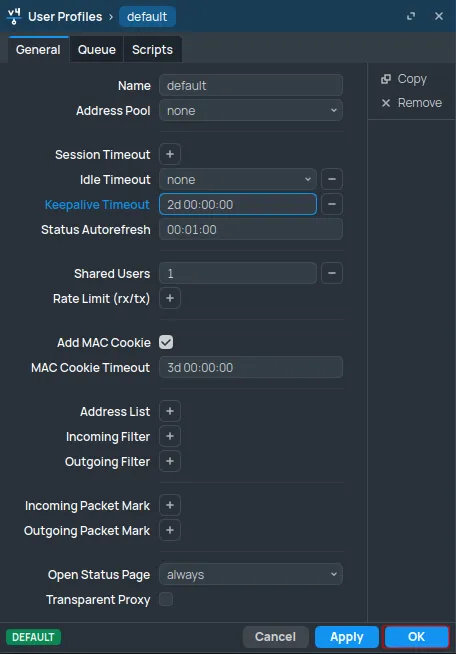
Click OK.
Interfaces configuration
Navigate to the Bridge section and open the Ports tab.
Double-click the interface to be used for Social WiFi.
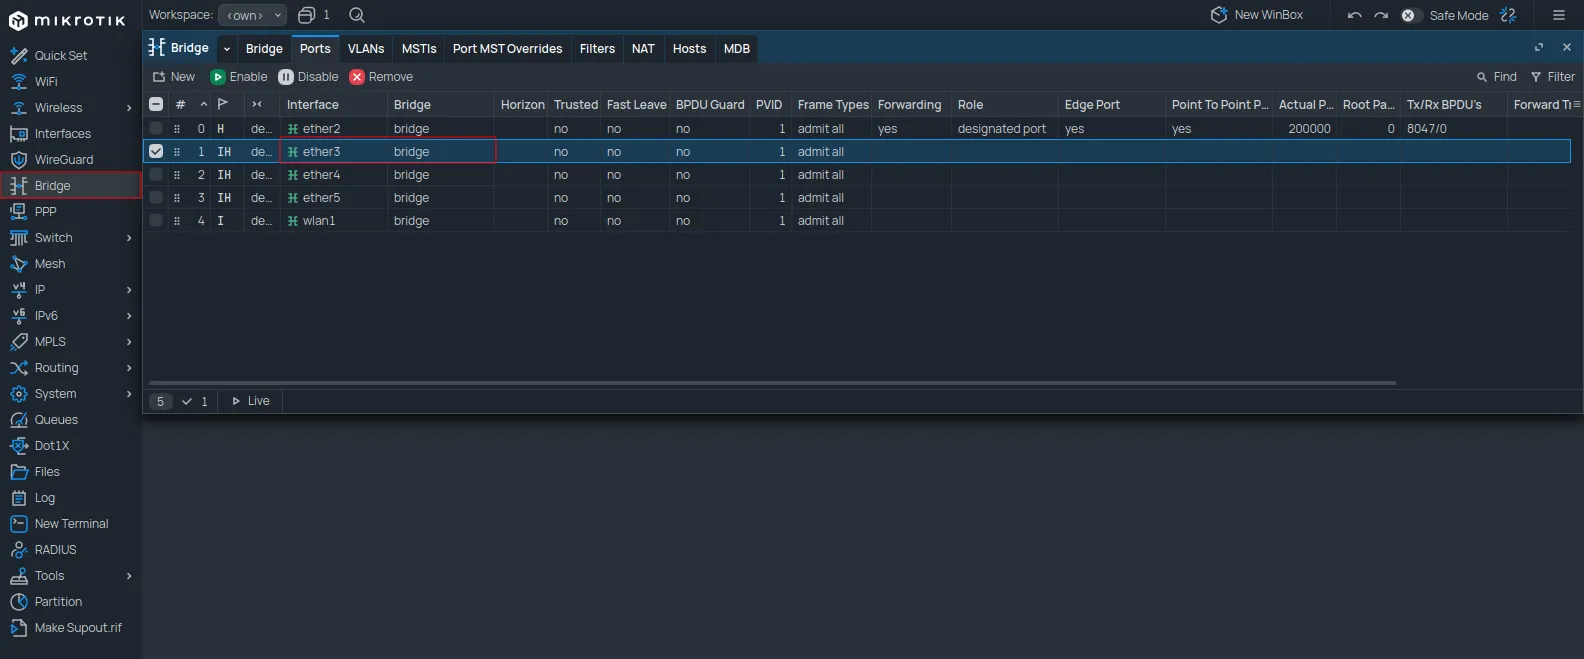
Change the Bridge value to sw.
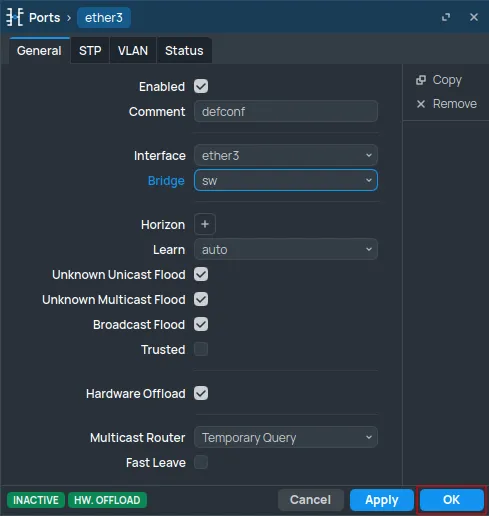
Click OK.
For VLAN configurations, refer to the VLANs and Additional APs guide after completing these steps.
Navigate to the Bridge section and open the Ports tab.
Double-click the wireless interface to be used for Social WiFi.
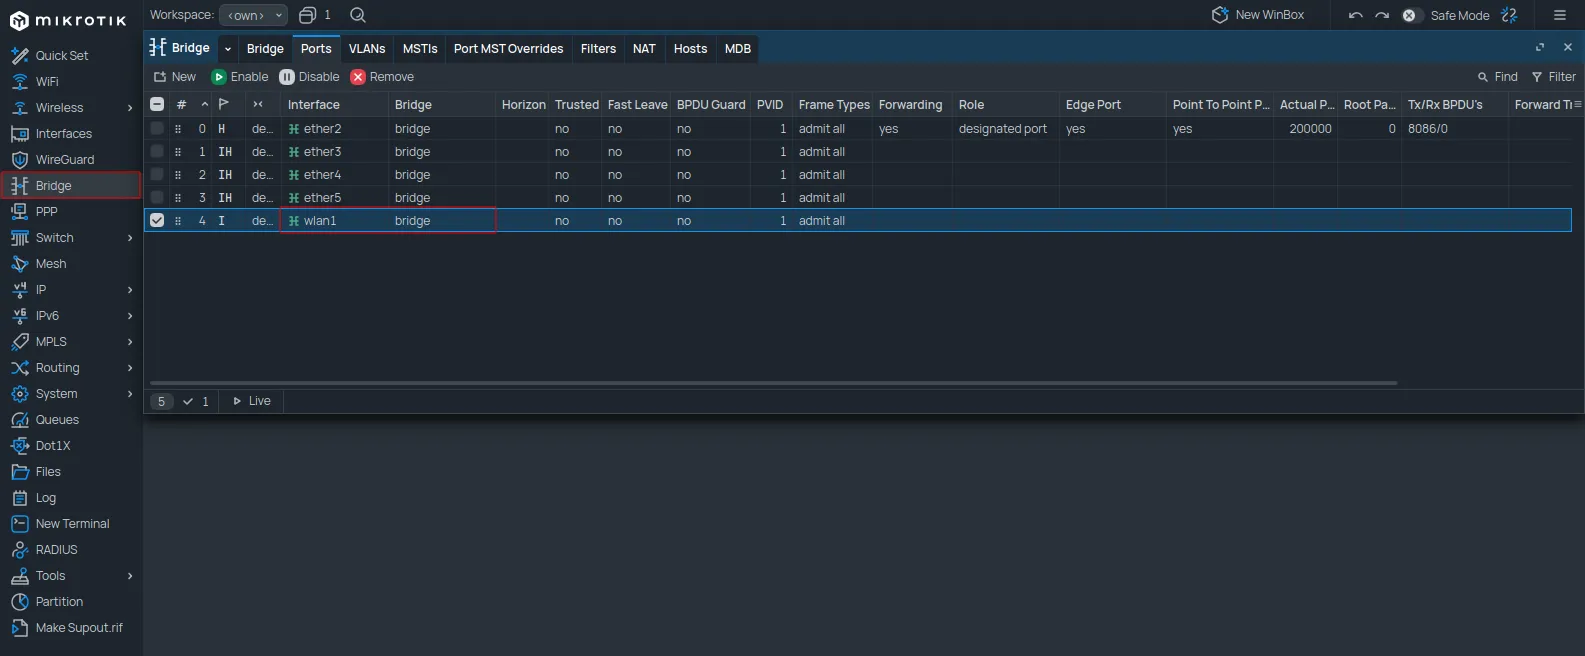
Change the Bridge value to sw.
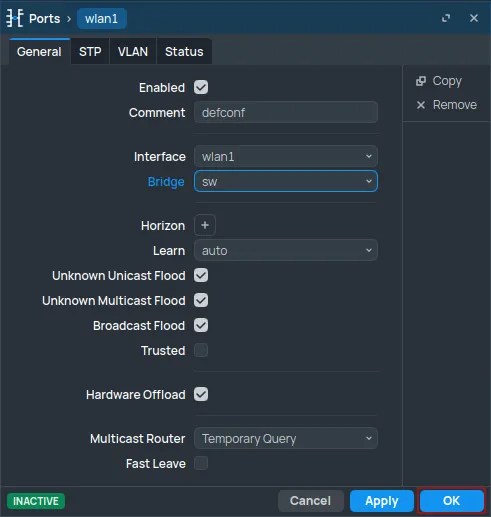
Click OK.
To change the WiFi network name, navigate to WiFi (or Wireless -> Wireless). In the WiFi Interfaces tab, double-click the relevant WiFi interface.
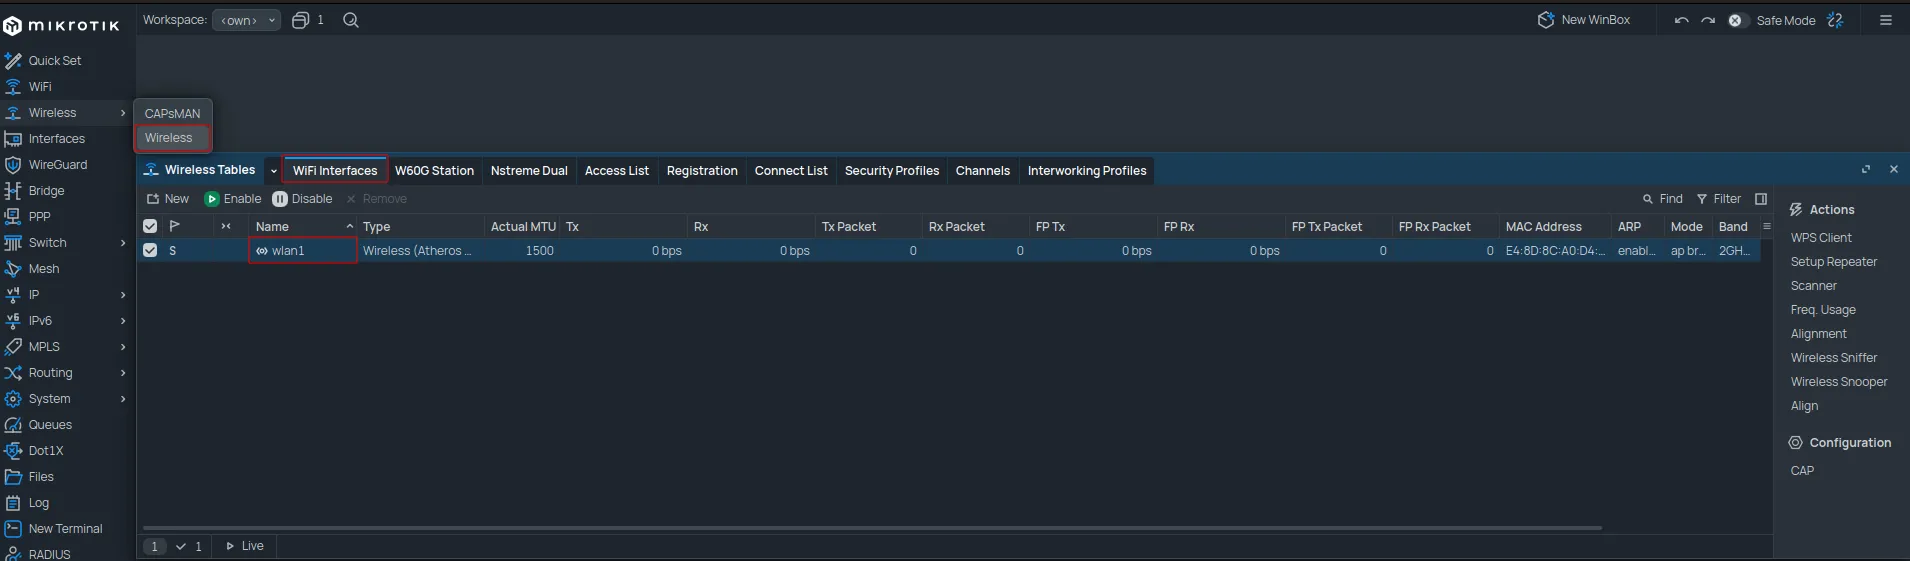
Open the Wireless tab and change the SSID to the desired network name.
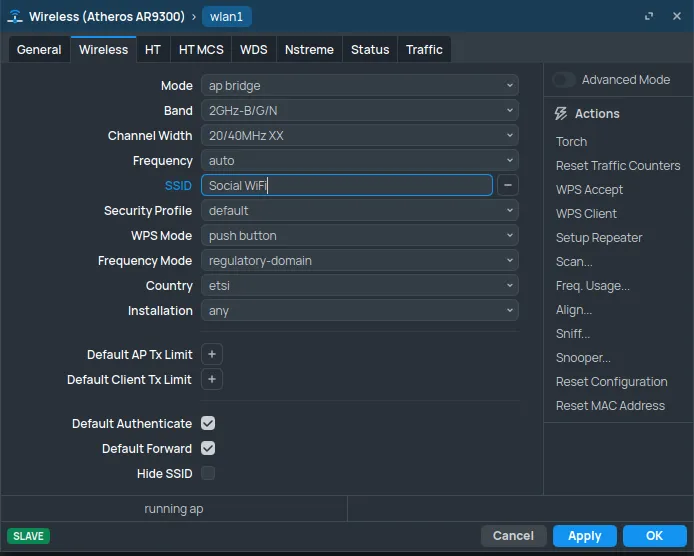
Click OK.
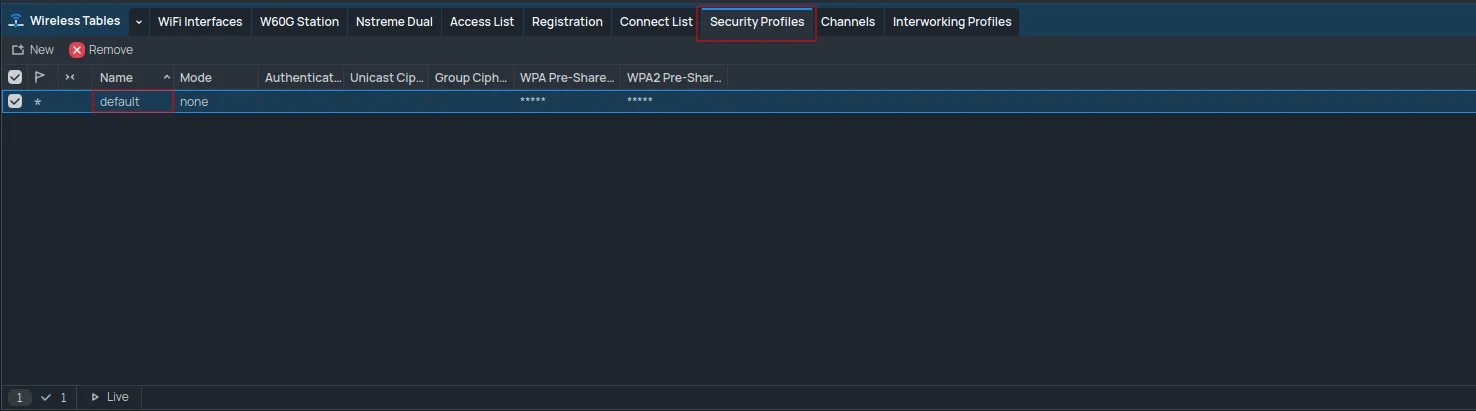
To remove the password from the WiFi network, open the Security Profiles tab and double-click the default profile.
Set the Mode to none.
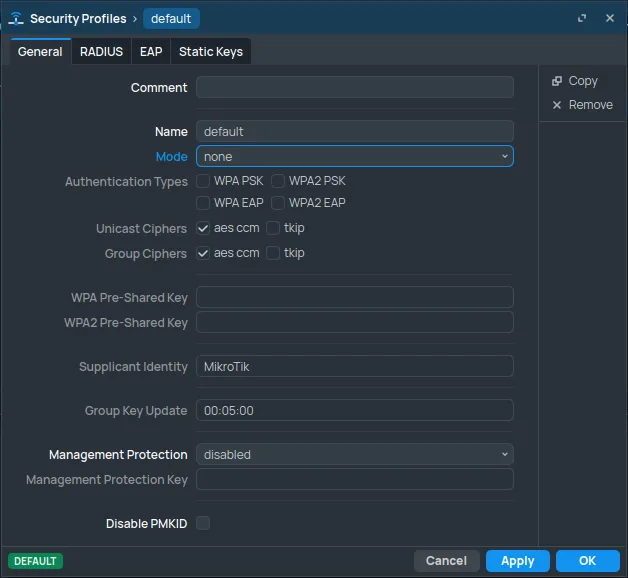
Click OK.
Social WiFi dashboard
Add the router MAC address to the panel
Navigate to Interfaces, double-click ether1, and find the MAC Address.
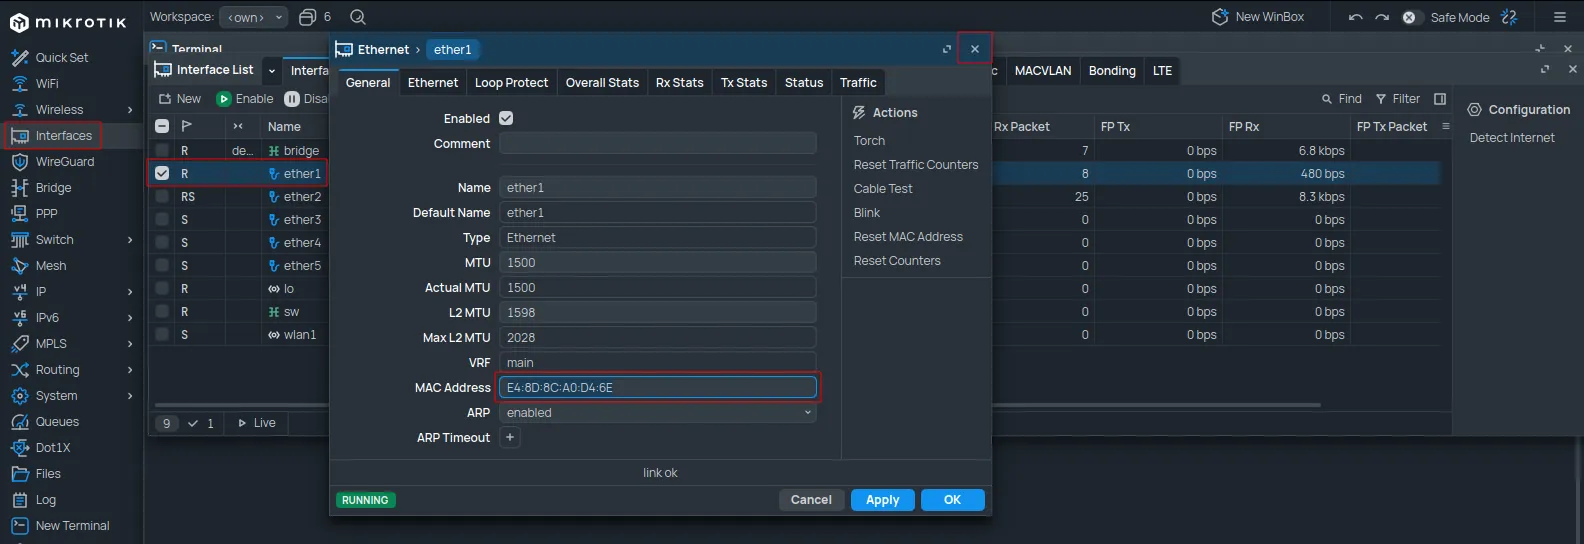
Copy the value from the MAC Address field.
Log in to the Social WiFi Dashboard, navigate to the Access Points section, and click +Add.
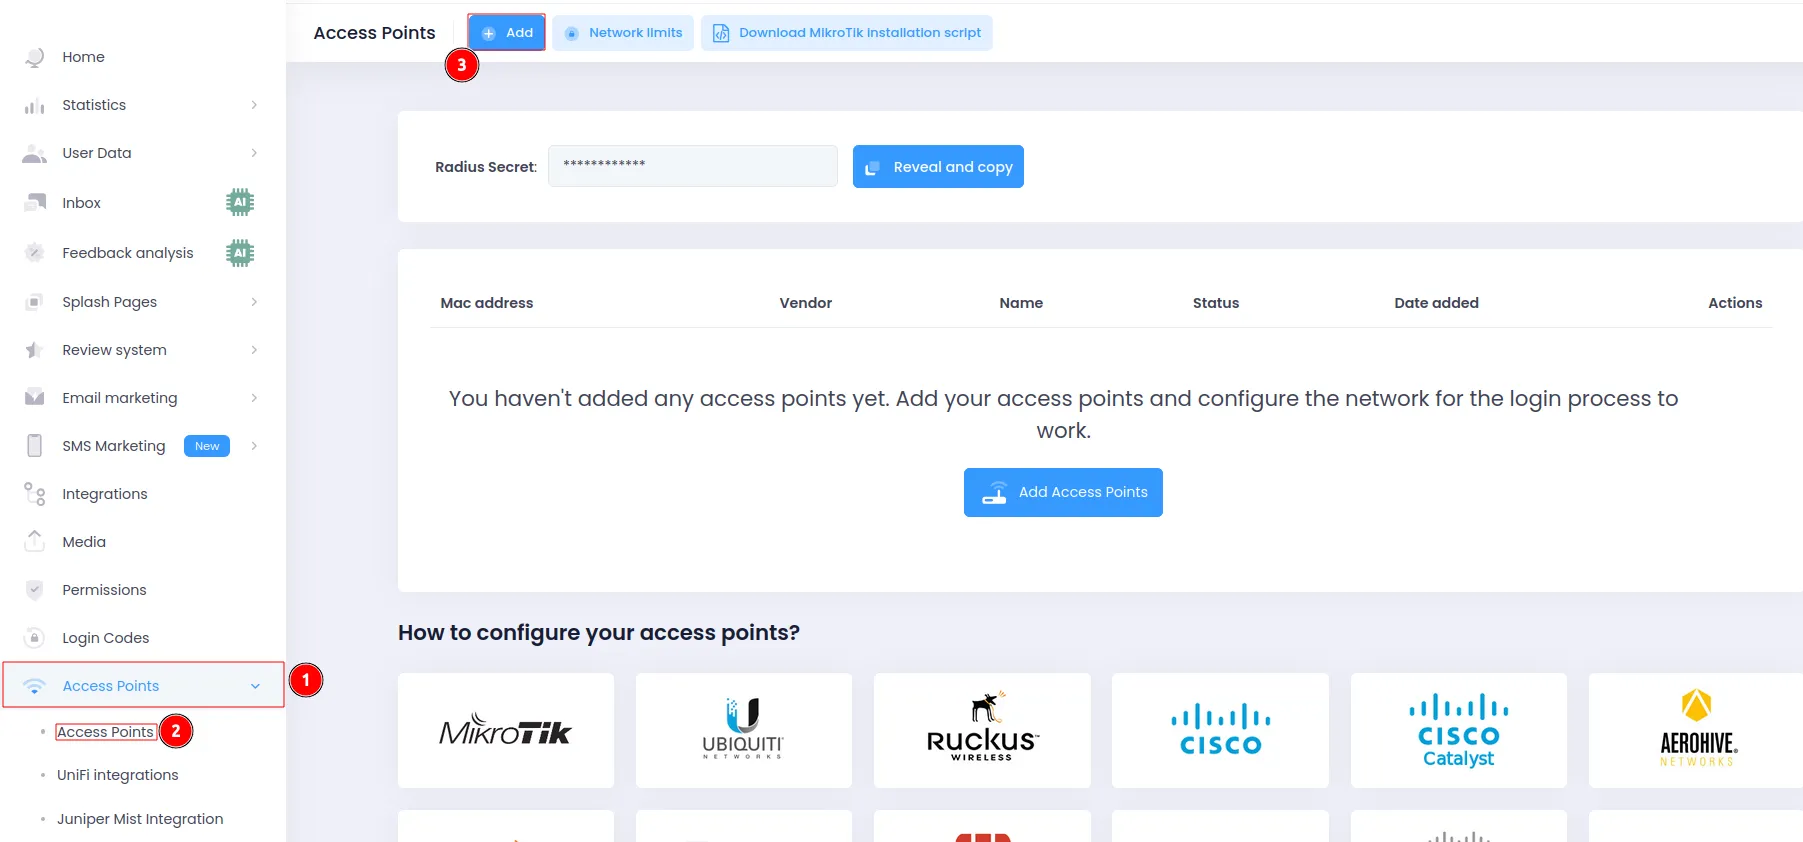
Paste the copied MAC address into the form. Naming the device is optional. Click Create.

Test the solution
Connect to the WiFi network. A login page should appear. Complete the login process to gain internet access. Connections and authorizations will appear in the Statistics section of the Social WiFi Panel.