Cisco Catalyst
Compatibility
The below instruction pertains to Cisco Catalyst 9800-CL Wireless Controller
Social WiFi has been tested and is proven to work on the following configurations:
Cisco Catalyst 9800-CL set up on KVM
- versions up to 17.3.4c
Cisco AIR-CAP3702I-E-K9
- versions compatibile with the Controller (installs as the AP provisions)
Accessing the device’s administration panel
- Log in to the administration panel with root permissions and go to Network.
Configure the controller
Go to Configuration -> Security -> Web Auth.
Click in to the global profile and make sure that the “Virtual IPv4 Address” is set as 192.0.2.1.
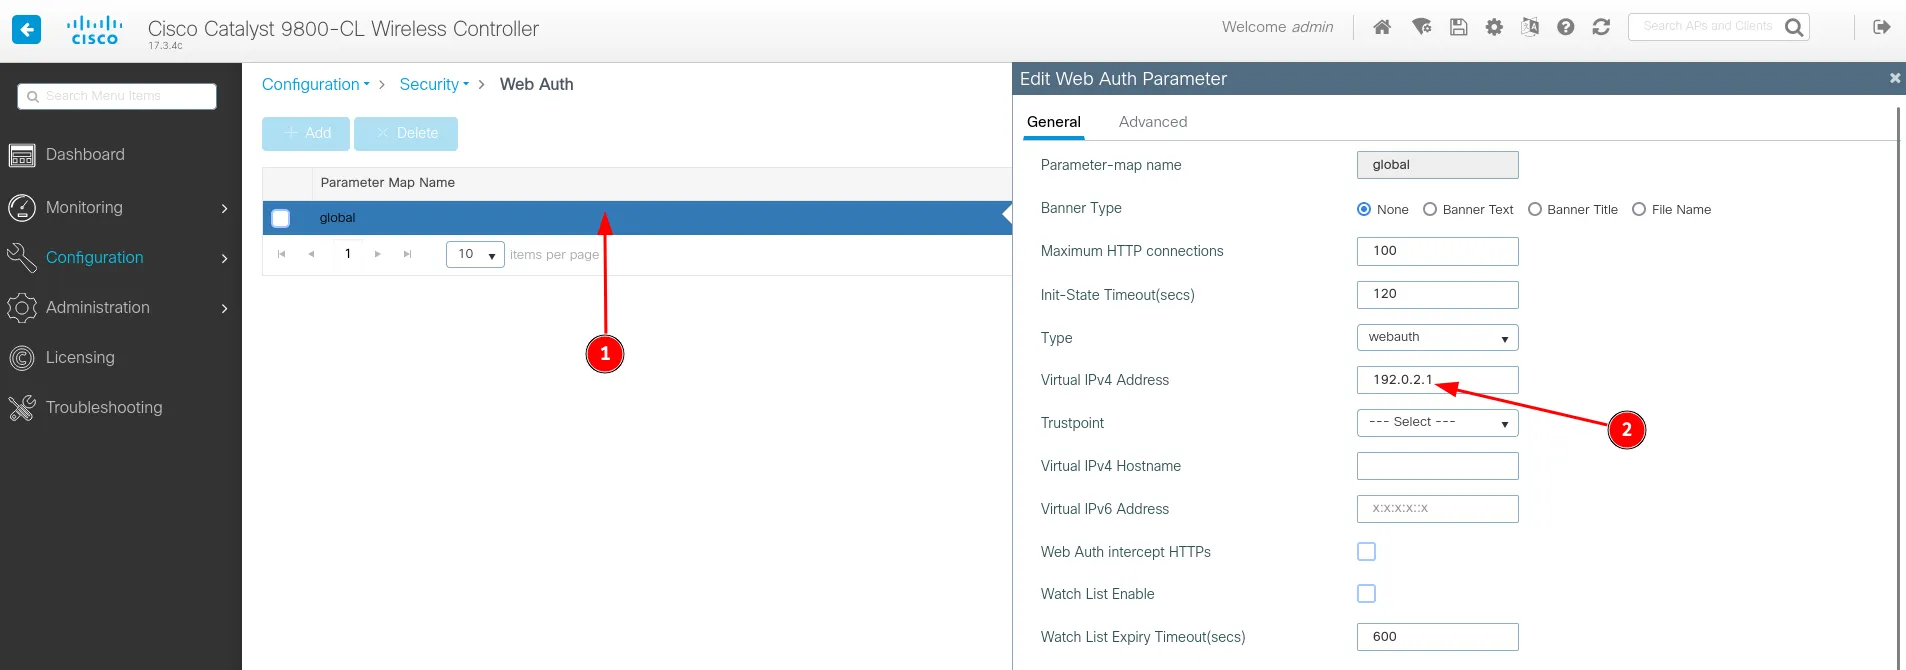
Press Apply.
Now, Add a new profile by clicking the Add button.
| Parameter-map name | sw_webauth |
|---|---|
| Maximum HTTP connections | 200 |
| Init-State Timeout | 3600 |
| Type | webauth |
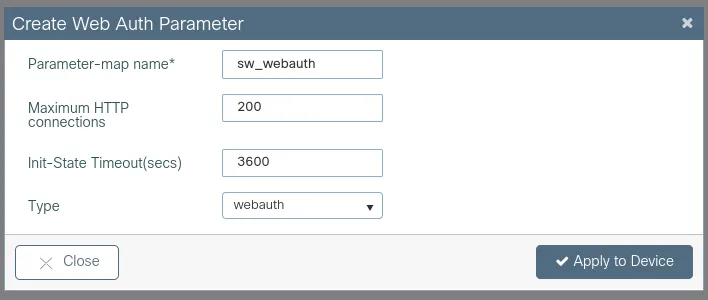
Press Apply to Device.
After you’ve created the profile, click on it and configure as follows:
On the General tab:
| Banner Type | None |
|---|---|
| Captive Bypass Portal | Leave unchecked |
| Disable Success Window | Enabled |
| Disable Logout Window | Enabled |
| Sleeping Client Status | Enabled |
| Sleeping Client Timeout | 720 |
On the Advanced tab:
| Redirect for log-in | https://login.socialwifi.com/ |
|---|---|
| Redirect On-Success | https://login.socialwifi.com/redirect/ |
| Redirect On-Failure | https://login.socialwifi.com/ |
| Redirect Append for AP MAC Address | ap_mac |
| Redirect Append for Client MAC Address | client_mac |
| Redirect Append for WLAN SSID | wlan_ssid |
| Portal IPV4 Address | 35.190.70.141 |

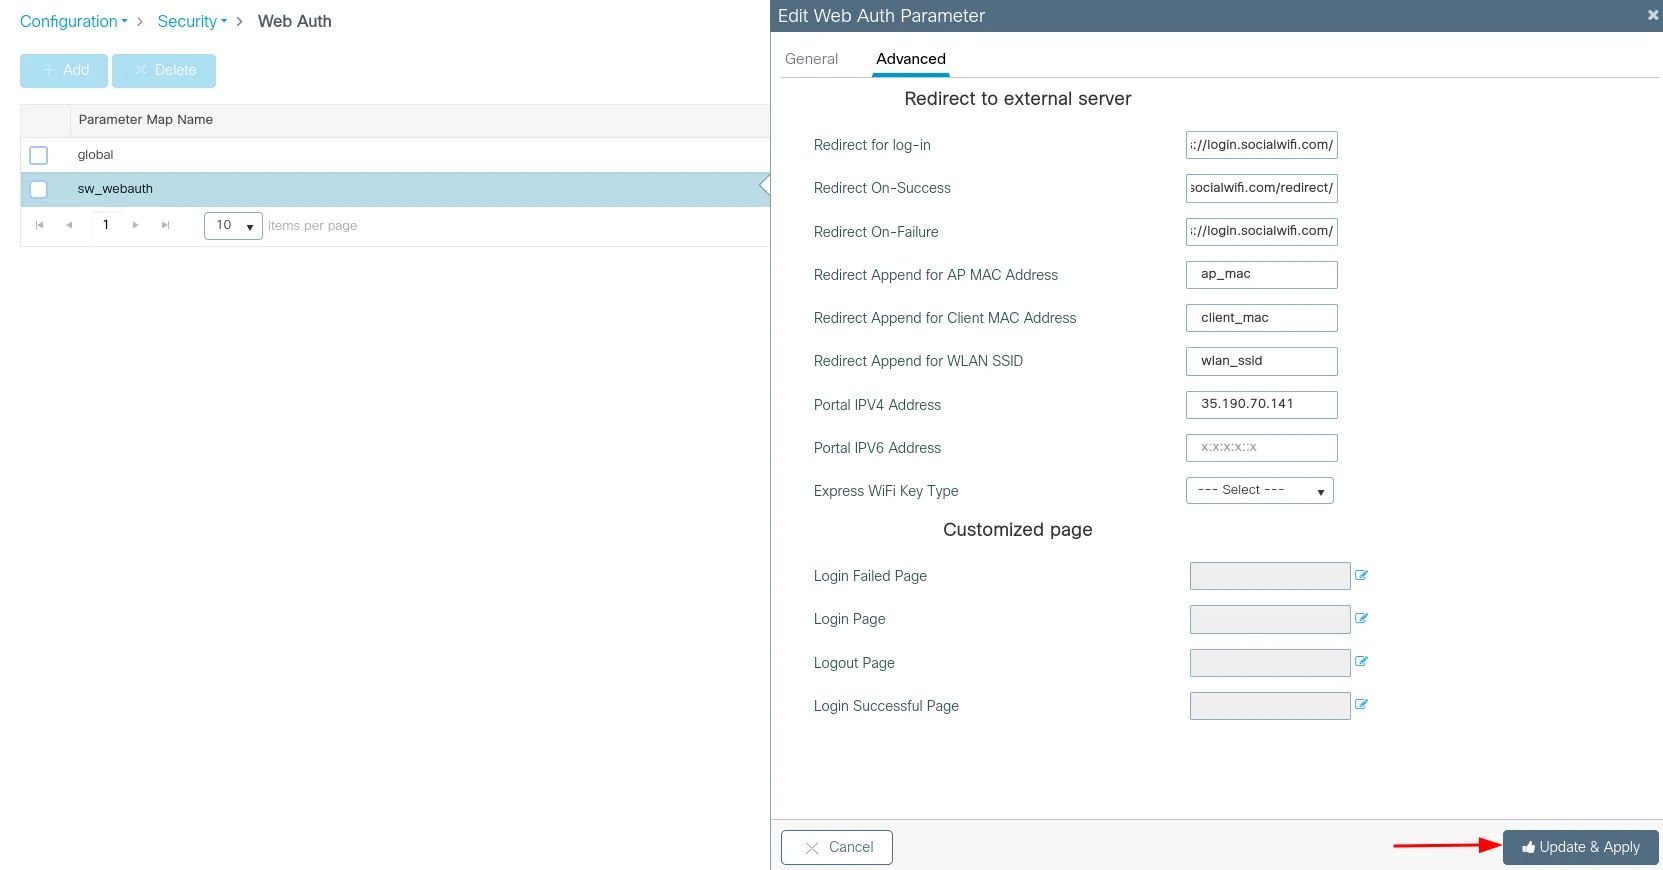
Click Update & Apply.
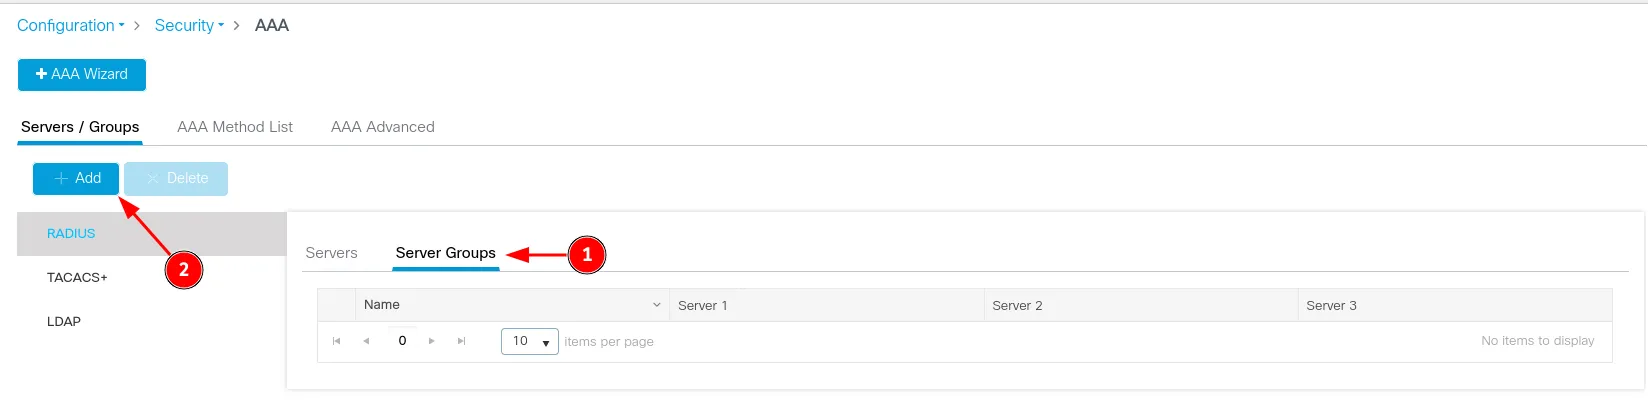
Go to Configuration -> Security -> AAA.
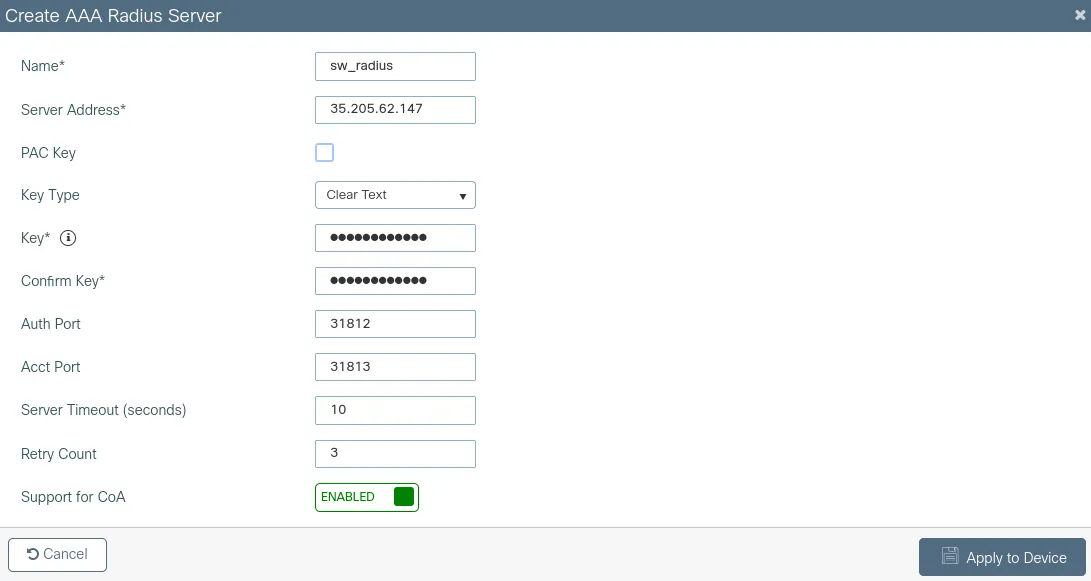
In the Servers / Groups and next Servers tab click +Add.
| Name* | sw_radius |
|---|---|
| Server Address* | 35.205.62.147 |
| PAC Key | Leave unchecked |
| Key Type | Clear Text |
| Key | *Radius Secret available in Access Points tab of the Social WiFi Panel* |
| Confirm Key | as above |
| Auth Port | 31812 |
| Acct Port | 31813 |
| Server Timeout | 10 |
| Retry Count | 3 |
| Support for CoA | Enabled |
Press Apply to Device.
Go the Server Groups tab and press +Add.
| Name | guest_radius |
| Group Type | RADIUS |
| MAC-Delimiter | hyphen |
| MAC-Filtering | none |
| Dead-Time (mins) | Leave default (5) |
| Assigned Servers | sw_radius |
| Source Interface VLAN ID | none |

Press Apply to Device.
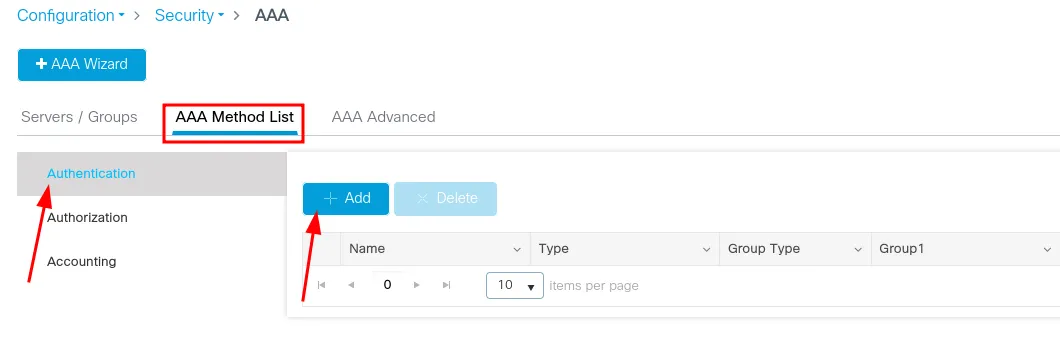
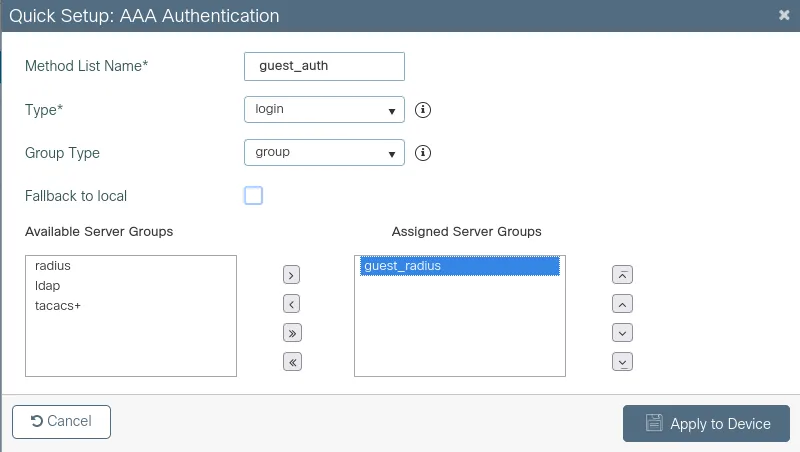
Next, go to the AAA Method List tab. Make sure that1 Authentication is selected and press +Add. On the General tab:
| Method List Name | guest_auth |
|---|---|
| Type | login |
| Group Type | group |
| Assigned Server Groups | guest_radius |
Press Apply to Device.
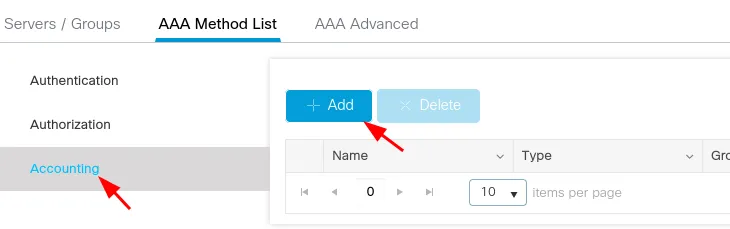
Switch to the Accounting tab on the left and click +Add.
| Method List Name | guest_acct |
|---|---|
| Type | identity |
| Assigned Server Groups | guest_radius |
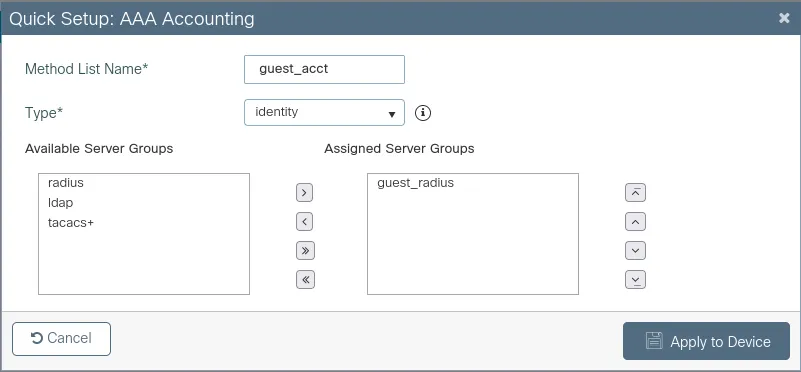
Press Apply to Device.
Now, go to the AAA Advanced tab. Make sure you’re in “Global Config” and press Show Advanced Settings >>>. You should see “Radius Attributes” drop down. Configure as follows:
Accounting
| Call Station ID | ap-macaddress-ssid |
|---|---|
| Call Station ID Case | upper |
| MAC-Delimiter | hyphen |
| Username Case | lower |
| Username Delimiter | none |
Authentication
| Call Station ID | ap-macaddress-ssid |
|---|---|
| Call Station ID Case | upper |
| MAC-Delimiter | hyphen |
Press Apply to Device.
Now, go to the Configuration -> Security -> URL Filters. Click +Add.
| List Name | guest_url_filter |
|---|---|
| Type | PRE_AUTH |
| Action | PERMIT |
URLs
*.socialwifi.comsw-login.comfacebook.com*.facebook.com*.fbcdn.netlinkedin.com*.linkedin.com*.licdn.comtwitter.comapi.twitter.comx.comapi.x.com*.twimg.comwhatsapp.com*.whatsapp.net*.whatsapp.comconnect.facebook.netwww.facebook.comwww.googletagmanager.comwww.googleadservices.comgoogleads.g.doubleclick.net*.youtube.com*.ytimg.com*.googlevideo.comyt3.ggpht.com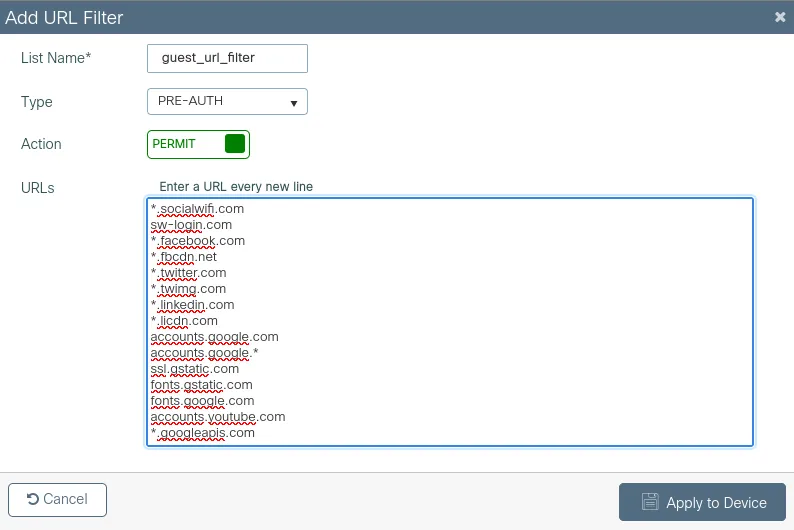
Press Apply to Device.
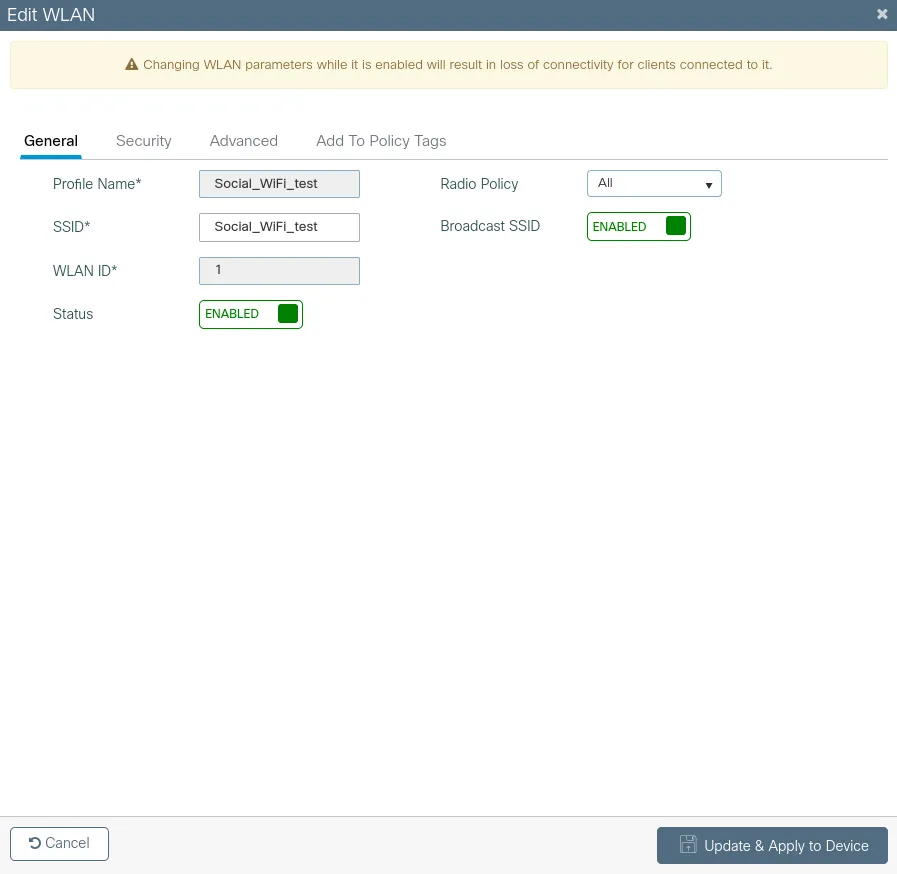
Go to the Configuration -> Tags & Policies -> WLANs. Click +Add or edit an existing WLAN.
On the General tab:
| Profile Name | *your profile name* |
| SSID | *your SSID name* |
| Status | Enabled |
| Radio Policy | All |
| Broadcast SSID | Enabled |
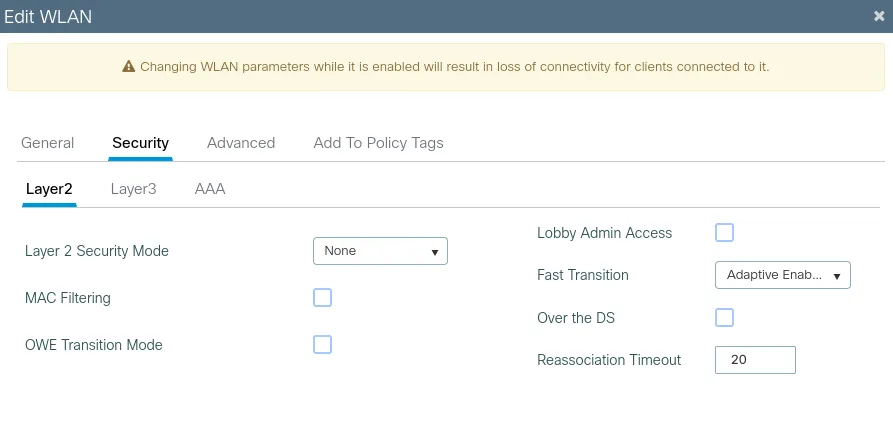
Go to the Security - Layer2 tab and set the Layer 2 Security Mode as “None” and MAC Filtering as Disabled. Leave rest as default.
In the Security - Layer 3 tab, click Show Advanced Settings >>> and configure as follows:
| Web Policy | Enabled |
| Web Auth Parameter Map | sw_webauth |
| Authentication List | guest_auth |
| On Mac Filter Failure | Disabled |
| Splash Web Redirect | Disabled |
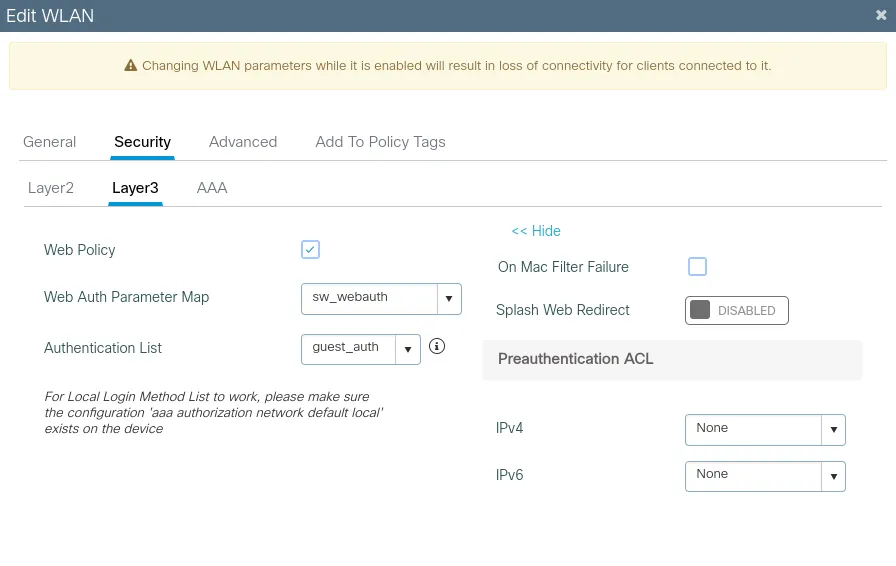
Press Apply to Device or Update & Apply to Device.
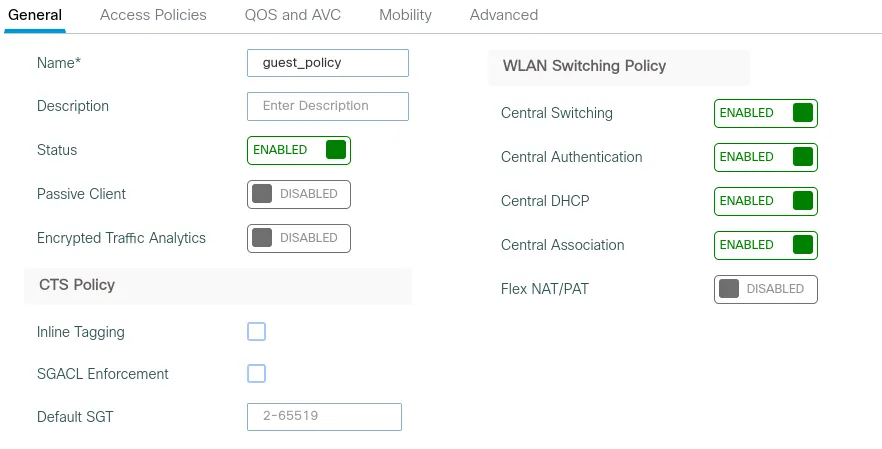
Now, go to Configuration -> Tags & Profiles -> Policy and press +Add. Leave all settings at default apart from the following:
On the General tab:
| Name* | guest_policy |
|---|---|
| Status | Enabled |
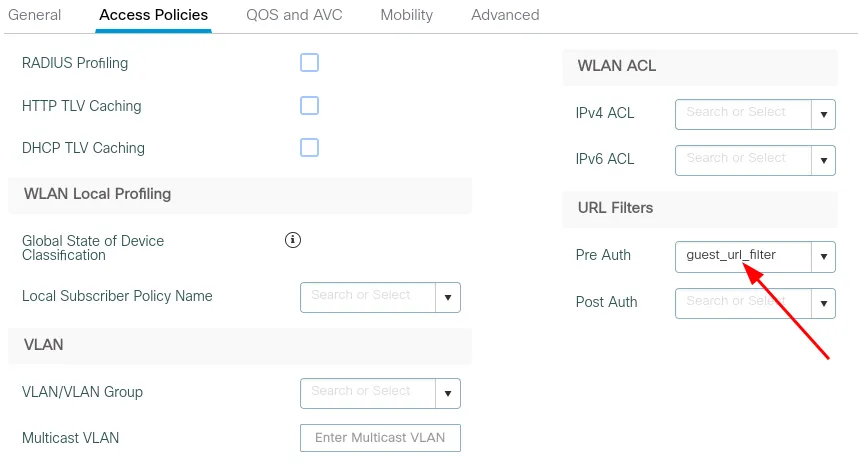
On the Access Policies tab:
URL Filters - “guest_url_filter”
On the Advanced tab:
| Session Timeout | 43200 |
|---|---|
| Idle Timeout | 3600 |
| Allow AAA Override | Enabled |
| Accounting List | guest_acct |
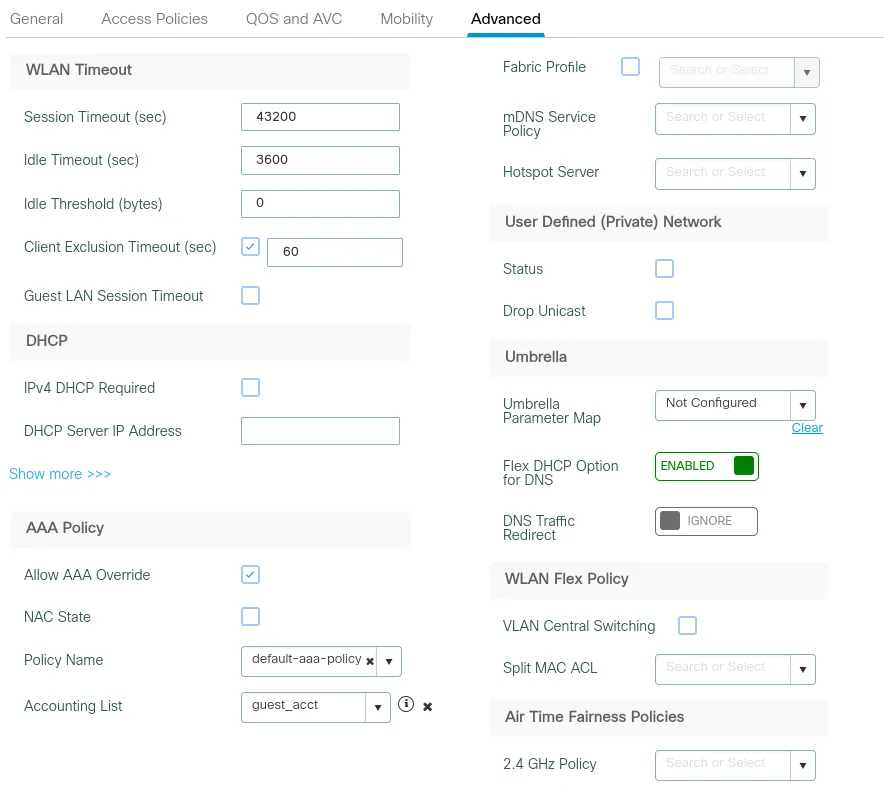
Click Apply to Device to save.
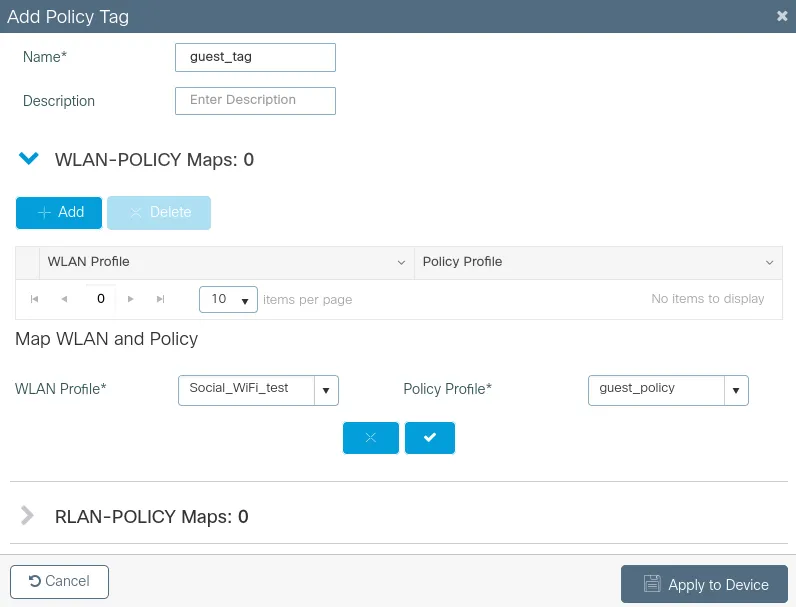
Next, go to Configuration > Tags & Profiles > Tags. Click +Add.
| Name | admi |
|---|---|
| WLAN Profile | *your WiFi name* |
| Policy Profile | guest_policy |
Click Apply to Device to save.
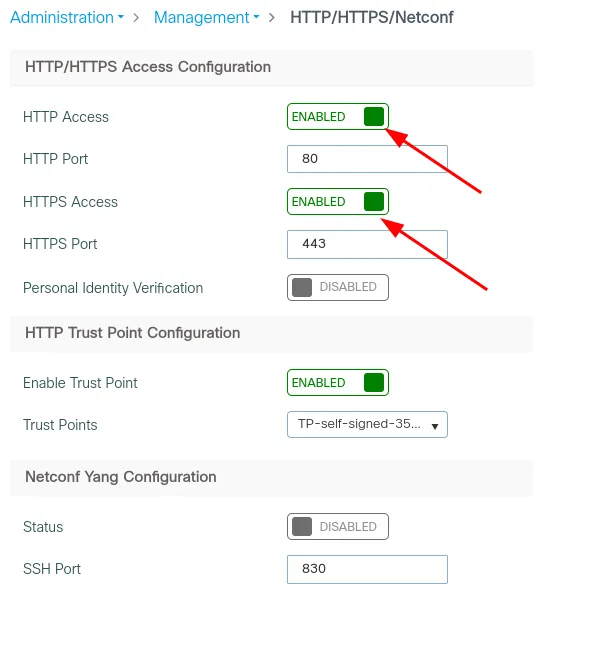
Go to Administration > Management > HTTP/HTTPS/Netconf and make sure that HTTP and HTTPS Access are Enabled.
Now you need to disable secure webauth. You can do it from the controllers CLI. Please run these commands:
enableconfigure terminalparameter-map type webauth globalwebauth-http-enablesecure-webauth-disable
Adding the device to Social WiFi platform
- Go to Configuration -> Wireless → Access Points.
- Copy the MAC addresses of the Access Points you would like to add to Social WiFi platform. You will have to change the format (from “xxxx.xxxx.xxxx” to “xx:xx:xx:xx:xx:xx”)
- Go to the Social WiFi Panel.
- Choose the place to which you would like to add the device.
- In the “Access Points” tab, press “Add” (upper right corner), paste the MAC address you copied into the form (adding a name is optional) and click “Create”.